
Before you paint old plaster, you’ll check for damp with brown paper or a meter, trace leaks or bridged DPCs, and spot salts by powdery blooms and tide marks. You’ll tap for hollows and watch cracks for movement, then you’ll scrape back loose paint to sound edges and brush away dust. You’ll repair with lime-compatible fillers and reattach blown areas. You won’t use PVA; you’ll tame suction with a breathable stabiliser or 70/30 mist coat, and there’s more to follow.
Key Takeaways
- Check for damp, condensation, and salt blooms first; fix gutters, ventilation, and bridged DPCs before any decorating work.
- Scrape only loose paint and friable distemper back to sound edges; avoid aggressive sanding that damages lime plaster and historic texture.
- Test for powdering and over-suction; use a breathable stabiliser on friable areas, not vinyl sealers that trap moisture.
- Repair cracks and hollow plaster with compatible lime-based fillers and reattachment methods; mist lightly to control suction before filling.
- Apply a properly diluted mist coat (70/30 or 60/40 water-to-emulsion), let fully dry, then add breathable top coats evenly.
Check Plaster for Damp, Salts, and Movement
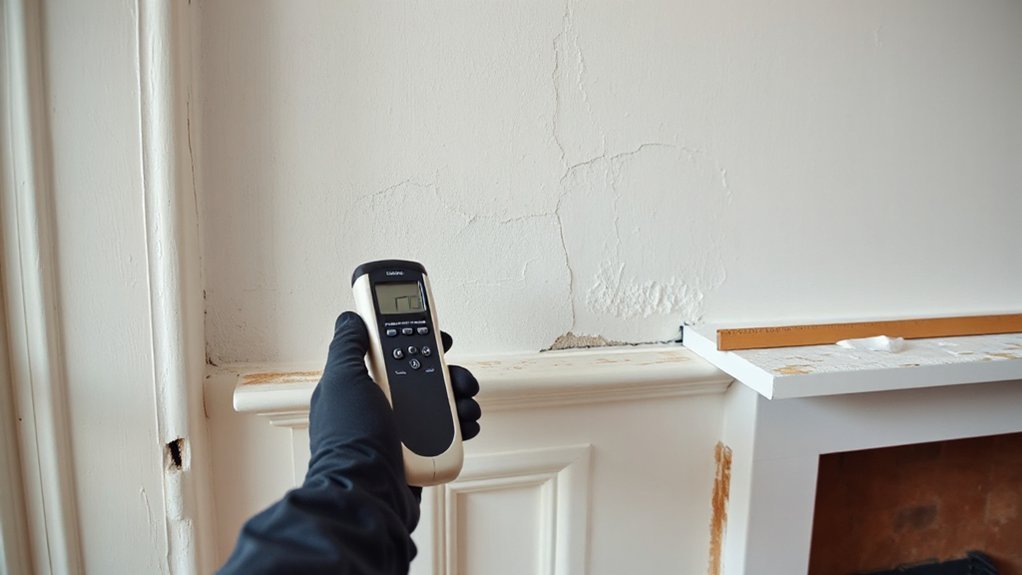
Before you lift a brush, examine the plaster as a conservator would: test for damp, salts, and movement, because each fault will defeat fresh paint and can worsen the fabric if you seal it in.
Begin with moisture detection: press clean brown paper to suspect patches, note darkening, and take readings with a capacitance meter, then confirm by ventilating and rechecking.
Trace sources—leaking gutters, bridged DPCs, trapped condensation—before you consider any finish.
Next, look for salt contamination: powdery bloom, friable faces, or tide marks. You’ll often find chlorides and nitrates near hearths, chimneys, and ground floors; record extent, don’t wash them deeper.
Finally, test movement by tapping for hollows and watching cracks through a week’s humidity change.
Scrape Loose Paint and Remove Flaking Areas
Once you’ve proved the plaster is sound and dry, turn to the old finish and take off only what’s already failed: scrape away loose paint, blistered distemper, and any friable edges until you reach a firm, well-adhered margin.
Use a sharp filling knife or shave-hook, keeping the blade shallow so you don’t bruise the lime surface or alter the wall texture that gives period rooms their character. Work methodically, tapping and watching for lifting at edges; stop when the coating resists.
Collect dust and chips as you go, and brush down with a soft hand brush rather than scouring. If you find many generations of paint color, record them before removal, then feather sound edges lightly for a tidy transition.
Fix Cracks and Reattach Blown or Hollow Plaster
With the loose finish pared back to firm edges, you can now deal with the wall itself—cracks that telegraph through paint and areas of plaster that sound hollow when you tap them.
Open hairline cracks slightly with a fine scraper, rake out dust, then mist lightly to temper suction. Press in a compatible lime-based filler, keeping the plaster texture in mind so the repair sits flush without a modern skim.
For blown plaster, locate sound margins by tapping, then drill small holes through the face into the void. Inject lime slurry or adhesive formulated for historical restoration, working from the lowest hole upward until it returns.
Gently draw the plaster back with washers and screws, protecting the surface with card. Remove fixings once set, fill, and feather edges carefully.
Sand Plaster Walls: Grit Guide and Dust Control
Although plaster rewards a light hand, you’ll need to sand selectively to level filled cracks, soften trowel marks, and knock back only the high spots that would catch the light under paint. Start with 120–150 grit on a cork block for repairs, then finish with 180–220 to blend without flattening historic Plaster texture.
Keep edges crisp around cornices and picture rails by feathering by hand, never grinding with a coarse disc. Rake a lamp across the wall to reveal ridges, and stop as soon as the surface reads even.
For Dust mitigation, mist the air lightly, sheet floors, and use a vacuum-sanding head or hold a nozzle beside your hand. Wear a P3 mask, and brush down with a soft broom before vacuuming.
Control Suction: Stabiliser vs Mist Coat (No PVA)
On old lime or gypsum plaster, you must first judge the suction: if the surface is friable, chalking, or powdery, you’ll use a proper stabiliser.
If it’s sound but thirsty, you’ll lay on a mist coat—no PVA—at roughly 70/30 or 60/40 water-to-matt emulsion.
You’ll know you’ve left over-suction when the paint drags, flashes patchy, or dries before you can keep a wet edge.
Get this step right and you’ll seal the surface without trapping moisture or smothering the wall’s breathability.
When To Use Stabiliser
When should you reach for a stabiliser instead of a mist coat? Choose it when old plaster turns dusty under your fingers, sheds fine powder, or shows friable limewash remnants that will otherwise bind your paint poorly.
You’re not “sealing” for modern gloss; you’re consolidating a weakened surface so later coats sit evenly and don’t peel.
For using stabiliser effectively, brush off loose material, vacuum the pores, then apply sparingly, working it in rather than flooding.
Let it cure fully, and test adhesion on a small patch before committing to the room.
When to avoid stabiliser: if the plaster is sound but merely absorbent, if salts or damp persist, or where breathability matters most on lime work—over-stabilising can form a skin and trap moisture.
Mist Coat Mix Ratios
Because old plaster can drink paint at different rates from one bay to the next, you’ll get the best finish by controlling suction with the right first coat: use a stabiliser only to consolidate genuinely friable, dusty surfaces, but reach for a true mist coat to key sound, porous plaster without adding an impermeable skin.
For a mist coat, thin a breathable matt emulsion with clean water: start at 70/30 (paint/water) on sound but open plaster, and go to 60/40 on very porous areas.
Don’t add PVA; it can seal and compromise later decorative finishes.
Stir thoroughly, then brush in, working across the Plaster texture to fill pinholes without flooding mouldings.
Keep your mix consistent room to room, and note ratios for later coats.
Signs Of Over-Suction
Although sound old plaster can look perfectly serviceable, over-suction shows itself the moment you start painting: the coat goes flat and patchy within minutes, dries too fast to level, and leaves drag marks, lap lines, or a dusty “chalking” rub-off under your finger.
You’ll also notice the wall texture telegraphing oddly, with porous areas dulling the paint sheen while denser lime patches hold a slight gloss. Edges around fills flash, and cut-ins won’t marry.
Confirm it by wiping with a damp sponge: if the surface drinks instantly and powders, you’ve got excessive suction.
For conservation work, don’t reach for PVA. Use a breathable stabiliser only where friable, then mist-coat the rest to equalise porosity before your full coats.
Prime Old Plaster for Strong Paint Adhesion
You’ll get lasting adhesion on old plaster by choosing a primer that suits the wall’s age, finish, and breathability, rather than a modern one-size-fits-all coating.
If the surface is friable or chalking, you’ll first seal that powdery plaster so the primer can bind to sound material instead of loose dust.
Then you’ll lay on a proper mist coat—well-thinned, evenly brushed or rolled, and worked into the pores—so the new paint keys without forming a brittle skin.
Choose The Right Primer
Before you open a paint tin, choose a primer that matches the condition and character of your old plaster, since the wrong sealer can lock in moisture or fail to bind a friable surface.
In British period rooms, you’ll often face lime plaster, which needs breathable systems. For sound lime, favour a vapour-permeable mineral or lime-compatible primer rather than heavy acrylics that can trap damp.
For later gypsum repairs, use a quality acrylic primer designed for interior plaster, keeping the film thin.
Make primer selection with the finish coat in mind: check paint compatibility between primer, undercoat, and topcoat, especially when using claypaint, distemper-style mattes, or modern vinyl emulsions.
Where staining persists, specify a stain-blocking primer only where needed.
Seal Powdery Plaster Surfaces
Where old plaster has turned chalky and leaves dust on your fingers, you must seal it or the best paint will fail to key. Begin by dry-brushing and vacuuming the wall, then wipe lightly with a barely damp sponge so you don’t soften friable areas.
If the surface still powders, apply a breathable, conservation-minded stabiliser or diluted binding coat suited to lime or gypsum, choosing a product that won’t trap moisture in British masonry. Work it well into the pores with a brush, not a roller, and keep runs off cornices and skirtings.
Let it cure fully, then check by rubbing: you want a firm, even Plaster finish. Take care around decorative textures; flood them and you’ll lose crisp relief and shadows.
Apply Mist Coat Correctly
Once the plaster feels firm and no longer sheds dust, lay on a proper mist coat to give your finish paint something to bite into without sealing the wall shut.
For traditional lime or early gypsum, keep it breathable: thin a matt emulsion with clean water (about 20–30%) until it soaks in rather than sits on top.
Work in good light, cut in neatly, and roll out evenly, watching for dark patches that show thirsty areas.
Don’t overwork; let the coat draw in and dry fully.
This stage isn’t applying primer as a heavy film, but careful surface preparation that keys the wall.
If it powders after drying, add another mist coat, not vinyl or gloss.
Then you’re ready for your top coats.
Conclusion
Before you lift a brush, you’ll have checked the plaster for damp, salts, and movement, then scraped back every loose edge. You’ll have stitched cracks, re-secured any hollow patches, and sanded with care, keeping dust well controlled. You’ll have tamed suction with stabiliser or a proper mist coat—never PVA—then primed for reliable adhesion. Do it this way and your finish can last practically forever, while the old fabric stays respected.