
Start by confirming property pins or a survey, then check setbacks/permits and mark utilities before you stretch a taut mason’s line for a straight layout. Choose durable wood or composite with hot-dip galvanized or stainless hardware. Match post spacing to true panel widths and gate clearances. Dig holes below frost line, add tamped gravel, set posts plumb, brace, and pour concrete. After curing, fasten rails/panels with structural screws, add mid-rails, and cap posts—next you’ll see the step-by-step details.
Key Takeaways
- Confirm property lines, permits, setbacks, and easements, then mark a straight control line with offset stakes and taut mason’s line.
- Call before you dig, locate utilities, and avoid restricted corridors to prevent unsafe placement and future rework.
- Set posts below frost line on tamped gravel, plumb and braced, with consistent spacing that matches true panel widths and gate hardware clearances.
- After concrete cures, attach rails level using structural screws or through-bolts, add mid-rails for long spans, and use anti-sag bracing on gates.
- Use corrosion-resistant hardware, pre-drill to prevent splitting, seal cut ends, add post caps, and recheck plumb and fastener tightness after settling.
Lay Out the Fence Line (Property, Permits, Utilities)
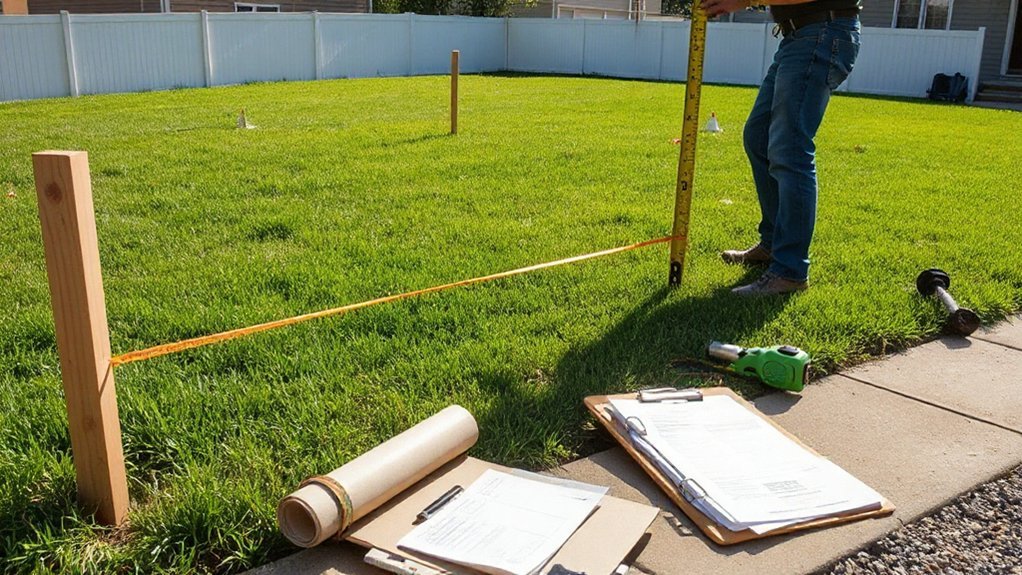
Before you dig or set a single stake, confirm the fence line is legal and safe: locate your property pins or verify boundaries with a current survey, check local setback/height rules and secure any required permits or HOA approvals.
Then have all underground utilities marked through your local “call before you dig” service and note easements that restrict placement. If pins are missing or disputed, order a Land survey and document corner monuments.
Translate the approved line into a control layout: set offset stakes outside the dig zone, run taut mason’s line, and confirm straightness with a transit or laser. Measure diagonals to verify corners are square.
Recheck zoning regulations for street-front visibility triangles and utility corridors. Mark gate openings and post centers in paint, then pause if any mark conflicts.
Pick Fence Materials That Match Your Weather
After you’ve verified the layout and cleared utilities, you need to choose fence materials that fit your site’s moisture, temperature swings, and sun exposure so you don’t create premature rot, corrosion, or warping hazards.
You’ll compare weather-resistant wood species and treatments, select metal options rated for high humidity and salt air, and confirm fasteners and coatings to prevent galvanic corrosion.
You’ll also weigh composite and vinyl for long-term durability, checking UV stability, thermal expansion limits, and impact resistance for your climate.
Weather-Resistant Wood Choices
Although any fence board can look good on day one, your local climate determines whether it stays straight, rot‑free, and fastener‑tight over the long haul. Choose naturally durable species where moisture and insects are common: cedar, redwood, or black locust.
In dry, high‑UV regions, select dense, stable lumber and budget for stricter coating maintenance.
Inspect each board before installation. Favor tight, straight wood grain and minimal pith; these reduce cupping and checking.
Specify kiln‑dried, exterior‑rated lumber, and store it off the ground under cover to prevent uneven wetting.
Pre‑seal cut ends, then apply a compatible weatherproof finish on all faces before you hang boards.
Wear gloves and eye protection when cutting, sanding, or brushing finishes, and follow the product’s ventilation and cure-time requirements.
Metal Options For Humidity
Wood holds up well when you pick the right species and seal it correctly, but in humid or salt‑air climates you may get longer service life by switching to corrosion‑resistant metal components or full metal panels.
Prioritize Corrosion resistance: choose hot‑dip galvanized steel or marine‑grade aluminum, and avoid bare mild steel fasteners. Specify stainless hardware (304 inland, 316 near coasts) and isolate dissimilar metals with nylon washers to prevent galvanic attack.
Because high humidity drives moisture absorption in surrounding soils and debris, set posts on compacted gravel with drainage, keep panel bottoms off grade, and don’t trap leaf litter against rails.
Touch up cut edges with zinc‑rich coating, then inspect annually for pitting. Wear gloves when handling sharp sheet and cut ends.
Composite And Vinyl Durability
If your climate swings from freeze–thaw winters to high‑UV summers, composite and vinyl fencing can outperform stained lumber by resisting rot, insects, and moisture uptake.
To verify composite durability, check the manufacturer’s capstock thickness, UV stabilizers, and ASTM test data for flexural strength and impact resistance.
Specify stainless or hot‑dipped fasteners to prevent galvanic corrosion, and predrill where required to avoid cracking.
For vinyl longevity, choose panels with titanium dioxide for UV blocking, thickened rails, and internal aluminum or steel reinforcement in wind zones.
Maintain straight lines by setting posts below frost depth, using gravel drainage, and bracing during concrete cure.
Wear eye protection when cutting, and control dust with a vacuum or wet cut.
Plan Fence Post Spacing for Panels and Gates
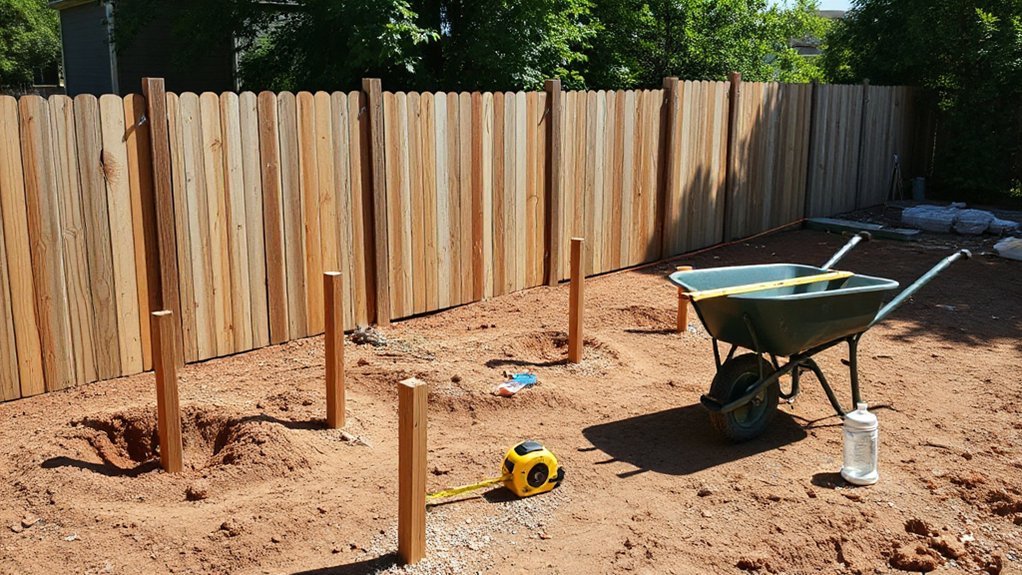
Before you dig a single hole, lay out your fence run and calculate post spacing around the exact panel widths and gate openings you’ll install. Measure each panel’s true end-to-end dimension, not the nominal size, and include bracket or rail clearances.
Mark centers with stakes and mason’s line so fence post spacing stays consistent and panel alignment doesn’t drift. If the run won’t divide evenly, adjust at a noncritical section or use a cut panel; don’t “stretch” bays.
For gates, set posts to the manufacturer’s required opening, then add hardware offsets and hinge-side clearance for swing. Plan latch height and avoid conflicts with grade changes.
Verify plumb references, check diagonal measurements, and confirm property lines and utility locates before committing layout marks.
Dig Fence Post Holes Below Frost Line (Add Gravel)
With your post centers marked and lines pulled tight, start drilling each post hole to a depth that reaches below your local frost line so seasonal freeze–thaw cycles can’t heave the footing and rack the fence. Use an auger sized for your post plus clearance; keep the hole walls clean and vertical. Call utility locating services before you dig, and wear eye, hearing, and hand protection.
Bore to consistent depth, then bell the bottom slightly if soil allows for better bearing. Remove loose spoil, roots, and standing water with a clamshell digger. Add 4–6 inches of Gravel bedding to the base, then tamp it firmly to create a stable, draining pad.
Verify depth with a tape at multiple points and keep spoils back from the edge to prevent cave-ins.
Set Fence Posts Plumb and Brace While Concrete Cures
Once the gravel pad is tamped, drop the post into the hole, orient any faces or brackets to your layout line, and set the base centered.
Check plumb on two adjacent sides with a level, then rotate as needed until it’s true. Install temporary bracing: stake two 2x4s or metal braces to the ground and screw them to the post at mid‑height so you can fine‑tune alignment.
Recheck height against your stringline and lock the braces.
Wear gloves and eye protection before handling dry mix. Add concrete in lifts, rodding each lift to eliminate voids and keep the post from drifting.
Maintain post stabilization by verifying plumb every few minutes during initial set. Protect the hole from vibration and water during concrete curing.
Attach Fence Rails and Panels to Prevent Sagging
After the concrete’s cured and braces are off, you’ll fasten each rail to the posts with corrosion-resistant hardware and proper pilot holes so connections won’t loosen under load.
You’ll keep rail spacing consistent with a story pole or spacer block, and you’ll verify level and straight alignment before you fully tighten fasteners.
To prevent sagging, you’ll reinforce panels with additional blocking or a mid-rail where needed.
You’ll recheck plumb and hardware tightness as you go.
Secure Rail-to-Post Fasteners
Because rail connections carry most of the fence’s load, you need rail‑to‑post fasteners that lock the rails tight and resist movement under wind, gate vibration, and seasonal wood shift. Use galvanized or stainless structural screws or rated rail brackets; don’t rely on smooth nails.
Pre‑drill near rail ends to prevent splitting, then drive fasteners square to the post with an impact driver set to moderate torque. Verify each bracket’s fastener schedule and embedment, and keep heads seated without crushing fibers.
Where panels act as privacy screen options, add approved connectors at each rail end to control racking.
Wear eye protection and gloves, and keep hands clear of pinch points. After fastening, recheck plumb, then install decorative post caps to limit moisture intrusion.
Maintain Consistent Rail Spacing
Although your posts can be perfectly plumb, inconsistent rail spacing will telegraph into wavy panel lines and invite sagging as the fence loads up in wind and weather. Establish rail heights from a fixed benchmark, then mark every post with a story pole or spacer block so top and bottom rails land identically.
Clamp rails in place before fastening, and recheck level and parallel spacing at each bay. When attaching panels or pickets, keep your fasteners aligned to the rails, not to varying board lengths, so loads transfer evenly.
Wear eye protection when cutting spacers and use stable sawhorses to prevent kickback. Uniform spacing keeps Decorative accents straight and ensures Privacy enhancements don’t create gaps or uneven reveals over time.
Reinforce Panels Against Sagging
If you want panels to stay straight through seasonal movement and gust loads, you must build a continuous load path from pickets to rails to posts.
For Fence reinforcement, fasten rails to posts with rated structural screws or through‑bolts, not nails, and predrill near ends to prevent splitting. Use two fasteners per rail end, set in a staggered pattern, and keep edge distance per manufacturer guidance.
For Panel stability, attach pickets with two exterior‑grade screws at every rail, maintaining consistent spacing so loads share evenly. Add a mid‑rail on spans over 6 ft or where wind exposure is high.
If you use prefab panels, add metal rail brackets and a diagonal anti‑sag brace from the bottom hinge side to the top latch side.
Wear eye protection.
Use Exterior-Rated Fence Fasteners, Hardware, and Caps
When your fence faces rain, UV exposure, and seasonal movement, standard interior fasteners can corrode, stain the wood, and loosen over time. Choose exterior-rated screws, bolts, and brackets: hot-dip galvanized for treated lumber, or 304/316 stainless near salt or pool chemicals.
Match fasteners to hardware coatings to prevent galvanic reaction, and drive screws straight to avoid splitting. Pre-drill near ends and on Decorative lattice to reduce cracking and racking.
Use structural screws for rails, not drywall or deck nails. Add post caps to shed water, reduce end-grain saturation, and limit Fence staining from rust bleed.
Wear eye protection, clamp workpieces, and keep hands clear of driver bits. Tighten, don’t overtork, and recheck torque after settling.
Conclusion
Like Odysseus plotting his course, you’ll keep your fence true by measuring the line, confirming permits, and calling to mark utilities. You’ve matched materials to climate, spaced posts for panels and gates, and dug below the frost line with a gravel base for drainage. You’ve set posts plumb, braced them while concrete cures, and fastened rails with exterior‑rated hardware and caps. Inspect annually, tighten hardware, and you’ll avoid sagging.