
You can refresh a tired kitchen by tightening prep, cook, clean, and store zones, then fixing traffic so primary aisles stay 36 inches wide (42 for two cooks) and appliance doors don’t collide. Add proper landing space: 15 inches by the fridge and cooktop, 24 inches by the sink. Replace dated cabinets and counters with full-overlay, soft-close boxes and durable quartz or stainless. Finish with CRI 90+ layered LEDs, plus updated hardware, faucet, and sink. Next, you’ll see upgrade options that fit your layout and budget.
Key Takeaways
- Replace dated cabinets, counters, hardware, and flooring with durable modern finishes like full-overlay doors, quartz, and consistent pulls.
- Rework the layout into prep, cook, clean, and store zones, keeping tools grouped to reduce steps and clutter.
- Protect traffic flow with 36–42 inch aisles, clear appliance door swings, and adequate landing space beside fridge, sink, and cooktop.
- Maximize storage using ceiling-height cabinets, roll-outs, toe-kick drawers, and adjustable pantry shelving to reclaim dead space.
- Modernize lighting and plumbing with layered CRI 90+ LEDs, accessible GFCIs, leak testing, proper trap alignment, and future-ready fixtures.
Quick Checklist: What Makes a Kitchen Look Dated
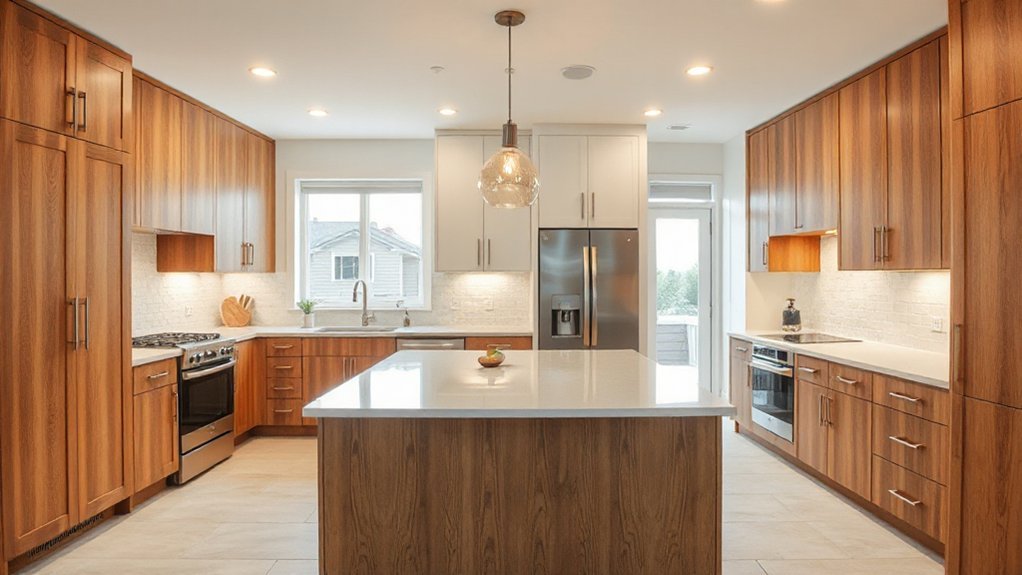
If you’re trying to pinpoint why your kitchen feels stuck in another decade, run a quick visual and functional check for the most common dated features: glossy honey-oak cabinets, busy laminate or 4-inch tile countertops, short 4-inch backsplashes, yellowed grout, exposed fluorescent box fixtures, mismatched appliance finishes, brass or ornate hardware, and worn vinyl or small-pattern ceramic floors.
Next, verify basics that affect both appearance and compliance: outlets should be GFCI-protected at countertop runs, cover plates uncracked, and lighting should provide task illumination without glare. Check that cabinet doors align, drawers glide smoothly, and toe-kicks aren’t broken or water-swollen.
Review Color schemes for yellow-beige dominance and low-CRI bulbs that shift finishes. Limit decorative accents like roosters, ivy borders, or sponge-painted walls that date the room fast.
Fix Kitchen Flow With Smart Work Zones
Dated finishes stand out fast, but poor layout slows you down every day, so fix the flow by setting up clear work zones: prep, cook, clean, and store. Use Smart zoning to group tools where you use them: knives, boards, and trash at prep; pans, oils, and spices at cook.
Keep prep counters uninterrupted and aim for 15 inches of landing space at each side of the cooktop when possible.
For clean, keep the sink, dishwasher, and waste pull-out adjacent, with a clear 36-inch walkway so doors can open without conflicts.
Store daily items between knee and shoulder height, and put heavy cookware in lower drawers.
Add dedicated circuits and GFCI protection at countertop receptacles per code.
This workflow optimization cuts steps and reduces cross-traffic.
Rethink the Work Triangle (Not a Rulebook)
Although designers still reference the classic sink–stove–fridge “work triangle,” you’ll get better results by treating it as a diagnostic tool, not a strict layout formula. Map your actual routes: prep at the sink, cook at the range, grab cold items, then plate. If one leg forces you through a traffic lane, revise.
Use a creative layout that respects clearances and access. Keep primary aisles at least 36 inches wide (42 inches if two cooks share), and don’t let appliance doors collide.
Provide 15 inches of landing space beside the refrigerator latch side, 12 inches on one side of the cooktop and 15 inches on the other, and 24 inches near the sink. With unconventional planning, you can shift tasks to adjacent runs or an island while maintaining safe, efficient paths.
Add Storage Without Expanding Your Kitchen
You can add capacity without changing your kitchen’s footprint by using vertical storage solutions—take cabinets to the ceiling, install rated wall shelving into studs, and keep required clearances around cooking and ventilation.
You’ll also gain space with hidden storage upgrades like toe-kick drawers, pull-out tray bases, and full-extension roll-outs that meet manufacturer load specs.
You don’t need more square footage; you need every cubic inch planned, anchored, and accessible.
Vertical Storage Solutions
Where can extra storage go when your cabinet footprint can’t change? Look up. Add vertical shelving in the pantry, above the refrigerator, or on a blank wall between openings.
Keep shelves at least 18 inches above the countertop where required for small-appliance clearance, and don’t block required receptacle access or range hood capture.
For pantry organization, install adjustable standards so you can re-space shelves as needs shift; anchor into studs or use rated toggles per manufacturer loads.
Use 10–12-inch shelf depths for cans and dry goods, and label zones to prevent overstacking.
Add a ceiling-height cabinet or soffit-height shelf to reclaim dead space, but maintain clearance around HVAC registers and sprinkler heads.
Hidden Storage Upgrades
When every cabinet is already spoken for, hidden storage upgrades let you add capacity inside the same footprint by using the voids behind doors, under shelves, and between studs.
Add toe-kick concealed drawers for sheet pans and pet bowls; specify full-extension, soft-close slides rated for the load and keep clearances from baseboard heat or ducting.
Use a shallow pull-out behind a false drawer front at the sink for sponges, but maintain access to the shutoff valves and GFCI-protected receptacles.
Build Hidden compartments in an end panel or island support leg for charging stations; route cords through listed grommets and keep wiring in approved raceways.
Between-stud niches beside the fridge can store trays without reducing required appliance ventilation space.
Choose Modern Kitchen Cabinets That Look Custom
Three details make modern kitchen cabinets look custom: clean construction, consistent reveals, and hardware that’s sized and placed with intention. Specify full-overlay doors, 3/4-inch plywood boxes, and soft-close, adjustable hinges so gaps stay even and operation stays quiet.
Use scribed fillers and finished end panels so runs terminate cleanly at walls and appliances. Choose custom cabinet styles like slab fronts, slim Shaker, or flat-panel with integrated pulls, and keep one door profile throughout for visual discipline.
For innovative finish options, select factory-cured lacquer, UV matte, or thermofoil rated for heat and moisture; confirm CARB Phase 2/TSCA Title VI compliance.
Plan clearances: don’t block required appliance vents, and keep uppers below hood and sprinkler limits. Align pulls by jig for repeatability.
Pick Durable Countertops for a Modern Kitchen
Because countertops take the most abuse in a modern kitchen—heat, knives, acids, and constant cleaning—you should pick a surface that matches how you actually cook and that installs to manufacturer specs.
For low maintenance, choose engineered quartz and require sealed seams, radiused edges, and heat-resistant trivets near ranges.
If you prep heavily, consider stainless for hygiene and easy sanitizing; specify integral backsplashes at wet walls.
For Eco friendly materials, look at recycled-glass composite or paper-resin slabs, and verify VOC limits on adhesives and sealers.
For cost effective options, use quality laminate with postformed edges, but keep joints away from sinks.
Template after cabinets are fastened, leave required appliance clearances, and support overhangs per code with brackets.
Upgrade Kitchen Lighting for Task and Mood
Durable countertops handle the wear, but good lighting lets you prep safely and makes the room feel finished. Start with layered light: ambient lighting for overall coverage, then task illumination where you cut, mix, and read labels.
Put recessed LEDs on a dimmer and aim for even spacing to avoid shadow pockets. Add under-cabinet LED strips at the front rail so your body doesn’t block the beam. Choose 2700–3000K for warmth, or 3000–3500K if you want a cleaner look, and keep CRI 90+ for accurate food color.
Use damp-rated fixtures near sinks and cooking zones. Meet code with GFCI-protected circuits as required and switch locations at entries. Verify clearances above cooktops and maintain ventilation access.
Update Kitchen Hardware, Faucet, and Sink Fast
Where can you get the biggest visual and functional upgrade in a single afternoon? Swap cabinet pulls, the faucet, and even the sink.
Measure hole spacing (center-to-center) and match it to new hardware to avoid re-drilling. Choose corrosion-resistant finishes and verify sharp edges aren’t exposed.
Shut off water, open the faucet to relieve pressure, and use listed supply lines with proper thread sealant where required.
For the sink, confirm cabinet clearance, drain location, and that the disposal/air gap (if required locally) stays accessible.
Pick eco-friendly materials like recycled stainless or composite granite.
Add a pull-down faucet that supports Smart appliance integration via compatible sensors or leak shutoff valves.
Test for leaks and proper trap alignment.
Conclusion
It’s funny how your “fine” old kitchen suddenly feels outdated once you fix flow, zones, and storage. You don’t need more square footage—you need clearances, landing space, and a safer work triangle that actually works. Add cabinets that read custom, pair them with durable counters, and layer task plus ambient lighting on proper circuits. Then swap hardware, faucet, and sink. Ironically, the smallest code-smart upgrades make it feel brand-new.