
Put on cut-resistant gloves, safety glasses, and long sleeves, then clear the area, lay drop cloths, and use a HEPA vacuum to control shards and dust. Measure the opening in three spots each way, use the smallest numbers, and subtract 1/8 inch; match the original glass thickness and required safety rating. Tape and remove broken pieces, soften and scrape old putty, and pull glazing points. Bed the new pane, add points every 6–8 inches, tool fresh glazing, cure, and water-test for leaks. Next, you’ll see tips for tricky sashes and safer cleanup.
Key Takeaways
- Wear cut-resistant gloves, safety glasses, and long sleeves; isolate the area with drop cloths and keep pets and bystanders away.
- Measure the opening in multiple spots, use the smallest dimensions, and subtract 1/8 inch for safe glass clearance.
- Choose the correct glass type and thickness; use tempered or laminated safety glass where codes or exposure risks require it.
- Remove shards and old glazing safely: tape cracks, pull pieces inward, HEPA-vacuum debris, and scrape softened putty and glazing points.
- Dry-fit and install the pane into fresh glazing compound, add glazing points every 6–8 inches, tool a sealed bead, then test for rattles and leaks.
Protect Yourself and Prep the Work Area
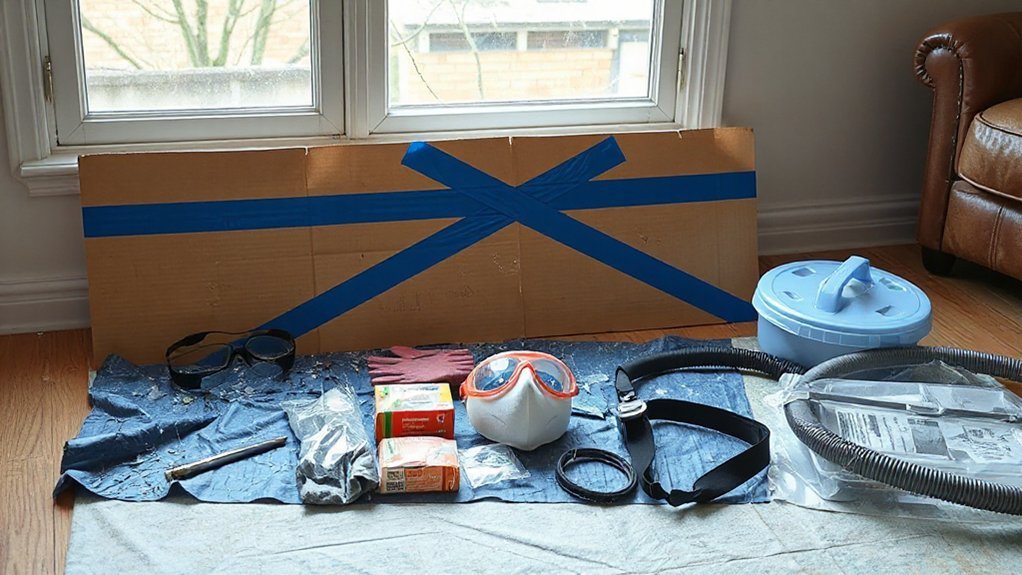
Before you touch the sash or remove any trim, suit up and control the area so you don’t get cut or spread glass shards. Put on Personal protective equipment: cut-resistant gloves, safety glasses, long sleeves, and sturdy shoes. If there’s lead paint risk, add a respirator and disposable coveralls. Keep bystanders and pets out, and post a warning.
Set up workspace organization next. Lay a drop cloth to catch fragments, then place a rigid board underneath to prevent punctures.
Position a sealed container for shards and a second bag for contaminated debris. Illuminate the pane with a work light so you can see hairline cracks. Vacuum loose particles with a HEPA unit, then mist and wipe surrounding surfaces to lock down dust.
Gather Tools and Choose the Right Glass
Once the area’s secure, gather your tools and confirm the replacement glass specs so you don’t force an ill-fitting pane into the sash. Set out cut-resistant gloves, safety glasses, a putty knife, glazing chisel, small pry bar, wire brush, glass pliers, and a vacuum with a HEPA filter. Keep a drop cloth and a rigid disposal container for shards.
Choose glass rated for the window’s location: tempered for doors, sidelites, or low sills; laminated for security or storm exposure. Match edge finish requirements and verify compatibility with existing glazing compound or gasket.
Inspect the sash for rot, corrosion, or loosened joints; plan Frame reinforcement before re-glazing. Confirm glass calibration marks, coatings orientation, and any insulated-unit labels before you proceed.
Measure the Window Opening and Glass Thickness
After you’ve removed loose shards and cleared the sash, measure the opening in three places—top, middle, and bottom for width, then left, center, and right for height—using a steel tape, and record the smallest values so the new pane won’t bind when the frame moves.
Subtract 1/8 inch from both the smallest width and height for safe clearance; note dimensions as W × H for accurate Glass measurement.
Next, determine glass thickness: measure an intact pane from the same window with calipers, or check the rabbet depth and subtract space needed for glazing.
Match the original when possible; too thin rattles, too thick stresses the frame.
For Thickness selection, confirm local code requirements for tempered safety glass in doors or low sills.
Remove Broken Window Pane and Old Glazing
How do you pull a broken pane without turning the sash into a hazard? Start with Safety precautions: wear cut-resistant gloves, eye protection, long sleeves, and a respirator if glazing is old. Lay a drop cloth, tape the cracked glass in a grid, and remove the sash if possible.
For Glass removal, pry out loose shards with pliers and lift larger pieces toward the center, never toward your hands. Vacuum fragments, then wipe with a damp disposable rag.
Soften old glazing with a heat gun on low or an infrared tool; keep heat moving to avoid scorching. Scrape putty with a stiff putty knife, then pull glazing points with needle-nose pliers.
Brush the rabbet clean and inspect for rot or bent muntins.
Install, Seal, and Test the New Window Pane
With the rabbet scraped clean and the glazing points removed, you’re ready to set the replacement pane and lock in a weather-tight seal.
Put on Safety equipment: cut-resistant gloves, eye protection, and a dust mask.
Dry-fit the glass, confirm even clearance, then bed it into a thin, continuous line of glazing compound or silicone rated for windows. Press the pane firmly until it seats, but don’t twist.
Install new glazing points every 6–8 inches, driving them flush to hold tension without cracking the glass.
Tool a smooth exterior bead, ensuring full contact with wood and glass; this is one of the most reliable Weatherproofing techniques. Let it cure per label.
Test by gently tapping, checking rattle, and running water to confirm no leaks.
Conclusion
You’ve now given that window a fresh start without guaranteeing any nasty surprises. Do a final sweep for “unwanted sparkles” of glass, then confirm the pane sits flat, centered, and fully supported. Press along the glazing to verify even contact, and check sealant continuity with no gaps or soft spots. Reinstall stops, tighten hardware just snug, and wipe the glass clean. Finally, open and close the sash to ensure smooth travel and a draft-free fit.