
You can usually fix a loose door handle by tightening what’s already there. Wiggle the handle to locate play, then score any paint and pop off the rosette cover with a flat screwdriver. Tighten the mounting screws evenly until snug, and tighten the handle’s set screw with the correct Allen key without over-torquing. If it still wobbles, inspect the spindle for wear and re-seat the latch and strike for alignment. Keep going to learn the full checklist.
Key Takeaways
- Wiggle the handle to pinpoint looseness at the rosette, spindle, set screw, or latch alignment before disassembling anything.
- Pop off the rosette cover, then tighten mounting screws evenly until snug to stop the whole plate from shifting.
- Tighten the handle’s set screw with the correct Allen key, seating it firmly on the spindle flat without overtightening.
- Inspect the spindle and hub for wear or wrong length; replace only the spindle if it’s rounded, burred, or undersized.
- Re-align the latch and strike plate to prevent binding, then test operation and add blue threadlocker to screws that repeatedly loosen.
Why Your Door Handle Is Loose (Quick Checks)
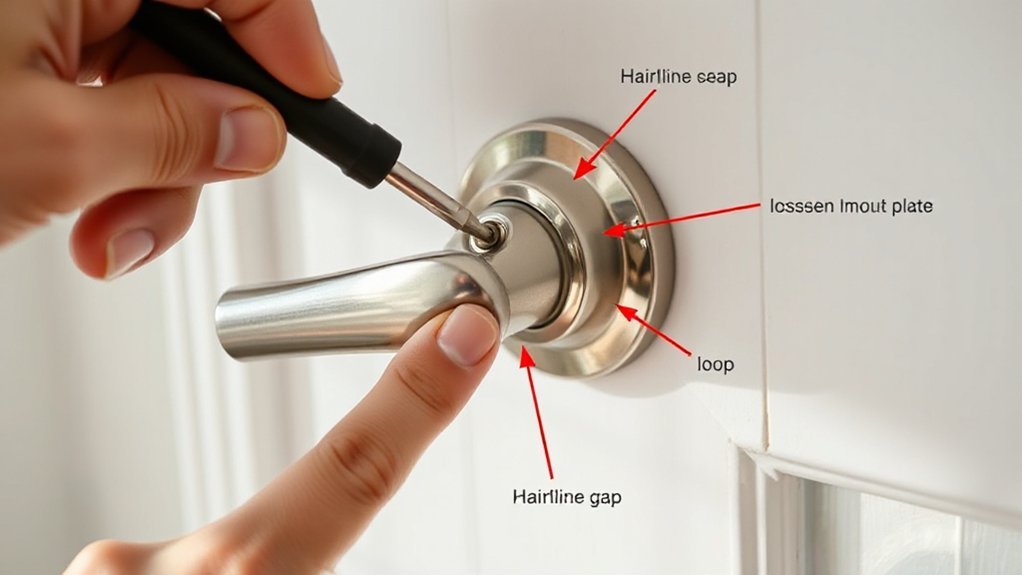
Before you grab a screwdriver, pinpoint what’s actually moving: grip the handle and wiggle it while watching the rosettes/plates and spindle area, because that motion tells you where the looseness originates.
If the whole plate shifts against the door, the mounting screws or through-bolts have likely backed out from vibration and repeated use.
If the lever droops but the plate stays tight, the handle’s set screw may be loose on the spindle.
If you feel play only when turning, suspect a worn spring cassette or a misaligned latch hub.
Check the door edge: a latch that drags in the strike can torque the handle loose over time.
For DIY home repairs, these quick observations isolate common hardware issues before you touch anything.
Tools You Need to Fix a Loose Door Handle
Although most loose-handle fixes only take a few minutes, you’ll work faster and safer if you stage the right tools first: a #2 Phillips and a flathead screwdriver, a small hex/Allen key set (common for lever set screws), a tape measure, and a flashlight or headlamp to clearly see the spindle, screws, and latch alignment.
Add a small parts tray or magnetic bowl so you don’t lose fasteners. Keep needle-nose pliers for stabilizing a loose spindle or extracting a stubborn screw, and a utility knife to score paint at the rosette edge without chipping.
Use a non-marring pry tool if you’re working on softer door handle materials like brass. If you’re dealing with historical design hardware, bring a hand screwdriver (not an impact driver) to avoid stripping fine threads.
Wear safety glasses.
Tighten Mounting Screws Behind the Rosette (Cover Plate)
Pop the rosette (cover plate) off with a flat screwdriver or release tab, and keep your other hand braced so you don’t slip and scratch the door.
Once the cover’s off, you’ll see the mounting screws—tighten them evenly with the correct driver until snug, not over-torqued.
Refit the rosette and confirm the handle feels solid and rotates smoothly.
Remove Rosette Cover Plate
Once you’ve confirmed the handle still wiggles, remove the rosette (cover plate) to access the mounting screws that anchor the lockset to the door. Start by closing the door for stability, then protect the finish with painter’s tape around the rosette—especially on Decorative accents and mixed-metal Handle styles that scratch easily.
Inspect the rosette edge for a release slot or seam. If there’s a detent hole, press it with a small flat screwdriver or paper clip while gently pulling the rosette away.
If it’s a snap-on cover, slide a thin putty knife under the edge and twist slightly to pop it free, keeping the blade flat to avoid gouging.
For threaded rings, rotate the rosette counterclockwise by hand.
Set parts aside in order.
Tighten Hidden Mounting Screws
With the rosette off, you can access the concealed mounting screws that clamp the lockset halves to the door and eliminate handle play.
Support the exterior lever with one hand so you don’t twist the spindle or scratch decorative hardware. Using the correct Phillips or Torx driver, turn each screw clockwise in small, alternating increments to pull the chassis evenly against the door.
Don’t overtighten; stop when the rosette seats flat and the lever no longer rocks.
Check alignment: the latch should retract smoothly without binding, and the lever should return under spring tension.
If the screws bottom out before tightening, add a thin washer or verify you’re using the right screws for your handle styles.
Reinstall the rosette and test again.
Find and Tighten the Set Screw on a Loose Handle
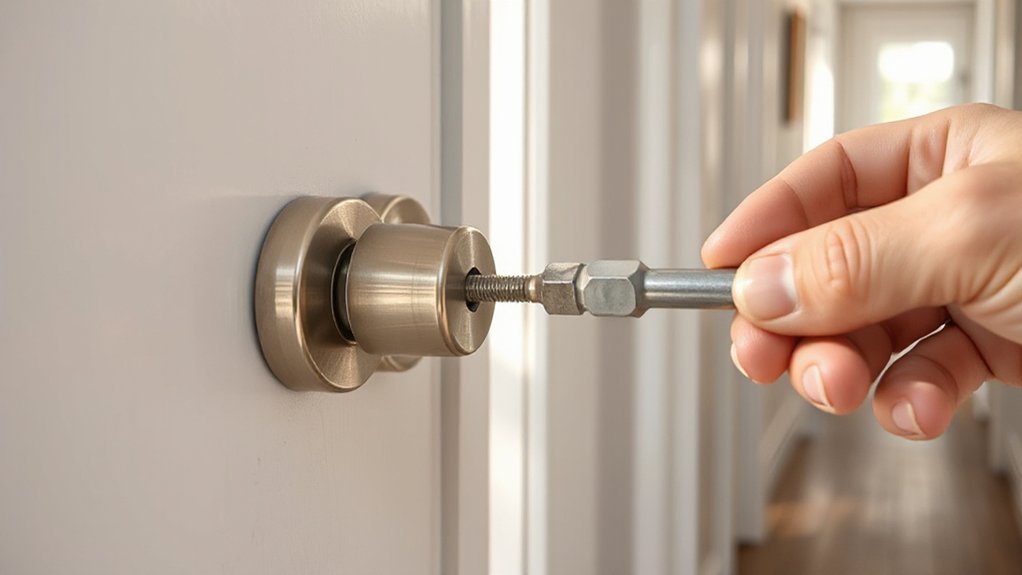
Before you reach for a screwdriver, locate the handle’s set screw—typically a small recessed screw on the underside or side of the lever near the base where it meets the rose (the round cover plate). Turn the lever to expose it, then steady the door so it can’t swing and pinch your fingers.
Select the correct driver (usually a 2–3 mm hex key or small flathead) to avoid stripping soft handle material like brass or zinc. Insert fully, then tighten clockwise in small increments until the handle stops wobbling.
Don’t overtighten; you can crack plated finishes and ruin aesthetic matching across the hardware set. Wipe away grit, then test by rotating and pulling the lever firmly. Recheck after several cycles for looseness.
If It’s Still Loose, Inspect and Replace the Spindle
If the handle still wiggles after you’ve tightened the set screw, the spindle (the square shaft that links both handles through the latch) likely has worn flats, is undersized, or isn’t seating fully in the lever hub.
For Spindle inspection, keep the door open, support the lever, and remove the handle per the manufacturer’s method (usually an Allen screw or release pin). Pull the spindle and check for rounding, twists, burrs, or uneven wear.
Verify it’s the correct length so it fully engages both hubs. Measure the spindle’s width against the hub’s square bore, and confirm the bore isn’t cracked.
Replace the spindle with a matching size and material, then reassemble and test for smooth rotation.
If play persists, plan Handle replacement.
Re-Seat the Latch and Adjust the Strike Plate
When the lever feels tight but the door still rattles or won’t latch cleanly, re-seat the latch and correct the strike alignment to remove binding and slack. Open the door, keep fingers clear of the latch edge, and support the handle so it can’t drop.
Remove the two latch-face screws, pull the latch straight out, and inspect for bent parts or debris. Reinsert it fully, keeping the bevel toward the strike, then tighten screws evenly to prevent twist—this is basic Door latch adjustment.
Next, close the door slowly and watch where the bolt hits. Loosen strike screws, shift the plate to center the bolt in the opening, and retighten firmly. If the jamb’s painted, score edges before shifting to avoid splintering during Strike plate alignment.
Test the Fix and Stop the Handle Loosening Again
Cycle the handle and latch several times with the door open, then closed. Confirm smooth return and full latch engagement without binding.
Recheck every mounting and set screw with the correct driver and snug them evenly—don’t overtighten and strip threads.
If the screws have a history of backing out, apply a small amount of medium-strength threadlocker to clean threads. Reassemble, and let it cure before heavy use.
Verify Handle Operation
After you’ve tightened the hardware and re-seated the handle, verify the mechanism operates smoothly before you consider the job finished. With the door open, cycle the lever or knob 10–15 times. You should feel consistent spring return with no grinding, binding, or lateral wobble. Keep fingers clear of the latch edge to prevent pinch injuries.
Next, close the door and test again: operate the handle, confirm the latch retracts fully, then release and ensure it extends completely. Check that the strike engagement feels clean and that you don’t need extra force.
Compare performance to the handle design (lever vs. knob) and account for door material; softer wood or hollow-core skins can flex and mimic looseness. If operation stays smooth under light push/pull loads, you’re done.
Check Screw Tightness
Even if the handle now feels solid, confirm the screws hold torque under real use so it doesn’t work loose again. With the door open, cycle the lever 20–30 times, then recheck each visible fastener. Use the correct driver size to prevent cam-out; keep your other hand clear of the latch edge to avoid pinches.
Tighten set screws first, then through-bolts, alternating sides to seat the rose evenly. Stop when resistance increases sharply; over-torquing can strip threads or crack trim.
Close the door and repeat the cycle while applying normal force where your hand naturally lands, checking door handle ergonomics. Finally, sight the handle and escutcheon for parallel alignment; a square, flush fit supports aesthetic improvements and reduces wobble.
Apply Threadlocker Preventatively
Once you’ve confirmed the screws stay tight under repeated use, apply a medium-strength threadlocker (e.g., blue) to the fasteners most likely to back out—typically the set screws and through-bolts—so vibration and daily lever force can’t walk them loose.
Remove one fastener at a time to keep alignment. Degrease threads with isopropyl alcohol, then add a small drop to the male threads only; wipe squeeze-out immediately to protect Door handle aesthetics. Reinstall and torque snugly with the correct driver to avoid stripping.
Verify Material compatibility: use products rated for plated steel, stainless, and brass, and avoid high-strength (red) on small screws.
Let it cure per label, typically 12–24 hours, before heavy use. Recheck once after curing.
Conclusion
You’ve now tightened the rosette screws, secured the set screw, checked the spindle, and verified latch alignment—without swapping the whole lock. That matters: loose hardware is a leading cause of in-home injuries, and door-related accidents send roughly 300,000 people to U.S. emergency departments each year. Before you walk away, cycle the handle 20–30 times, confirm smooth latch throw, and recheck screw torque. Add threadlocker and tighten annually to prevent repeat loosening.