
You’ll transform your garden after dark by zoning it first: paths, seating, focal plants, and hazards. Choose warm 2700–3000K, shielded low-voltage LEDs for stable output and tight optics, then keep intentional darkness for contrast and sky view. Line walkways with low-glare path lights (100–200 lumens) spaced 6–8 feet and offset. Uplight specimen trees with 10–25° spots and wash walls evenly. Next, you’ll refine aiming, dimming, and smart controls.
Key Takeaways
- Zone your garden by function—paths, seating, beds, focal points—and keep intentional dark areas for contrast and sky view.
- Choose warm 2700–3000K low-voltage LEDs for reliable runtime, good beam control, high CRI color, and easy expansion.
- Light paths with shielded, low-glare fixtures spaced 6–8 feet apart, using 100–200 lumens to guide footsteps without glare.
- Uplight trees and specimens with narrow 10–30° beams for trunks and wider floods for canopies, placed off-trunk to avoid hot spots.
- Use smart controls—timers, dimming, and motion at gates—to keep a soft baseline while boosting light only where needed.
Map Your Outdoor Lighting Zones First
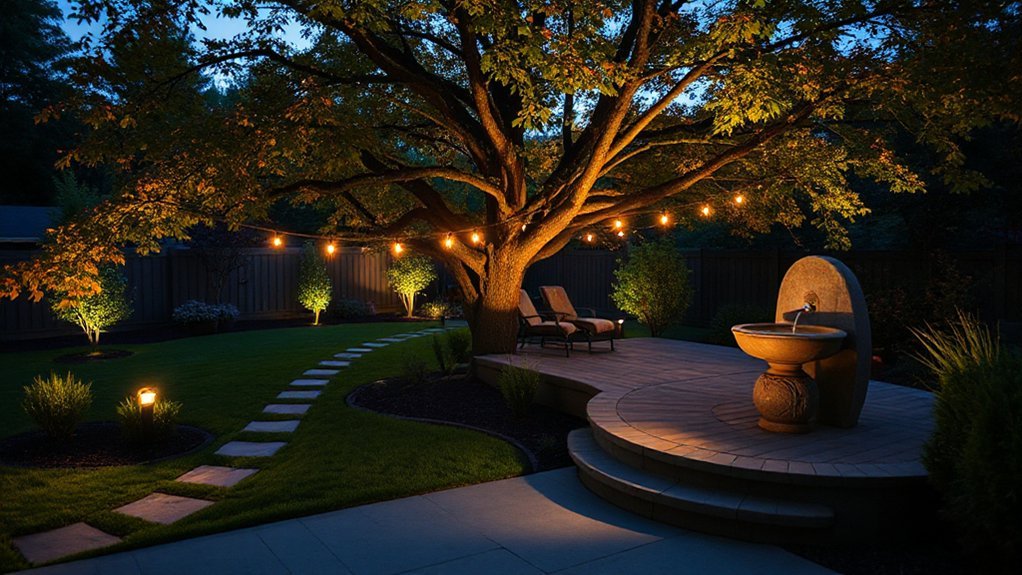
Before you buy a single fixture, map your outdoor lighting zones so every lumen has a job. Walk the site at night and sketch circulation, focal points, and hazards.
Use garden zoning to separate task, accent, and ambient needs: steps and thresholds demand crisp guidance; seating wants soft, low-glare pools; specimen trees deserve controlled highlights.
Define outdoor zones by function, not property lines, then note mounting heights, beam spreads, and shield requirements to keep light off windows and neighbors.
Mark existing power access and routing paths, but don’t pick hardware yet.
Finally, assign target brightness levels per zone and decide where darkness is intentional, preserving contrast, depth, and sky view.
This plan turns ideas into a coherent, controllable layout.
Solar or Low-Voltage: Which Should You Use?
Although solar fixtures promise quick installs with zero trenching, they don’t deliver the same output, runtime consistency, or beam control you’ll get from a properly sized low-voltage system. Solar excels when you need accent points and can tolerate seasonal dimming; panel angle, battery chemistry, and shade dictate lumen drop and color shift.
You’ll gain energy efficiency by skipping transformer losses, but you’ll trade away predictability.
Choose low-voltage when you’re shaping scenes: tight uplight spreads, glare-cut shielding, and dimming tied to timers or photocells. You’ll manage installation complexity—cable routing, burial depth, and voltage drop—yet you’ll get stable CCT, higher CRI options, and expandable circuits.
If you want repeatable drama night after night, low-voltage wins.
Path Lighting Ideas for Safer Walkways
How do you make a walkway feel inviting without turning it into a runway? Start with low-glare fixtures spaced 6–8 feet apart, offset on alternating sides to prevent harsh scallops and hide shadows that trip you up. Aim for 100–200 lumens per light and choose warm 2700–3000K to preserve night vision and plant color.
Use shielded path lights or louvered step markers so you direct photons onto the walking plane, not into eyes or windows. Add a single uplight to silhouette a garden sculpture at a bend; it becomes a waypoint without flooding the path.
For outdoor security, integrate motion-triggered bollards near gates, then maintain steady, dim baseline lighting elsewhere. Keep cables buried, connectors waterproof, and lenses cleaned seasonally.
Patio and Deck Lighting Ideas for Ambiance
When you treat your patio or deck like an outdoor room, layered lighting builds ambiance without blasting the space. Start with dimmable string lights on a warm 2200–2700K setting, tensioned on stainless cable for a clean line and reduced sag.
Add low-glare step lights or recessed deck riser LEDs to define edges and prevent missteps.
Next, place shielded lanterns or bollard-style mini posts near garden furniture to create task zones for dining and cards, while keeping sightlines comfortable.
For fire features, pair outdoor fireplaces with discreet flame-rated wall sconces or toe-kick strips that won’t compete with the glow.
Use photocells plus smart dimmers to ramp output from sunset to late night, and choose IP65-rated fixtures with marine-grade hardware for longevity.
Uplighting Ideas to Make Trees Stand Out
Place uplights a few feet off the trunk and aim them upward to wash the canopy, not the lower bark, so you get layered leaf texture and clean silhouettes.
Choose beam angles with intent—narrow spots (10–25°) to punch up tall trunks and wide floods (40–60°) to spread across broad crowns without hot spots.
Adjust tilt and spacing until the light grazes branches evenly and keeps glare out of your sightlines.
Position Lights For Canopies
Two well-aimed uplights can turn a flat canopy into a layered ceiling of texture and shadow. Set fixtures just outside the drip line so trunks stay readable while leaves catch the glow.
Aim each light across, not straight up, to spread canopy illumination through branching planes. Offset the pair by a few feet to avoid a hotspot and to reveal depth between limbs.
Mount or stake units low, then tilt until the brightest zone lands high in the crown, not on the first branches. Hide housings behind shrubs, stones, or root flares, keeping sightlines clean.
If you’re supplementing with overhead fixtures, place them farther back and dimmer, so uplight remains dominant and natural-looking.
Choose Beam Angles Wisely
Because beam angle controls how light “reads” bark, branching, and leaf mass, you’ll get better-looking uplights by matching the spread to the tree’s geometry instead of defaulting to a wide flood.
Start with 10–15° on tall, clean trunks to carve a crisp column and pull eyes upward. Move to 24–36° for multi-stem trees so you catch several trunks without washing the ground.
Save 60° floods for broad canopies only when you can set the fixture far enough back to avoid hot spots. Aim the lamp so the brightest core lands on texture, not leaves, then adjust until your lighting focus reveals depth rather than glare.
Mix angles—narrow for trunk, medium for canopy—to stage the silhouette.
Light Exterior Walls With Washing and Grazing
When you want your home’s façade to read as architecture—not just a dark outline—wall washing and wall grazing let you sculpt it with controlled light.
For wall washing, set fixtures 18–36 inches off the wall and aim them straight up to create an even veil that minimizes texture and expands perceived width. Choose wider optics and add louvers or glare shields so you don’t spill light into windows or sightlines.
For grazing techniques, push linear LEDs or in-grade uplights tight to stone, brick, or timber cladding; the steeper angle exaggerates relief and reveals mortar joints, grain, and shadow cadence. Keep spacing tight to avoid scallops, and dim to match ambient levels.
Warm 2700–3000K preserves material color, while careful aiming keeps the beam disciplined.
Subtle Lighting Ideas for Garden Beds
For garden beds, you’ll get the cleanest nighttime edge with low-glare border lights that sit tight to the soil line and aim light laterally, not into your eyes.
You can also hide compact downlights in shrubs or under eaves to drop narrow, controlled beams that pick out texture on foliage and blooms.
Keep outputs modest and optics shielded, and you’ll define the planting geometry without washing out color or creating hotspots.
Low-Glare Border Lights
How do you outline a garden bed at night without turning it into a runway? Choose low-glare border lights with shielded optics and a 2700K–3000K color temperature. You’ll get garden safety by defining edges and reducing trip hazards, while keeping your sightlines comfortable.
Set fixtures 12–18 inches apart, aiming beams inward across mulch, not outward toward paths or windows. Pick 2–5 lumen micro-spikes or louvered caps that cut uplight and hide the diode point.
For consistent output, run a 12V system with thicker cable to minimize voltage drop on long runs. Use corrosion-resistant housings and stake bases deep enough to resist frost heave.
Done right, the line reads as a soft contour—clean, quiet, and pure aesthetic enhancement.
Hidden Downlighting Accents
Although path lights draw the eye at ankle level, hidden downlighting accents shape a garden bed with quieter, more natural cues. Mount compact, shielded fixtures high in a tree limb, pergola beam, or soffit, then aim them steeply to mimic moonlight and prevent glare.
You’ll get leaf texture, shadow layering, and improved garden aesthetics without visible hardware. Choose warm 2700–3000K LEDs to keep flowers believable, and use narrow 20–30° optics to pick out specimen plants while leaving mulch subdued.
With modern lighting technology, you can add low-voltage drivers, dimming, and smart zoning so each bed runs at 10–30% output after dusk. Hide wiring in conduit under edging, and seal connections.
Avoid Glare, Hot Spots, and Overlighting
When you push brightness too far or aim fixtures carelessly, outdoor lighting turns from guidance into glare, creating harsh hot spots, deep shadows, and a washed-out yard that feels exposed rather than inviting.
Start by choosing lower-lumen fixtures and warmer CCTs (2200–3000K) so contrast stays gentle on eyes and plants.
For Reducing glare, shield the source: use full-cutoff housings, glare caps, and louvered baffles, and aim beams below the horizontal plane. Mount lights higher only when you can narrow the beam and control spill.
For Managing hot spots, overlap beams at the edges, not the centers, and dim in 10–20% steps until highlights read as texture, not glare.
Add timers, motion sensors, and zoning so you light only what’s needed.
Conclusion
When you map zones and choose solar or low-voltage wisely, your garden stops disappearing at dusk and starts performing. You’ll stitch safe paths with low-glare markers, then layer patio warmth like a dimmable soundtrack. Aim uplights to crown trees, wash walls for quiet depth, and graze textures to reveal every ripple. Keep bed lighting subtle—more whisper than shout. If you avoid hot spots and overlighting, you’ll build a nightscape that reads like constellations.