
Start by mapping your hallway’s real traffic flow, door swings, and drop zones so you keep clear walking width and choose wall-hugging furniture. Brighten fast with high-LRV warm white or greige paint, plus a mirror that bounces light down the corridor. Layer lighting: a flush or semi-flush ceiling fixture, sconces mounted 60–66 inches high, and warm 2700–3000K dimmable LEDs. Anchor it with durable flooring and a runner leaving 4–6 inch borders, then finish with aligned art and tight, curated styling—there’s more ahead on layout, storage, and impact.
Key Takeaways
- Map traffic flow and keep the lower zone clear; use narrow benches or shelves so the hallway stays open and functional.
- Upgrade flooring in high-wear areas with durable matte finishes, and add a runner with 4–6 inch borders secured by non-slip pads.
- Brighten walls with high-LRV paint and a tight, consistent palette that continues into adjacent rooms for a longer, calmer visual line.
- Layer lighting with a dimmable ceiling fixture plus sconces at 60–66 inches high to reduce shadows and visually widen narrow walls.
- Create impact with one oversized artwork or a matching-frame gallery grid, hung 57–60 inches to center, with minimal, curated accessories.
Plan Your Hallway Makeover for Traffic and Light
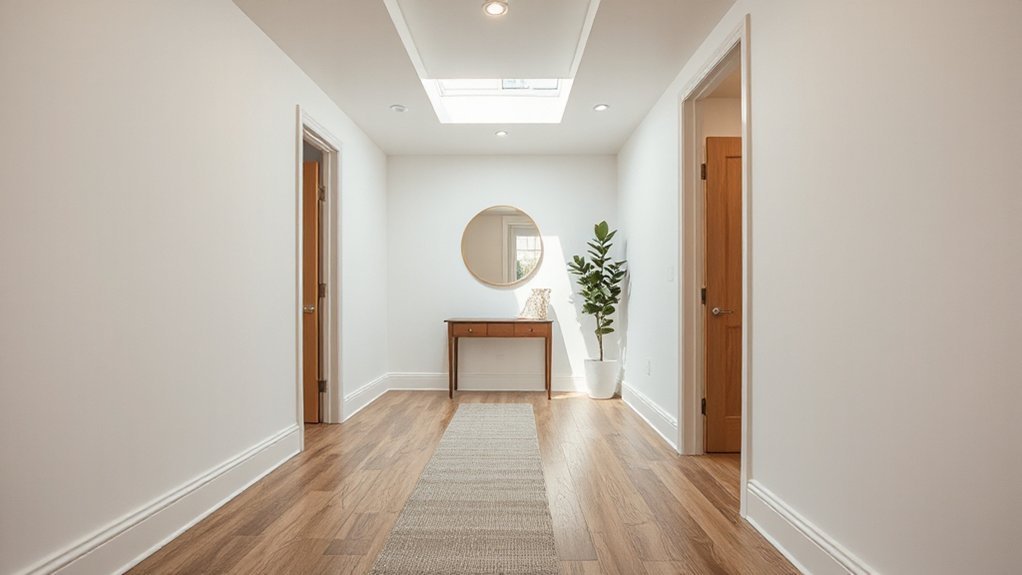
Before you pick paint or hang art, map how people actually move through your hallway and where natural and artificial light land throughout the day. Measure clear walking width, note pinch points at door swings, and track where bags and shoes naturally drop.
Use that data to choose durable flooring at high-wear zones and slip-resistant runners where turns happen. Layer lighting by task: brighter at closets, softer near bedrooms, and glare-free at eye level.
Plan outlets and switch locations so you don’t block them with consoles or hooks. Keep color coordination tied to adjacent rooms so progressions feel intentional, not chopped.
Lock in furniture arrangement with tape outlines, ensuring drawers open, radiators breathe, and sightlines stay clean.
Brighten the Hallway With Paint, Mirrors, and Walls
Once you’ve mapped traffic and lighting, use your walls as light multipliers: choose a high-LRV paint (warm white, greige, or a soft clay) in an eggshell or satin that bounces light without spotlighting every scuff. Then place mirrors where they’ll reflect a window or fixture—not a blank wall—so the hallway reads wider and brighter.
Keep color schemes tight: run the same wall color through adjacent rooms or shift one shade lighter to extend sightlines. Add crisp contrast with a deeper door color or tonal trim for depth without narrowing the passage.
For wall treatments, try vertical beadboard, slim battens, or micro-paneled wainscoting to lift the eye and disguise dings. In longer corridors, create a gallery grid with matching frames to calm visual noise.
Layer Hallway Makeover Lighting (Ceiling, Sconces, Lamps)
Start with the ceiling fixture, because it sets the hallway’s overall brightness and scale—flush mounts for low ceilings, semi-flush or a slim pendant for taller runs.
Then add wall sconces to layer light at eye level, reduce shadows, and visually stretch narrow walls with evenly spaced, warm LEDs.
Finish with a small lamp on a console or shelf to bring in that boutique-hotel glow and make the pass-through feel lived-in.
Ceiling Fixtures First
Because a hallway’s lighting has to work hard in a narrow, high-traffic space, your ceiling fixture should set the tone and provide the baseline brightness you’ll build on with sconces and lamps.
Start by measuring ceiling height and width so you don’t choose a piece that crowds the sightline. For low ceilings, go with a slim flush-mount; for standard heights, a semi-flush adds depth; for tall entries, a small chandelier elongates the corridor.
Current ceiling fixture styles that read elevated include opal-glass globes, ribbed shades, and matte black or aged brass.
Prioritize fixture placement: center it on the hallway’s axis, then space multiples evenly (about 6–8 feet apart) to eliminate dark pockets and shadows.
Use dimmable LEDs at 2700–3000K.
Add Wall Sconce Layers
With your ceiling fixture setting the baseline brightness, wall sconces add the side-to-side glow that keeps a hallway from feeling like a lit tunnel. Use wall sconce layering to widen the visual field, soften shadows at doorways, and highlight artwork without glare.
Mount sconces 60–66 inches from the floor, then stagger pairs along longer runs so light overlaps instead of creating bright spots. For tighter halls, choose slim profiles or up/down styles that wash the wall and make it read taller.
Trend-forward finishes—aged brass, matte black, or plaster—double as decorative wall lighting while staying quiet in a narrow space. Put sconces on a dimmer so evening circulation feels calm, and match bulb color to your ceiling fixture for a seamless, gallery-like corridor.
Lamps For Warmth
Even if your ceiling light and sconces cover the basics, a small lamp adds the warm, low-level glow that makes a hallway feel lived-in instead of purely pass-through.
Place one on a slim console, a wall-mounted shelf, or a closed shoe cabinet so it doesn’t pinch the walkway. Choose cozy lamps with tapered linen shades, opal glass, or pleated fabric—textures that diffuse warm lighting and soften hard angles.
Scale matters: keep the base narrow, but let the shade sit near eye level to reduce glare and bounce light onto the walls. Add a dimmable LED (2700K) and a plug-in timer so it clicks on at dusk.
In long halls, repeat a matching lamp every 8–10 feet for rhythm.
Choose Durable Hallway Flooring and Runners
In a hallway that gets constant foot traffic, you’ll want flooring that can take a beating—think engineered hardwood, LVP, or porcelain tile in a matte, low-glare finish.
You can visually stretch the space with a runner that’s scaled to the corridor, leaving a slim border of floor showing on both sides and stopping a few inches short of door swings.
You’ll keep everything secure and quiet with a non-slip pad, then stay ahead of wear by vacuuming often, spot-cleaning fast, and rotating the runner for even fading.
High-Traffic Flooring Materials
Where does your hallway take the biggest beating—right at the front door, along the pinch-point by the stairs, or in that narrow strip between rooms? Map those wear zones first, then match them to Durability considerations like scratch resistance, dent tolerance, and easy-clean finishes that won’t show every scuff under raking light.
For Material options, you can’t beat porcelain tile for grit, salt, and wet boots; choose a matte, slip-resistant finish and tight grout lines for a calmer visual rhythm.
Engineered hardwood brings warmth without the movement issues of solid planks, especially in long, linear corridors.
Luxury vinyl plank is trend-forward, quieter underfoot, and forgiving if you’ve got pets.
If you crave softness, pick low-pile, solution-dyed carpet tiles you can swap individually.
Runner Size And Placement
Once you’ve nailed down your wear zones, size and place a runner to protect the traffic line without making the hallway feel pinched. Aim for a runner size that leaves 4–6 inches of floor showing on each side; that border frames the path and keeps narrow halls from feeling like a carpeted tunnel.
In wider corridors, scale up so the runner reads intentional, not lost.
For runner placement, start 6–10 inches from the first threshold and stop short of the last doorway so doors swing cleanly and transitions feel crisp. Center it on the main sightline, not necessarily the wall, especially if you’ve got radiators or built-ins.
Use stripes to elongate, or a low-contrast pattern to hide daily scuffs and grit.
Non-Slip Pads And Care
A well-sized runner only works if it stays put, so lock it down with a non-slip pad and a simple care routine that matches your hallway’s traffic. Choose felt-rubber blends for hardwood, and grippy PVC for tile; trim to sit 1 inch inside the runner’s edge so it disappears visually while gripping the full stride zone.
For hallway safety, vacuum weekly with the beater bar off to protect low-pile trends and prevent edge curl. Spot-clean spills fast, working from the outer ring inward, then blot dry so moisture doesn’t migrate to seams.
Every month, lift the runner to air out both sides, check for pad residue, and rotate end-to-end to even wear at the entry and turn points. Replace non-slip pads once they flatten.
Add Slim Hallway Storage (Hooks, Shelves, Benches)
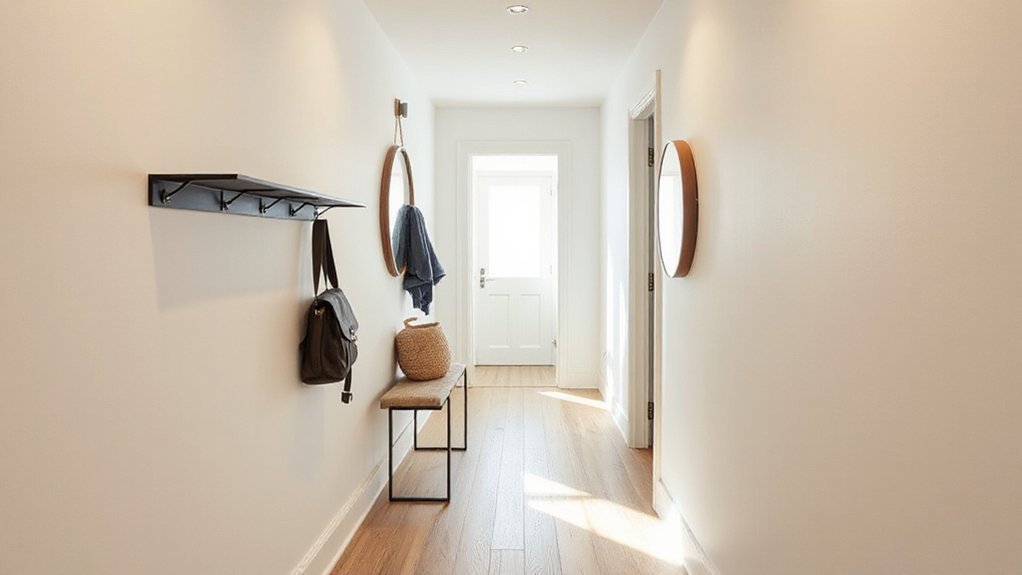
Even if your hallway measures only a few feet wide, you can carve out high-function storage by keeping everything slim, wall-hugging, and vertically stacked. Choose slim storage like a 4–6-inch-deep picture ledge for keys and mail, and mount hallway hooks in a tight grid to hold coats, bags, and dog leashes without spreading out.
Add a shallow floating shelf above the hooks to park hats or baskets, and keep the lower zone clear for smooth traffic flow. If you need seating, pick a narrow bench (10–12 inches deep) with a lift-top or cubbies; it gives you a landing spot for shoes while hiding clutter.
Finish with matching hardware and aligned heights so the wall reads calm, not crowded.
Finish Your Hallway Makeover With Art and Styling
Because a hallway is mostly movement and first impressions, art and styling have to work fast: set a clear focal line at eye level, then build a tight, intentional vignette that doesn’t pinch the pathway.
Anchor the space with one oversized piece, or run a clean gallery in matching frames with consistent mat widths for a crisp art arrangement. Keep spacing 2–3 inches, and align centers at about 57–60 inches from the floor.
Use a picture light or wall-wash sconce to flatten shadows and boost color.
On a slim console, layer styling accessories with varied heights: a catchall tray, a narrow vase, and one sculptural object.
Edit hard, then repeat one metal finish to tie it together.
Conclusion
It’s funny how the “in-between” space ends up doing the most. When you plan for traffic flow and tame the light, your hallway stops feeling like a pass-through and starts reading like a room. You’ll bounce daylight with paint and mirrors, stack lighting from ceiling to sconces, and ground it all with a durable runner. Add slim hooks or a perch, then finish with tight-framed art—suddenly, the smallest footprint makes the loudest statement.