
Shut off the stop valve (or main) and open the outdoor tap fully to bleed pressure; keep it open while you work. Identify the first wet point: spout, handle, or threads. If it leaks at the handle, snug the packing nut in 1/8 turns while holding the body. If it drips from the spout, replace the washer and inspect the valve seat. For thread leaks, reseat and wrap PTFE tape clockwise 3–5 turns—next you’ll see deeper fixes.
Key Takeaways
- Shut off the stop valve or main supply, then open the tap fully to depressurize and drain residual water before repairs.
- Identify the leak source by drying the tap and watching where water first appears: spout, handle, or threaded connections.
- Stop handle leaks by tightening the packing nut in 1/8-turn increments while holding the valve body to avoid twisting pipes.
- Fix thread leaks by reseating fittings and applying PTFE tape clockwise 3–5 wraps on dry threads, then tightening snugly.
- End spout drips by replacing worn washers, O-rings, or cartridges; replace the entire tap if cracked or frost-damaged.
Turn Off the Water and Bleed Pressure
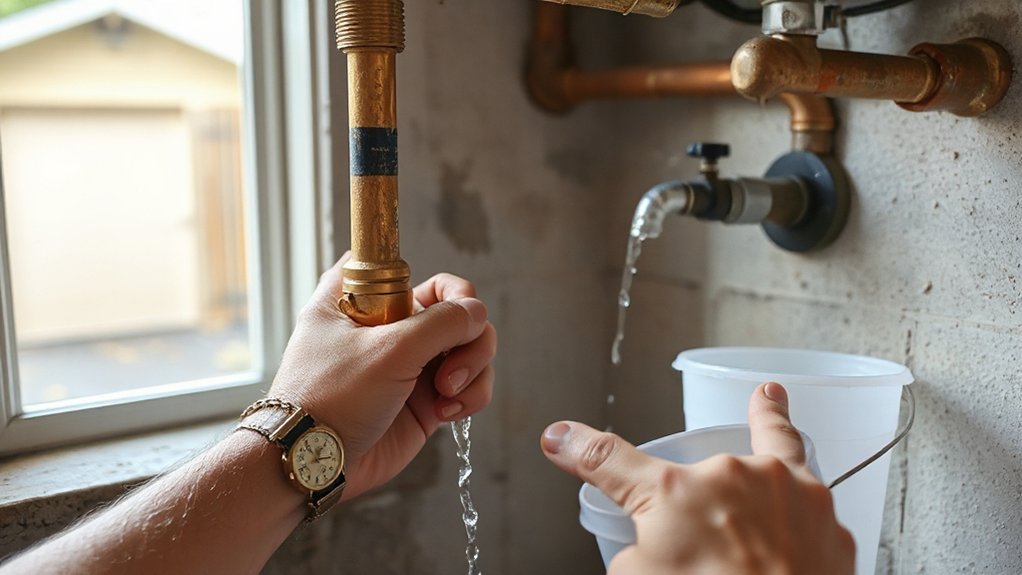
Before you touch the outdoor tap or pull any parts, shut off the water supply at the dedicated stop valve (if installed) or at the home’s main shutoff. Then open the tap fully to bleed off line pressure and drain residual water.
Verify the shutoff holds by confirming flow stops after a few seconds; if it doesn’t, don’t proceed until you can isolate the line. Keep the spout open while you work so trapped pressure can’t force water past seals or fittings.
If a hose or backflow device is attached, remove it to prevent siphon issues and comply with outdoor plumbing best practices.
Capture the drained water in a bucket for water conservation, and keep the area dry to prevent slips and electrical hazards.
Find the Outdoor Tap Leak: Spout, Handle, or Threads
Once the line is depressurized, pinpoint the leak source by watching where water first appears: the spout (drip from the outlet), the handle/stem (water weeping from under the handle or packing nut), or the hose threads/vacuum breaker (leaks only when a hose or cap is installed).
Dry the assembly with a rag, then place paper towel strips under each suspect point to reveal the first wet spot.
For spout drips, confirm the valve is fully closed and note whether dripping continues after several minutes; persistent flow suggests a worn internal seal.
For thread leaks, inspect gasket condition, cross-threading, and the vacuum breaker’s seating; replace cracked washers and confirm a code-required backflow device remains installed.
Document findings for outdoor plumbing repairs and safer garden maintenance.
Leaking at the Handle? Tighten the Packing Nut
If water seeps from under the handle or around the stem while the spout itself stays dry, the packing nut has likely loosened and needs a controlled retighten.
Shut off the branch supply at the interior stop valve, then open the outdoor tap to verify pressure is relieved.
Hold the valve body with a wrench to avoid twisting soldered or threaded joints, and use an adjustable wrench to turn the packing nut clockwise in 1/8-turn increments.
Recheck by cycling the tap handle from fully closed to fully open; you want smooth movement without seepage.
Don’t overtighten—excess compression can bind the stem and damage packing.
Restore water, inspect for leaks, and confirm the handle stays dry under full line pressure.
Dripping From the Spout? Replace the Washer
If your outdoor tap drips from the spout when it’s fully closed, you’ve likely got a worn washer on the valve stem.
Shut off the water supply at the isolation valve (or main), then open the tap to relieve pressure before you disassemble it.
Fit a matching, code-approved washer squarely in the retainer and tighten it securely so it seats flat and seals without binding.
Identify Worn Tap Washer
When water drips steadily from the spout even with the tap fully closed, a worn washer inside the valve usually fails to seal against the valve seat.
For Tap maintenance, confirm the leak path: dry the spout, close the handle firmly (don’t overtighten), and watch for renewed droplets within 60 seconds. If dripping returns, the washer or seat interface is suspect, not the packing nut.
For Washer inspection, note handle feel and sound. A gritty, notchy turn or metal-on-metal squeal suggests the rubber washer has hardened, cracked, or detached from its screw.
Check for pulsing drips that worsen with higher upstream pressure; that pattern also points to poor sealing.
Plan to replace the washer with a matching size and material rated for potable water use.
Shut Off Water Supply
A confirmed spout drip puts the washer and valve seat at the top of the suspect list, so shut off the water supply before you open the tap body. Locate the dedicated stop valve for the outdoor bibb or shut the main if none exists, as many codes require an accessible, serviceable shutoff.
Turn the valve clockwise until it seats; don’t force it. Open the outdoor tap fully to depressurize and drain the line, then close it once flow stops.
Verify isolation with Leak detection: watch the spout for continued flow and confirm the meter isn’t advancing.
Protect Water conservation by limiting discharge into landscaping and capturing runoff in a bucket. If the shutoff won’t hold, stop and replace that valve first.
Fit New Washer Properly
After you’ve isolated and drained the line, pull the old washer from the bibb’s stem and fit the replacement so it matches the original diameter and thickness, seats flat, and aligns cleanly with the valve seat.
Use OEM or plumbing-rated rubber/neoprene, not generic soft washers that deform and fail.
For code-compliant, leak-free sealing, inspect the screw and retainer: replace corroded hardware and tighten to snug, not crushed.
Confirm the stem face is clean; remove grit with a non-marring pad.
Your tool selection matters—use a correctly sized screwdriver to avoid cam-out and stem damage.
Before reassembly, check for a nicked valve seat; if damaged, dress it with a seat tool or replace the bibb.
Restore water slowly, test under pressure, and verify no drip during garden maintenance.
Handle Still Leaks? Replace the O-Ring or Cartridge
If tightening the packing nut and handle hardware doesn’t stop the drip, the faucet’s internal seal has likely failed, so you’ll need to replace the O-ring or the cartridge.
Shut off the fixture’s supply at the interior stop and open the tap to relieve pressure; follow local code requirements for isolation and backflow protection.
Remove the handle, then pull the stem or cartridge per the manufacturer’s diagram.
Inspect the O-ring for nicks, flattening, or mineral scoring; replace with the exact size and material (EPDM for potable water).
If the valve uses a cartridge, install an OEM replacement and align ports correctly.
Lightly lubricate O-rings with silicone grease only.
Restore flow slowly, check for drips, and confirm reliable Garden irrigation while supporting Water conservation year-round.
Leak at Outdoor Tap Threads? Reseat and Seal Connections
If water’s seeping from the hose bibb threads, confirm the leak is at the threaded joint—not the stem or vacuum breaker. Then shut off the supply and relieve pressure.
Reseat the hose or fitting by backing it off, cleaning the threads and gasket face, and threading it on straight to avoid cross-threading.
Wrap PTFE thread seal tape in the tightening direction (as permitted for the connection type) and re-tighten snugly with a wrench—don’t over-torque and crack the fitting.
Identify Thread Leak Source
Although a drip at the outdoor tap often looks like a valve failure, water that beads or runs from the threaded outlet typically points to a compromised hose-thread seal rather than an internal washer.
Confirm the source by drying the spout, then cracking the valve open briefly and watching where moisture first appears. If the threads wet up while the body and stem stay dry, you’ve isolated a thread-side leak.
Inspect for cross-threading, flattened hose washers, debris on the male threads, or a damaged vacuum breaker; replace parts only with listed components that meet local code.
Shut off pressure before touching fittings, and relieve residual pressure to prevent spray injuries.
Address leaks promptly to protect Garden irrigation reliability and support Pest prevention by eliminating standing water.
Reseat Hose Or Fitting
Once you’ve confirmed the moisture starts at the hose threads, shut off the water supply, open the outdoor tap to relieve residual pressure, and then reseat the connection.
Disconnect the hose and inspect the female coupling for grit, cross-threading, or a distorted swivel. Check the washer or O-ring; replace it if it’s cracked, flattened, or missing.
Clean both mating faces, then thread the hose on by hand to avoid damaging the spout’s male threads. Tighten until snug; don’t use pliers unless the fitting is designed for it, since over-torque can split plastic couplings and violate manufacturer instructions.
Restore water and verify no drips under normal garden irrigation flow. Add this check to routine outdoor faucet maintenance to prevent repeat leaks.
Apply Thread Seal Tape
When water beads at the outdoor tap’s threaded joint even after you’ve reseated the hose or fitting, wrap the male threads with PTFE (thread seal) tape to improve sealing without overstressing the connection.
Shut off the supply, open the tap to depressurize, and dry the threads. Wrap Thread seal tape clockwise (as you face the end) 3–5 turns, keeping it back from the first thread so debris can’t enter the line. Smooth it into the grooves, then reinstall the hose or adapter hand-tight plus a small wrench nudge; don’t crack the bibb or fitting.
Restore pressure and check for seepage. If the tap sits in a freeze zone, add pipe insulation to the supply stub to reduce stress from icing.
Replace the Outdoor Tap If It’s Cracked or Frost-Damaged
If freezing temperatures cracked the tap body or split the frost-proof stem, you’ll need to replace the outdoor tap rather than keep tightening parts that can’t seal.
Shut off the interior isolation valve, open the spigot to depressurize, and verify zero flow. If none exists, shut off the main.
Disconnect the supply using two wrenches to prevent twisting the piping, and cut back to sound copper/PEX as required by local code.
Install a listed frost-proof sillcock of correct length so the shutoff seats inside conditioned space, with the barrel pitched slightly downward.
Use approved fittings, tape/dope per manufacturer, and restore flow while checking for leaks.
Outdoor faucet maintenance includes replacing damaged units promptly; winterizing outdoor taps prevents recurrence.
Conclusion
Don’t let that outdoor tap drip turn into a “Trojan horse” behind your siding. You’ve already shut off the supply, bled pressure, and verified whether the leak starts at the handle, spout, or threads. By tightening the packing nut, replacing washers, O-rings, or cartridges, and resealing threaded joints with approved tape or compound, you’ll restore a watertight seal. If you spot cracks or frost damage, replace the faucet to code and prevent structural water damage.