
Start by inspecting each sash for twist, open joints, and rot at the lower rail and sill line, then decide what’s sound enough to repair. Score paint lines, remove staff stops, lift out the lower sash, tie off cords, pull the parting bead, and withdraw the upper sash, labeling everything. Strip paint only on moving edges, clean channels, and wax for glide. Repair rot and loose mortise-and-tenon joints, re-cord, renew beads, then prime and paint, lapping onto glass—more details follow.
Key Takeaways
- Inspect sashes, joints, muntins, and rot at rails and sill line to decide repair versus replacement, documenting all findings.
- Gather sharp tools, low-heat paint removal gear, clamps, and PPE; choose compatible materials like hide glue, linseed putty, and sash cord.
- Remove interior stops, lower sash, parting bead, then upper sash; label parts, tie off cords, and bag hardware for reassembly.
- Strip paint only in moving channels, clean tracks, set nails below surface, and lubricate sash edges and beads with paraffin or beeswax.
- Repair rot and loose joints, replace cords and beads, service pulleys, then prime and paint, slightly overlapping glass for a weather-tight seal.
Assess Wooden Sash Windows: Repair or Replace?
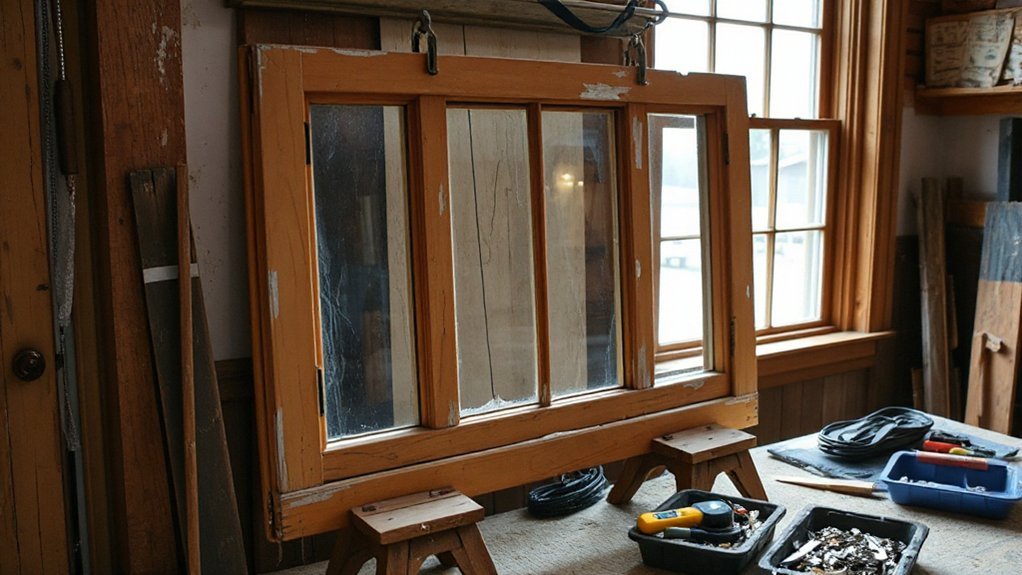
Before you reach for replacement units, take a careful inventory of what you’ve got, because original sash often repays repair when its core timber remains sound. You’ll inspect rails, stiles, and meeting rails for spring, twist, and open joints; probe suspected decay at the lower rail and sill line, and note whether damage is localized or structural.
Check muntins for fractures, glazing bars for thinning, and mortise-and-tenon shoulders for tight bearing. If putty has failed yet the arrises remain crisp, you can justify repair for Historical accuracy.
If previous alterations have erased profiles, or rot has advanced through joints and pins, consider modern alternatives, but match sightlines, horn details, and glass thickness to the opening exactly. Document findings for measured decisions.
Tools, PPE, and Materials for Sash Restoration
Once you’ve decided the sash deserves saving, set yourself up with the same disciplined kit a joiner would recognize: sharp cutting tools, controlled heat for paint and putty, accurate measuring and clamping, and materials that respect old-growth timber and traditional glazing.
Keep chisels honed, add a narrow pry knife, and use a carbide scraper; pair them with an infrared heater or low-temp heat gun to soften coatings without scorching profiles.
Wear a P100 respirator, goggles, nitrile gloves, and disposable coveralls for dust and lead paint.
Stock hide glue or reversible epoxy sparingly, linseed-oil putty, shellac-based primer, and sash cord, waxed if specified.
Choose brass screws and period pulleys to maintain Historical accuracy while managing Restoration cost sensibly.
Remove the Sashes and Protect the Trim
Although the joinery looks simple at a glance, you’ll get the cleanest removal by treating the frame and its mouldings as finished furniture, not demolition. Score paint lines with a sharp knife, then ease off the interior stop with a thin putty knife and a small pry bar, levering against a wood shim. Label each stop and its location.
Lower the bottom sash a few inches, cut any paint bridging, and lift it free. Tie off the sash cords immediately so the weights don’t drop, then tag left/right. Remove the parting bead carefully, working from the meeting rail area, and withdraw the upper sash the same way.
Bag screws, lifts, and locks for hardware restoration, and cushion the glass for later Glass replacement. Mask the trim with low-tack tape and cardboard.
Strip Paint and Ease Tight Sash Channels
With the sashes out and the trim protected, you’ll strip the paint that’s bridged the parting beads and jamb liners, using a low-heat gun and sharp scraper or a solvent stripper where heat would scorch the old growth.
You’ll keep the work lead-safe with wet methods, containment, and a HEPA vacuum as you go.
Then you’ll clear the channels to bare, true wood, dress high spots lightly, and apply a dry film lubricant or a rubbed paraffin coat so the sashes run free without attracting grit.
Safe Paint Stripping Methods
Because old sash paint often bridges the meeting rails and packs into the parting and staff channels, you’ll get the best results by stripping only where the window must move, not by scouring the whole frame. Score the paint line with a sharp knife, then pull the sash and parting bead carefully so you don’t splinter brittle profiles. Protect glass with foil tape and a thin sheet of metal.
Choose non toxic solvents for flat areas where you can keep dwell time controlled; brush on, wait, then lift softened paint with a shave hook, working with the grain.
For stubborn ridges, use a heat gun on low, keep it moving, and stop as soon as the paint turns dull and pliable. Scrape immediately, then wipe residue clean.
Lubricate And Clear Channels
Where does a sash usually bind after you’ve broken the paint seal? Most often at the parting bead, staff bead, and the jamb channels where old paint has bridged. Pull the sash, then scrape only the high ridges with a sharp, narrow chisel held flat; don’t gouge the stile. Follow with a cabinet scraper and a few passes of fine paper on a hardwood block to true the bearing surfaces.
For channel cleaning, vacuum the pockets, then wipe the channels with mineral spirits to lift grit and waxy residue. Check for protruding brads and set them below the surface.
For window lubrication, rub dry paraffin or beeswax along the sash edges and beads; avoid oily lubricants that attract dust. Rehang and test for smooth travel.
Repair Rot and Tighten Loose Sash Joints
Before you touch paint or putty, inspect the sash for rot and joint failure, since both will undo an otherwise careful restoration. Probe suspect rails, stiles, and the bottom meeting edge with an awl; punky fibers and dark staining signal sash window rot. Excavate to sound wood, then flood the cavity with consolidant and pack it with a dutchman patch or epoxy filler shaped to the original profile.
For loose mortise-and-tenon corners, do wooden joint repair: strip the joint, scrape out failed glue, and test-fit square. Re-glue with hot hide glue for period correctness, clamp diagonally, and verify equal diagonals. If the tenon’s worn, peg it with a small hardwood dowel, then plane flush after cure. Prime end grain immediately.
Replace Sash Cords, Pulleys, and Balance Weights
Once the sash itself is sound, you can restore the counterbalance by renewing the cords, servicing the pulleys, and confirming the weights match the sash.
Start by opening the weight pocket and retrieving each weight; keep left and right sets paired.
Weigh the sash and compare: the combined weights should slightly underbalance it so it closes firmly.
For Sash cord replacement, cut new braided cotton sash cord to length, melt the ends, and tie a figure-eight to the weight ring.
Feed the cord over the pulley, then pin it temporarily at the stile while you rehang the sash and set the knot in the sash groove.
For Pulley repair, remove paint, oil the axle, and true the wheel so it spins freely, without wobble.
Draught-Proof Timber Sash Windows (Beads and Seals)
After you’ve restored the counterbalance, turn to draught-proofing by renewing the parting and staff beads and fitting discreet seals that stop rattle without tightening the sash.
Ease out the staff bead with a thin chisel, keeping the old profile as a pattern. For bead replacement, mill or buy matching ovolo sections in straight-grained softwood, then pre-drill and pin with lost-head nails so you don’t split it.
Replace the parting beads next, ensuring the sash runs freely in the groove. Rout or saw a neat kerf and press in brush pile or sprung bronze, keeping the carrier continuous at meeting rails.
Rehang and test: the sash should slide under its own weight. Finish with seal maintenance: vacuum the piles, wipe wax, and replace crushed strips early.
Prime and Paint Sash Windows So It Lasts
Although the joinery now runs sweetly and seals neatly, you’ll only keep rot and sticking at bay if you prime and paint the sash in the traditional order and with thin, well-worked coats.
Start by spot-priming bare timber and end-grain with an oil-based wood primer; don’t flood it, just work it into pores and joints. Prime the glazing bars and meeting rails next, then lightly denib.
Apply undercoat, brushing out with the grain and keeping the paint off the draught seals.
Lay on the topcoat last, and “strike” the paint line to the glass with a slight overlap to seal the putty edge.
For color matching, take a clean paint scrape to a specialist and match the aged tone. That supports historical accuracy.
Conclusion
Once you’ve re-hung the sashes, sealed the beads, and laid on your final coats, you’ll feel the window come back to life. A joiner I apprenticed under timed it: after cords and parting-bead seals, his draught strip cut the candle-flicker test from 10 seconds to none. That’s the point—like resetting a pocket watch, each pin, scrape, and brushstroke restores steady movement. Keep the channels waxed, and it’ll run true for decades.