
Walk your garden after dark and mark doors, ground-floor windows, paths, steps, and shadowed corners where sightlines fail. Mount fixtures high enough to stay out of reach, then aim beams 15–30° downward to cut glare and spill. Light access points for face-and-hand visibility, edge-light paths and treads, and place fixtures at both ends of side passages and on shed corners so beams overlap and erase shadow bands. Keep going to refine optics, timers, and sensor zones.
Key Takeaways
- Walk the garden on a moonless night to map routes, entry points, and persistent shadow zones behind sheds, hedges, and pergolas.
- Mount lights high and aim 15–30° downward to reduce glare and spill, using shields near windows and neighbor-facing boundaries.
- Prioritize doors and ground-floor windows by washing faces and latch areas along approach lines, aligning beams with any camera viewpoints.
- Light pathways and steps with low-glare edge fixtures aimed across treads, keeping consistent spacing and adding extra units at hazards and curves.
- Cover side passages and sheds with lights at both ends and on adjacent faces, overlapping beams to eliminate dark bands and blind corners.
Map Your Garden at Night for Blind Spots
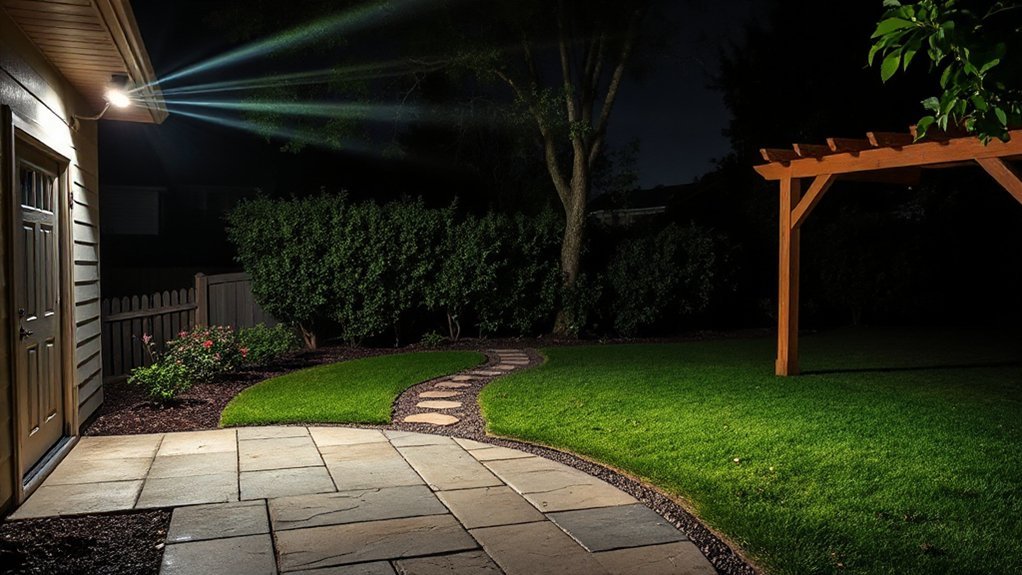
Before you mount a single fixture, walk your garden after dark and map where light fails, because daytime sightlines don’t reveal true coverage gaps. Use a notepad or phone sketch to mark circulation routes, entry points, and any hardscape edges that disappear in shadow.
Stand at doors, gates, and paths and note what you can’t see: corners behind sheds, dense hedges, pergola posts, and elevation changes from garden landscaping. Identify reflective surfaces (windows, pale walls, gravel) that may cause glare and reduce contrast.
Track existing ambient sources like streetlights or neighbors’ luminaires and record their spill. For wildlife friendly lighting, flag habitat zones and corridors so you can prioritize low-impact placement and limit unnecessary illumination.
Verify results on a moonless night.
Set Security Light Height, Angle, and Beam Spread
Once you’ve marked your dark zones, set each security light’s mounting height, aiming angle, and beam spread as a single system: higher mounts widen coverage but flatten facial detail, while lower mounts improve identification at gates and paths but create longer shadows behind shrubs and posts.
Aim fixtures 15–30° downward to keep spill off neighboring lots and reduce glare into cameras.
Choose beam spread by task: 10–25° for long side passages, 40–90° for patios and lawn edges, and asymmetric wall-wash optics to graze fences without hotspots.
Overlap beams slightly so moving subjects stay illuminated during transitions.
Pair Motion sensors with a short ramp-up and a 30–120 second hold to avoid rapid cycling.
Use Light timers for dusk-to-midnight baseline, then sensor-only overnight.
Place Security Lights at Doors and Ground-Floor Windows
Because doors and ground-floor windows act as your primary access points, treat them as priority nodes in the lighting layout and aim for clean facial and hand-level illumination at typical approach lines. Mount fixtures near door heads or soffits and offset them so the beam crosses the visitor, not the lens, reducing glare and improving identification.
For windows, place lights to wash frames and latch areas while avoiding direct spill through glass that can silhouette occupants and compromise Indoor security. Use narrow-to-medium optics to avoid lighting empty wall, and add shields to cut upward and neighbor-facing spill.
If you run camera integration, align beam direction with the camera’s field of view and set output to prevent blown highlights on faces and reflective door hardware. Set consistent color temperature across these nodes.
Place Security Lights Along Paths, Steps, and Trip Hazards
Run low-glare fixtures along pathway edges so you define the walking line without washing out nearby planting beds.
Aim light across treads and landings to cast crisp shadows that reveal step noses, drops, and changes in grade.
Keep spacing consistent and place luminaires on the outside of turns and at every hazard point so you don’t create dark gaps where footing fails.
Illuminate Pathway Edges
If you want reliable, glare-free coverage where people actually walk, prioritize pathway edges and every change in elevation. Mount low bollards or shielded path lights 12–18 inches high, aimed downward at 30–45°, so you wash the walking surface without lighting sightlines.
Space fixtures 6–10 feet apart, tightening spacing on curves to prevent dark pockets. Select 2700–3000K LEDs with full cutoff optics to support garden aesthetics while preserving contrast for obstacle detection.
Keep beams off planting beds; use glare shields and orient lenses away from foliage for plant growth considerations and to reduce hotspotting on glossy leaves.
Run wiring outside root zones, and set timers or motion with low-level standby to maintain continuity.
Highlight Steps And Drops
When your path shifts from flat to vertical—even by a single riser—treat that edge as a primary security-lighting target. Aim fixtures across the tread, not down the stair run, so you reveal riser faces without glare.
Mount step lights 150–300 mm above each tread, or use low bollards set back 300–600 mm to keep beams off eye level.
For drops, wash the landing and the first step, then add a narrow-beam accent to mark the edge line.
Plan motion sensor placement so it triggers before a foot reaches the change: position sensors 2–3 m upstream, angled 15–30° across travel.
Tie zones into lighting automation: step circuits stay at dim standby, then ramp to full on detection.
Cover Side Passages, Sheds, and Dark Corners (Overlap Light)
Place a light at each end of your side passage so the beams overlap and eliminate mid-run shadow bands along fences and gates.
For sheds, mount one fixture to wash the door plane and a second on the adjacent corner so their coverage intersects at the rear edge where concealment occurs.
You’ll get continuous illumination through dark corners by aiming for cross-lighting rather than a single hotspot.
Illuminate Side Passages
Because side passages naturally trap shadows between fences, walls, and planting beds, you’ll get the best security coverage by treating them as a continuous corridor and designing for overlapping light. Mount fixtures along the run at consistent spacing so each beam intersects the next at roughly 20–30% of its footprint, preventing blind pockets near gates, bins, and service doors.
Aim asymmetric wall packs or shielded floods downward at 30–45° to keep glare off neighboring windows while maintaining vertical illumination on faces. Use motion sensors with a low-lux standby mode, so you get fast activation without wasting power, improving energy efficiency.
Prioritize 3000–4000K LEDs and high CRI for accurate color recognition. Keep wiring accessible and protect controls in weatherproof enclosures.
Overlap Shed Corner Lighting
Side passages rarely end at a clean edge—they usually terminate at a shed wall, gate post, or rear corner where one fixture can’t see around the return, so you need overlapping corner coverage.
Mount two luminaires on adjacent faces of the shed corner, each aimed 30–45° across the blind side, so their beams intersect mid-passage.
Keep mounting heights matched (2.2–2.8 m) to avoid shadow bands and to maintain consistent vertical illuminance on fences and doors.
Specify asymmetric optics or adjustable heads to push light along the ground plane without overspill into neighbors’ windows.
Set PIR sensors to slightly different zones and delays, so motion near the corner sustains overlap lighting rather than strobing.
Test at night and fine-tune cutoff.
Light Gates, Driveways, and Parking: Without Neighbour Spill
When you light gates, driveways, and parking bays, you need a layout that gives you continuous, readable illumination on approach paths while keeping the beam cut-off tight to your boundary.
Mount asymmetric, full cut-off luminaires at 2.5–3.5 m, aimed 5–10° down, and keep fixtures 0.5–1 m inside your fence line to prevent neighbour spill.
Use cross-lighting: place two units on opposing posts so shadows don’t hide faces or number plates.
Specify 3000K, 70+ CRI to support security without washing out garden aesthetics.
Add a hood or louvre where sightlines leave your plot.
Pair PIR with low-level dusk dimming for energy efficiency, and zone-control the driveway separately from the gate to avoid overlighting.
Conclusion
Walk your garden at night and let the shadows show you what daytime hides. Mark blind spots, then set each fixture high, aimed down, with a beam spread that overlaps—never leaves a seam. Lock in doors and ground-floor windows first, then trace paths and steps with glare-controlled pools of light. Don’t forget side passages, sheds, and corners. Finally, light gates and driveways with tight cutoffs. When the last dark patch disappears… that’s your coverage.