
Start by measuring headroom along stairs, circulation paths, and occupancy zones, then verify joist species, span, spacing, and bearing for required loads and deflection limits; add sistering, LVLs, or beams if needed. Confirm planning permission for dormers, windows, or roofline changes, and submit drawings to Building Control for staged inspections and final sign-off. Design continuous insulation, airtightness, and ventilation to prevent condensation, then upgrade wiring, lighting, and HVAC zoning. Next, you’ll see how to optimize stairs, storage, and daily flow.
Key Takeaways
- Confirm structural capacity and code-compliant headroom, stairs, guardings, and egress before planning finishes or furniture.
- Plan circulation first, then place stairs, doors, and built-ins to keep clear pathways and safe, consistent riser/tread geometry.
- Build a continuous insulation and airtightness system, with correct ventilation and fireblocking to prevent condensation and meet regulations.
- Upgrade electrical, lighting, and mechanical ventilation; keep junction boxes, duct runs, and penetrations accessible and code-compliant.
- Use low-profile, securely anchored storage at eaves and under stairs, preserving required egress width, airflow paths, and daily usability.
Can Your Loft Renovation Meet Height and Structure Rules?
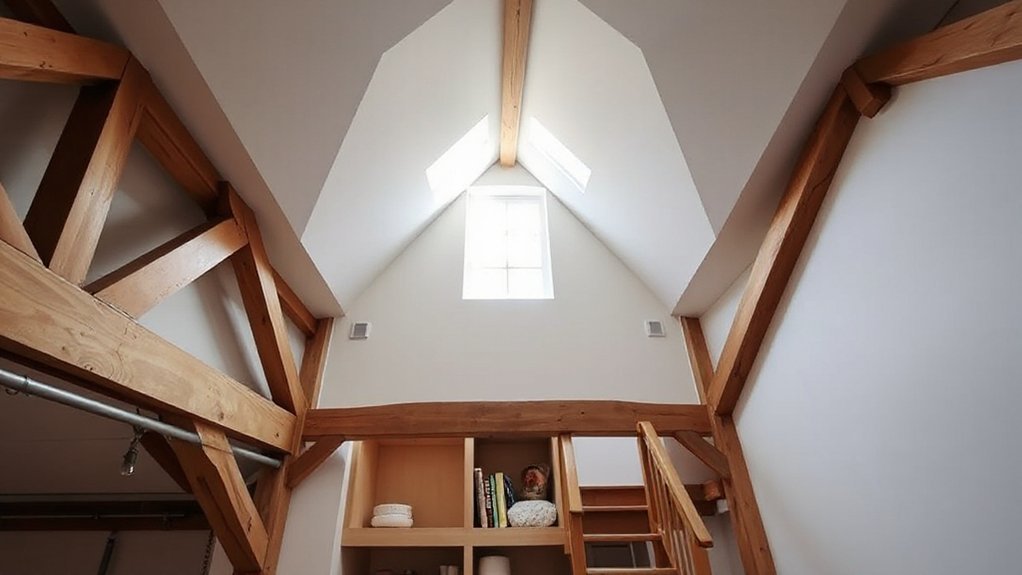
Before you finalize a loft renovation plan, verify that the space can meet code-required ceiling heights and that the existing structure can carry the new dead and live loads without overstress. Measure headroom at proposed circulation paths, stairs, and any areas intended for regular occupancy, then compare results to applicable Building codes. If height is marginal, you’ll need engineered solutions such as dormers or lowered ceilings below—don’t assume exceptions apply.
Next, confirm Structural integrity by inspecting joist species, span, spacing, bearing conditions, and any notches or bore holes. Calculate tributary loads for finishes, partitions, and furnishings, and check deflection limits to control bounce and cracking. If capacity falls short, specify sistering, LVLs, or new beams with proper connections.
Pick the Right Use for Your Loft Renovation
Once you’ve confirmed the loft can meet height and structural requirements, define its primary use early because occupancy type drives nearly every downstream code decision.
If you’re creating a bedroom, you’ll need space for a compliant egress route and clearances that won’t be blocked by furniture placement.
If it’s an office or studio, prioritize workstation zones, glare control, and dedicated circuits for equipment loads.
For a lounge, plan seating sightlines, media wall backing, and guard locations to keep fall protection intact.
Map circulation first, then assign built-ins so you don’t compromise headroom at slopes.
Keep storage low at kneewalls, and reserve tall elements for the ridge line.
Finish with decorative accents that don’t reduce required clear widths or access panels.
Planning Permission, Building Regs, and Inspections
Although a loft conversion can feel like an internal remodel, you still need to confirm whether it triggers planning permission and must satisfy Building Regulations, then schedule inspections so each hidden element gets signed off before you cover it up.
Check local planning rules for dormers, roofline changes, new windows, and added floor area; in conservation zones, you’ll often need consent. Submit drawings, structural notes, and a spec to Building Control, then follow applicable Building codes for structure, stairs, headroom, fire separation, smoke/heat alarms, escape windows, and guardings.
Use approved contractors where required and keep certificates for electrics and any new drainage connections. Book staged inspections for structural supports, fire protection details, and stair installation.
You’ll need final sign-off and occupancy permits before you move in.
Insulation and Heating/Cooling for a Comfortable Loft
Because a loft sits directly under the roof deck and outside air, you’ll only get year-round comfort if you design insulation and HVAC as a single, code-compliant system: set a target U‑value/R‑value that meets your local energy code, maintain continuous insulation at rafters, gables, and eaves to eliminate thermal bridging, and protect performance with an airtight layer plus correctly sized ventilation paths (or an approved warm-roof assembly) to prevent condensation.
Then size heating/cooling to the new heat-loss and solar-gain calculations, not the house’s original plant. You’ll improve thermal comfort and energy efficiency by using room-by-room load calculations, zoning, and low-temperature emitters (radiant panels or hydronic loops) or a properly commissioned mini-split.
Seal ducts to code, insulate pipework, and verify airflow and refrigerant charge. Add smart controls and balance the system so the loft doesn’t overheat or lag.
Add Light, Electrics, and Ventilation Up Top
You’ll plan loft lighting around headroom and task zones, specifying IC-rated recessed fixtures or low-profile surface luminaires. You’ll also verify any skylight work meets local egress and tempered-glazing requirements.
You’ll upgrade wiring to current code by sizing circuits for the added load, installing AFCI/GFCI protection where required, and routing cables with proper protection and staple spacing.
You’ll also provide code-compliant ventilation by verifying exhaust CFM, insulating and sealing ducts to prevent condensation, and maintaining required roof/soffit vent pathways for balanced airflow.
Plan Lighting For Lofts
Before you close in the ceiling or finish the knee walls, map the loft’s lighting, electrical runs, and high-level ventilation so every junction box, cable route, and duct penetration stays accessible and code-compliant.
Lay out ambient lighting first: place recessed or low-profile fixtures to avoid headroom conflicts and maintain required clearances from insulation and framing. Add task lighting at desks, reading nooks, and stair landings, and specify IC-rated, airtight housings where assemblies demand it.
Use smart controls so you can zone slopes, dormers, and the center bay independently; include 3-way switching at both stair and loft entries.
Plan receptacle locations around furniture and egress paths, and reserve chases for future low-voltage runs. Coordinate vent grille placement with lighting to prevent glare and drafts.
Upgrade Wiring And Ventilation
Where do you add capacity and airflow without tearing finished surfaces back open? Start by tracing existing circuits, then size a new subpanel or feeder to meet load calculations per NEC Article 220.
Pull new cable through chase walls, soffits, or surface-mounted raceway, and staple or strap within code limits. Add AFCI/GFCI protection where required, bond metal boxes, and label breakers for electrical safety.
Upgrade lighting feeds with 14/2 or 12/2 as amperage dictates, and keep junction boxes accessible.
For ventilation systems, run insulated ducting to a roof or gable cap, slope condensate lines, and seal joints with mastic. Meet ASHRAE 62.2 rates, provide makeup air for fans, and verify clearances at insulation and rafters.
Stairs, Storage, and Layout That Work Daily
You’ll start by specifying stairs that meet local code for rise/run, minimum clear width, headroom, and guard/handrail requirements while staying compact with winders or alternating treads where permitted.
You’ll then lock in built-in storage—knee-wall cabinets, under-stair drawers, and rated access panels—so it preserves egress paths, doesn’t block required clearances, and supports HVAC/electrical serviceability.
Finally, you’ll plan the daily-flow layout by mapping circulation from the stair landing to sleep, work, and bath zones, keeping door swings, clear walking paths, and furniture footprints conflict-free.
Safe, Space-Smart Stairs
Although a loft stair can double as storage and circulation, it still has to meet daily-use safety basics: size the run for code-compliant headroom and landing clearances, keep risers uniform, and provide a continuous handrail with proper graspability and guard protection at open edges.
For stair safety, confirm tread depth and riser height stay within your adopted code, and keep nosings consistent to prevent trips. If you need space-efficient stairs, favor a compact straight run or switchback over alternating treads unless permitted and clearly justified.
Maintain a clear walking width, limit steepness, and avoid encroaching doors at landings. Add slip-resistant nosings, bright step-edge contrast, and lighting controlled from both levels.
Verify guard heights and infill spacing at the loft opening.
Built-In Storage Solutions
Once your stair run and loft opening meet code and feel predictable underfoot, you can make the circulation zone earn its keep with built-in storage that doesn’t steal clearance. Keep required egress width and headroom intact by recessing cabinets between studs or under treads, and stop faces flush to avoid snag points.
Use drawer boxes on full-extension slides rated for the load, and anchor to framing with structural screws, not finish nails. Add Hidden compartments behind removable toe-kicks or false risers, but keep access panels tool-free and labeled for maintenance.
Specify Modular shelving with adjustable standards fastened into blocking so shelves stay plumb and don’t rack. Vent any enclosed volumes near HVAC returns, and maintain fireblocking where cavities connect to concealed spaces.
Daily-Flow Layout Planning
Because lofts compress circulation into a few critical feet, plan the daily-flow path around the stair run, the landing/loft opening, and the doors or drawers you’ll touch most, then lock those clearances in before you place storage or furniture.
Keep egress routes unobstructed: maintain a clear stair width per local code, provide uniform riser/tread geometry, and preserve headroom at the opening and along the run.
Size the landing so you can turn, open a door, or pull drawers without stepping into the stair.
For furniture arrangement, align the bed or desk so you don’t narrow the path; avoid low beams at primary walking lines.
Add guardrails at edges and consider privacy considerations with partial-height screens that don’t block required ventilation or light.
Conclusion
You’ve turned your loft from dead air into working square footage by proving headroom, joist capacity, and safe load paths. You’ve matched the space to its use, then cleared permissions, Building Regs, and inspections so nothing’s left to chance. With continuous insulation, sealed vapor control, and sized HVAC, comfort won’t leak away. You’ve poured in daylight, compliant wiring, and balanced ventilation. Finally, code-safe stairs, smart storage, and a tight layout make it liveable daily.