
Start by measuring your existing lock’s backset, door thickness, spindle size (often 5 mm), and fixing type (through-bolts, surface screws, or a grub screw) so you can buy an exact match. Wedge the door, tape around the roses, pop off covers, and remove hidden screws while supporting the thumbturn. Pull out the spindle and latch, noting bevel orientation. Fit the new latch bevel toward the strike, tighten screws evenly, then test and adjust the strike if needed. Keep going to pick up quick fixes for sticking and wobble.
Key Takeaways
- Measure spindle size, door thickness, backset, and fixing centres to buy a like-for-like turn and release set.
- Photograph both sides and the door edge to match rosette size, faceplate shape, and screw positions.
- Remove cover roses or grub screws, undo fixings, then slide out thumbturn, spindle, and the latch mechanism.
- Fit the new latch with the bevel facing the strike, then reinstall spindle and roses, tightening screws evenly.
- Test closing and turning; fix sticking or misalignment by adjusting the strike plate and using dry graphite lubricant.
Identify Your Turn-and-Release (Measurements + Fixings)
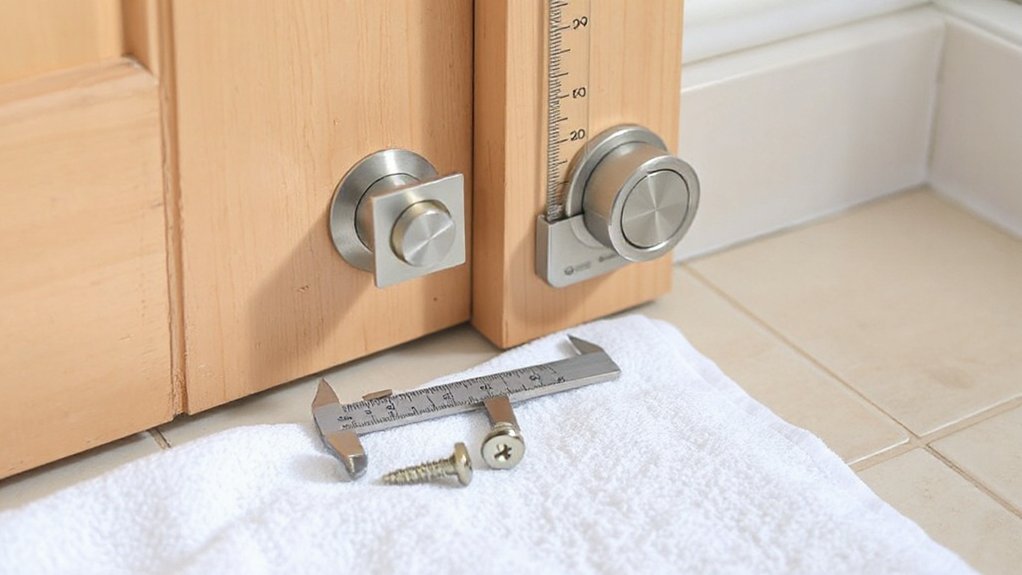
Before you buy anything, identify exactly what you’ve got by measuring the existing turn-and-release and noting how it’s fixed to the door. Keep the door open and latch engaged so you don’t trap yourself.
Measure the spindle size (typically 5 mm) and the door thickness. Record the backset and centre-to-centre spacing if it’s a combined handle/lock set.
Check whether it’s a mortice bathroom lock, a tubular latch with a privacy bolt, or a standalone thumbturn and emergency release.
Inspect the faceplate shape and screw centres, and confirm whether fixings are through-bolts or surface screws.
Photograph both sides and the edge.
Match these details to ensure lock security, then choose finishes from decorative options without changing dimensions or handing.
Gather Tools and Parts (No Drilling Needed)
Next, gather everything you’ll need so you can swap the turn-and-release in one controlled pass without drilling: a matching replacement set (same spindle size, screw centres, and door thickness range), a No.2 Pozi/Phillips screwdriver, a small flat screwdriver or pick for cover roses, a 3–5 mm Allen key if your thumbturn uses grub screws, a tape measure, a parts tray, and a door wedge.
Wear eye protection, keep the door propped open, and confirm the new screws match the existing holes so you don’t strip threads or force fixings.
Lay the new door hardware out in order: thumbturn, release, spindle, roses, screws.
Measure spindle length and compare to door thickness so the lock mechanism clamps without binding.
Check screw heads match your driver to prevent cam-out.
Keep a magnetic tray for tiny fixings, and have a torch ready to inspect alignment and wear.
Remove the Old Turn-and-Release (Hidden Screws, Grub Screws)
Once you’ve confirmed the door is wedged open and stable, start by finding how the roses (cover plates) are retained—most turn-and-release sets hide the fixings behind a snap-on cover or a tiny grub screw.
Protect decorative finishes with masking tape, then slide a thin plastic pry tool under the rose and pop it evenly, or loosen the grub screw with the correct hex key.
Pull the rose back to expose the fixing screws. Support the handle/turn with one hand, then remove screws with a screwdriver and set them aside.
If it’s through-bolted, undo both sides evenly to avoid twisting the spindle. Withdraw the turn, release, and spindle straight out.
Finally, remove the latch faceplate screws and slide the latch out, noting handing and locking mechanisms orientation.
Choose a Replacement Turn and Release Lock That Fits
Before you buy a new turn-and-release lock, measure the backset and the bore diameter so the latch and body seat correctly without forcing the door.
Then verify the spindle type, length, and orientation match your existing mechanism so the thumbturn engages smoothly and the emergency release works reliably.
Finally, check the rosette diameter and fixing points cover the old holes and align with the door thickness so you don’t compromise the door’s strength.
Match Backset And Bore
Although many turn-and-release locks look interchangeable, you need to match the backset and bore sizes so the new lock seats flat and latches reliably.
Start by opening the door and supporting it so it can’t swing while you measure door hardware.
Measure backset: from the door edge to the center of the existing bore, commonly 2-3/8 in. or 2-3/4 in.
Next, measure the cross-bore diameter (the big hole through the face), typically 2-1/8 in., and the edge-bore diameter for the latch, often 1 in.
Verify the door thickness, too, so the latch aligns with the strike.
If any dimension’s off, lock mechanisms can bind, the latch may not fully extend, and the lock can fail under force.
Confirm Spindle And Rosette
Because turn-and-release sets don’t share a universal spindle size or trim footprint, you should confirm the spindle type and rosette dimensions before you buy.
Remove one handle and thumbturn with a screwdriver, then pull the spindle out carefully so you don’t pinch fingers on sharp escutcheon edges. Measure spindle length end-to-end and note the cross-section (square, splined, or D). Check whether it’s fixed to one side or free-floating, since that affects compatibility and emergency-release function.
Next, measure the rosette’s outside diameter and thickness, and inspect the mounting pattern and screw spacing. Compare these to the new set’s rosette design so it fully covers old paint rings and screw holes.
Reassemble loosely to verify smooth rotation and no binding.
Install and Align the New Turn and Release Lock
Once you’ve confirmed the new lock matches the door thickness and backset, slide the latch into the edge bore with the bevel facing the strike plate, then secure it with the supplied screws without overtightening.
Insert the spindle through the latch hub and align both roses against the door faces. Hold the exterior release side steady while you seat the interior turn side, keeping the spindle centered so the lock mechanisms don’t bind.
Start mounting screws by hand, then tighten evenly in alternating turns to keep the trim square and support door security. Verify the turn rotates smoothly and the release slot engages without forcing.
Close the door and confirm the latch fully enters the strike; adjust strike screws only if needed. Recheck all fasteners.
Fix Common Turn-and-Release Problems (Sticking, Wobble, Misalignment)
Before you assume the new lock’s defective, diagnose the symptom so you fix the right cause.
If it sticks, open the door, remove the spindle, and confirm the latch retracts smoothly by hand. Lightly deburr paint or burrs on the strike and latch face, then apply a dry graphite lube—avoid oil that attracts grit.
If you feel wobble, tighten through-bolts evenly, confirm the rose sits flush, and replace stripped screws; don’t overtighten and crack the door.
For misalignment, mark where the latch hits the strike, then shift the strike plate, shim it, or deepen the mortise with a chisel, cutting away from your body.
Re-test the lock mechanism after each repair techniques step.
Conclusion
You’ve walked this little door-keeper’s path like a locksmith in a narrow castle corridor: measure first, match fixings, then loosen hidden or grub screws and lift the old set free. You didn’t drill; you controlled the risks. Now slide the new spindle through, seat both roses, tighten evenly, and test the turn and emergency release. If it sticks or wobbles, realign, re-seat, and re-tighten until the latch moves cleanly.