
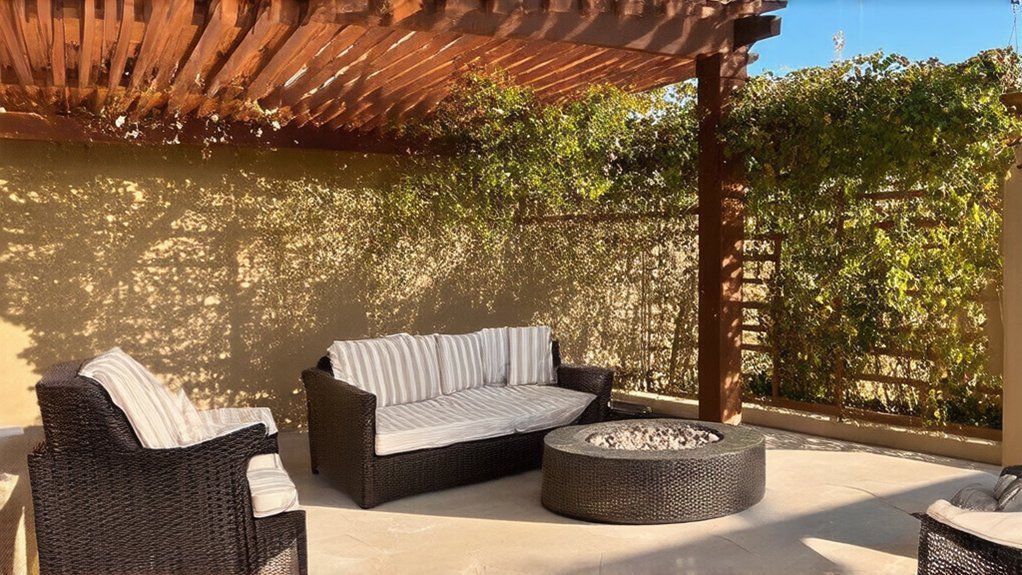
How to Create a Shaded Seating Area Using Pergolas or Garden Structures
Map your pergola footprint to the sun path, shadows, and clearances, then size the roof plane to extend 18–24 inches beyond chair backs and confirm permits, setbacks, and wind/snow loads. Choose attached construction for clean progressions and predictable framing, or go freestanding when grade, drainage, or trees limit tie-ins. Tune shade with slats set perpendicular to harsh afternoon sun, adjustable louvers, solid panels, retractable fabric, or vines, then add screens and low-glare lighting for comfort. Keep going for system-specific detailing.
Key Takeaways
- Map the pergola footprint to sun paths and verify shade at noon and 3 p.m. to place seating in peak shade.
- Size the roof plane to extend 18–24 inches beyond chair backs, and confirm setbacks, permits, and wind/snow anchorage requirements.
- Choose a roof system—solid panels, adjustable louvers, or retractable fabric—based on desired shade control, ventilation, and rain runoff.
- Optimize shade by orienting slats perpendicular to harsh afternoon sun and tightening spacing (about 8–12 inches o.c.) as needed.
- Add living shade or screens using trained vines, privacy panels, or outdoor curtains, positioned to block glare and key sightlines.
Plan Your Pergola Layout (Sun, Space, Permits)
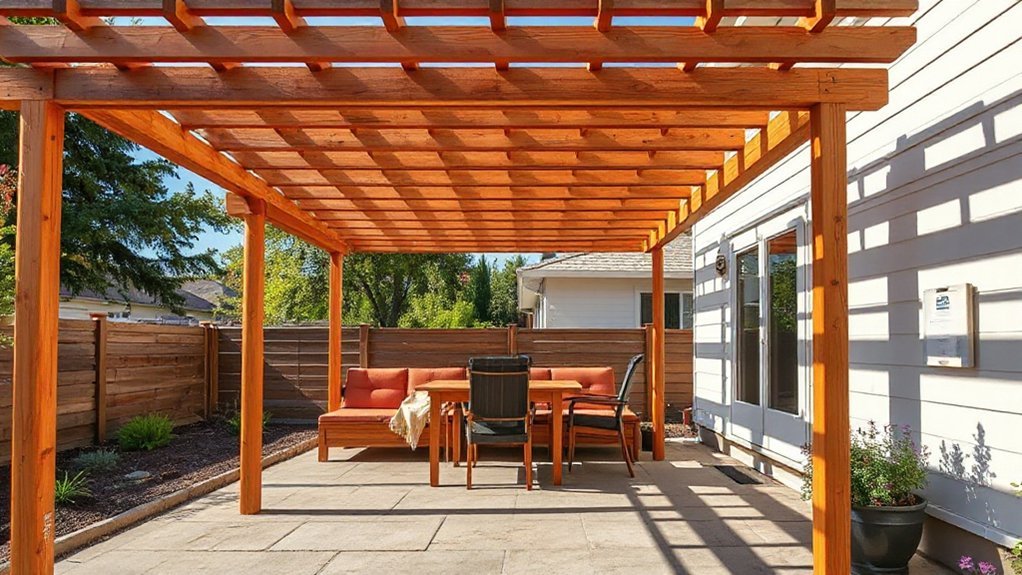
Before you buy lumber or set footings, map your pergola’s footprint against the sun path, your available clearances, and local code constraints.
Track Sun exposure at morning, solar noon, and late afternoon; note shadow lines from your house, trees, and fences.
Position seating where peak shade lands during your actual use hours, then size the roof plane to extend at least 18–24 inches beyond chair backs.
Verify setbacks from property lines, overhead service drops, and easements, and keep post locations clear of irrigation, septic, and roots.
Check permit requirements for accessory structures, including height limits, anchorage details, and snow/wind loads.
Call 811, mark utilities, and document the layout for inspections.
Choose a Pergola: Attached vs Freestanding
Although both styles can deliver usable shade, choosing between an attached pergola and a freestanding pergola comes down to how you want the structure to transfer loads, manage water, and define circulation on your specific site.
Attach to the house when you’ve got sound framing to lag into, predictable eave heights, and you want a clean threshold from interior to patio. You’ll simplify footings, but you must detail flashing, ledger isolation, and roof runoff so you don’t trap moisture against siding—key for Pergola maintenance.
Go freestanding when setbacks, trees, or grade changes make anchoring cleaner, or when you want the pergola to act as a room in Garden design. You’ll add more piers and bracing, yet you’ll gain flexible orientation and clearer drainage paths.
Compare Pergola Shade Options (Louvers, Panels, Fabric)
Once you’ve set the pergola’s footprint and orientation, you’ll choose a shade system that matches your sun path, wind exposure, and drainage plan.
Adjustable louvered roofs let you tune light and ventilation while shedding water when pitched and guttered correctly.
Solid panel coverings lock in full-time shade and require precise slope and flashing at connections.
Retractable fabric canopies give you flexible coverage with minimal dead load, but you’ll need clean anchor lines, tensioning hardware, and a wind stow strategy.
Adjustable Louvered Roofs
When you need a pergola roof that can track shifting sun angles and sudden weather changes, adjustable louvers give you the most controllable shade envelope. You can tune blade pitch to block high summer sun yet admit low winter light, which lets you target comfort at the seating zone instead of over-darkening the whole deck.
Align the louvers perpendicular to the primary afternoon exposure (often west/southwest) to reduce glare and radiant load. Specify gutters and downspouts integrated into the beams so runoff doesn’t sheet onto cushions.
For wind-prone sites, choose a system with lock-in-place blades and anemometer-driven automated shading that parks the roof open or closed based on thresholds. Add concealed LED strips and fan mounting points without compromising drainage paths.
Solid Panel Coverings
Where do solid panel coverings outperform louvers and fabric? You’ll see the advantage on wind-exposed decks, coastal sites, and courtyard pergolas where you want fixed, all-day shade and dependable rain shedding.
Specify insulated aluminum panels or polycarbonate sheets when you need thermal buffering, UV control, and a clean ceiling plane for recessed downlights, fans, and conduit runs. You can pitch panels 1/4 inch per foot to a gutter beam, then route downspouts to a drain or rain garden to keep paving dry.
Use opaque panels over dining zones to reduce glare, while leaving perimeter bays open for cross-ventilation.
Solid panel coverings also deliver aesthetic enhancement by aligning seams with rafter spacing and matching trim to fascia colors.
Retractable Fabric Canopies
Although you can engineer permanent shade with louvers or solid panels, a retractable fabric canopy gives you tunable coverage that adapts to sun angle, breezes, and how you actually use the patio hour to hour.
Mount tracks tight to the pergola beams so the fabric rides above head height, and align the opening direction with prevailing wind to reduce sail forces.
Prioritize canopy materials rated for UV, mildew, and colorfastness; solution-dyed acrylic or PVC-coated polyester handles high exposure better than cotton blends.
Specify fabric tensioning at both the lead bar and rear anchor so you don’t get ponding after rain or noisy flutter in gusts.
Add a slight pitch, integrate drain points, and place tie-backs where you’ll park the shade at sunset.
Control Sun With Pergola Slats and Spacing
Because the slat layout dictates how much direct beam sunlight reaches your seating zone, you should treat pergola spacing and orientation as a controllable shading system rather than a decorative detail.
For Sun control, set slats perpendicular to the harshest afternoon azimuth; on west-facing patios, run members north–south so they cast longer shadows during peak heat.
Adjust Pergola spacing to your latitude and desired shade factor: 2×6 slats at 12 in. o.c. give intermittent shade, while 8 in. o.c. tightens cut-off and reduces glare.
Increase slat depth to improve angle blocking without closing airflow.
If your seating faces low morning sun, cant slats 10–15° or add a secondary cross-batten to break beam paths.
Verify with a noon/3 p.m. site check.
Add a Retractable Pergola Canopy or Shade Sail
If your pergola slats can’t cover every sun angle, you can add a retractable canopy system—track-guided fabric, cable-driven panels, or a motorized roller—sized to your bay spacing and post layout.
If you’re using a shade sail instead, you’ll set attachment points to match your seating footprint, pitch it for runoff, and align it to block peak afternoon exposure without clipping circulation paths.
Specify UV-stabilized HDPE or solution-dyed acrylic with rated UPF, corrosion-resistant hardware, and reinforced corners so the assembly holds tension and maintains shade performance season after season.
Retractable Canopy Options
Where does the sun hit hardest during your peak-use hours—midday over the dining set, or late afternoon across the lounge zone? Specify a retractable canopy that tracks that exposure: a rail-guided pergola canopy for linear coverage, or a cable-suspended tension fabric panel for flexible span. You’ll control heat gain while keeping views open when shade isn’t needed.
Choose weatherproof materials matched to your microclimate: solution-dyed acrylic for UV stability, PVC-coated polyester for higher tensile strength, or PTFE-coated fabric for maximum longevity.
Detail the hardware like you’d exterior trim: marine-grade stainless fasteners, anodized aluminum tracks, and low-friction carriages. Add a slight crown or integrated gutter line so runoff doesn’t pond, and include wind-locks or breakaway clips to protect the structure.
Shade Sail Placement Tips
Even though a shade sail reads like a simple fabric plane, you’ll get the best performance by placing it from a sun-path and anchor-load plan rather than by eye. Map summer noon and late-afternoon angles, then skew the sail so its longest edge blocks the worst glare on your outdoor furniture.
Keep one corner higher to drive runoff away from seating and pathways, and maintain consistent tension lines to prevent flutter.
If you’re tying into a pergola, align fixings to posts or beam nodes, not mid-span members, and keep hardware accessible for seasonal retensioning.
Avoid placing edges where ladders or pruning tools swing during garden maintenance.
Set clear zones for grills, doors, and circulation so the sail doesn’t turn your shade into an obstacle.
Materials And UV Protection
Because UV exposure and heat load vary by orientation and nearby reflective surfaces, choose canopy or shade-sail fabrics by rated UV block, permeability, and hardware grade rather than by color alone.
Aim for 90–98% UV protection in open patios; use tighter weaves on south- and west-facing edges, and more permeable mesh where wind funnels between buildings.
Specify solution-dyed acrylic or high-density polyethylene for material durability, and confirm mildew resistance if the canopy will retract into a cassette.
Match thread and webbing to the cloth (PTFE or UV-stabilized polyester).
For hardware, use 316 stainless or hot-dip galvanized fittings, and isolate dissimilar metals to prevent corrosion.
Add a retractable track system or tensioned sail with turnbuckles so you can tune pitch and shed rain.
Shade a Pergola With Climbing Plants and Vines
If you want your pergola to cast real, usable shade without adding a solid roof, train climbing plants and vines up the posts and across the rafters to form a living canopy. Match species to exposure: use deciduous options on south and west faces for summer shade and winter sun, and evergreen only where year-round cover won’t darken interiors.
Install stainless eye screws and tensioned wire or mesh beneath rafters so shoots grip quickly and loads transfer cleanly to beams. Space planting 18–24 inches off footings with drip irrigation and root barriers near paving.
Use Vining strategies like two-leader training per post, lateral weaving every 12 inches, and midsummer tip-pruning to thicken cover. Choose climbing plants with non-invasive habits and manageable weight.
Add Pergola Privacy Screens, Curtains, or Panels
Where do you need the most screening—street side, a neighboring second-story window, or wind-driven afternoon sun? Map sightlines from seated height and identify the azimuth of glare. Then position Privacy screens on the pergola’s outer bays, prioritizing west and northwest exposures.
Use slatted cedar, perforated metal, or composite panels set 1–2 inches off posts for drainage and airflow. Keep panel height just above eye level to preserve openness while blocking views.
If wind is a factor, brace with hidden Z-clips and choose 40–60% open area to reduce sail effect.
Add decorative curtains only on leeward sides; hang them on stainless cables with weighted hems and tie-backs so they track smoothly and don’t whip. Seal fasteners for corrosion resistance.
Finish the Pergola Seating Area With Lighting and Decor
Once the screens and panels lock in your sightlines, you can tune the pergola into a usable room after sunset by layering lighting and weather-rated decor to match your layout and exposure.
Start with Outdoor lighting on two circuits: an overhead ambient run (dimmable string or linear LED under rafters) and low-glare task points at seating edges. Aim fixtures away from neighbors and down toward the floor plane to cut spill and insects.
If wind funnels through the structure, choose shatterproof globes and stainless hardware. Add step or post-cap lights to mark circulation from patio to lawn.
Then finish with decorative accents that resist UV and moisture: solution-dyed cushions, powder-coated planters, and a washable outdoor rug sized to keep front chair legs on it. Anchor decor for gusts.
Conclusion
You’ve dialed in your pergola layout to match sun angles, setbacks, and any permit requirements, then chosen attached or freestanding structure for the cleanest site fit. Now you control shade with louvers, panel spacing, retractable canopies, or a shade sail tuned to your seating zone. You can soften it with vines, then tighten comfort with privacy screens or curtains. Finish with task lighting and weather-rated décor—your patio will feel like a million suns switched off.…