Garden & Outdoor

Garden & Outdoor

Garden & Outdoor Improvements: Creating Beautiful and Functional Outdoor Spaces

A well-designed outdoor space adds value, improves kerb appeal, and creates an area where you can relax, entertain, and enjoy time with family and friends. Whether you have a compact garden or a large outdoor area, thoughtful improvements can transform unused space into an attractive extension of your home.

From garden walls and patios to pathways and outdoor features, quality workmanship ensures your outdoor space is both practical and built to last.

Why Invest in Garden & Outdoor Improvements?

Outdoor areas are exposed to changing weather conditions throughout the year, making durable construction and quality materials essential. Improving your garden not only enhances the appearance of your property but also creates additional usable space for everyday living.

A well-maintained garden can also increase property value and make your home more appealing to future buyers.

Popular Garden Improvement Projects

Garden and outdoor work can include a wide range of improvements, such as:

  • Garden walls
  • Patios
  • Pathways
  • Brick planters
  • Steps
  • Boundary walls
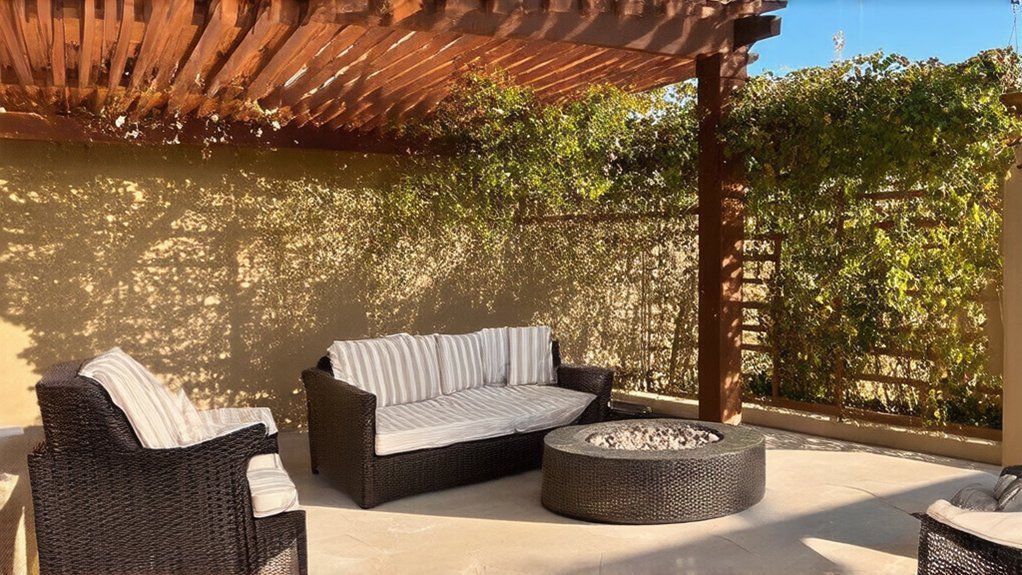
  • Outdoor seating areas
  • General landscaping preparation
  • Property entrances
  • Exterior repair work

Each project can be tailored to complement the style and layout of your home.

Garden Walls

A professionally built garden wall provides both structure and character. Whether defining boundaries, supporting raised beds, or creating attractive landscaping features, brick and block garden walls offer long-lasting durability with minimal maintenance.

Well-constructed walls also improve privacy and help organise outdoor spaces more effectively.

Patios and Outdoor Living Areas

Patios create comfortable spaces for relaxing, dining, or entertaining outdoors. Careful planning, proper foundations, and precise installation ensure a level, durable surface that performs well throughout the seasons.

Choosing materials that complement your property’s style creates a seamless connection between indoor and outdoor living.

Pathways and Access

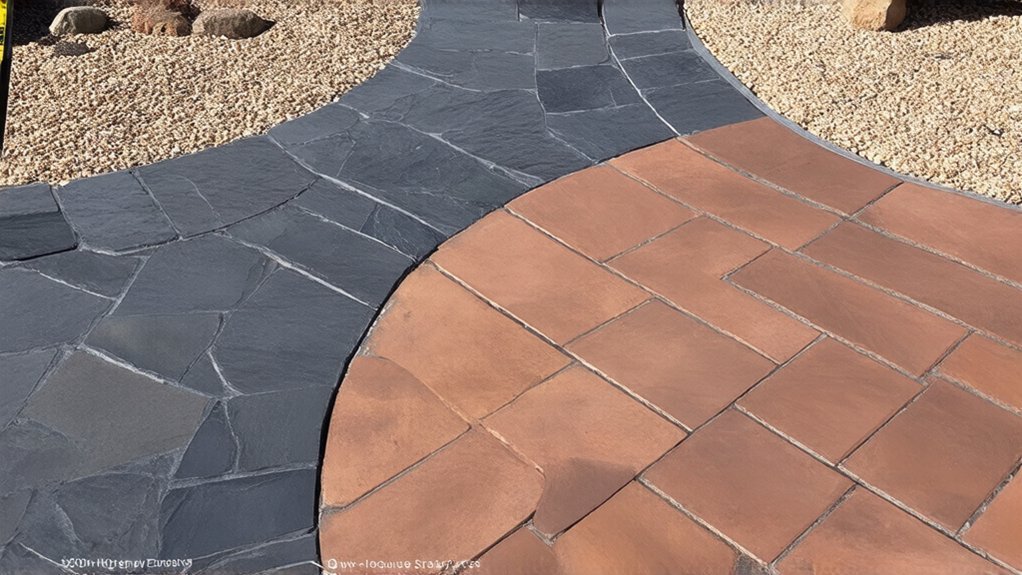
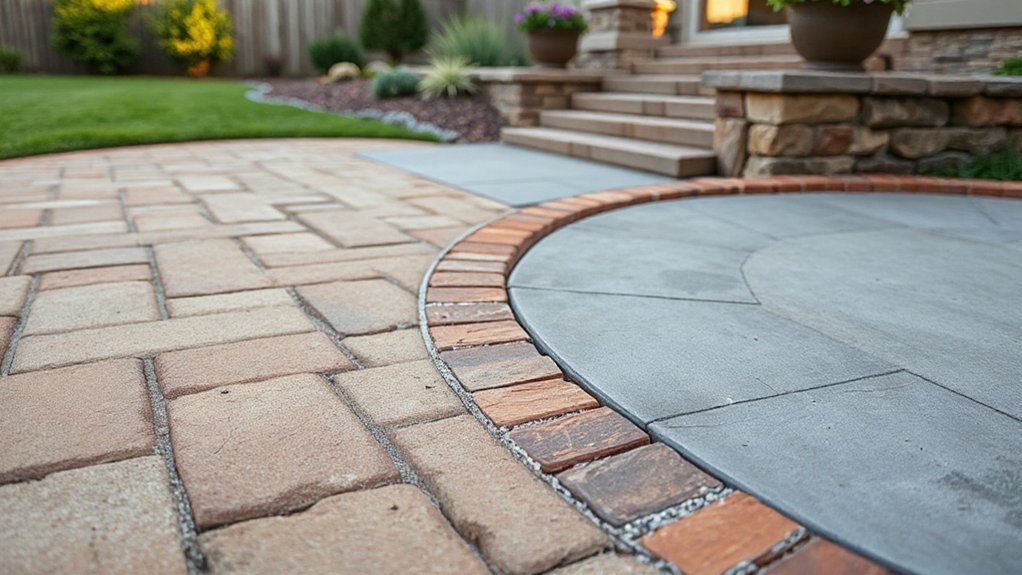
Well-designed pathways improve both safety and appearance by providing clear routes throughout the garden. Quality paving reduces trip hazards while making outdoor spaces easier to access during all weather conditions.

Strong foundations and proper drainage help maintain the appearance and stability of pathways over time.

Outdoor Brickwork

Brickwork remains one of the most durable and attractive choices for outdoor construction. From decorative features to structural walls, professionally completed brickwork withstands changing weather while maintaining its appearance for many years.

Outdoor brickwork can be designed to match the existing style of the property, creating a consistent finish throughout the exterior.

Property Boundaries

Boundary walls and entrance features provide security while improving the overall appearance of a property. Repairing or rebuilding damaged boundary walls restores both safety and kerb appeal.

Well-built entrance walls and pillars also create a welcoming first impression for visitors.

Planning Outdoor Improvements

Successful garden projects begin with careful planning. Important considerations include:

  • Available space
  • Drainage
  • Existing landscaping
  • Property style
  • Access requirements
  • Long-term maintenance

Planning these details before work begins helps ensure a practical and visually balanced result.

Benefits of Professional Outdoor Work

Professional construction delivers reliable, long-lasting results while ensuring every feature is built correctly from the ground up. Benefits include:

  • High-quality workmanship
  • Durable construction
  • Improved kerb appeal
  • Increased outdoor living space
  • Better property value
  • Reduced maintenance over time

Experienced tradespeople also ensure foundations, levels, and structural elements are completed to a professional standard.

Maintaining Your Outdoor Space

Regular maintenance helps keep gardens and outdoor features looking their best. Cleaning patios, checking brickwork, repairing minor damage, and keeping pathways clear all contribute to extending the lifespan of outdoor improvements.

Routine care also helps prevent small issues from becoming costly repairs.

Conclusion

Garden and outdoor improvements can completely transform the way you use and enjoy your property. From professionally built garden walls and patios to pathways, boundary features, and outdoor living spaces, quality workmanship creates attractive, functional areas that enhance both your home and your lifestyle. Investing in well-planned outdoor improvements provides lasting value while making the most of every part of your property.

outdoor shade and structure
Garden & Outdoor

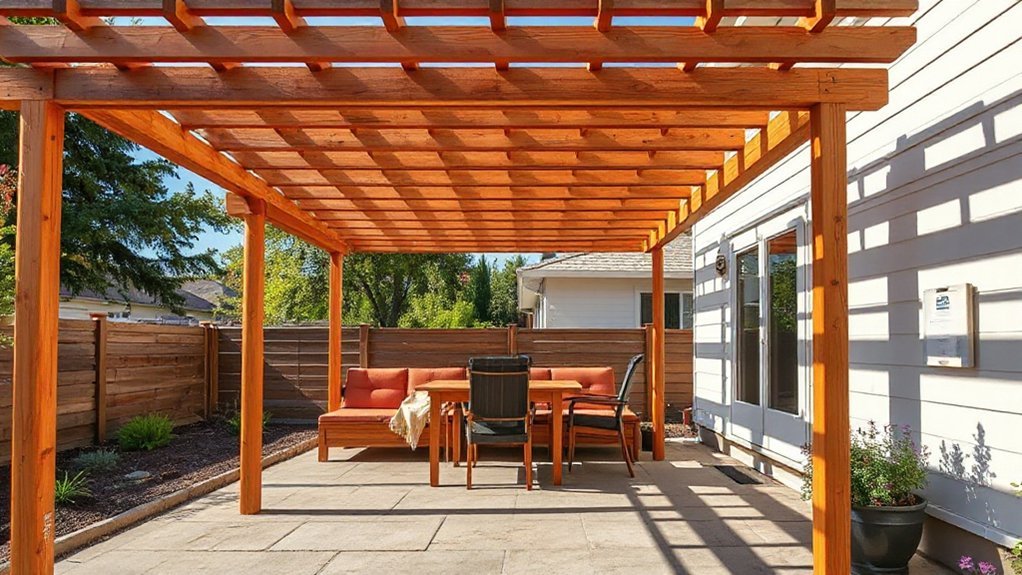
Building a Pergola: A Stylish Way to Add Shade and Structure to Your Outdoor Space

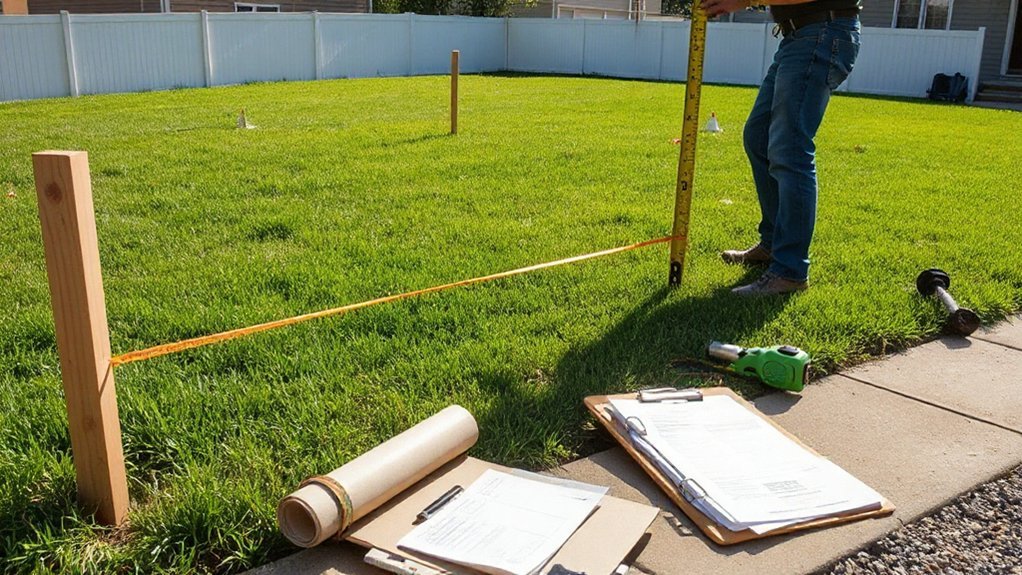
You’ll get the best pergola by first tracking seasonal sun and wind, then choosing slats, tighter rafters, or a retractable canopy that won’t act like a sail. Stake out the footprint to confirm door swings, grill clearance, and sightlines, and call for utility locates before digging. Pick wood, vinyl, or metal that fits your home’s lines and local uplift/footing rules. Keep hardware corrosion-resistant, manage runoff, and you’ll see smart options ahead.

Key Takeaways

  • Choose a shade style (slats, tight rafters, or retractable canopy) based on seasonal sun angles and local wind exposure.
  • Size and place the pergola to protect door swings, grills, and sightlines while catching breezes and avoiding roof drip lines.
  • Confirm setbacks, easements, utility locates, and permit rules for height, attachment, footing depth, and wind uplift.
  • Select materials to match your home and climate: wood for customization, vinyl for low maintenance, metal for slim modern spans.
  • Build with correct footings, braced plumb posts, code-rated connectors, corrosion-resistant hardware, and planned conduit for lighting and fans.

Decide What Shade and Style You Want

shade style materials design

Before you buy lumber or dig footings, decide how much shade you actually need and what style fits your site. Track sun angles across seasons, then choose between dappled slats, a tighter rafter grid, or a covered canopy for near-solid relief.

If wind funnels through your yard, favor open designs and retractable Fabric options that won’t act like a sail. Match the pergola’s lines to your home: clean, square posts for modern facades; tapered members and decorative tails for traditional trim.

Keep material choices fire- and weather-appropriate for your region, and avoid adding roof-like panels that could trigger stricter structural requirements under local codes. Pick durable finishes and smart color choices that reduce glare and heat.

Choose Pergola Size, Placement, and Permits

Because a pergola’s footprint affects everything from how you move through the yard to what your inspector will sign off on, start by staking out a few size options on the ground and living with them for a day. Check door swings, grill clearance, and sightlines from key windows.

Keep posts out of root zones and underground utilities; call for locates before you dig. Place it to catch prevailing breezes, avoid constant drip lines, and respect property setbacks and easements.

For landscaping integration, align beams with existing paths, patios, and planting beds so runoff and traffic don’t trample soil. Then confirm permit triggers: height, attached vs. freestanding, footing depth below frost line, and wind uplift requirements.

Build in maintenance tips: leave access for ladders, and plan drainage around bases.

Compare Pergola Materials: Wood, Vinyl, Metal

Now that you’ve set size, placement, and permits, you need to pick a pergola material that fits your site conditions and passes code checks.

You’ll weigh wood’s easy customization and repairability against vinyl’s low-maintenance profiles and UV/heat movement that can affect fasteners and spans.

You’ll also compare metal options (aluminum or steel) for higher strength-to-size ratios and clean lines, while accounting for corrosion protection, connection hardware, and local wind/snow load requirements.

Wood Vs. Vinyl

Whether you’re matching an existing deck or starting from scratch, the material you choose for a pergola sets the tone for everything that follows—cost, maintenance, structural details, and even what your inspector will want to see.

Wood gives you warm grain and flexible sizing, so you can tune beam depth, rafter spacing, and notching to meet local snow and wind loads. You’ll also handle outdoor aesthetics easily with stain or paint, but you’ll sign up for maintenance considerations like sealing, checking fasteners, and managing rot at post bases.

Vinyl stays bright with simple wash-downs and resists insects, yet it often relies on an internal wood or steel core for span and uplift resistance. Confirm footing size, post anchorage, and attachment hardware are listed and code-compliant for your jurisdiction.

Metal Strength And Style

If you’re building where wind uplift, long spans, or tight clearances drive the design, metal pergola framing lets you carry more load with slimmer members and fewer intermediate posts. You’ll get clean lines and modern aesthetics while keeping sightlines open on small patios or over walkways.

Choose galvanized steel or powder-coated aluminum for metal durability in wet, coastal, or termite-prone zones. Check local code for corrosion class, allowable spans, and required anchorage; you may need engineered calcs, uplift-rated post bases, and specified embedment or epoxy-set anchors in existing slabs.

Isolate dissimilar metals to prevent galvanic corrosion, and detail drainage so water can’t sit in channels. With metal, you’ll spend less time on refinishing and more time using the shade year after year.

Create Pergola Shade: Slats, Canopies, Panels

shade options for pergolas

Because a pergola’s open rafters won’t block much midday sun on their own, you’ll want to add shade with fixed slats, a retractable canopy, or panel infill that matches your site’s sun path and wind exposure.

Angle slats toward the harshest sun, and keep spacing consistent so you don’t create striped glare on seating. In windy zones, choose low-profile slats or rated panels, and follow local uplift requirements and fastener schedules.

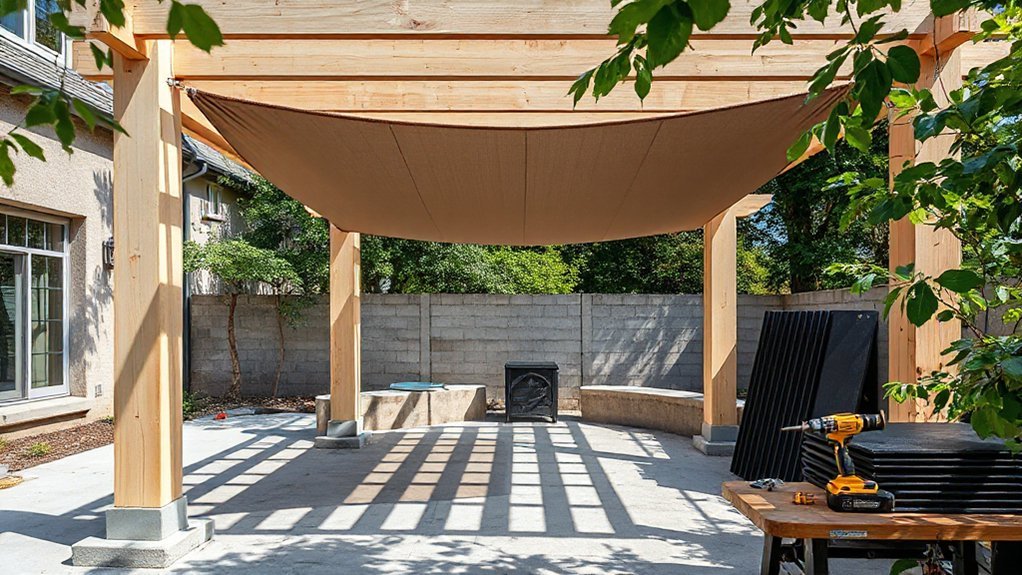
For canopies, pick fabric options that resist UV, mildew, and fading, and confirm your HOA or fire code allows them. Use stainless or coated hardware, add a drain path so water won’t pond, and include installation tips like tensioning evenly and allowing seasonal removal.

If you use panels, maintain required clearances from grills and property lines.

DIY Pergola Build Steps: Footings to Rafters

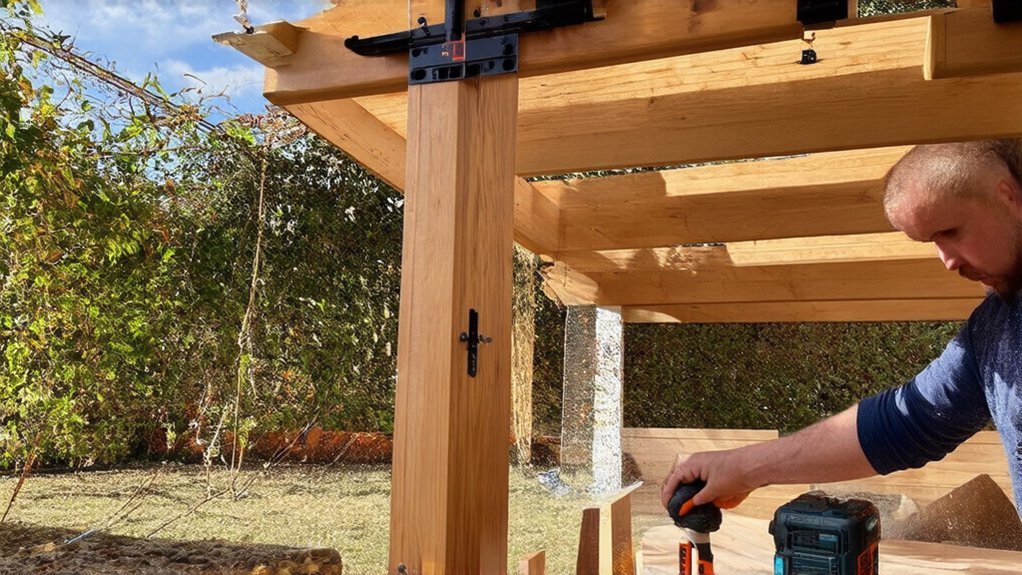
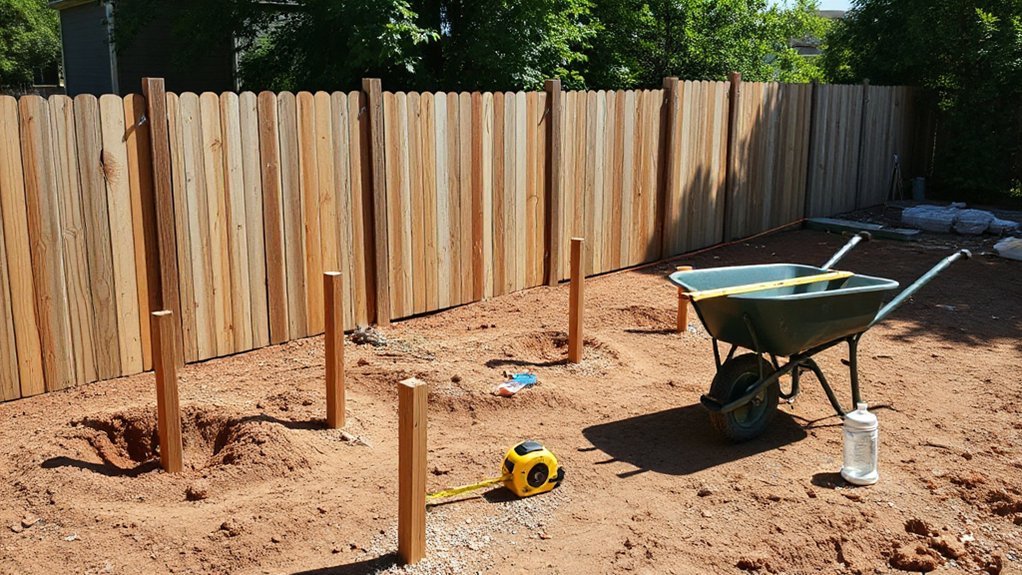
Where do you start a DIY pergola so it stays square, plumb, and code-compliant? You start by calling for utility locates, checking setbacks, and confirming footing depth below frost line. Lay out batter boards and string lines, then verify diagonals match.

Dig or auger holes, add gravel, set rebar, and pour concrete with post bases aligned to your strings.

After cure, stand posts, brace them, and plumb in two directions. Cut beams to length, crown them consistently, and bolt per span tables and hardware specs.

Snap a centerline, mark rafter layout, and seat rafters with hangers or notches allowed by code. Stub conduit for outdoor lighting before you close framing.

Leave clearance and sleeves for plant integration near posts.

Finish Your Pergola: Lighting, Vines, Privacy

Once the framing passes inspection and the lumber dries out, you can finish your pergola with the parts that make it usable—power, plants, and screening—without trapping moisture or creating hazards.

Run electrical only where your code allows: use a GFCI-protected circuit, exterior-rated boxes, and conduit strapped to posts; keep splices accessible and lights listed for wet locations.

For ambient lighting, hang low-voltage string lights or mount downlights under the beams, leaving drip loops and clearance from combustibles.

Train climbing vines with stainless wire trellises set off the wood so air can dry it; avoid aggressive species near footings.

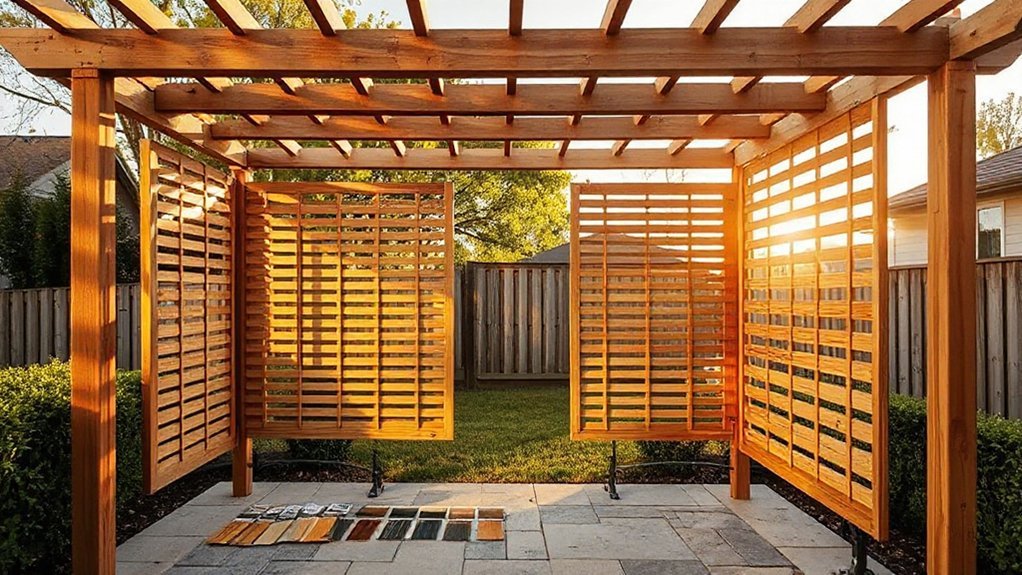
Add privacy with slatted panels or outdoor fabric on removable tracks, preserving egress and wind-load gaps.

Conclusion

You’ve now got a pergola plan that won’t leave your yard “unexpectedly sun‑kissed.” You’ve matched shade style to your space, picked a size and location that respects setbacks, frost depth, and any permits, and chosen materials that suit your climate. Whether you use slats, panels, or a canopy, you’ll anchor posts on proper footings, square the frame, and set rafters true. Add low‑voltage lighting, vines, and privacy—then enjoy it.…

simple garden water features
Garden & Outdoor

Creating a Garden Water Feature: Simple Designs That Add Instant Calm

You’ll get instant calm by choosing a self-contained water feature that fits your space and power: a bubbling urn or bowl for tight patios, or a stock-tank basin or low rill for larger yards. Set it on a level gravel-and-paver pad in bright shade or morning sun, keep it within hose reach and near a GFCI outlet or use a solar pump. Hide cords, allow a 18–24-inch splash zone, and tune flow with river rock—next you’ll see easy builds and upkeep.

Key Takeaways

  • Choose a self-contained bubbling urn, bowl, or stock-tank basin based on your space and desired sound level.
  • Pick a pump setup that matches power access: submersible near an outlet, or solar with battery when cords aren’t possible.
  • Place the feature on a level, compacted pad in morning sun or bright shade to reduce algae and evaporation.
  • Build simple DIY fountains by hiding a basin, running tubing through a pot, and topping with river rock to soften splash.
  • Keep it calming and clean with regular skimming, monthly filter rinses, water top-offs, and fall pump protection before freezes.

Choose a Simple Garden Water Feature (By Space + Power)

match space and power

Whether you’ve got a tight patio corner or a wide lawn to work with, you’ll choose a simpler (and better-looking) water feature if you match the design to two constraints up front: available space and available power.

In a small footprint, pick a self-contained urn or bowl where the basin hides inside a planter footprint and the sound stays close to seating.

With more room, a low rill or stock-tank basin reads intentional without complex plumbing.

Next, plan around power. If you’ve got an exterior outlet, you can run a quiet submersible pump with a steady column.

If you don’t, choose solar pump options with a battery for evening flow.

Lock in material choices early: glazed ceramic amplifies sparkle, corten or stone reads grounded, and molded resin keeps weight manageable.

Place Your Garden Water Feature: Level, Sun, and Splash

Once you’ve picked a feature that fits your space and power, the placement does most of the work for how it looks, sounds, and holds up. Set it on a truly level pad—compacted gravel under pavers or a flat stone—so water stays centered and doesn’t creep out of the basin. Check level front-to-back and side-to-side.

Aim for bright shade or morning sun; harsh afternoon sun boosts algae and evaporates water fast. Keep it within hose reach and near an outlet, but tuck cords along edges or under mulch. Allow a splash zone: 18–24 inches of clear perimeter from decking, siding, and tender plants. Use nearby garden lighting to skim the surface at night.

Add a shallow landing stone to encourage wildlife attraction without trampling beds.

DIY Bubbling Pot Garden Fountain (Weekend Build)

After you’ve dialed in a level, splash-safe spot near water and power, a bubbling pot fountain gives you a clean, modern water sound with minimal footprint and no exposed pond edge.

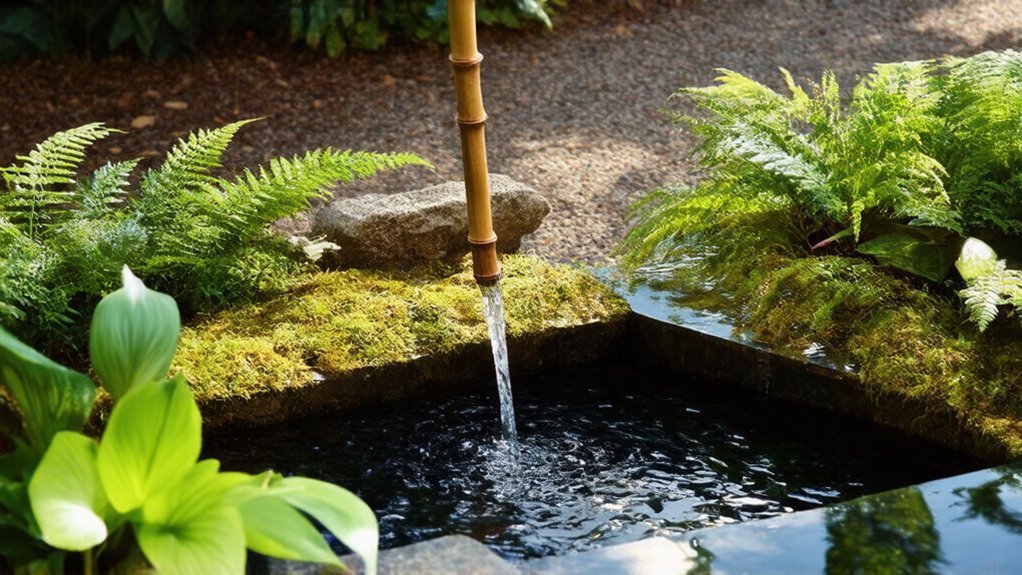
Set a perforated basin in a shallow dig, then backfill so the rim disappears under mulch or pavers. Drop in a sturdy water pump, route tubing up through the pot, and cap it with a nozzle or diffuser for a tight, low-splash dome.

Choose a tall, glazed jar for crisp reflections near a patio, or a matte, textured urn to blend beside a garden pond.

Top the basin with river rock to hide hardware, stabilize the pot, and tune the tone. Plug into a GFCI, then adjust flow until it burbles, not spits.

Build a Container Mini-Pond Water Feature

Because a container mini-pond holds a stable volume of water with no digging, you can tuck it into a sun-to-part-shade corner of the patio, beside a bench, or at the edge of a planting bed and still get that reflective, wildlife-friendly surface.

Choose a frost-proof ceramic bowl, half barrel, or stock tank at least 18 inches deep, and set it dead-level on compacted gravel so the waterline reads crisp.

Hide a small pump under a flat stone to keep the surface moving, or leave it still for mirror-like reflections.

Arrange aquatic plants by height: dwarf papyrus or sweet flag in the back, water lettuce mid-basin, and a mini water lily centered.

Add low-voltage pond lighting to graze the rim and shimmer after dusk.

Keep Your Garden Water Feature Clean Year-Round

Even if your water feature sits under open sky, you can keep it clear in every season by pairing a simple maintenance rhythm with smart placement and hardware. Site it where it gets morning sun but dodges harsh afternoon heat; less thermal swing means fewer blooms. Add a skimmer or intake screen and hide it behind a clipped sedge or stone baffle so the view stays clean.

Set a Maintenance schedule: skim leaves twice weekly, rinse the filter monthly, and top off with dechlorinated water as levels drop.

For Algae control, keep water moving with a correctly sized pump, shade 30–50% with lilies or a trellis, and add beneficial bacteria after rain.

In fall, stretch netting over the basin and lift the pump before hard freezes.

Conclusion

Once you’ve matched a simple feature to your space and power, you’ll feel the garden settle. Level the base, mind midday glare, and keep splash off decking so the sound stays crisp, not messy. One client in a narrow townhouse courtyard used a 20-inch glazed bubbling pot on a hidden patio slab—after adding river stone and a weekly rinse, the pump ran quietly all season. Stay on top of debris, and calm becomes automatic.…

install durable straight fencing
Garden & Outdoor

How to Install a Strong, Long‑Lasting Fence That Stays Straight for Years

Start by confirming property pins or a survey, then check setbacks/permits and mark utilities before you stretch a taut mason’s line for a straight layout. Choose durable wood or composite with hot-dip galvanized or stainless hardware. Match post spacing to true panel widths and gate clearances. Dig holes below frost line, add tamped gravel, set posts plumb, brace, and pour concrete. After curing, fasten rails/panels with structural screws, add mid-rails, and cap posts—next you’ll see the step-by-step details.

Key Takeaways

  • Confirm property lines, permits, setbacks, and easements, then mark a straight control line with offset stakes and taut mason’s line.
  • Call before you dig, locate utilities, and avoid restricted corridors to prevent unsafe placement and future rework.
  • Set posts below frost line on tamped gravel, plumb and braced, with consistent spacing that matches true panel widths and gate hardware clearances.
  • After concrete cures, attach rails level using structural screws or through-bolts, add mid-rails for long spans, and use anti-sag bracing on gates.
  • Use corrosion-resistant hardware, pre-drill to prevent splitting, seal cut ends, add post caps, and recheck plumb and fastener tightness after settling.

Lay Out the Fence Line (Property, Permits, Utilities)

verify boundaries and permits

Before you dig or set a single stake, confirm the fence line is legal and safe: locate your property pins or verify boundaries with a current survey, check local setback/height rules and secure any required permits or HOA approvals.

Then have all underground utilities marked through your local “call before you dig” service and note easements that restrict placement. If pins are missing or disputed, order a Land survey and document corner monuments.

Translate the approved line into a control layout: set offset stakes outside the dig zone, run taut mason’s line, and confirm straightness with a transit or laser. Measure diagonals to verify corners are square.

Recheck zoning regulations for street-front visibility triangles and utility corridors. Mark gate openings and post centers in paint, then pause if any mark conflicts.

Pick Fence Materials That Match Your Weather

After you’ve verified the layout and cleared utilities, you need to choose fence materials that fit your site’s moisture, temperature swings, and sun exposure so you don’t create premature rot, corrosion, or warping hazards.

You’ll compare weather-resistant wood species and treatments, select metal options rated for high humidity and salt air, and confirm fasteners and coatings to prevent galvanic corrosion.

You’ll also weigh composite and vinyl for long-term durability, checking UV stability, thermal expansion limits, and impact resistance for your climate.

Weather-Resistant Wood Choices

Although any fence board can look good on day one, your local climate determines whether it stays straight, rot‑free, and fastener‑tight over the long haul. Choose naturally durable species where moisture and insects are common: cedar, redwood, or black locust.

In dry, high‑UV regions, select dense, stable lumber and budget for stricter coating maintenance.

Inspect each board before installation. Favor tight, straight wood grain and minimal pith; these reduce cupping and checking.

Specify kiln‑dried, exterior‑rated lumber, and store it off the ground under cover to prevent uneven wetting.

Pre‑seal cut ends, then apply a compatible weatherproof finish on all faces before you hang boards.

Wear gloves and eye protection when cutting, sanding, or brushing finishes, and follow the product’s ventilation and cure-time requirements.

Metal Options For Humidity

Wood holds up well when you pick the right species and seal it correctly, but in humid or salt‑air climates you may get longer service life by switching to corrosion‑resistant metal components or full metal panels.

Prioritize Corrosion resistance: choose hot‑dip galvanized steel or marine‑grade aluminum, and avoid bare mild steel fasteners. Specify stainless hardware (304 inland, 316 near coasts) and isolate dissimilar metals with nylon washers to prevent galvanic attack.

Because high humidity drives moisture absorption in surrounding soils and debris, set posts on compacted gravel with drainage, keep panel bottoms off grade, and don’t trap leaf litter against rails.

Touch up cut edges with zinc‑rich coating, then inspect annually for pitting. Wear gloves when handling sharp sheet and cut ends.

Composite And Vinyl Durability

If your climate swings from freeze–thaw winters to high‑UV summers, composite and vinyl fencing can outperform stained lumber by resisting rot, insects, and moisture uptake.

To verify composite durability, check the manufacturer’s capstock thickness, UV stabilizers, and ASTM test data for flexural strength and impact resistance.

Specify stainless or hot‑dipped fasteners to prevent galvanic corrosion, and predrill where required to avoid cracking.

For vinyl longevity, choose panels with titanium dioxide for UV blocking, thickened rails, and internal aluminum or steel reinforcement in wind zones.

Maintain straight lines by setting posts below frost depth, using gravel drainage, and bracing during concrete cure.

Wear eye protection when cutting, and control dust with a vacuum or wet cut.

Plan Fence Post Spacing for Panels and Gates

fence post spacing and layout

Before you dig a single hole, lay out your fence run and calculate post spacing around the exact panel widths and gate openings you’ll install. Measure each panel’s true end-to-end dimension, not the nominal size, and include bracket or rail clearances.

Mark centers with stakes and mason’s line so fence post spacing stays consistent and panel alignment doesn’t drift. If the run won’t divide evenly, adjust at a noncritical section or use a cut panel; don’t “stretch” bays.

For gates, set posts to the manufacturer’s required opening, then add hardware offsets and hinge-side clearance for swing. Plan latch height and avoid conflicts with grade changes.

Verify plumb references, check diagonal measurements, and confirm property lines and utility locates before committing layout marks.

Dig Fence Post Holes Below Frost Line (Add Gravel)

With your post centers marked and lines pulled tight, start drilling each post hole to a depth that reaches below your local frost line so seasonal freeze–thaw cycles can’t heave the footing and rack the fence. Use an auger sized for your post plus clearance; keep the hole walls clean and vertical. Call utility locating services before you dig, and wear eye, hearing, and hand protection.

Bore to consistent depth, then bell the bottom slightly if soil allows for better bearing. Remove loose spoil, roots, and standing water with a clamshell digger. Add 4–6 inches of Gravel bedding to the base, then tamp it firmly to create a stable, draining pad.

Verify depth with a tape at multiple points and keep spoils back from the edge to prevent cave-ins.

Set Fence Posts Plumb and Brace While Concrete Cures

Once the gravel pad is tamped, drop the post into the hole, orient any faces or brackets to your layout line, and set the base centered.

Check plumb on two adjacent sides with a level, then rotate as needed until it’s true. Install temporary bracing: stake two 2x4s or metal braces to the ground and screw them to the post at mid‑height so you can fine‑tune alignment.

Recheck height against your stringline and lock the braces.

Wear gloves and eye protection before handling dry mix. Add concrete in lifts, rodding each lift to eliminate voids and keep the post from drifting.

Maintain post stabilization by verifying plumb every few minutes during initial set. Protect the hole from vibration and water during concrete curing.

Attach Fence Rails and Panels to Prevent Sagging

After the concrete’s cured and braces are off, you’ll fasten each rail to the posts with corrosion-resistant hardware and proper pilot holes so connections won’t loosen under load.

You’ll keep rail spacing consistent with a story pole or spacer block, and you’ll verify level and straight alignment before you fully tighten fasteners.

To prevent sagging, you’ll reinforce panels with additional blocking or a mid-rail where needed.

You’ll recheck plumb and hardware tightness as you go.

Secure Rail-to-Post Fasteners

Because rail connections carry most of the fence’s load, you need rail‑to‑post fasteners that lock the rails tight and resist movement under wind, gate vibration, and seasonal wood shift. Use galvanized or stainless structural screws or rated rail brackets; don’t rely on smooth nails.

Pre‑drill near rail ends to prevent splitting, then drive fasteners square to the post with an impact driver set to moderate torque. Verify each bracket’s fastener schedule and embedment, and keep heads seated without crushing fibers.

Where panels act as privacy screen options, add approved connectors at each rail end to control racking.

Wear eye protection and gloves, and keep hands clear of pinch points. After fastening, recheck plumb, then install decorative post caps to limit moisture intrusion.

Maintain Consistent Rail Spacing

Although your posts can be perfectly plumb, inconsistent rail spacing will telegraph into wavy panel lines and invite sagging as the fence loads up in wind and weather. Establish rail heights from a fixed benchmark, then mark every post with a story pole or spacer block so top and bottom rails land identically.

Clamp rails in place before fastening, and recheck level and parallel spacing at each bay. When attaching panels or pickets, keep your fasteners aligned to the rails, not to varying board lengths, so loads transfer evenly.

Wear eye protection when cutting spacers and use stable sawhorses to prevent kickback. Uniform spacing keeps Decorative accents straight and ensures Privacy enhancements don’t create gaps or uneven reveals over time.

Reinforce Panels Against Sagging

If you want panels to stay straight through seasonal movement and gust loads, you must build a continuous load path from pickets to rails to posts.

For Fence reinforcement, fasten rails to posts with rated structural screws or through‑bolts, not nails, and predrill near ends to prevent splitting. Use two fasteners per rail end, set in a staggered pattern, and keep edge distance per manufacturer guidance.

For Panel stability, attach pickets with two exterior‑grade screws at every rail, maintaining consistent spacing so loads share evenly. Add a mid‑rail on spans over 6 ft or where wind exposure is high.

If you use prefab panels, add metal rail brackets and a diagonal anti‑sag brace from the bottom hinge side to the top latch side.

Wear eye protection.

Use Exterior-Rated Fence Fasteners, Hardware, and Caps

When your fence faces rain, UV exposure, and seasonal movement, standard interior fasteners can corrode, stain the wood, and loosen over time. Choose exterior-rated screws, bolts, and brackets: hot-dip galvanized for treated lumber, or 304/316 stainless near salt or pool chemicals.

Match fasteners to hardware coatings to prevent galvanic reaction, and drive screws straight to avoid splitting. Pre-drill near ends and on Decorative lattice to reduce cracking and racking.

Use structural screws for rails, not drywall or deck nails. Add post caps to shed water, reduce end-grain saturation, and limit Fence staining from rust bleed.

Wear eye protection, clamp workpieces, and keep hands clear of driver bits. Tighten, don’t overtork, and recheck torque after settling.

Conclusion

Like Odysseus plotting his course, you’ll keep your fence true by measuring the line, confirming permits, and calling to mark utilities. You’ve matched materials to climate, spaced posts for panels and gates, and dug below the frost line with a gravel base for drainage. You’ve set posts plumb, braced them while concrete cures, and fastened rails with exterior‑rated hardware and caps. Inspect annually, tighten hardware, and you’ll avoid sagging.…

garden nighttime illumination ideas
Garden & Outdoor

Outdoor Lighting Ideas That Transform Your Garden After Dark

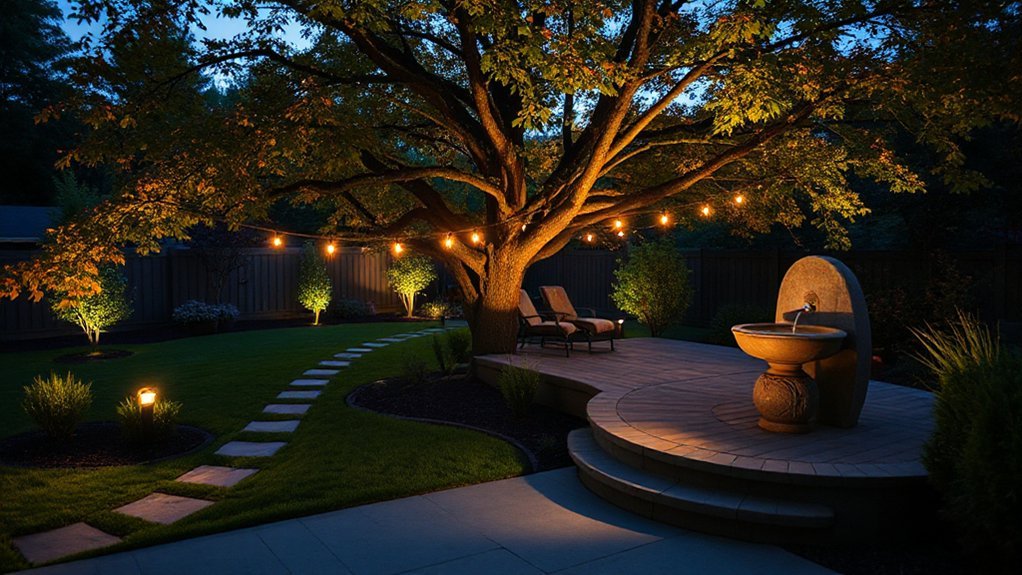
You’ll transform your garden after dark by zoning it first: paths, seating, focal plants, and hazards. Choose warm 2700–3000K, shielded low-voltage LEDs for stable output and tight optics, then keep intentional darkness for contrast and sky view. Line walkways with low-glare path lights (100–200 lumens) spaced 6–8 feet and offset. Uplight specimen trees with 10–25° spots and wash walls evenly. Next, you’ll refine aiming, dimming, and smart controls.

Key Takeaways

  • Zone your garden by function—paths, seating, beds, focal points—and keep intentional dark areas for contrast and sky view.
  • Choose warm 2700–3000K low-voltage LEDs for reliable runtime, good beam control, high CRI color, and easy expansion.
  • Light paths with shielded, low-glare fixtures spaced 6–8 feet apart, using 100–200 lumens to guide footsteps without glare.
  • Uplight trees and specimens with narrow 10–30° beams for trunks and wider floods for canopies, placed off-trunk to avoid hot spots.
  • Use smart controls—timers, dimming, and motion at gates—to keep a soft baseline while boosting light only where needed.

Map Your Outdoor Lighting Zones First

plan zone map brightness

Before you buy a single fixture, map your outdoor lighting zones so every lumen has a job. Walk the site at night and sketch circulation, focal points, and hazards.

Use garden zoning to separate task, accent, and ambient needs: steps and thresholds demand crisp guidance; seating wants soft, low-glare pools; specimen trees deserve controlled highlights.

Define outdoor zones by function, not property lines, then note mounting heights, beam spreads, and shield requirements to keep light off windows and neighbors.

Mark existing power access and routing paths, but don’t pick hardware yet.

Finally, assign target brightness levels per zone and decide where darkness is intentional, preserving contrast, depth, and sky view.

This plan turns ideas into a coherent, controllable layout.

Solar or Low-Voltage: Which Should You Use?

Although solar fixtures promise quick installs with zero trenching, they don’t deliver the same output, runtime consistency, or beam control you’ll get from a properly sized low-voltage system. Solar excels when you need accent points and can tolerate seasonal dimming; panel angle, battery chemistry, and shade dictate lumen drop and color shift.

You’ll gain energy efficiency by skipping transformer losses, but you’ll trade away predictability.

Choose low-voltage when you’re shaping scenes: tight uplight spreads, glare-cut shielding, and dimming tied to timers or photocells. You’ll manage installation complexity—cable routing, burial depth, and voltage drop—yet you’ll get stable CCT, higher CRI options, and expandable circuits.

If you want repeatable drama night after night, low-voltage wins.

Path Lighting Ideas for Safer Walkways

How do you make a walkway feel inviting without turning it into a runway? Start with low-glare fixtures spaced 6–8 feet apart, offset on alternating sides to prevent harsh scallops and hide shadows that trip you up. Aim for 100–200 lumens per light and choose warm 2700–3000K to preserve night vision and plant color.

Use shielded path lights or louvered step markers so you direct photons onto the walking plane, not into eyes or windows. Add a single uplight to silhouette a garden sculpture at a bend; it becomes a waypoint without flooding the path.

For outdoor security, integrate motion-triggered bollards near gates, then maintain steady, dim baseline lighting elsewhere. Keep cables buried, connectors waterproof, and lenses cleaned seasonally.

Patio and Deck Lighting Ideas for Ambiance

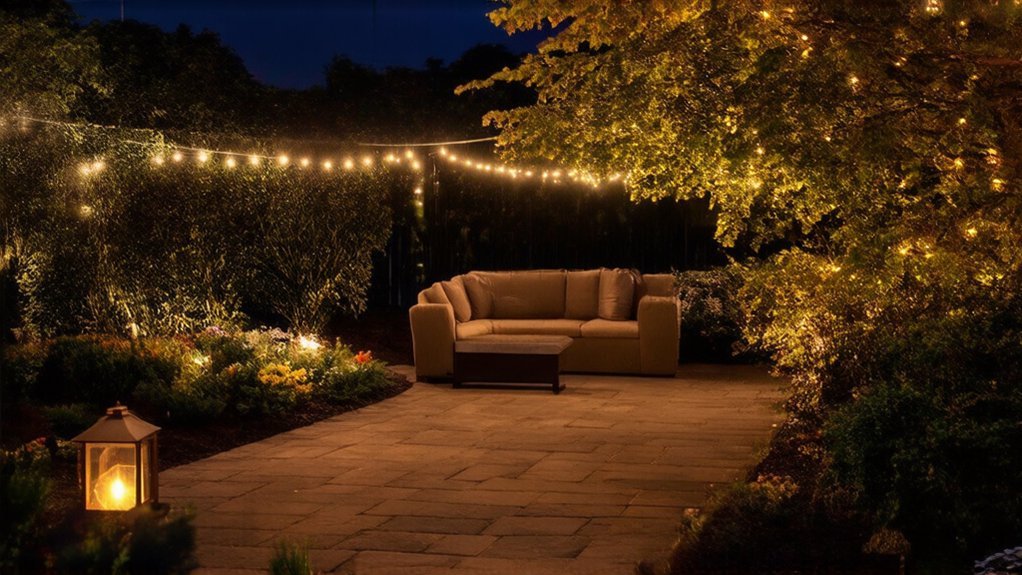
When you treat your patio or deck like an outdoor room, layered lighting builds ambiance without blasting the space. Start with dimmable string lights on a warm 2200–2700K setting, tensioned on stainless cable for a clean line and reduced sag.

Add low-glare step lights or recessed deck riser LEDs to define edges and prevent missteps.

Next, place shielded lanterns or bollard-style mini posts near garden furniture to create task zones for dining and cards, while keeping sightlines comfortable.

For fire features, pair outdoor fireplaces with discreet flame-rated wall sconces or toe-kick strips that won’t compete with the glow.

Use photocells plus smart dimmers to ramp output from sunset to late night, and choose IP65-rated fixtures with marine-grade hardware for longevity.

Uplighting Ideas to Make Trees Stand Out

Place uplights a few feet off the trunk and aim them upward to wash the canopy, not the lower bark, so you get layered leaf texture and clean silhouettes.

Choose beam angles with intent—narrow spots (10–25°) to punch up tall trunks and wide floods (40–60°) to spread across broad crowns without hot spots.

Adjust tilt and spacing until the light grazes branches evenly and keeps glare out of your sightlines.

Position Lights For Canopies

Two well-aimed uplights can turn a flat canopy into a layered ceiling of texture and shadow. Set fixtures just outside the drip line so trunks stay readable while leaves catch the glow.

Aim each light across, not straight up, to spread canopy illumination through branching planes. Offset the pair by a few feet to avoid a hotspot and to reveal depth between limbs.

Mount or stake units low, then tilt until the brightest zone lands high in the crown, not on the first branches. Hide housings behind shrubs, stones, or root flares, keeping sightlines clean.

If you’re supplementing with overhead fixtures, place them farther back and dimmer, so uplight remains dominant and natural-looking.

Choose Beam Angles Wisely

Because beam angle controls how light “reads” bark, branching, and leaf mass, you’ll get better-looking uplights by matching the spread to the tree’s geometry instead of defaulting to a wide flood.

Start with 10–15° on tall, clean trunks to carve a crisp column and pull eyes upward. Move to 24–36° for multi-stem trees so you catch several trunks without washing the ground.

Save 60° floods for broad canopies only when you can set the fixture far enough back to avoid hot spots. Aim the lamp so the brightest core lands on texture, not leaves, then adjust until your lighting focus reveals depth rather than glare.

Mix angles—narrow for trunk, medium for canopy—to stage the silhouette.

Light Exterior Walls With Washing and Grazing

When you want your home’s façade to read as architecture—not just a dark outline—wall washing and wall grazing let you sculpt it with controlled light.

For wall washing, set fixtures 18–36 inches off the wall and aim them straight up to create an even veil that minimizes texture and expands perceived width. Choose wider optics and add louvers or glare shields so you don’t spill light into windows or sightlines.

For grazing techniques, push linear LEDs or in-grade uplights tight to stone, brick, or timber cladding; the steeper angle exaggerates relief and reveals mortar joints, grain, and shadow cadence. Keep spacing tight to avoid scallops, and dim to match ambient levels.

Warm 2700–3000K preserves material color, while careful aiming keeps the beam disciplined.

Subtle Lighting Ideas for Garden Beds

For garden beds, you’ll get the cleanest nighttime edge with low-glare border lights that sit tight to the soil line and aim light laterally, not into your eyes.

You can also hide compact downlights in shrubs or under eaves to drop narrow, controlled beams that pick out texture on foliage and blooms.

Keep outputs modest and optics shielded, and you’ll define the planting geometry without washing out color or creating hotspots.

Low-Glare Border Lights

How do you outline a garden bed at night without turning it into a runway? Choose low-glare border lights with shielded optics and a 2700K–3000K color temperature. You’ll get garden safety by defining edges and reducing trip hazards, while keeping your sightlines comfortable.

Set fixtures 12–18 inches apart, aiming beams inward across mulch, not outward toward paths or windows. Pick 2–5 lumen micro-spikes or louvered caps that cut uplight and hide the diode point.

For consistent output, run a 12V system with thicker cable to minimize voltage drop on long runs. Use corrosion-resistant housings and stake bases deep enough to resist frost heave.

Done right, the line reads as a soft contour—clean, quiet, and pure aesthetic enhancement.

Hidden Downlighting Accents

Although path lights draw the eye at ankle level, hidden downlighting accents shape a garden bed with quieter, more natural cues. Mount compact, shielded fixtures high in a tree limb, pergola beam, or soffit, then aim them steeply to mimic moonlight and prevent glare.

You’ll get leaf texture, shadow layering, and improved garden aesthetics without visible hardware. Choose warm 2700–3000K LEDs to keep flowers believable, and use narrow 20–30° optics to pick out specimen plants while leaving mulch subdued.

With modern lighting technology, you can add low-voltage drivers, dimming, and smart zoning so each bed runs at 10–30% output after dusk. Hide wiring in conduit under edging, and seal connections.

Avoid Glare, Hot Spots, and Overlighting

When you push brightness too far or aim fixtures carelessly, outdoor lighting turns from guidance into glare, creating harsh hot spots, deep shadows, and a washed-out yard that feels exposed rather than inviting.

Start by choosing lower-lumen fixtures and warmer CCTs (2200–3000K) so contrast stays gentle on eyes and plants.

For Reducing glare, shield the source: use full-cutoff housings, glare caps, and louvered baffles, and aim beams below the horizontal plane. Mount lights higher only when you can narrow the beam and control spill.

For Managing hot spots, overlap beams at the edges, not the centers, and dim in 10–20% steps until highlights read as texture, not glare.

Add timers, motion sensors, and zoning so you light only what’s needed.

Conclusion

When you map zones and choose solar or low-voltage wisely, your garden stops disappearing at dusk and starts performing. You’ll stitch safe paths with low-glare markers, then layer patio warmth like a dimmable soundtrack. Aim uplights to crown trees, wash walls for quiet depth, and graze textures to reveal every ripple. Keep bed lighting subtle—more whisper than shout. If you avoid hot spots and overlighting, you’ll build a nightscape that reads like constellations.…

design shaded garden seating
Garden & Outdoor

How to Create a Shaded Seating Area Using Pergolas or Garden Structures

Map your pergola footprint to the sun path, shadows, and clearances, then size the roof plane to extend 18–24 inches beyond chair backs and confirm permits, setbacks, and wind/snow loads. Choose attached construction for clean progressions and predictable framing, or go freestanding when grade, drainage, or trees limit tie-ins. Tune shade with slats set perpendicular to harsh afternoon sun, adjustable louvers, solid panels, retractable fabric, or vines, then add screens and low-glare lighting for comfort. Keep going for system-specific detailing.

Key Takeaways

  • Map the pergola footprint to sun paths and verify shade at noon and 3 p.m. to place seating in peak shade.
  • Size the roof plane to extend 18–24 inches beyond chair backs, and confirm setbacks, permits, and wind/snow anchorage requirements.
  • Choose a roof system—solid panels, adjustable louvers, or retractable fabric—based on desired shade control, ventilation, and rain runoff.
  • Optimize shade by orienting slats perpendicular to harsh afternoon sun and tightening spacing (about 8–12 inches o.c.) as needed.
  • Add living shade or screens using trained vines, privacy panels, or outdoor curtains, positioned to block glare and key sightlines.

Plan Your Pergola Layout (Sun, Space, Permits)

plan position and permit carefully

Before you buy lumber or set footings, map your pergola’s footprint against the sun path, your available clearances, and local code constraints.

Track Sun exposure at morning, solar noon, and late afternoon; note shadow lines from your house, trees, and fences.

Position seating where peak shade lands during your actual use hours, then size the roof plane to extend at least 18–24 inches beyond chair backs.

Verify setbacks from property lines, overhead service drops, and easements, and keep post locations clear of irrigation, septic, and roots.

Check permit requirements for accessory structures, including height limits, anchorage details, and snow/wind loads.

Call 811, mark utilities, and document the layout for inspections.

Choose a Pergola: Attached vs Freestanding

Although both styles can deliver usable shade, choosing between an attached pergola and a freestanding pergola comes down to how you want the structure to transfer loads, manage water, and define circulation on your specific site.

Attach to the house when you’ve got sound framing to lag into, predictable eave heights, and you want a clean threshold from interior to patio. You’ll simplify footings, but you must detail flashing, ledger isolation, and roof runoff so you don’t trap moisture against siding—key for Pergola maintenance.

Go freestanding when setbacks, trees, or grade changes make anchoring cleaner, or when you want the pergola to act as a room in Garden design. You’ll add more piers and bracing, yet you’ll gain flexible orientation and clearer drainage paths.

Compare Pergola Shade Options (Louvers, Panels, Fabric)

Once you’ve set the pergola’s footprint and orientation, you’ll choose a shade system that matches your sun path, wind exposure, and drainage plan.

Adjustable louvered roofs let you tune light and ventilation while shedding water when pitched and guttered correctly.

Solid panel coverings lock in full-time shade and require precise slope and flashing at connections.

Retractable fabric canopies give you flexible coverage with minimal dead load, but you’ll need clean anchor lines, tensioning hardware, and a wind stow strategy.

Adjustable Louvered Roofs

When you need a pergola roof that can track shifting sun angles and sudden weather changes, adjustable louvers give you the most controllable shade envelope. You can tune blade pitch to block high summer sun yet admit low winter light, which lets you target comfort at the seating zone instead of over-darkening the whole deck.

Align the louvers perpendicular to the primary afternoon exposure (often west/southwest) to reduce glare and radiant load. Specify gutters and downspouts integrated into the beams so runoff doesn’t sheet onto cushions.

For wind-prone sites, choose a system with lock-in-place blades and anemometer-driven automated shading that parks the roof open or closed based on thresholds. Add concealed LED strips and fan mounting points without compromising drainage paths.

Solid Panel Coverings

Where do solid panel coverings outperform louvers and fabric? You’ll see the advantage on wind-exposed decks, coastal sites, and courtyard pergolas where you want fixed, all-day shade and dependable rain shedding.

Specify insulated aluminum panels or polycarbonate sheets when you need thermal buffering, UV control, and a clean ceiling plane for recessed downlights, fans, and conduit runs. You can pitch panels 1/4 inch per foot to a gutter beam, then route downspouts to a drain or rain garden to keep paving dry.

Use opaque panels over dining zones to reduce glare, while leaving perimeter bays open for cross-ventilation.

Solid panel coverings also deliver aesthetic enhancement by aligning seams with rafter spacing and matching trim to fascia colors.

Retractable Fabric Canopies

Although you can engineer permanent shade with louvers or solid panels, a retractable fabric canopy gives you tunable coverage that adapts to sun angle, breezes, and how you actually use the patio hour to hour.

Mount tracks tight to the pergola beams so the fabric rides above head height, and align the opening direction with prevailing wind to reduce sail forces.

Prioritize canopy materials rated for UV, mildew, and colorfastness; solution-dyed acrylic or PVC-coated polyester handles high exposure better than cotton blends.

Specify fabric tensioning at both the lead bar and rear anchor so you don’t get ponding after rain or noisy flutter in gusts.

Add a slight pitch, integrate drain points, and place tie-backs where you’ll park the shade at sunset.

Control Sun With Pergola Slats and Spacing

Because the slat layout dictates how much direct beam sunlight reaches your seating zone, you should treat pergola spacing and orientation as a controllable shading system rather than a decorative detail.

For Sun control, set slats perpendicular to the harshest afternoon azimuth; on west-facing patios, run members north–south so they cast longer shadows during peak heat.

Adjust Pergola spacing to your latitude and desired shade factor: 2×6 slats at 12 in. o.c. give intermittent shade, while 8 in. o.c. tightens cut-off and reduces glare.

Increase slat depth to improve angle blocking without closing airflow.

If your seating faces low morning sun, cant slats 10–15° or add a secondary cross-batten to break beam paths.

Verify with a noon/3 p.m. site check.

Add a Retractable Pergola Canopy or Shade Sail

If your pergola slats can’t cover every sun angle, you can add a retractable canopy system—track-guided fabric, cable-driven panels, or a motorized roller—sized to your bay spacing and post layout.

If you’re using a shade sail instead, you’ll set attachment points to match your seating footprint, pitch it for runoff, and align it to block peak afternoon exposure without clipping circulation paths.

Specify UV-stabilized HDPE or solution-dyed acrylic with rated UPF, corrosion-resistant hardware, and reinforced corners so the assembly holds tension and maintains shade performance season after season.

Retractable Canopy Options

Where does the sun hit hardest during your peak-use hours—midday over the dining set, or late afternoon across the lounge zone? Specify a retractable canopy that tracks that exposure: a rail-guided pergola canopy for linear coverage, or a cable-suspended tension fabric panel for flexible span. You’ll control heat gain while keeping views open when shade isn’t needed.

Choose weatherproof materials matched to your microclimate: solution-dyed acrylic for UV stability, PVC-coated polyester for higher tensile strength, or PTFE-coated fabric for maximum longevity.

Detail the hardware like you’d exterior trim: marine-grade stainless fasteners, anodized aluminum tracks, and low-friction carriages. Add a slight crown or integrated gutter line so runoff doesn’t pond, and include wind-locks or breakaway clips to protect the structure.

Shade Sail Placement Tips

Even though a shade sail reads like a simple fabric plane, you’ll get the best performance by placing it from a sun-path and anchor-load plan rather than by eye. Map summer noon and late-afternoon angles, then skew the sail so its longest edge blocks the worst glare on your outdoor furniture.

Keep one corner higher to drive runoff away from seating and pathways, and maintain consistent tension lines to prevent flutter.

If you’re tying into a pergola, align fixings to posts or beam nodes, not mid-span members, and keep hardware accessible for seasonal retensioning.

Avoid placing edges where ladders or pruning tools swing during garden maintenance.

Set clear zones for grills, doors, and circulation so the sail doesn’t turn your shade into an obstacle.

Materials And UV Protection

Because UV exposure and heat load vary by orientation and nearby reflective surfaces, choose canopy or shade-sail fabrics by rated UV block, permeability, and hardware grade rather than by color alone.

Aim for 90–98% UV protection in open patios; use tighter weaves on south- and west-facing edges, and more permeable mesh where wind funnels between buildings.

Specify solution-dyed acrylic or high-density polyethylene for material durability, and confirm mildew resistance if the canopy will retract into a cassette.

Match thread and webbing to the cloth (PTFE or UV-stabilized polyester).

For hardware, use 316 stainless or hot-dip galvanized fittings, and isolate dissimilar metals to prevent corrosion.

Add a retractable track system or tensioned sail with turnbuckles so you can tune pitch and shed rain.

Shade a Pergola With Climbing Plants and Vines

If you want your pergola to cast real, usable shade without adding a solid roof, train climbing plants and vines up the posts and across the rafters to form a living canopy. Match species to exposure: use deciduous options on south and west faces for summer shade and winter sun, and evergreen only where year-round cover won’t darken interiors.

Install stainless eye screws and tensioned wire or mesh beneath rafters so shoots grip quickly and loads transfer cleanly to beams. Space planting 18–24 inches off footings with drip irrigation and root barriers near paving.

Use Vining strategies like two-leader training per post, lateral weaving every 12 inches, and midsummer tip-pruning to thicken cover. Choose climbing plants with non-invasive habits and manageable weight.

Add Pergola Privacy Screens, Curtains, or Panels

Where do you need the most screening—street side, a neighboring second-story window, or wind-driven afternoon sun? Map sightlines from seated height and identify the azimuth of glare. Then position Privacy screens on the pergola’s outer bays, prioritizing west and northwest exposures.

Use slatted cedar, perforated metal, or composite panels set 1–2 inches off posts for drainage and airflow. Keep panel height just above eye level to preserve openness while blocking views.

If wind is a factor, brace with hidden Z-clips and choose 40–60% open area to reduce sail effect.

Add decorative curtains only on leeward sides; hang them on stainless cables with weighted hems and tie-backs so they track smoothly and don’t whip. Seal fasteners for corrosion resistance.

Finish the Pergola Seating Area With Lighting and Decor

Once the screens and panels lock in your sightlines, you can tune the pergola into a usable room after sunset by layering lighting and weather-rated decor to match your layout and exposure.

Start with Outdoor lighting on two circuits: an overhead ambient run (dimmable string or linear LED under rafters) and low-glare task points at seating edges. Aim fixtures away from neighbors and down toward the floor plane to cut spill and insects.

If wind funnels through the structure, choose shatterproof globes and stainless hardware. Add step or post-cap lights to mark circulation from patio to lawn.

Then finish with decorative accents that resist UV and moisture: solution-dyed cushions, powder-coated planters, and a washable outdoor rug sized to keep front chair legs on it. Anchor decor for gusts.

Conclusion

You’ve dialed in your pergola layout to match sun angles, setbacks, and any permit requirements, then chosen attached or freestanding structure for the cleanest site fit. Now you control shade with louvers, panel spacing, retractable canopies, or a shade sail tuned to your seating zone. You can soften it with vines, then tighten comfort with privacy screens or curtains. Finish with task lighting and weather-rated dĂ©cor—your patio will feel like a million suns switched off.…

selecting durable paving materials
Garden & Outdoor

Hardscaping Essentials: Choosing the Right Materials for Paths and Patios

You’ll choose path and patio materials by matching texture, thickness, permeability, and base design to your site’s soil, slope, shade, and traffic load. Specify 60–80 mm concrete pavers or dense stone for high-wear routes, and use tight joints plus rigid edge restraint to stop lippage and creep. In freeze-thaw zones, pick low-absorption units over soft limestone and build a well-drained, compacted base. Set patios 1.5–2% away from doors, and you’ll see what fits next.

Key Takeaways

  • Match material to traffic load and site conditions to ensure durability and the intended appearance.
  • Prioritize slip-resistant textures and avoid polished finishes in shaded, damp areas prone to biofilm.
  • In freeze-thaw climates, use low-absorption stone, fired clay, or air-entrained concrete on a well-drained, compacted base.
  • Manage drainage by sloping patios 1.5–2% from doors and directing runoff to permeable joints, trenches, or slot drains.
  • Balance budget and maintenance: stone is premium, concrete pavers are replaceable and consistent, and gravel is affordable but needs edging upkeep.

How to Choose Path and Patio Materials?

material selection for durable pathways

If you want a path or patio that looks intentional and performs year-round, start by matching the material to your site conditions and traffic load. In freeze-thaw zones, choose units with low absorption and specify a compacted, well-drained base to limit heave.

On slopes, prioritize textured surfaces and tight jointing to improve traction and reduce runoff scour. In shaded, damp areas, avoid slick finishes and detail edge restraint to prevent creep.

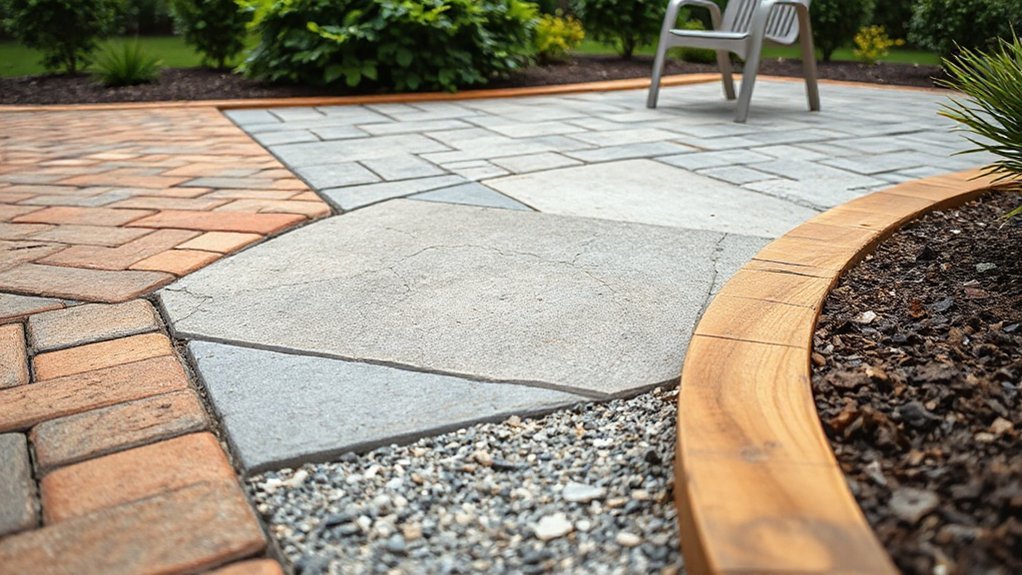
For Landscape integration, echo existing site geometry, align joints with thresholds, and shift grades cleanly at doorways. Let aesthetic considerations guide color temperature, aggregate scale, and pattern rhythm so the hardscape reads as part of the planting palette.

Finally, confirm thickness, slip resistance, and permeability targets before you commit.

Quick Picks: Best Materials by Use Case

When you’re specifying hardscape by use case, match material performance to the site’s wear patterns and drainage conditions.

For high-traffic paths, you’ll prioritize tight-jointed pavers, dense natural stone, or broom-finished concrete that resists polishing, heave, and edge raveling under repetitive footfall.

For patio entertaining surfaces, you’ll pick finishes that stay level under furniture, manage spills and heat gain, and deliver consistent slip resistance across seating, grill, and circulation zones.

High-Traffic Path Materials

Because foot traffic concentrates load at edges, joints, and turns, you’ll get the best performance by matching each path material to how the route behaves on your site—slope, drainage, freeze–thaw exposure, and maintenance tolerance.

For straight, busy runs, specify 60–80mm concrete pavers on a compacted, well-graded base; they resist rocking at joints and allow easy spot repairs.

On tight curves and frequent direction changes, choose clay brick or small-format stone set on bedding sand to lock patterns and reduce edge spalling.

In wet shade, avoid untreated wood; use dense granite, fired clay, or composite boards for fungal resistance and safer traction.

Where roots heave or soils move, use permeable interlocking pavers to drain fast and keep lines crisp.

Choose finishes for aesthetic versatility and glare control.

Patio Entertaining Surface Picks

Although a patio reads like a single “room,” entertaining pushes loads, spills, heat, and chair drag into specific zones, so you’ll get better long-term performance by choosing the surface to match your use case—dining, fire feature, pool adjacency, or high-turnover party seating—plus your site’s drainage, sun exposure, and freeze–thaw risk.

For dining, specify porcelain pavers on a drained base; they resist wine, grease, and metal chair wear.

Around fire, use dense concrete or clay brick with tight joints; avoid resin-bound near embers.

Pool-side, choose light-toned, tumbled travertine or textured concrete for cooler, slip-resistant footing and salt tolerance.

For party flow, set large-format pavers for fewer trip edges, and align joints to circulation for landscape integration.

Favor local stone or permeable systems to cut environmental impact.

Compare Stone, Brick, Pavers, and Gravel

If you’re planning a patio, path, or driveway, you’ll get the best results by matching the material to your site conditions and performance targets—load, drainage, freeze–thaw exposure, and edge restraint.

In garden design, start with subgrade soils: expansive clay wants thicker base and tighter joints; sandy sites tolerate thinner sections. Your environmental impact shifts with sourcing and permeability, so map runoff routes and infiltration capacity before you pick finishes.

Use stone where you need high compressive capacity and minimal joint movement, and specify sawn versus cleft faces based on slip and visual rhythm.

Choose brick when you want modular coursing that aligns with building datum lines.

Select concrete pavers for precise geometry, consistent thickness, and engineered bedding layers.

Use gravel for permeable shoulders, secondary paths, and transitions that require flexible grading.

Pros and Cons of Each Hardscaping Material

material selection considerations

To choose the right hardscaping material for your site, you’ll weigh durability and expected lifespan against traffic loads, base prep, and drainage conditions.

You’ll also compare cost and installation complexity—cutting, bedding, edge restraint, and labor time—to keep the design on budget without compromising performance.

Finally, you’ll plan for maintenance and weathering, factoring in freeze–thaw cycling, staining, joint migration, and surface settling over time.

Durability And Lifespan

How long will your patio, path, or retaining wall hold its line once freeze–thaw cycles, UV exposure, de-icing salts, and settlement start working on it?

Poured concrete resists compression but can crack along control joints; sealers slow scaling.

Clay brick weathers gracefully yet spalls if salts concentrate at edges.

Natural stone excels in UV stability and abrasion, but soft limestones pit in acidic runoff.

Concrete pavers flex with slight subgrade movement; polymeric sand reduces washout, though joints need monitoring.

Gravel drains well and avoids heave, yet migrates on slopes and under plow blades.

Composite decking boards fade less now, but heat and fastener creep can telegraph.

Among innovative materials, permeable pavers and eco friendly options like recycled-aggregate slabs extend life by managing water.

Cost And Installation

Longevity only pays off when the install matches your site and your budget, so cost and labor deserve the same scrutiny as freeze–thaw performance. Concrete’s lowest unit price can vanish if you need thicker sections, rebar, or extensive formwork on unstable subgrade.

Clay brick costs more up front, but you can phase it in and reuse units if you revise your landscape design. Natural stone carries high material and freight costs, yet it fits premium details where cuts are minimal and laying patterns stay simple.

Permeable pavers add excavation depth, geotextile, and graded aggregate, but they can reduce drainage infrastructure and environmental impact fees.

Gravel installs fastest on level, well-drained sites, though edging and base prep still determine long-term geometry and safety.

Maintenance And Weathering

Because your site’s sun exposure, drainage rate, and winter de-icing habits dictate what actually survives year after year, you should weigh maintenance and weathering as performance specs, not afterthoughts.

Concrete pavers handle freeze-thaw well if you keep joints topped and edging locked; polymeric sand reduces washout but can haze in high heat.

Poured concrete resists weeds yet telegraphs cracks where subgrade settles; seal it to limit salt scaling and UV chalking.

Natural stone wins on color stability, but soft limestone spalls under de-icers and clay soils; choose dense granite for wet zones.

Brick looks timeless, though it effloresces with poor drainage and needs re-sanding.

Gravel drains best, but it migrates, needs periodic raking, and raises long-term material costs under heavy foot traffic and seasonal weather effects.

Cost and Lifespan by Hardscaping Material

While your layout and base preparation set the performance ceiling, material choice determines the real budget and the service life you can expect on a given site.

Poured concrete often wins on upfront cost, but you’ll trade for joint control and eventual surface repair; expect decades with periodic sealing.

Clay brick suits Historical landscaping and lets you swap individual units; higher install cost, long lifespan.

Natural stone carries the highest material and labor cost, yet delivers the longest service life and premium edge detailing.

Concrete pavers balance price and replaceability; choose thicker units for vehicular zones.

Gravel is cheapest and permeable, but you’ll budget for edging, top-ups, and regrading.

For Sustainable materials, specify locally sourced stone or recycled-content pavers.

Climate Fit: Freeze-Thaw, Heat, and Heavy Rain

climate responsive paving design

Material cost and expected service life only hold if the surface matches your climate loads and drainage reality.

In freeze-thaw zones, you’ll want low-absorption, air-entrained concrete, dense natural stone, or fired clay pavers; avoid soft limestone and poorly fired brick that spalls at edges. Specify tight joint tolerances and a stable base so heave doesn’t telegraph into lippage.

In hot climates, choose lighter colors to reduce surface temps, and use heat-stable binders; dark asphalt can rut and amplify glare, altering material aesthetics.

Under heavy rain, prioritize capillary breaks, raised thresholds at doors, and edge restraints that resist washout.

Detail expansion joints, sealers, and compatible mortars to prevent thermal stress cracking and boost climate resilience.

Traction and Drainage for Safer Surfaces

Where do slips start—at the finish, the slope, or the drain detail you skipped? You control traction by matching surface texture to use: broom-finished concrete for entries, flamed granite for pool decks, tumbled pavers where bare feet need grip without abrasion. Avoid polished stone in shaded zones where biofilm forms.

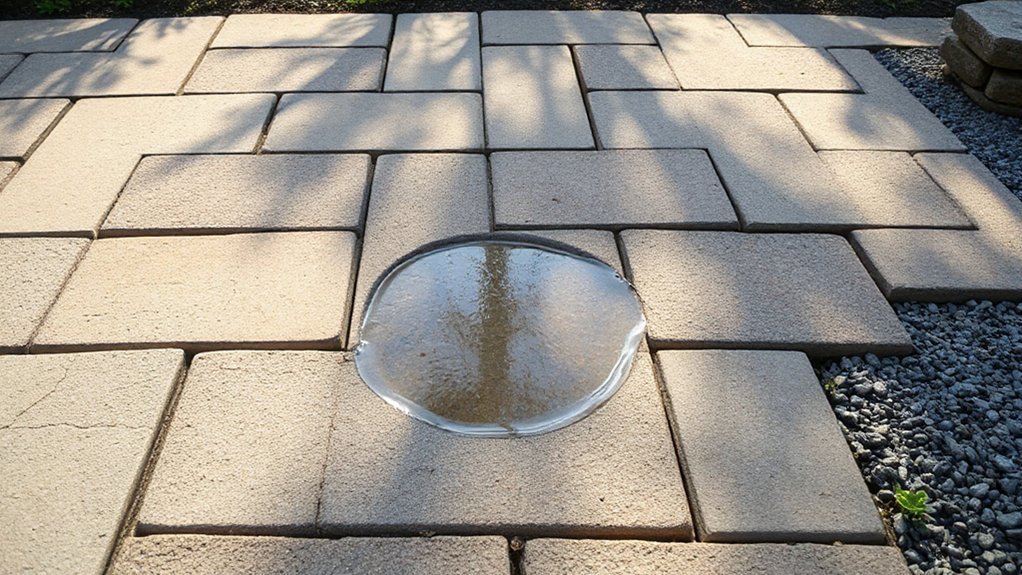
Then you manage water. Set patios at 1.5–2% fall away from doors, and break long runs with subtle cross-slope so runoff doesn’t sheet into walk lanes. Keep joints permeable where soils infiltrate; otherwise, route flow to a slot drain or gravel trench at the low edge.

Detail edge stability with rigid restraints and compacted base so units don’t tip, creating trip lips and ponding.

Maintenance and Installation: DIY vs Pro

Traction and drainage only perform as designed if you install them to spec and keep them clear, so the real question becomes whether you can execute the tolerances and maintenance schedule yourself.

DIY works when your site’s slope is mild, soil is stable, and you can compact base in lifts, hit 1–2% pitch, and keep joints uniform. You’ll also need to plan edge restraint, geotextile separation, and cleanouts so fines don’t clog permeable systems—especially with eco-friendly materials like porous pavers.

Hire a pro when you’re cutting grades near foundations, tying into existing drains, or building steps and retaining edges that must meet code.

Pros also source consistent batches and align patterns with landscaping trends while minimizing waste and rework.

Conclusion

When you choose path and patio materials, you balance structure, aesthetics, and site conditions. Match stone, brick, pavers, or gravel to your soil type, slope, and drainage plan, then confirm slip resistance and joint strategy for safe traction. In freeze-thaw zones, you’ll want stable bases and permeable detailing; in heat, lighter colors reduce surface temps. Don’t cut corners on edging and compaction—those details lock performance in. Done right, you’ll build it once and walk it for years.…


stylish wildlife friendly garden
Garden & Outdoor

Designing a Wildlife‑Friendly Garden That Still Looks Stylish

Start by mapping sun, wind, drainage, and canopy so you can place layered zones—groundcovers, shrubs, and small trees—into connected forage corridors. Keep it stylish with tight steel or stone edging, repeated plant drifts, and open sightlines while tucking dense cover behind focal planes. Choose locally native, single-flower species that stagger blooms from early spring to late fall, matching drought or swale conditions. Add a shallow, recirculating bowl with a stone ramp and discreet nesting sites; next, you’ll refine details and maintenance.

Key Takeaways

  • Map sun, wind, drainage, and canopy first, then place layered planting zones and corridors while preserving clean sightlines and access.
  • Choose locally native, pollinator-friendly plants with open single blooms, plus larval hosts, and stagger flowering for season-long nectar.
  • Layer structure intentionally—trees, shrubs, perennials, groundcovers—stepping heights toward paths and repeating drifts for a modern, cohesive rhythm.
  • Add discreet water and nesting micro-sites: shallow recirculating bowls with stone ramps, and hidden bee blocks or boxes with clear flight paths.
  • Keep it polished with crisp steel or stone edging, selective leaf litter under shrubs, spring cutbacks for overwintering insects, and minimal-chemical pest thresholds.

Plan a Modern Wildlife-Friendly Garden Layout

layered planting and corridors

Although a wildlife‑friendly garden looks effortless, you’ll get better habitat performance when you plan the layout like a modern site scheme: map sun and wind exposure, drainage paths, and existing canopy first. Then place layered planting zones (groundcover–shrub–small tree) to create continuous shelter and forage corridors.

Next, establish edge conditions: tighten hardscape lines, keep sightlines open, and tuck dense cover behind focal planes so the garden reads clean from the house. Connect habitat patches with Wildlife corridors sized to your site—hedgerows, stepping‑stone beds, and fence‑line thickets—while preserving a maintenance route for access.

For Urban integration, align corridors with neighboring trees, alley plantings, and green roofs. Buffer light and noise using berms, screens, and water‑infiltration swales. Route irrigation to support drought‑resilient zoning.

Choose Native Plants for Season-Long Blooms

Once your layout maps sun, wind, and drainage and links habitat patches with corridors, you can tune the planting matrix so nectar, pollen, seeds, and cover persist from early spring through frost.

Start with locally native species keyed to your ecoregion, then select cultivars only when they don’t dilute floral access or phenology.

Build Pollinator friendly plant choices by prioritizing open, single flowers, high nectar volume, and larval host function.

Use Seasonal bloom strategies: schedule overlapping flowering windows, stagger genotypes for extended peak, and include early and late resources to prevent forage gaps.

Specify drought‑tolerant natives in hot, reflective zones, and moisture‑adapted taxa in swales so bloom timing stays stable.

Finish with repeated drifts to keep a clean, modern rhythm.

Layer Plants for Height, Habitat, and Texture

After you’ve set your seasonal bloom sequence, build structure by stacking plants into vertical layers that mimic local habitat and read as intentional design.

Use Vertical planting: canopy or small trees for shade and perches, a shrub midstory for shelter, then herbaceous drifts for nectar and larval hosts. Finish with a ground layer of sedges, low natives, and leaf‑litter pockets to stabilize soil, cool roots, and support invertebrates that feed birds.

You’ll get cleaner sightlines if you repeat forms—clumps, mounds, and airy spires—rather than mixing everything randomly. Keep taller masses to the back or center, and step heights down to paths for a curated edge.

Stitch beds together with Pollinator corridors: continuous, layered strips that connect sunny nodes across your garden.

Add Modern Water and Discreet Nesting Sites

Layered planting gives wildlife cover and foraging routes, but you’ll anchor daily use of the space by adding reliable water and nesting micro‑sites that stay visually quiet.

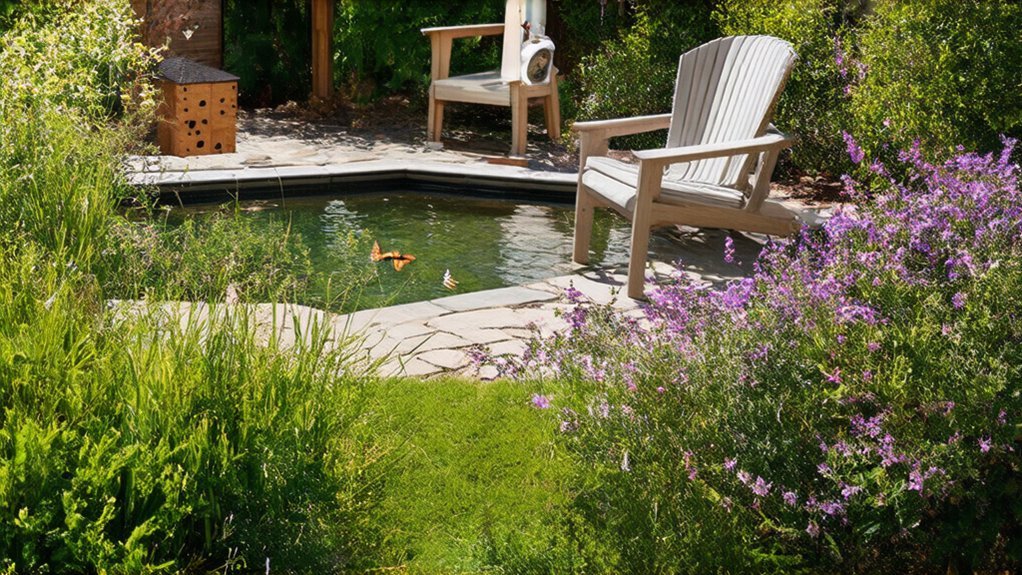
Choose a shallow, recirculating rill or bowl with a dark liner so reflections read crisp—water feature aesthetics improve when edges align with paving modules and planting masks the pump access. Keep a 2–5 cm beach zone or textured stone ramp so bees, birds, and hedgehogs can drink safely.

For nesting, build in nesting site concealment: tuck swift or sparrow boxes behind a slatted screen, set bat tubes under a clean fascia, and stack drilled hardwood blocks inside a ventilated cabinet. Face openings east or southeast, add shade, and keep flight paths clear.

Keep It Neat With Low-Maintenance Routines

Even if you’re aiming for a loose, habitat-rich look, you’ll keep the garden reading intentional by setting a few low-maintenance routines that double as ecological management. Edge beds with steel or stone, then shear “soft” plantings back to that line twice a year so structure stays crisp while stems and seedheads persist through winter.

For garden cleanup, swap broad raking for selective edits: lift only smothering leaf mats from paths, leave 5–7 cm of leaf litter under shrubs, and compost diseased material hot.

Cut perennials to 15–20 cm in early spring to protect overwintering insects. For pest control, use thresholds: scout weekly, hand-remove hotspots, blast aphids with water, and favor habitat tweaks—mulch consistency, airflow, and diverse flowering strips—over chemicals.

Conclusion

You don’t have to choose between crisp design and biodiversity. When you plan clean sightlines, specify native, season‑long bloomers, and build layered structure, you’re creating habitat that reads intentional. Add a slim rill or bowl for water and tuck nesting tubes behind a slatted screen. For example, a small urban courtyard swapped sterile gravel for drifts of native salvia and grasses; within weeks, bees arrived, birds bathed, and the space still felt minimalist.…

gentle patio slab cleaning
Garden & Outdoor

How to Clean and Restore Weathered Patio Slabs Without Harsh Chemicals

Identify your slab material first (water-drop test) and stick to pH-neutral soap or oxygen-based cleaner; avoid acids on limestone/marble and strong alkalis on reconstituted stone. Clear and sweep the patio, mist and shield plants, then pre-wet the surface. Scrub small sections with hot soapy water and a stiff nylon brush, rinse well, and treat stains with a baking-soda paste. Use diluted vinegar only on concrete after a spot-test. Let slabs dry fully, then apply a breathable sealer for longer-lasting results, with more step-by-step safeguards ahead.

Key Takeaways

  • Identify slab material and porosity with a water-drop test, then choose pH-neutral soap or oxygen bleach; avoid acids on limestone and marble.
  • Clear furniture, sweep debris, pre-rinse thoroughly, and ensure slabs are dry and uniformly matte before deeper cleaning or sealing.
  • Scrub small sections with warm water and pH-neutral soap using a stiff nylon brush, keeping the surface wet 2–3 minutes, then rinse well.
  • Remove algae, moss, and organic stains with oxygen-based cleaner; dwell 10–15 minutes, scrub again, and rinse with low pressure.
  • After full drying, apply a breathable water-based sealer in thin coats, avoiding puddles, and let cure 24–72 hours before replacing furniture.

Identify Slab Material and Safest Cleaner

identify test match clean

Before you reach for any cleaner, you’ll get safer, more predictable results by identifying what your patio slabs are made from, because each material reacts differently to acids, alkalis, abrasives, and even “natural” products like vinegar.

Start with Material identification: check invoices, look for manufacturer stamps, and compare texture and porosity—dense, speckled concrete differs from layered sandstone; limestone and marble often show fine veining and feel “softer” under a key scratch.

Run a small water-drop test to gauge absorption.

Then match Safe cleaning agents: use pH‑neutral soap for most concrete and porcelain; use diluted oxygen bleach for organic staining on concrete and sandstone; avoid acids on limestone, marble, and cement-based slabs; avoid strong alkalis on aluminum-based reconstituted stone.

Patch-test first.

Prep the Patio and Protect Plants

Now that you’ve matched the slab material to a low-risk cleaner, set up the patio so runoff and overspray don’t damage plants or track grime back onto clean areas. Clear loose items first: move garden furniture, pots, grills, and doormats off the slabs. Sweep debris away from doors and drains, then cordon off the work zone with tape or cones.

Protect vegetation next. Lightly mist nearby leaves with clean water to reduce uptake, then cover beds with breathable fabric or cardboard shields, keeping covers off foliage tips. Block runoff paths using rolled towels or sand-filled socks along edges and thresholds.

Unplug or isolate outdoor lighting circuits, cap connectors, and route extension cords overhead. Wear gloves, eye protection, and non-slip footwear throughout.

Clean Patio Slabs With Hot Soapy Water

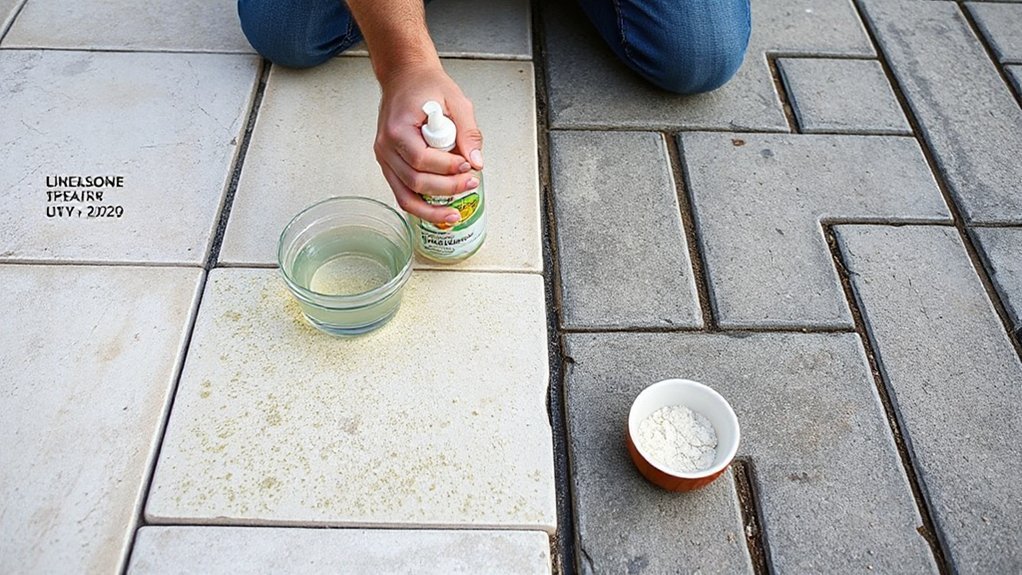
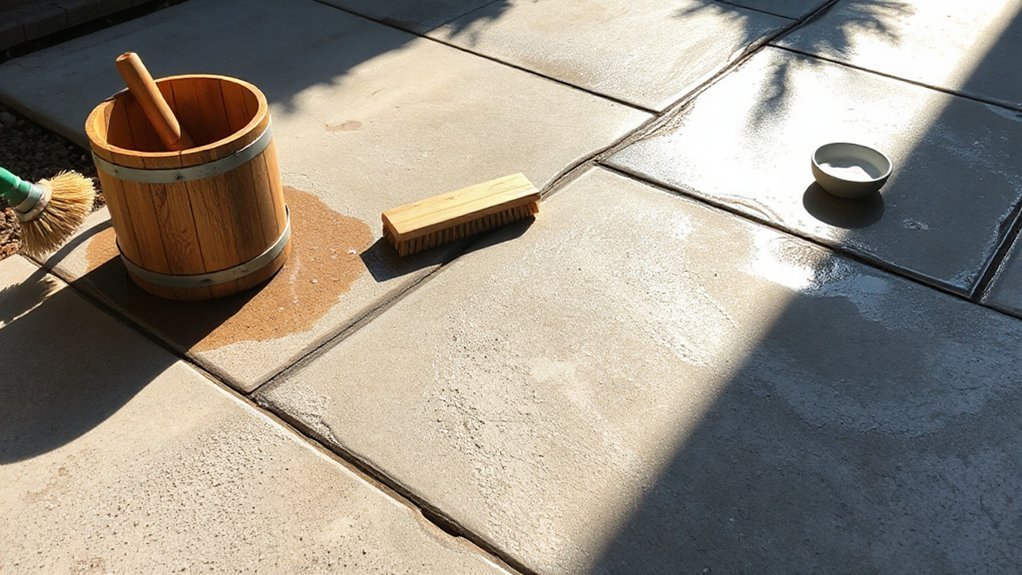
Once the area’s prepped, start with hot soapy water to lift surface grime without etching or bleaching the slabs. Fill a bucket with very warm water and a few drops of pH-neutral dish soap; avoid degreasers that can leave residue.

Wet the surface first to reduce streaking, then scrub in small sections with a stiff nylon brush, working along joints and textured faces. Keep the solution wet for 2–3 minutes, then agitate again to break the soil film.

Rinse thoroughly with clean water so soap doesn’t attract dirt and dull your patio design. Wear gloves and non-slip footwear, and keep electrical tools dry.

Move outdoor furniture only after the slabs dry completely.

Remove Moss and Algae Without Bleach

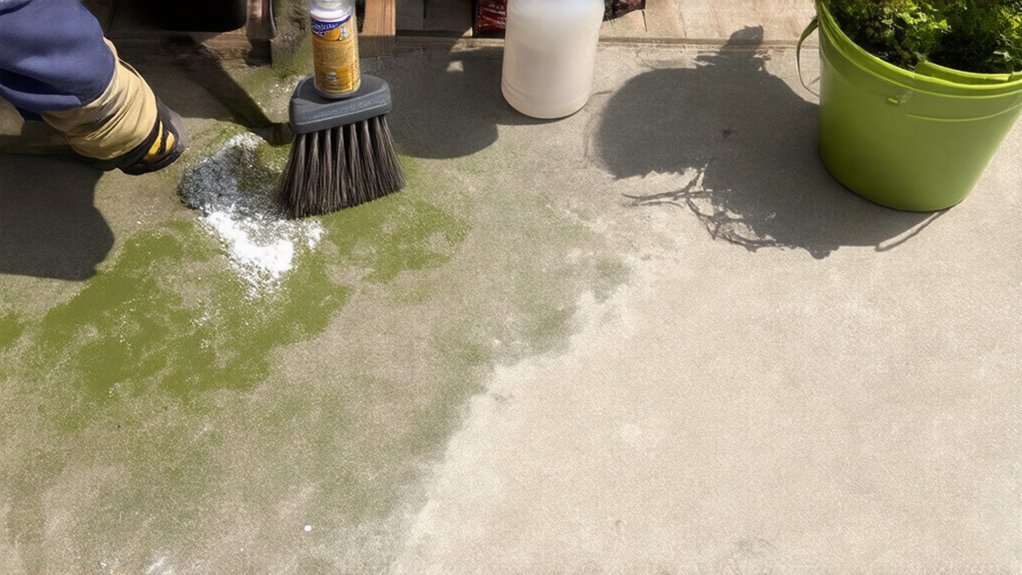
Although moss and algae look stubborn, you can remove them without bleach by combining mechanical agitation with an oxygen-based cleaner or a mild vinegar solution, then controlling moisture so regrowth slows.

Start dry: sweep grit, then use a stiff nylon brush to break the biofilm. Pre-wet joints lightly so cleaners spread evenly, but don’t flood.

Apply an oxygen-based cleaner at label dilution, or spray 1:1 white vinegar and water for Eco friendly alternatives; keep it off nearby plants.

Let dwell 10–15 minutes, scrub again, then rinse with low-pressure water to avoid etching and joint loss.

Wear gloves and eye protection, and avoid inhaling aerosols.

For Organic moss removal, pull thick clumps from joints, then top up jointing sand and improve drainage.

Treat Patio Slab Stains With Baking Soda Paste

Mix baking soda with a small amount of water until you’ve got a thick paste, and wear gloves to protect your skin while you work.

Apply the paste directly to the stain, scrub with a stiff nylon brush using controlled pressure, and keep the area damp so you don’t create dust.

Let it sit briefly, then rinse thoroughly with clean water and confirm runoff drains safely away from plants and nearby surfaces.

Mix Baking Soda Paste

When you need a low-toxicity spot treatment for mild to moderate patio slab staining, a baking soda paste gives you controlled abrasion and gentle alkalinity without harsh fumes.

For reliable stain removal, you’ll mix Baking soda with just enough water to form a thick, spreadable paste that won’t run into joints or drains. Start with a clean, dedicated container and a non-metal spoon; avoid reactive aluminum.

Add three parts Baking soda to one part water, then adjust by teaspoons until it holds soft peaks. Wear nitrile gloves and eye protection to prevent irritation, and avoid inhaling dust during measuring.

If you’re treating porous stone, test the paste on an inconspicuous area first to confirm it won’t lighten the surface. Use immediately; don’t store mixed paste.

Scrub And Rinse Stains

Once the paste is in place, scrub the stain with a nylon-bristle brush using tight circular strokes and light-to-moderate pressure. Then let it dwell for 5–10 minutes without allowing it to dry.

Work from the outer edge inward to prevent rings, and keep the area lightly misted if conditions are hot or windy. For embedded stain treatment, reapply a thin layer and repeat the scrub once, avoiding metal brushes that can gouge concrete.

Rinse thoroughly with clean water, directing runoff away from plants and drains if required. Use a low-pressure hose stream; don’t power-wash, which can erode the slab surface.

For Efflorescence removal, rinse twice and brush while rinsing to lift loosened salts. Let the slab air-dry, then inspect and spot-treat remaining marks.

Use Vinegar Safely on Concrete Slabs Only

Use vinegar only on concrete slabs, and keep it diluted to control etching risk—start at 1:1 vinegar to water, and don’t exceed 2:1 for stubborn residue.

Apply it to a small, inconspicuous spot first, wait 5–10 minutes, then rinse and check for whitening or surface roughness.

If the test area stays stable, you can proceed in sections, keeping contact time short and rinsing thoroughly.

Dilute Vinegar Ratios

Although vinegar can lift light mineral haze and mildew, you’ll need to dilute it carefully to avoid etching concrete and weakening the surface paste.

For routine film, mix 1 part white vinegar (5% acetic acid) with 4 parts water (about 1% acid).

For heavier grime, use 1:2, but don’t exceed that ratio on concrete.

Keep Vinegar concentration low and control contact time to protect the cement binder while maintaining Cleaning effectiveness.

Apply with a pump sprayer or microfiber mop, keeping the slab damp, not flooded.

Let it dwell 3–5 minutes, then scrub with a nylon brush.

Rinse thoroughly with clean water to stop the reaction.

Wear nitrile gloves and eye protection, and avoid metal tools that can stain.

Spot-Test Concrete Areas

Before you treat the full patio, spot-test your diluted vinegar on a small, inconspicuous section of the concrete slab to confirm it won’t etch, lighten the color, or expose aggregate.

Choose a corner near an edge, wet the area with clean water, then apply the vinegar mix with a nylon brush for 60–90 seconds. Don’t let it dry; keep it damp and controlled.

Rinse thoroughly and neutralize with a light baking-soda-water wipe, then rinse again.

Let the spot dry fully (at least 2 hours) and inspect in angled light. If you see chalking, roughened paste, or uneven Color enhancement, stop and increase dilution.

If the finish looks even and you get subtle texture improvement, you can proceed safely.

Rinse Thoroughly and Let Patio Slabs Dry

rinse dry clear surface

Once you’ve finished scrubbing and spot-treating, rinse the patio slabs thoroughly with clean water to flush away loosened grime and any remaining residue that could dry into a film. Work from the highest edge down, using a hose with a gentle spray; avoid pressure that can etch soft concrete.

Keep runoff out of drains by sweeping slurry toward soil or a collection area. Wear eye protection and non-slip footwear, and keep children and pets off the wet surface.

After rinsing, remove obstacles and reset furniture arrangement only after the slabs dry. Promote even drying with airflow and sunlight; don’t cover the area.

Pause lawn maintenance nearby to prevent clippings and soil from recontaminating the surface. Wait until the slabs feel dry and look uniformly matte.

Seal Patio Slabs and Prevent New Grime

When the slabs have dried to a uniform, matte finish, seal them to lock out moisture, reduce staining, and slow algae regrowth. Choose a breathable, water-based paving sealer rated for your slab material and slip resistance.

Wear nitrile gloves, eye protection, and a respirator if the label requires it, and keep pets away.

Mask decorative borders you don’t want darkened, and test a small corner for color change.

Apply with a low-pressure sprayer or roller in thin, even coats; don’t puddle in joints.

Maintain ventilation and avoid open flames.

Let the first coat tack, then apply the second within the recoat window.

Keep outdoor furniture off until fully cured, typically 24–72 hours.

Sweep regularly to prevent grit abrasion.

Conclusion

You’ve restored your weathered patio slabs without harsh chemicals by matching the cleaner to the material, working from a protected, prepped surface, and escalating from hot soapy water to targeted treatments. You’ve removed moss and algae safely, used baking soda for stains, and limited vinegar to concrete only. After a thorough rinse and full dry, seal the slabs to lock out moisture and grime. Treat maintenance like calibrating a tool: precise, repeatable, and safe.…

constructing a vegetable bed
Garden & Outdoor

Building a Raised Bed Vegetable Garden From Scratch

Start by picking a site with 6–8+ hours of direct sun, good airflow, and easy water access; confirm exposure through the day. Build a bed you can reach into (typically 4 ft wide if accessible from both sides) with rot-resistant, non-leaching lumber and corrosion-resistant screws. Fill it using a 40/40/20 blend of screened topsoil, finished compost, and aeration material, adjusting pH to 6.2–7.0. Plant cool- then warm-season crops, water with drip, mulch 2–3 inches, and keep going for step-by-step details.

Key Takeaways

  • Pick a sunny, open site with 6–8+ hours of direct light, good airflow, and paths wide enough for comfortable access.
  • Size beds for reach and maintenance: 48 inches wide for two-sided access, 30–36 inches for one-sided, and 6–12 feet long.
  • Build with non-toxic, rot-resistant lumber and corrosion-resistant screws; square corners, predrill holes, and follow basic tool safety.
  • Fill with a well-draining mix: 40% topsoil, 40% finished compost, 20% aeration; aim for pH 6.2–7.0 and test if possible.
  • Plant by season and maintain with drip/soaker watering, 2–3 inch mulch, weekly weeding, and regular pest and disease scouting.

Pick a Sunny Spot for Your Raised Bed Vegetable Garden

optimal sunny garden location

Although you can grow some crops in partial shade, your raised bed will perform best in a location that receives at least 6–8 hours of direct sun per day.

8+ hours of sun is ideal for fruiting vegetables like tomatoes, peppers, cucumbers, and squash. Verify sun exposure by observing the site at 2–3 hour intervals or using a solar-path app; note midday obstructions from trees and buildings.

Favor southern exposure and keep the bed away from reflective heat traps that elevate soil temperature beyond ideal root-zone ranges.

Guarantee convenient access to water, because consistent moisture improves nutrient uptake and reduces stress-related pest outbreaks.

For garden pest management, choose an open, breezy spot to lower foliar humidity and disease pressure.

Plan nearby composting techniques so finished compost is easy to apply without shading.

Choose Raised Bed Dimensions That Fit Your Space

You’ll start by measuring your site’s usable footprint while confirming sun exposure and access for tools, water, and maintenance.

You’ll then set bed width and length to match your reach—typically keeping beds about 3–4 ft wide if you can access both sides—so you can work efficiently without compacting soil.

Finally, you’ll choose a bed height that fits your mobility and drainage goals and leave pathways wide enough for safe, frequent traffic.

Measure Sun And Access

Where does the sun actually fall across your yard from morning to late afternoon? Track it for 2–3 clear days, logging full sun hours at the proposed bed footprint. Use a phone compass or solar app to note azimuth and obstructions, then map shade considerations from trees, fences, and buildings at 9 a.m., noon, and 3 p.m.

Aim for 6+ hours of direct light for fruiting crops. Next, evaluate wind exposure: flag prevailing wind direction and speed, and watch for turbulence near corners and walls that can desiccate seedlings.

Finally, measure access. Mark door-to-bed travel lines, hose reach, and wheelbarrow turns. Keep paths straight, level, and wide enough for tools without stepping into soil.

Optimize Bed Width And Length

How wide and long should your raised bed be to maximize planting area without sacrificing reach and access? Set bed width by your comfortable reach: most adults manage 24 inches from one side, so 48 inches works when you can access both sides; choose 30–36 inches if access is from one side only. Use these ranges to reduce compaction and make harvesting faster.

Set bed length to fit your site and materials, not an arbitrary number. Keep runs manageable for watering uniformity and structural straightness; 6–12 feet typically stays square with standard lumber lengths and minimizes bowing.

If you need more area, replicate modules rather than stretching one bed. This standardizes crop rotation, supports consistent spacing, and simplifies season planning.

Plan Height And Pathways

Next, set bed height and pathway width together, because they control drainage, root volume, ergonomics, and long-term access.

For most vegetables, build 10–12 inches of soil depth; go 18–24 inches if you’ll grow carrots, parsnips, or tomatoes and want stronger drought buffering.

Keep the top edge 16–24 inches high if you need easier bending; don’t exceed what you can fill with quality soil.

Size pathways for your tools and gait. Aim for 24–30 inches for foot traffic, 36–48 inches if you’ll wheel a cart.

Use compacted mulch or gravel to reduce mud, improve pest prevention by limiting slug habitat, and sharpen garden aesthetics with consistent lines.

Leave turning space at bed ends.

Build Your Raised Bed Frame (Safe Materials + Tools)

safe precise raised bed construction

Before you cut a single board, choose frame materials and fasteners that won’t leach harmful compounds into your soil. Then stage the right tools so you can build square, level, and structurally rigid beds.

Use naturally rot-resistant lumber (cedar, redwood) or heat-treated pine; avoid creosote ties and older pressure-treated stock. Fasten with exterior-grade, corrosion-resistant screws (stainless or ceramic-coated), not drywall screws.

Measure twice, cut once with a miter saw or circular saw and guide. Clamp corners, predrill to prevent splitting, then drive screws to consistent depth.

Confirm squareness by matching diagonals; check level on every side before final tightening. Follow safety precautions: eye/ear protection, gloves, stable work surface.

Prioritize tool maintenance—sharp blades, charged batteries, calibrated squares—so cuts stay true and joints don’t rack.

Fill Your Raised Bed (Soil Recipe + How Much to Buy)

You’ll get better yields if you fill your raised bed with a consistent, well-draining mix—typically a balanced blend of screened topsoil, finished compost, and aeration material (like coarse vermiculite or pine bark fines).

Before you buy anything, you’ll calculate the soil volume you need by multiplying bed length × width × fill depth, then convert to cubic feet or cubic yards to match supplier units.

With those numbers, you can source ingredients in the right proportions and avoid underfilling, overbuying, or settling-related sinkholes.

Raised Bed Soil Recipe

Although raised beds give you tight control over drainage and fertility, the bed performs only as well as the soil blend you put in it. Build a stable, biologically active mix by combining 40% screened topsoil, 40% mature compost, and 20% aeration material (pumice, perlite, or coarse sand).

This compost mixture supplies nutrients and microbes, while topsoil anchors structure and water-holding. Aim for a crumbly texture that forms a weak ball when squeezed, then breaks with a tap.

Adjust pH toward 6.2–7.0 using lab-tested lime or elemental sulfur. Add soil amendments based on crop demand: 1–2 cups rock phosphate per 10 sq ft for root crops, and 1 cup greensand for potassium. Mix thoroughly to prevent nutrient hotspots.

Calculate Soil Volume Needed

How much soil do you actually need to fill a raised bed to working depth without overbuying? Measure interior length, width, and target depth (in feet), then multiply: L Ă— W Ă— D = cubic feet.

Convert to cubic yards by dividing by 27. Example: a 4Ă—8 bed filled to 1.0 ft needs 32 ftÂł, or 1.2 ydÂł.

Subtract 10–15% if you’re topping existing soil, but add 10% for settling after watering.

Buy bulk by the cubic yard when volume exceeds ~1 ydÂł; use bagged soil (labeled in ftÂł) for small beds.

Before final purchase, run Soil testing to confirm texture and pH, then adjust your mix using composting techniques and targeted amendments.

Choose Vegetables for Your Raised Bed by Season

Because soil warms and cools faster in a raised bed, you’ll get the best yields by matching crops to seasonal temperature ranges rather than planting everything at once.

In early spring, target cool-season crops that tolerate 40–70°F soils: peas, spinach, lettuce, radish, and brassicas.

After your last frost and once soil holds near 65°F, switch to warm-season fruiting crops: tomatoes, peppers, cucumbers, beans, and squash; these stall below ~55°F.

In late summer, re-seed fast cool-season greens for fall as nights drop; choose varieties with short days-to-maturity.

Use companion planting to reduce pest pressure: interplant alliums with carrots to disrupt fly location, and pair basil with tomatoes for improved pest control.

Rotate plant families yearly to limit soilborne disease.

Water, Mulch, and Maintain Your Raised Bed Garden

water mulch maintain properly

Once you’ve planted, consistent moisture and surface protection become the main controls on growth, yield, and disease pressure in a raised bed. Use watering techniques that target the root zone: drip lines or soaker hoses deliver uniform wetting and reduce leaf wetness.

Water early, and apply enough to moisten 6–8 inches; then let the top inch dry slightly to limit damping-off and fungus. Check moisture with your finger or a probe, and adjust frequency as temperatures rise.

Select mulch types based on crop and climate: shredded leaves or straw insulate and suppress weeds; compost mulch feeds soil but can crust if overapplied. Maintain 2–3 inches, keep mulch off stems, and top-dress midseason.

Pull weeds weekly, scout pests, and re-level irrigation.

Conclusion

You’ve picked sun, sized the bed, built a safe frame, and filled it with a calibrated soil mix. You’ve matched crops to season, then set water and mulch to stabilize moisture and temperature. Now the variables narrow: light, nutrients, and consistent irrigation. But there’s one final test you can’t shortcut—observation. Over the next 7–14 days, you’ll track emergence, leaf color, and soil dampness at 2 inches deep. Miss it, and yield slips quietly.…

Scroll to Top