
Upgrade your utility room by zoning it for washing, folding, messy tasks, and a drop zone, and keep a 36-inch path for baskets. Choose easy-wipe cabinets with full-extension drawers, plus a tall pantry for vacuums and refill jugs. Add wall rails, rubberized hooks, and labeled peg strips within reach. Use dead space with slim pull-outs, toe-kick drawers, and over-appliance cabinets. Finish with quartz or stainless counters and sealed, spill-proof flooring—next up, even smarter built-ins.
Key Takeaways
- Plan distinct zones for washing, folding, messy tasks, and drop-off, maintaining 36-inch walkways and clear door swings.
- Choose storage by item type: full-extension drawers for daily supplies and tall pantries with adjustable shelves for vacuums and jugs.
- Add wall-mounted rails, hooks, and short track systems for brooms, mops, and pet gear, anchored into studs and labeled.
- Convert dead space with slim pull-outs, toe-kick drawers, over-appliance cabinets, and fold-down shelves to maximize every inch.
- Specify hard-working surfaces: quartz or stainless counters, caulked seams, porcelain tile or sealed LVP flooring, plus epoxy grout and washer drain pan.
Plan Your Utility Room Layout and Zones
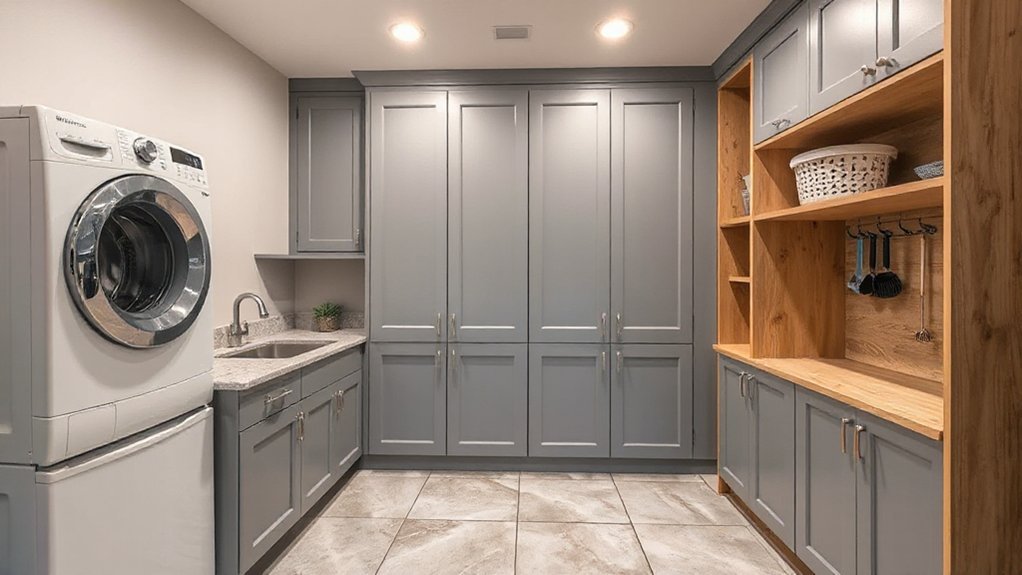
Before you buy shelves or move appliances, map out how you’ll actually use the room and divide it into clear zones. Set a wash zone with straight access to hookups and enough door-swing clearance. Place a fold-and-sort zone beside it, leaving a 36-inch path so baskets and hampers don’t choke traffic.
Create a utility zone near the sink or drain pan area for messy tasks and quick wipe-downs. Add an entry drop zone by the door with a bench-width landing strip for bags and shoes.
Plan outlets and switches per zone, then layer bright task light with decorative lighting for visibility. Finish by confirming airflow: choose ventilation solutions that exhaust humidity and keep the room comfortable.
Choose Utility Room Cabinets by What You Store
Once you list what needs to live in your utility room—detergents, cleaning tools, pet supplies, bulk paper goods, or a vacuum—you can match cabinet type and size to the job instead of guessing.
Put daily items in base cabinets with full-extension drawers so you can see everything at a glance.
Reserve a tall pantry cabinet for brooms, a vacuum, and refill jugs; add adjustable shelves for changing bottle heights.
For messy supplies, choose easy-wipe Cabinet materials like thermofoil, laminate, or sealed plywood, and skip raw MDF near damp floors.
Use closed cabinets for visual calm, and add clear bins inside to tighten Storage organization.
Measure your largest items, then size door openings and shelf spacing so nothing gets wedged.
Add Wall Storage: Hooks, Rails, and Hangers
Because cabinets can’t hold everything you reach for mid-task, add wall storage with hooks, rails, and hangers to keep tools visible, dry, and off the floor.
Start with Wall organization: map zones for cleaning, laundry, and pet gear, then assign each item a dedicated hanger or hook.
Mount a sturdy rail for brooms and mops so handles don’t topple, and add S-hooks for spray bottles and dustpans.
Use rubberized hooks for wet coats, leashes, or garden gloves to prevent slipping.
Install a pegboard strip or short track system for frequently used tools, and label positions so everything returns fast.
Keep hanging solutions within arm’s reach, leave clearance for doors, and anchor into studs for safe weight limits.
Use Dead Space for Utility Room Built-Ins
Even if your utility room feels maxed out, you can squeeze in major function by turning dead space—awkward corners, the gap beside a washer, the wall behind a door, or the area above appliances—into simple built-ins. Measure clearances first, then add a slim pull-out tower for detergents, a toe-kick drawer for rags, or an over-appliance cabinet for bulk paper goods.
Use adjustable shelves so tall bottles and baskets fit without wasted height. Add Hidden compartments like a false-front panel that stores lint tools, stain sticks, and spare filters.
Choose multi purpose fixtures: a fold-down sorting shelf, a tilt-out hamper, or a narrow bench with bins below. Finish with labeled fronts so you grab items fast and keep clutter contained.
Pick Utility Room Surfaces That Handle Spills and Heat
If you choose utility-room surfaces the same way you’d spec a workbench, you’ll prevent most stains, warping, and scorch marks before they happen. Start with Spill resistant countertops such as quartz, stainless steel, or solid-surface; they shrug off detergent, bleach splashes, and wet baskets. Use a tight backsplash seam and caulked edges so spills can’t wick into substrate.
For Heat tolerant surfaces, add a stainless landing zone beside irons, garment steamers, or hot tools. If you prefer laminate, specify postformed edges and a heat pad policy; it’s durable but can blister.
For flooring, pick porcelain tile or sealed LVP with welded seams at thresholds. Finish with epoxy grout and a drain pan under the washer for insurance.
Conclusion
When you upgrade your utility room, you’re not just adding storage—you’re adding order. Plan zones so washing, folding, and cleaning don’t collide. Choose cabinets that fit what you stash, not what looks nice. Add hooks, rails, and hangers so tools stay visible and reachable. Build into dead space so nothing’s wasted. Pick durable surfaces that resist spills, heat, and scrapes. Work smarter, store cleaner, maintain easier, and keep everything ready.