
If your switch flickers, feels gritty, runs warm, crackles, or shows discoloration, replace it with a like‑for‑like unit (single‑pole has 2 brass screws; 3‑way has a common plus 2 travelers). Shut off the correct breaker, then prove the circuit is dead with a voltage tester on all conductors. Remove the plate, pull the switch out, label line/load/ground, reconnect tightly, reassemble, restore power, and test; keep going for extra tips.
Key Takeaways
- Confirm the switch is faulty by checking flickering, heat, arcing sounds, loose mounting, or burning smell before replacing it.
- Identify the switch type (single-pole or 3-way) by terminal count and labels; don’t rely on wire colors alone.
- Turn off the correct breaker and verify all wires are de-energized using a voltage tester before touching conductors.
- Label and disconnect wires carefully, inspect for damage, and match the replacement switch’s voltage/amperage and terminal style to the original.
- Reconnect hot, load, and ground securely, mount the switch flush, reinstall the cover, restore power, and test for normal operation without arcing.
Spot the Signs You Need to Replace a Light Switch
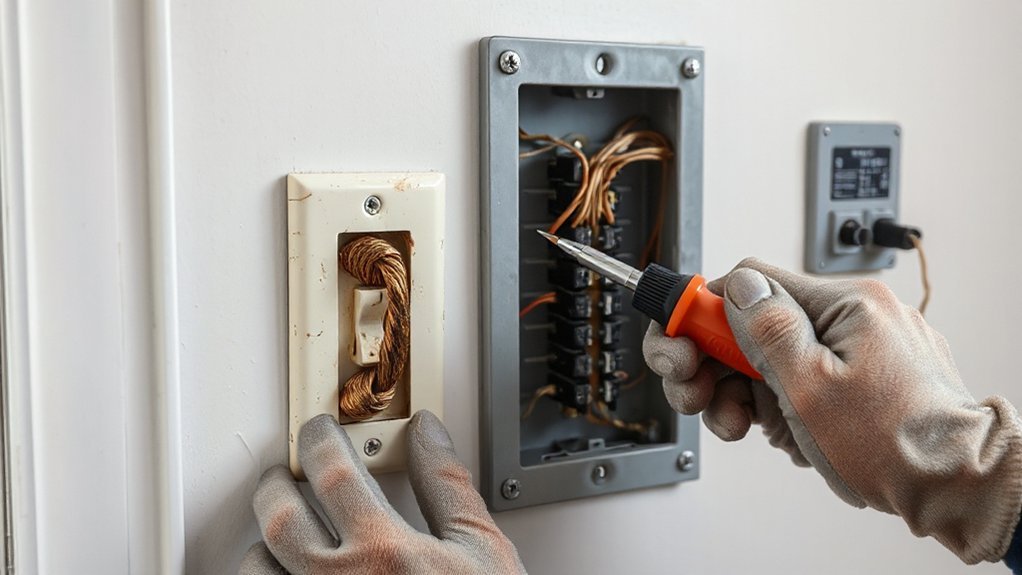
Although many switch problems look minor at first, you should replace a light switch if it shows clear failure or heat damage: intermittent operation (lights flicker when the toggle is steady), arcing or crackling sounds, visible discoloration or melting on the device or cover plate, a loose yoke that won’t tighten securely in the box, or a warm faceplate under normal load.
You should also act if the switch feels gritty, binds, won’t latch positively, or if the lights stay on/off inconsistently, indicating worn contacts. If you smell burning insulation, see soot at the strap, or find brittle conductors when you remove the cover plate, stop and de-energize at the breaker.
A failing switch can undermine Lighting design by causing nuisance flicker and can reduce Energy efficiency through poor contact resistance and heat. Replace with a listed device of correct rating.
Identify Your Switch Type (Single-Pole vs. 3-Way)
Once you’ve decided the switch really is failing, identify whether you’re dealing with a single-pole or a 3-way before you buy parts or move any conductors.
A single-pole controls a light from one location and typically has two brass terminal screws plus a green ground.
A 3-way controls the same load from two locations and has three current-carrying terminals: one common (often a dark screw) and two travelers (brass), plus ground; it won’t have ON/OFF markings.
Confirm by removing the cover plate and looking for a 3-conductor cable (often red/black/white) on a 3-way.
Don’t rely on wire colors alone—verify with wiring diagrams and terminal labeling for switch compatibility and correct conductor placement.
If anything looks nonstandard, stop.
Grab the Tools and the Correct Replacement Switch
Before you shut off any power, gather what you’ll need and buy a switch that matches the exact function and ratings of the original: single-pole or 3-way, the same voltage (typically 120/277V), and an amperage rating at least equal to the circuit (most commonly 15A or 20A).
Check switch compatibility by matching terminal style (screw, backwire clamp), grounding provision, and whether you need a neutral for smart controls.
If you’re replacing a dimmer, confirm it’s rated for the lamp type (LED/CFL/incandescent) and total wattage.
For tool organization, lay out an insulated screwdriver set, wire stripper, needle-nose pliers, non-contact voltage tester, flashlight, and a small parts cup for screws.
Bring a UL/CSA-listed cover plate if the old one’s cracked.
Turn Off the Breaker for the Light Switch Circuit
At your service panel, identify the correct circuit breaker feeding the light switch by using the panel directory and confirming by turning the switch load on/off.
Move that breaker fully to OFF to de-energize the circuit, and don’t rely on the wall switch for isolation.
Verify the switch is dead at the box with a properly rated voltage tester on all conductors to ground and neutral before you touch any wiring.
Identify Correct Circuit Breaker
How do you make sure you’ve killed power to the switch you’re replacing? Start at your service panel and use the directory label as a guide, but don’t trust it blindly. For circuit safety, you’ll confirm the branch circuit by testing, not guessing.
Turn the light on, then have a helper toggle breakers one at a time while you note which breaker controls that load. If the light is fed by a multi-location setup, check every related switch position to confirm consistent control.
Re-label the panel directory immediately using clear room and load descriptions so it matches Electrical codes expectations for identification. If breakers aren’t labeled or multiple rooms go dead, stop and map the circuit before proceeding.
Never assume “off” equals de-energized.
Shut Off Breaker Power
Keep the panel cover closed, stand to the side, and use one hand when operating the handle to reduce shock exposure.
Don’t rely on wall switches, dimmers, or smart controls to de-energize conductors; only the breaker provides the required disconnect.
Set out your Switch installation tools now—insulated screwdriver, wire strippers, and a listed replacement device—so you won’t leave the work area.
Planning ahead also protects Lighting aesthetics by preventing rushed, misaligned hardware.
Verify Switch Is Dead
With the breaker switched off and your tools within reach, prove the circuit is actually de-energized before you touch any conductors. Flip the wall switch on, then try the light; it should stay dark. Don’t rely on the lamp alone—use a non-contact voltage tester at the switch yoke and at each insulated conductor in the box.
Next, pull the switch out slightly and use a two-pole tester or multimeter: test hot-to-neutral and hot-to-ground; you should read 0 volts. Confirm your tester works by checking a known live receptacle before and after.
Follow wire color coding (black/red hot, white neutral, green/bare ground), but still test—miswires happen. These checks align with electrical code standards and reduce shock risk.
Verify Power Is Off With a Voltage Tester
Before you touch any conductors, confirm the circuit is de-energized using a properly rated voltage tester. For electrical safety, use a CAT III (or better) tester and verify it works on a known live source first.
Then test the switch box: place one probe on the suspected hot and the other on neutral or the equipment grounding conductor. You should read 0 V.
Test hot-to-ground and hot-to-neutral, because an open neutral can mislead you.
If you’re using a non-contact tester, treat it as a screening tool only and confirm with a contact meter.
Re-check the live source afterward to prove the tester didn’t fail.
This voltage testing sequence meets safe work practice expectations and reduces shock risk.
Remove the Old Switch and Label the Wires
With power confirmed off, remove the wall plate, then loosen the mounting screws and pull the switch straight out to expose the terminals.
Before you loosen any terminal screws or wire connectors, label each conductor with tape (line/hot, load/switched hot, neutral if present, and ground) to preserve the correct connections.
Keep the wires separated and supported so they can’t touch the metal box or each other while you work.
Unscrew And Remove Switch
Once you’ve confirmed the circuit is de-energized, how do you remove the old switch without losing track of the wiring? Start by removing the cover plate screw, then back out the two mounting screws securing the switch to the box. Pull the device straight out a few inches, keeping conductors undisturbed to maintain wiring safety. Don’t force it; if it binds, check for paint, drywall pressure, or a misaligned yoke.
With the switch exposed, inspect the box fill and grounding path. Confirm the device type (single-pole, 3-way, 4-way) and verify switch compatibility with your replacement. If you see brittle insulation, overheated terminals, or a damaged strap, stop and correct the issue before proceeding.
Keep the switch supported so wires aren’t strained.
Label Wires Before Disconnecting
Even though the switch wiring may look straightforward, you’ll save time and prevent miswires by labeling every conductor before you loosen a single terminal. With power confirmed off, take a clear photo, then apply tape flags and write “LINE,” “LOAD,” “TRAVELER,” and “GROUND” as applicable.
Don’t rely only on wire color codes; repainting, age, or prior repairs can defeat expectations. Identify the common on 3-way/4-way switches and mark it distinctly.
Next, loosen terminal screws and pull each conductor free using insulated tools, keeping bends gentle to avoid nicking copper. Cap any loose hot candidates with a wire connector until you’re ready to reconnect.
Proper labels also verify switch compatibility, ensuring you reinstall the correct single-pole, 3-way, or smart-rated device.
Connect the New Light Switch, Then Test It Safely
After you’ve confirmed the circuit is de-energized at the box with a non-contact tester, connect the new switch to match the original wiring: land the hot feed and switched-hot on the switch’s brass terminals (or the two leads on a standard single-pole).
Bond the bare/green equipment ground to the green screw and the metal box if present, and keep all splices tight under listed wire connectors. Use color coding and verify wire insulation is intact; re-strip to clean copper if nicked.
Fold conductors neatly, keep grounding continuous, and mount the switch with the yoke flush to the box. Install the cover plate.
Restore the breaker, then test with the switch in both positions and confirm the fixture operates normally. If it trips or arcs, shut off power and recheck connections.
Conclusion
You’ve spotted the warning signs, identified whether you’ve got a single-pole or 3-way switch, gathered the right tools, and shut off the correct breaker. You’ve verified de-energized conductors with a voltage tester before touching anything. After labeling and transferring each wire to the matching terminal, you’ve tightened connections to manufacturer torque and reinstalled the device and cover. Restore power and test operation. Follow these steps, and you’ll feel a million times safer working in the box.