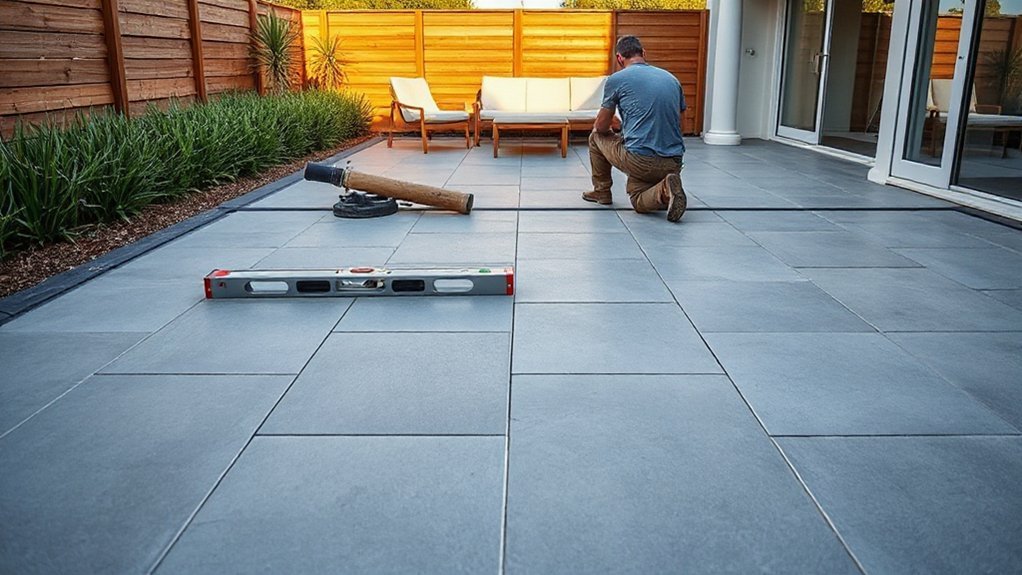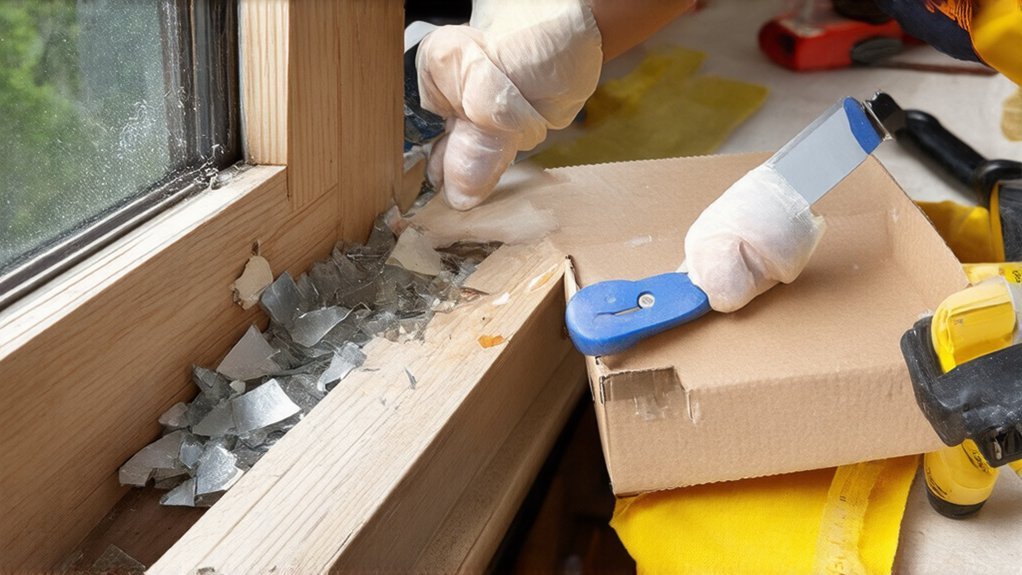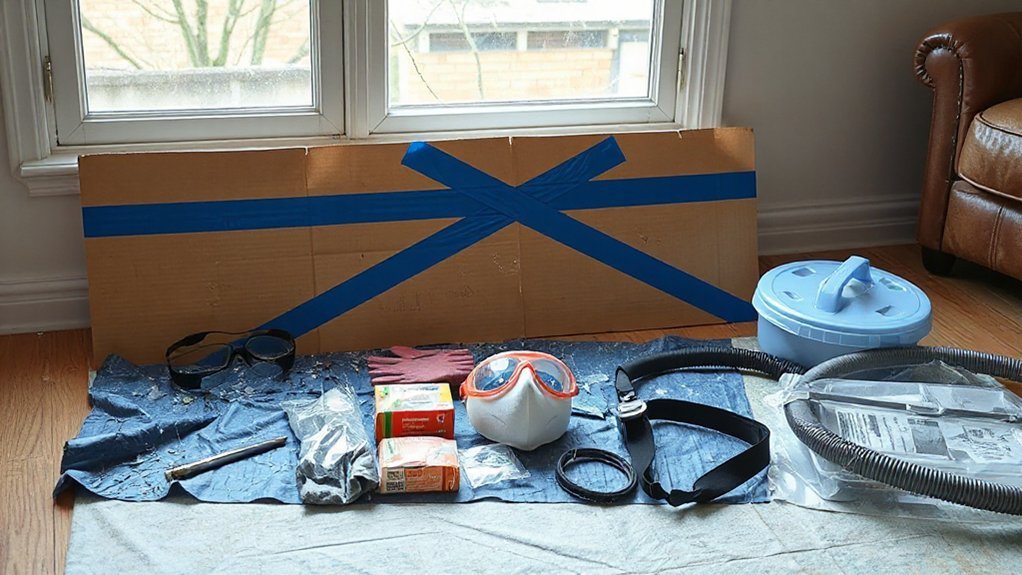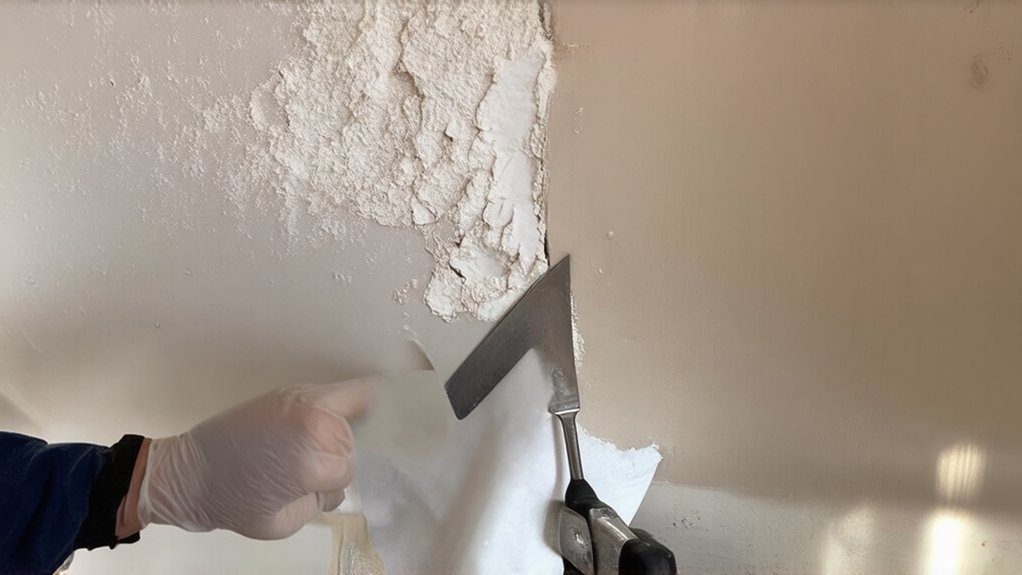
fixing cracked wall plaster
General Property Repairs

Repairing Cracked Wall Plaster: Quick Methods That Give a Smooth Finish

First, confirm the crack isn’t moving: check for a “step” with a straightedge, moisture stains, and any widening after 7–14 days. Score it into a shallow V, undercut slightly, vacuum dust, wipe lightly, and seal with primer or bonding agent. For hairlines, press in paintable flexible filler and feather 50–75 mm. For wider cracks, embed fiberglass mesh in compound, skim, sand, prime, paint. Next, you’ll refine material choice and texture matching.

Key Takeaways

  • Check if the crack is hairline or moving; look for widening, steps, or damp stains, and recheck after 7–14 days.
  • Choose the right filler: spackle for hairline cracks, setting joint compound for medium defects, or real plaster for deep voids.
  • Prep for a smooth finish by scoring a shallow V, slightly undercutting, vacuuming dust, and sealing with bonding agent or primer.
  • For hairline cracks, press flexible filler in thinly, feather 50–75 mm past the crack, then sand lightly and prime.
  • For wider cracks, embed fiberglass mesh tape in compound, apply feathered coats 100–150 mm out, sand smooth, prime, and paint.

Decide If Your Plaster Crack Is Cosmetic or Moving

assess crack movement and stability

Before you mix plaster or reach for tape, determine whether the crack is purely cosmetic or still moving, because the repair method depends on that distinction. Start by mapping the crack: note length, width, and whether it follows lath lines, corners, or openings.

Hairline, uniform cracks that don’t offset surfaces usually indicate shrinkage or age, not loss of Structural stability. Check for displacement by running a straightedge across both sides; any step suggests movement.

Next, assess Moisture impact: look for staining, efflorescence, soft plaster, or recurring dampness near bathrooms, chimneys, or exterior walls. Mark both ends with pencil ticks and date them, or apply a small paper “tell-tale” with tape.

Recheck in 7–14 days; widening confirms active movement.

Pick the Right Repair Material (Filler vs Compound vs Plaster)

Once you’ve confirmed the crack isn’t actively moving, match the repair material to the substrate and the defect’s depth. Use lightweight spackle or vinyl filler for hairline surface cracks; it sands fast and minimizes shrinkage.

Choose setting-type joint compound for shallow-to-medium defects on painted plaster where you need longer working time and strong feathering.

Use real plaster (gypsum or lime-based) when the break exposes brown coat, lath keys, or deep voids; it bonds chemically and restores hardness.

For color matching, pick a repair that won’t telegraph through paint: white fillers under light colors, neutral bases for tinted topcoats.

Tool selection matters: flexible putty knife for spackle, wider taping knife for compound, and a hawk/trowel for plaster.

Prep Plaster Cracks: Open, Clean, and Seal the Area

Although a plaster crack can look like a simple line, you need to prep it like a joint so the repair bonds to solid material instead of dust and loose edges. Score the crack into a shallow V with a utility knife, widening it just enough to remove feathered edges and expose firm plaster.

Undercut slightly where you can so the patch keys in mechanically. Vacuum the groove, then brush out remaining grit; don’t leave powder that weakens adhesion.

Wipe with a barely damp sponge and let it dry fully. Seal the exposed plaster with a thin coat of bonding agent or primer to control suction and prevent flash-drying.

Mask adjacent paint to protect Surface texture. Note existing sheen and Color matching needs for later.

Fix Hairline Plaster Cracks With Flexible Filler

Why do hairline plaster cracks keep reappearing after a “quick” patch? Rigid compounds can’t tolerate seasonal movement, so the crack prints through the repair.

For crack prevention, switch to a paintable flexible filler designed for fine cracking. Load a small amount onto a flexible putty knife and press it across the crack at a shallow angle, forcing filler into the void. Then skim a tight pass 50–75 mm beyond the line to feather edges. Keep the layer thin; thick beads shrink and telegraph.

Let it cure fully per the label, then lightly sand with 180–220 grit to match the surrounding wall texture. If the surface is textured, stipple or sponge the still-damp filler to replicate the pattern before drying. Prime only after dust removal.

Repair Wide Plaster Cracks With Mesh Tape, Then Sand and Paint

When a plaster crack opens wider than a hairline, you need reinforcement—not just filler—to stop the joint from re-splitting under movement. Rake the crack into a shallow V with a utility knife, remove dust, and mist lightly.

Apply a thin coat of setting-type joint compound or plaster repair, then embed self-adhesive fiberglass mesh tape centered over the gap. Knife another coat through the mesh to fully wet it out, feathering 100–150 mm past the tape.

Let it set hard, then apply a skim coat to level and match Decorative wall textures, if needed, with a sponge or stipple brush. Sand with 120–180 grit, vacuum, prime, then paint.

In Historical restoration techniques, use compatible lime-based plaster where required.

Conclusion

Now you’ve sized up whether the crack’s just cosmetic or still moving, matched it with the right filler, compound, or plaster, and prepped the joint by opening, cleaning, and sealing it. For hairlines, you’ve pressed in a flexible filler to tolerate slight movement. For wider gaps, you’ve reinforced with mesh tape, layered compound, then sanded flat. Once you prime and paint, the finish’s smooth—no cutting corners, just a durable repair.…
transforming spare room space
Home Upgrades & Renovations

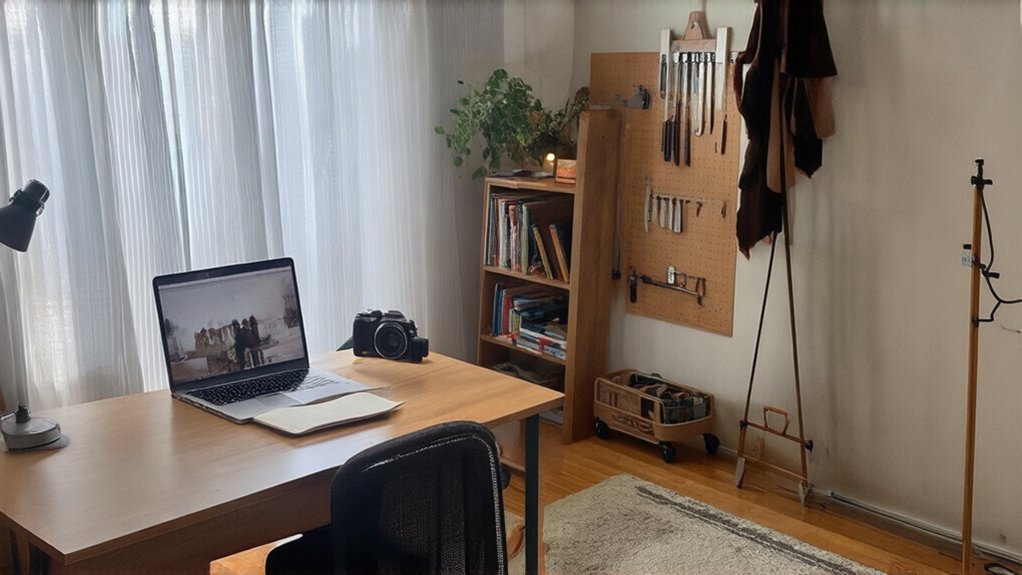
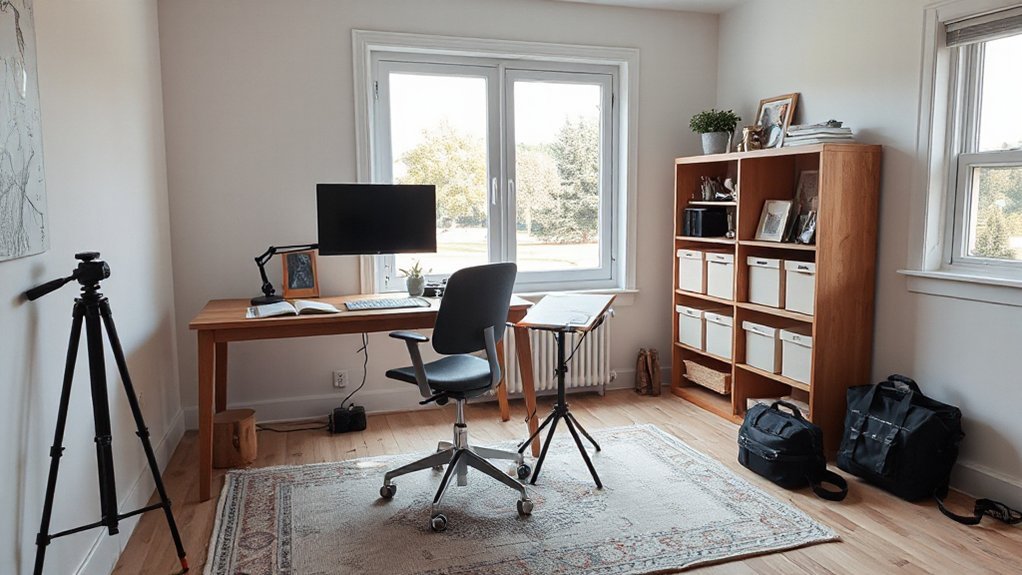
Turning a Spare Bedroom Into a Functional Home Office or Creative Studio

Start by ranking what you’ll do most—deep-focus work, messy making, calls, or writing—then zone the room around daylight and clear circulation. Place your desk perpendicular to the window, lift your laptop to eye level, and add a dimmable key light for calls. Choose slim, multi-use furniture and go vertical with shelves, rails, and labeled drawers. Quiet echoes with curtains, rugs, and fabric boards. Next, you’ll refine layout, storage, and sound.

Key Takeaways

  • List primary tasks and essential gear, then assign zones for focus work, making, calls, and storage to prevent cross-task clutter.
  • Place the main desk perpendicular to the window for flattering daylight, clear sightlines, and comfortable circulation through the room.
  • Choose compact, multi-purpose furniture and vertical storage like tall shelves, wall rails, and floating shelves to maximize floor space.
  • Build a video-call setup with eye-level screen, neutral background, dimmable key light, and tidy cables for a polished on-camera look.
  • Reduce noise and visual stress using curtains, rugs, door sweeps, labeled drawers, and minimal decor to keep the studio calm and functional.

Define Your Spare Bedroom Office or Studio Needs

optimize organize comfort budget

Before you buy a desk or hang a single shelf, get specific about what this room needs to do for you. Decide whether you’re primarily doing deep-focus computer work, messy making, client calls, or quiet writing, and rank those tasks by frequency.

List the gear each task demands—monitor, printer, easel, cutting mat—and note what must stay visible versus what can disappear into closed storage.

Set comfort targets: chair quality, task lighting, acoustic control, and a clear surface you can reset fast.

Choose color schemes that support the mood you want: calm neutrals for focus, warmer tones for creative energy, with one restrained accent.

Do budget planning early so upgrades land where they’ll matter most.

Plan the Spare Bedroom Layout and Zones

Once you’ve nailed down what you need to do in the room, map the space into clear zones that keep work flowing and clutter contained. Anchor your primary zone where daylight hits, then dedicate a secondary strip for making, scanning, or staging projects so tools don’t creep onto your main surface.

Keep circulation tight: leave a straight path from door to window and avoid pinch points near closets. Use vertical boundaries—rugs, curtain tracks, and wall grids—to signal zones without eating floor area.

Coordinate color schemes by zone: muted neutrals for focus, one restrained accent near the creative area for energy. Add soundproofing techniques where noise leaks: seal door gaps, hang dense textiles, and place soft panels on the wall shared with the busiest room.

Choose Compact Furniture for a Spare Bedroom Office

Because spare bedrooms rarely have endless floor space, you’ll get the best office setup by choosing compact furniture that works hard without looking cramped. Pick a slim writing desk or wall-mounted surface that leaves walking clearance and keeps sightlines open.

Choose a chair with a narrow profile and a low back so the room still reads like a bedroom. Add a rolling file cabinet that tucks under the desk, or use a storage ottoman that doubles as guest seating.

Keep shelving vertical: a tall bookcase or floating shelves hold supplies without stealing square footage.

Tie everything together with intentional color schemes—light woods, soft neutrals, or monochrome—to reduce visual noise. Then finish with minimal decor accents like a single framed print or a tidy tray.

Set Up Lighting and Video-Call Basics

Compact furniture keeps your spare-bedroom setup feeling open, and smart lighting makes it look just as polished on camera. Place your desk perpendicular to the window so daylight skims your face without backlighting. Add a dimmable key light at eye level, 45 degrees off-center, then soften shadows with a small bounce card or warm lamp. These lighting techniques keep skin tones even and artwork colors true.

For video conferencing, raise your laptop to eye height and angle it slightly down for a flattering frame. Choose a clean wall, curtain, or neutral art panel behind you, and keep distance so blur looks natural. Use wired earbuds or a small USB mic, and test levels before calls. Keep cords tucked to stay minimal and calm.

Build Storage for Tools, Papers, and Supplies

Keep clutter off your desk by anchoring the room with modular shelving that shifts as your projects change.

Sort papers and small tools into labeled drawers, so you can grab what you need in seconds and keep surfaces clean.

Then use vertical wall storage—rails, pegboards, slim ledges—to lift supplies into sight while preserving floor space and a calm, studio-ready look.

Modular Shelving Solutions

Two modular shelving elements—a wall-rail system and a few stackable cubes—can turn one blank bedroom wall into a clean, flexible storage zone for tools, papers, and supplies. Mount rails at eye level, then snap in shelves, bins, and hooks so you can reconfigure layouts as projects change.

Keep your most-used items within a single arm’s reach of the desk to reduce visual clutter and wasted steps.

Use cubes below for heavier gear and paper reams, and float a slim top shelf for reference books or display pieces that spark artistic inspiration. Choose matte finishes and matching hardware to unify the wall, then leave a few inches of breathing room around the grid for a calmer look.

Add felt-backed shelf liners for subtle acoustic treatment and quieter, cleaner workflows.

Labeled Drawer Organization

When your desktop starts collecting tools, loose papers, and half-finished ideas, shift the mess into a labeled drawer system that hides volume while preserving speed. Choose a compact drawer unit that slides under your desk, then assign categories: cutting tools, chargers, client files, sketch pads, adhesives, and backups.

Use shallow trays for pens and blades, deeper bins for devices and bulk supplies. Label fronts with clean typography or a small label maker, and add color dots to mirror your Color schemes for instant scanning.

Keep one “active” drawer for today’s project and reset it nightly. For Personal decor, swap plain pulls for brass, wood, or matte black, and line drawers with subtle patterned paper that matches your studio mood.

You’ll stay tidy without sacrificing style.

Vertical Wall Storage

Although floor space disappears fast in a spare bedroom, you can reclaim order by building upward with a clean, modular wall system that stores tools, papers, and supplies at arm’s reach. Mount a rail-and-hook track above your work zone, then add slim shelves for notebooks, archival boxes, and a printer stand.

Install pegboard panels for scissors, tape, rulers, and brushes, and keep the layout visually calm by repeating matching bins and hardware. Use magnetic wall strips for metal tools, blades, and binder clips, so small essentials don’t crowd your desktop.

Add a vertical file pocket for current projects and a lidded tray for loose parts. Pair the system with fold away desks, keeping circulation clear when you’re done.

Add Finishing Touches: Ergonomics, Acoustics, and Decor

Next, tame sound without bulky panels. Hang a thick curtain on a ceiling track, layer a low-pile rug, and place a fabric pinboard where reflections hit first.

If you record or take calls, add a small desktop mic shield and close gaps with a door sweep.

Finish with decorative accents that stay edited: one warm lamp, one plant, and a tight color palette that repeats across textiles and art.

Conclusion

You’ve turned a spare bedroom into a calm, high-function workspace by defining what you do, zoning the room, choosing compact pieces, nailing lighting for calls, and building storage that hides clutter fast. Picture a 10’×11′ room: you mount a slim desk under the window, tuck a rolling cart in the closet, and hang two cork rails above. With a supportive chair, a soft rug for acoustics, and one art print, it looks intentional—and works hard.…

durable all season timber deck
Garden & Outdoor

How to Install a Timber Deck That Lasts Through All Seasons

You’ll build a timber deck that lasts by mapping the footprint, setting finished height, and planning drainage with a slight fall away from the house. Call utility locates, dig footings below frost depth, and pour plumb concrete bases with approved galvanized or stainless post hardware. Frame square, use joist hangers and structural screws, and add mid-span blocking. Install climate-suited boards with consistent gaps, keep under-deck ventilation clear, seal cut ends, and schedule annual wash-and-reseal checks. Keep going to refine each step.

Key Takeaways

  • Plan deck height, square layout, and a 1:100 fall so water drains away from the house.
  • Set footings below frost depth in undisturbed soil, add gravel drainage, and use galvanized or stainless post bases.
  • Build a square, level frame with joists at 12–16 in. centers, approved hangers, structural screws, and mid-span blocking.
  • Install durable, stable boards with consistent gaps (3–5 mm dry; wider wet-treated), stagger butt joints, and ensure under-deck ventilation.
  • Use corrosion-resistant screws, pre-drill ends, seal all cut end-grain immediately, and inspect, wash, and re-seal annually.

Plan Layout, Levels, and Water Runoff

plan measure drain align

Before you cut timber or set footings, map the deck’s footprint, finished height, and drainage path so you don’t lock in problems you can’t easily correct later. Stake corners, run stringlines, and verify squareness by diagonal checks.

Set the finished deck height to maintain door thresholds and required step rises, and confirm clearance to vents and services. Establish a fall away from the house (about 1:100) and plan where water discharges so it won’t pond against foundations or erode soil.

Mark joist direction to minimize waste and align with traffic flow for better landscape integration. Identify lighting options now, including cable routes and fixture setbacks, so you don’t drill through beams later.

Recheck measurements.

Set Footings and Posts for a Solid Base

Once you’ve locked in the deck’s footprint and finished levels, set the footings and posts with precision because they carry the entire structure and control how true the frame stays over time. Call utility locates, then mark centers and dig below frost depth to undisturbed soil.

Bell or widen the base where codes allow, compact the bottom, and place a gravel pad for drainage. Set sonotubes plumb, then pour concrete to grade and embed approved post bases or anchor bolts.

Keep hardware hot-dip galvanized or stainless to prevent corrosion. Brace posts while you plumb and align them to stringlines, then cut to consistent height.

Check setbacks for landscaping integration and plan post locations for aesthetic considerations. Wear eye, hearing, and dust protection throughout.

Build a Level Joist Frame (Spacing & Blocking)

After your posts sit plumb and cut to height, you can build a level joist frame by setting the ledger and rim beam square. Then laying out joist spacing from a single reference edge helps ensure your measurements stay consistent.

Snap a level line, clamp components, and fasten with approved hangers and structural screws, not nails alone. Mark joists at 16 in. or 12 in. on-center as required.

Crown each joist up, and seat it fully in the hanger. Check for level across every third joist and correct with shims only where allowed.

Add blocking techniques at mid-span and over beams to prevent roll and reduce bounce; stagger blocks for easier fastening.

Keep hands clear of pinch points, and wear eye protection when cutting and drilling.

Choose Deck Boards That Suit Your Climate

Where you build your deck largely determines which deck boards will stay stable, safe, and low-maintenance over time.

In wet or coastal zones, choose naturally durable species (cedar, ipe) or capped composite to resist rot, corrosion staining, and surface checking.

In hot, high-UV regions, prioritize lighter colors and UV-stabilized finishes to reduce heat buildup and splinter risk.

In freeze-thaw climates, select boards with low moisture movement and strict grading; reject end checks, wane, and loose knots that can propagate cracks.

Make material comparisons using published decay ratings, Janka hardness, and warranty terms, not marketing claims.

If you want decorative patterns, verify your board thickness and hardness can handle tighter fastener spacing without splitting.

Confirm treatment chemistry suits your hardware.

Install Decking With Proper Gaps and Ventilation

Even if your framing is perfectly square, you’ll still get buckling, squeaks, and premature rot if you don’t install decking with consistent gaps and clear airflow. Set spacing with a gauge, not your eye: use about 3–5 mm for kiln-dried boards, and allow wider gaps for wet-treated boards as they shrink.

Keep gaps uniform at butt joints, and stagger joints so water can’t funnel into one seam. For drainage considerations, maintain a slight fall away from the house and keep board edges clear of debris.

Ventilation matters underneath: don’t block the perimeter; keep soil and mulch low to promote crossflow. For pest prevention, seal dark voids, keep plants trimmed back, and avoid trapping leaf litter.

Wear eye protection.

Pick Fixings That Resist Rust and Loosening

rust resistant secure deck fixings

Because deck boards act like springs as they swell, shrink, and take foot traffic, you need fixings that won’t corrode or back out over time. Choose stainless steel or hot-dip galvanized rust resistant screws rated for treated timber; avoid electroplated fasteners that fail in wet, salty, or chemically treated environments.

Use structural screws for ledgers and joist connections where required, and match manufacturer load ratings. Pre-drill near board ends to prevent splitting and maintain clamp force. Drive screws perpendicular and set heads flush, not countersunk, so fibers don’t crush.

Apply loosening prevention techniques: use two screws per joist, keep consistent edge distance, and re-check torque as you go. Wear eye protection and gloves.

Seal Cut Ends and Maintain the Deck Annually

Rust-resistant screws keep boards tight, but you still need to protect every exposed timber fiber you create during cutting and drilling. Brush off dust, then Seal ends immediately with an end-grain preservative or compatible sealer; treat notches, bolt holes, and board ends before installation.

Wear gloves and eye protection, and keep liquids off footing pads and fasteners. Wipe runs so you don’t trap grit that’ll abrade coatings.

After the deck’s built, schedule annual maintenance. Each spring, wash with a low-pressure rinse and a deck-safe cleaner, then let moisture content drop before recoating.

Inspect for lifted fibers, splitting around fixings, and black staining near joints; sand lightly and re-seal exposed end grain. Replace cracked boards and re-torque loose hardware.

Conclusion

You’ve laid out drainage like a riverbed, anchored footings like bedrock, and squared your joists so the frame stays true. You’ve matched boards to your climate, left ventilation gaps so moisture can’t ambush the timber, and chosen fixings that won’t corrode or creep. Seal every cut end; it’s armor, not optional. Then inspect yearly—tighten, clean, recoat—so your deck weathers seasons like a well-calibrated machine.…

tighten door handle screws
General Property Repairs

How to Fix a Loose Door Handle Without Replacing the Entire Mechanism

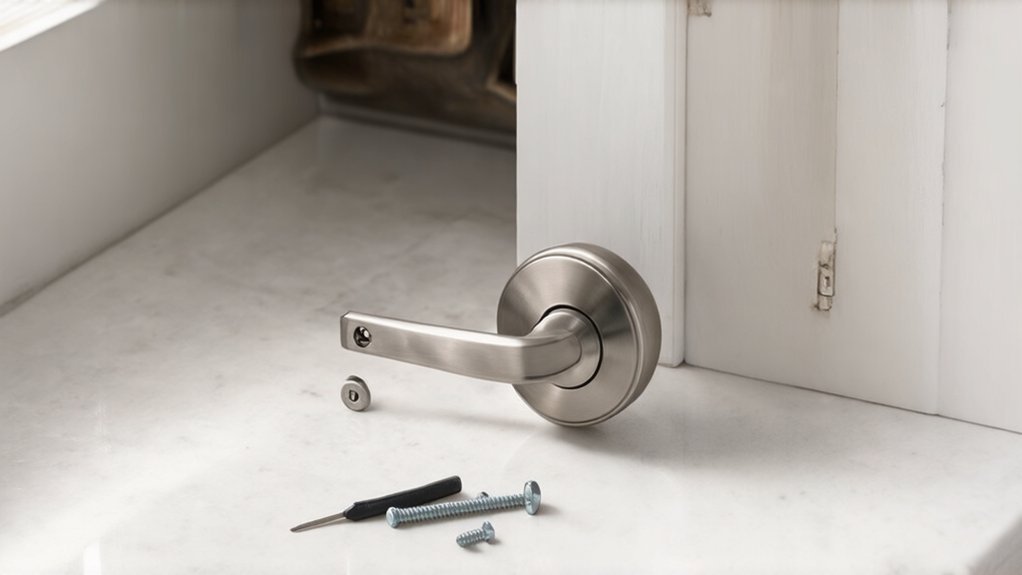
You can usually fix a loose door handle by tightening what’s already there. Wiggle the handle to locate play, then score any paint and pop off the rosette cover with a flat screwdriver. Tighten the mounting screws evenly until snug, and tighten the handle’s set screw with the correct Allen key without over-torquing. If it still wobbles, inspect the spindle for wear and re-seat the latch and strike for alignment. Keep going to learn the full checklist.

Key Takeaways

  • Wiggle the handle to pinpoint looseness at the rosette, spindle, set screw, or latch alignment before disassembling anything.
  • Pop off the rosette cover, then tighten mounting screws evenly until snug to stop the whole plate from shifting.
  • Tighten the handle’s set screw with the correct Allen key, seating it firmly on the spindle flat without overtightening.
  • Inspect the spindle and hub for wear or wrong length; replace only the spindle if it’s rounded, burred, or undersized.
  • Re-align the latch and strike plate to prevent binding, then test operation and add blue threadlocker to screws that repeatedly loosen.

Why Your Door Handle Is Loose (Quick Checks)

identify handle movement causes

Before you grab a screwdriver, pinpoint what’s actually moving: grip the handle and wiggle it while watching the rosettes/plates and spindle area, because that motion tells you where the looseness originates.

If the whole plate shifts against the door, the mounting screws or through-bolts have likely backed out from vibration and repeated use.

If the lever droops but the plate stays tight, the handle’s set screw may be loose on the spindle.

If you feel play only when turning, suspect a worn spring cassette or a misaligned latch hub.

Check the door edge: a latch that drags in the strike can torque the handle loose over time.

For DIY home repairs, these quick observations isolate common hardware issues before you touch anything.

Tools You Need to Fix a Loose Door Handle

Although most loose-handle fixes only take a few minutes, you’ll work faster and safer if you stage the right tools first: a #2 Phillips and a flathead screwdriver, a small hex/Allen key set (common for lever set screws), a tape measure, and a flashlight or headlamp to clearly see the spindle, screws, and latch alignment.

Add a small parts tray or magnetic bowl so you don’t lose fasteners. Keep needle-nose pliers for stabilizing a loose spindle or extracting a stubborn screw, and a utility knife to score paint at the rosette edge without chipping.

Use a non-marring pry tool if you’re working on softer door handle materials like brass. If you’re dealing with historical design hardware, bring a hand screwdriver (not an impact driver) to avoid stripping fine threads.

Wear safety glasses.

Tighten Mounting Screws Behind the Rosette (Cover Plate)

Pop the rosette (cover plate) off with a flat screwdriver or release tab, and keep your other hand braced so you don’t slip and scratch the door.

Once the cover’s off, you’ll see the mounting screws—tighten them evenly with the correct driver until snug, not over-torqued.

Refit the rosette and confirm the handle feels solid and rotates smoothly.

Remove Rosette Cover Plate

Once you’ve confirmed the handle still wiggles, remove the rosette (cover plate) to access the mounting screws that anchor the lockset to the door. Start by closing the door for stability, then protect the finish with painter’s tape around the rosette—especially on Decorative accents and mixed-metal Handle styles that scratch easily.

Inspect the rosette edge for a release slot or seam. If there’s a detent hole, press it with a small flat screwdriver or paper clip while gently pulling the rosette away.

If it’s a snap-on cover, slide a thin putty knife under the edge and twist slightly to pop it free, keeping the blade flat to avoid gouging.

For threaded rings, rotate the rosette counterclockwise by hand.

Set parts aside in order.

Tighten Hidden Mounting Screws

With the rosette off, you can access the concealed mounting screws that clamp the lockset halves to the door and eliminate handle play.

Support the exterior lever with one hand so you don’t twist the spindle or scratch decorative hardware. Using the correct Phillips or Torx driver, turn each screw clockwise in small, alternating increments to pull the chassis evenly against the door.

Don’t overtighten; stop when the rosette seats flat and the lever no longer rocks.

Check alignment: the latch should retract smoothly without binding, and the lever should return under spring tension.

If the screws bottom out before tightening, add a thin washer or verify you’re using the right screws for your handle styles.

Reinstall the rosette and test again.

Find and Tighten the Set Screw on a Loose Handle

tighten handle set screw

Before you reach for a screwdriver, locate the handle’s set screw—typically a small recessed screw on the underside or side of the lever near the base where it meets the rose (the round cover plate). Turn the lever to expose it, then steady the door so it can’t swing and pinch your fingers.

Select the correct driver (usually a 2–3 mm hex key or small flathead) to avoid stripping soft handle material like brass or zinc. Insert fully, then tighten clockwise in small increments until the handle stops wobbling.

Don’t overtighten; you can crack plated finishes and ruin aesthetic matching across the hardware set. Wipe away grit, then test by rotating and pulling the lever firmly. Recheck after several cycles for looseness.

If It’s Still Loose, Inspect and Replace the Spindle

If the handle still wiggles after you’ve tightened the set screw, the spindle (the square shaft that links both handles through the latch) likely has worn flats, is undersized, or isn’t seating fully in the lever hub.

For Spindle inspection, keep the door open, support the lever, and remove the handle per the manufacturer’s method (usually an Allen screw or release pin). Pull the spindle and check for rounding, twists, burrs, or uneven wear.

Verify it’s the correct length so it fully engages both hubs. Measure the spindle’s width against the hub’s square bore, and confirm the bore isn’t cracked.

Replace the spindle with a matching size and material, then reassemble and test for smooth rotation.

If play persists, plan Handle replacement.

Re-Seat the Latch and Adjust the Strike Plate

When the lever feels tight but the door still rattles or won’t latch cleanly, re-seat the latch and correct the strike alignment to remove binding and slack. Open the door, keep fingers clear of the latch edge, and support the handle so it can’t drop.

Remove the two latch-face screws, pull the latch straight out, and inspect for bent parts or debris. Reinsert it fully, keeping the bevel toward the strike, then tighten screws evenly to prevent twist—this is basic Door latch adjustment.

Next, close the door slowly and watch where the bolt hits. Loosen strike screws, shift the plate to center the bolt in the opening, and retighten firmly. If the jamb’s painted, score edges before shifting to avoid splintering during Strike plate alignment.

Test the Fix and Stop the Handle Loosening Again

Cycle the handle and latch several times with the door open, then closed. Confirm smooth return and full latch engagement without binding.

Recheck every mounting and set screw with the correct driver and snug them evenly—don’t overtighten and strip threads.

If the screws have a history of backing out, apply a small amount of medium-strength threadlocker to clean threads. Reassemble, and let it cure before heavy use.

Verify Handle Operation

After you’ve tightened the hardware and re-seated the handle, verify the mechanism operates smoothly before you consider the job finished. With the door open, cycle the lever or knob 10–15 times. You should feel consistent spring return with no grinding, binding, or lateral wobble. Keep fingers clear of the latch edge to prevent pinch injuries.

Next, close the door and test again: operate the handle, confirm the latch retracts fully, then release and ensure it extends completely. Check that the strike engagement feels clean and that you don’t need extra force.

Compare performance to the handle design (lever vs. knob) and account for door material; softer wood or hollow-core skins can flex and mimic looseness. If operation stays smooth under light push/pull loads, you’re done.

Check Screw Tightness

Even if the handle now feels solid, confirm the screws hold torque under real use so it doesn’t work loose again. With the door open, cycle the lever 20–30 times, then recheck each visible fastener. Use the correct driver size to prevent cam-out; keep your other hand clear of the latch edge to avoid pinches.

Tighten set screws first, then through-bolts, alternating sides to seat the rose evenly. Stop when resistance increases sharply; over-torquing can strip threads or crack trim.

Close the door and repeat the cycle while applying normal force where your hand naturally lands, checking door handle ergonomics. Finally, sight the handle and escutcheon for parallel alignment; a square, flush fit supports aesthetic improvements and reduces wobble.

Apply Threadlocker Preventatively

Once you’ve confirmed the screws stay tight under repeated use, apply a medium-strength threadlocker (e.g., blue) to the fasteners most likely to back out—typically the set screws and through-bolts—so vibration and daily lever force can’t walk them loose.

Remove one fastener at a time to keep alignment. Degrease threads with isopropyl alcohol, then add a small drop to the male threads only; wipe squeeze-out immediately to protect Door handle aesthetics. Reinstall and torque snugly with the correct driver to avoid stripping.

Verify Material compatibility: use products rated for plated steel, stainless, and brass, and avoid high-strength (red) on small screws.

Let it cure per label, typically 12–24 hours, before heavy use. Recheck once after curing.

Conclusion

You’ve now tightened the rosette screws, secured the set screw, checked the spindle, and verified latch alignment—without swapping the whole lock. That matters: loose hardware is a leading cause of in-home injuries, and door-related accidents send roughly 300,000 people to U.S. emergency departments each year. Before you walk away, cycle the handle 20–30 times, confirm smooth latch throw, and recheck screw torque. Add threadlocker and tighten annually to prevent repeat loosening.…

enhance living space ambiance
Home Upgrades & Renovations

How to Upgrade a Living Room With Better Lighting, Flooring and Storage

Start by mapping your layout and traffic flow, keeping 30–36 inches clear, then edit surface clutter and assign everything a home. Upgrade fast with a larger rug, baskets, and re-floated seating, then layer lighting: a scaled overhead fixture, dimmable table or floor lamps for task zones, and picture lights or LED strips for accent. Choose warm, high-CRI LEDs (2700–3000K) and durable wide-plank LVP or engineered wood with acoustic underlayment. Keep going for smarter built-ins and styling.

Key Takeaways

  • Measure the layout, keep 30–36 inches for circulation, and reposition seating around a properly sized rug to improve flow.
  • Start with quick wins: declutter surfaces, add baskets or trays, and introduce closed storage pieces to reduce visual noise.
  • Build layered lighting: ambient overhead, task lamps for reading zones, and accent picture or shelf lights for depth.
  • Use warm, high-CRI LEDs (2700–3000K, CRI 90+) on dimmers to shift from bright daytime light to cozy evening mood.
  • Upgrade flooring with durable wide-plank engineered wood or LVP, add acoustic underlayment, and hide cords with paintable wall channels.

Assess Your Living Room: Layout, Paths, Clutter

living room layout and clutter assessment

Before you buy anything new, take a clear-eyed look at how your living room actually works: map the layout, trace the natural walking paths from entry to seating to adjacent rooms, and note where you’re forced to sidestep furniture or funnel through tight gaps.

Then measure: sofa depth, rug size, clearance behind chairs, and sightlines to windows and the TV.

Sketch alternative furniture arrangements that keep 30–36 inches for circulation and anchor seating on a rug’s front third.

Audit clutter by surface: coffee table, media console, sideboards, and the “drop zone” near the door; anything without a home goes on a list.

Finally, evaluate color schemes under daytime and lamp light—warm whites, muted earths, and layered neutrals read current and calm.

Decide What to Upgrade First (Fast vs. Big Wins)

Start with fast-impact swaps that instantly sharpen the room—layer in updated lighting, crisp textiles, and a tighter color palette.

Then map your big wins around the pieces that define the look and function, like the sofa, area rug scale, and built-ins.

You’ll get a quick style lift now while budgeting and timing the high-value upgrades that make the space feel truly new.

Prioritize Fast Impact Changes

If you want your living room to feel upgraded fast, prioritize the changes that instantly shift what you see and how the space functions—then save the messy, budget-heavy moves for later.

Start with lighting swaps: add a warm-dim LED floor lamp, a plug-in picture light, or an uplight behind a plant to layer glow and erase flat shadows.

Refresh your color schemes with a tight palette—two neutrals plus one accent—through pillows, a throw, and art.

Then redo your furniture arrangement: float the sofa, anchor it with a properly sized rug, and pull chairs into a conversation zone.

Finish with quick storage wins: matching baskets, a tray on the ottoman, and one closed cabinet to hide chargers, remotes, and mail.

Plan High-Value Major Upgrades

Once you’ve nailed the quick visual fixes, map out the major upgrades that actually change how your living room performs—then sequence them by payoff.

Start with lighting infrastructure: add layered circuits, dimmers, and ceiling junctions so future pendants and sconces feel intentional.

Next, tackle flooring if it’s worn or noisy; wide-plank engineered wood or luxe vinyl in warm oak tones reads current and boosts comfort underfoot.

Then build storage: a media wall with closed bases and open shelves hides clutter while showcasing Decorative accents.

If you need speed, swap a dated fixture, add a large rug, and refine Color schemes with paint and textiles.

If you want big wins, invest in electrical, floors, and custom built-ins.

Budget these first, then style last.

Build Layered Lighting: Overhead, Task, Accent

Start with ambient overhead lighting that sets the room’s baseline—think a sculptural flush mount or a slim chandelier that matches your ceiling height and scale.

Then add focused task lighting where you actually live: an adjustable reading lamp by the sofa or a shaded floor lamp near a chair to control glare.

Finish with accent layers—picture lights, plug-in sconces, or a warm LED strip on shelves—to add depth, highlight texture, and make the space feel intentionally designed.

Choose Ambient Overhead Fixtures

Because overhead lighting sets the baseline mood for everything else in the room, choose an ambient fixture that delivers even, comfortable illumination without flattening the space. Prioritize diffused output: opal glass, fabric drums, or shaded LED discs soften glare and create an ambient glow across seating and circulation zones.

Scale matters—aim for a diameter that visually anchors the room (often 18–30 inches), and hang it so it clears sightlines while still feeling intentional.

Pick warm-dim LEDs (around 2700K) and put the circuit on a dimmer so you can shift from daytime clarity to evening coziness.

Explore fixture styles that suit your architecture: slim flush-mounts for low ceilings, sculptural pendants for height, or a modern chandelier to add rhythm without visual clutter.

Add Focused Task Lighting

Where do you actually read, work, scroll, or puzzle in your living room? Map those micro-zones, then add task lighting that targets them without flooding the whole space.

A slim floor lamp with an adjustable arm can tuck beside a sofa and aim light directly at pages. For a desk or console, choose a compact LED table lamp with a pivoting head so you can dial in focused illumination.

Look for warm, high-CRI bulbs (2700–3000K) so skin tones and textiles stay flattering, not gray. Add dimmers or touch controls to fine-tune brightness for daytime versus evening.

Keep finishes coordinated—matte black, aged brass, or soft nickel—to match your hardware and feel intentional.

Layer Accent Light Sources

Once your task lighting hits the spots you actually use, bring in accent sources to add depth and mood without bumping up overall brightness. Start with a pair of dimmable plug-in sconces to frame the sofa, or tuck an LED strip behind a media console for an ambient glow that feels architectural, not glaring.

Use accent spotlighting to guide the eye: aim a small, adjustable picture light at art, or place a discreet uplight in a tall planter to wash textured walls. Keep color temperature consistent—2700K to 3000K reads warm and modern—and control everything with smart dimmers or scene presets.

Vary heights and beam angles so shadows look intentional, and choose finishes that echo hardware: aged brass, matte black, or warm nickel.

Pick Fixtures and Bulbs (Size, Lumens, Warmth)

While your furniture sets the mood, your lighting seals it—so pick fixtures that scale to the room and bulbs that match how you actually live in it.

For fixture selection, anchor the space with a statement pendant or chandelier that’s roughly one-third the coffee-table width, then add slimmer floor and table lamps to keep sightlines airy and current.

Target 1,500–3,000 total lumens for a typical living room, then put everything on dimmers so you can shift from bright cleaning light to evening glow.

Choose bulb warmth intentionally: 2700K reads cozy and flattering, 3000K feels crisp but still residential, and anything cooler can look office-like.

Keep CRI 90+ for richer textiles, art, and skin tones throughout.

Make Lighting Look Built-In for Less

You’ve nailed fixture scale and bulb specs—now make the whole setup feel like it was planned with the house, not plugged in after the fact. Start by hiding cords: run lamp wire in paintable cord channel, then match it to your wall color. Swap plastic shades for linen or opal glass to mimic Built in lighting.

Add plug-in sconces, but mount them on backplates, center them to art, and hardwire later if you want. Use dimmer switches everywhere—plug-in dimmers for floor lamps, smart bulbs for table lamps—so light layers read intentional.

Upgrade with an oversized ceiling medallion, a clean canopy cover, and matching switch plates. These cost-effective upgrades give you a custom-looking glow without opening walls. Aim for warm, even ambience throughout.

Choose Living Room Flooring: Cozy, Tough, Quiet

durable quiet stylish flooring

If your living room needs to feel softer underfoot without sacrificing durability, flooring does most of the heavy lifting. Choose wide-plank engineered wood for warmth and stability, or luxury vinyl plank when you need scratch resistance and easy cleaning.

For quiet, prioritize cork, padded underlayment, or dense area rugs layered over hard surfaces to dampen footsteps and TV echo.

Match finishes to your color palettes: cool oak or light maple keeps a Scandinavian scheme airy, while walnut or smoked tones sharpen moody, saturated rooms.

Use furniture placement to protect traffic lanes—float seating on a rug that’s large enough for front legs, and leave a consistent border to frame the space.

Opt for low-sheen finishes and textured grains; they hide wear and feel current.

Install New Flooring Without Full Demo

Because a full tear-out can blow up your timeline (and your budget), you can often upgrade living room flooring by installing a floating system right over what’s there—think click-lock LVP, engineered wood, or laminate—so long as the surface is flat, dry, and firmly bonded.

Start by pulling base shoe, then skim-coat low spots and spot-sand ridges; even a 1/8-inch hump will telegraph in raking light. Add a thin acoustic underlayment for a quieter, softer feel, especially in open-plan homes.

Favor wide-plank, matte finishes and warm, natural tones that pair with today’s layered textiles.

Choose eco-friendly materials: low-VOC planks, FSC-certified cores, or recycled-content LVP.

Finally, integrate smart home comfort with radiant-heat-compatible flooring and discreet floor sensors.

Add Storage That Hides Mess and Shows Style

Fresh flooring sets the tone, but smart storage keeps the room looking intentional day to day. Start with concealed storage that earns its footprint: a lift-top coffee table for remotes and throws, an ottoman with a tray top, or a low credenza that hides games and charging clutter. Choose pieces with clean lines, warm wood, or matte fronts so they read like furniture, not utility.

Balance it with decorative shelving that feels curated, not crowded. Float shelves in matching finishes, then style in tight groupings—books stacked horizontally, a ceramic vessel, and one framed print. Mix closed and open zones so your eye lands on texture, not mess.

Add baskets in a consistent weave to soften corners and keep categories tidy.

Conclusion

Step back and you’ll see your living room’s upgrade path clearly. Start with what pays off fastest: layered lighting that mixes a dimmable overhead, focused task lamps, and subtle accent glow to highlight art and texture. Choose flooring that matches your lifestyle—quiet underfoot, durable, and warm-toned for today’s relaxed, modern look. Finish with storage that disappears clutter behind clean fronts and styled open shelves. Put these moves together, and you’ll hit the ground running.…

perennials evergreens structure
Garden & Outdoor

Garden Border Ideas: Mixing Perennials, Evergreens and Structural Plants

Start by mapping sun/shade and testing soil drainage, pH, and fertility, then measure your border for access and scale. Choose a clear style and a tight colour palette. Anchor the design with long-lived evergreens in layered tiers, spacing them for mature width. Add structural silhouettes (globes, columns, fans) to mark corners and curves. Layer perennials in 2–3 height bands and repeat key plants every 1.5–3 m for rhythm and season-long bloom. Next, you’ll see how to fine-tune combinations and winter structure.

Key Takeaways

  • Assess sun, shade, and soil drainage first, then plan border depth, access, and sightlines to match plant choices and layout.
  • Build a backbone with long-lived evergreens in layered tiers, spaced for mature size and varied textures to prevent congestion.
  • Add structural plants with strong silhouettes to anchor corners and curves, creating rhythm through repeated forms and intentional pruning.
  • Layer perennials in 2–3 height tiers, using repeated drifts with staggered bloom times for continuous color and minimal bare soil.
  • Design for winter by keeping evergreen volume, seed heads, and woody stems visible, supported by clean edging, mulching, and selective staking.

Assess Sun, Shade, Soil, and Border Size

evaluate site conditions thoroughly

Before you choose plants or edging, evaluate the site conditions that will control how your border performs: map daily sun and shade patterns, identify soil texture and drainage, and confirm pH and fertility with a simple test.

Record hours of direct light at key points; buildings and trees shift exposure seasonally, so note winter and summer differences.

Check Soil drainage by digging a 30 cm hole, filling it twice, and timing infiltration; slow percolation flags compaction or a perched water table.

Assess structure with a hand-texture test and look for rooting depth limits.

Measure border length, depth, and access routes so you can stage plants, tools, and irrigation.

Finally, list microclimates and required shade tolerance zones so selections won’t fail under canopy drip or reflected heat.

Choose a Garden Border Style and Colour Palette

Next, you’ll define your garden border style—formal and geometric, relaxed and cottage-like, or modern and minimal—to set plant structure and edging requirements.

Then you’ll select a harmonious colour palette by choosing a dominant hue, 1–2 supporting colours, and a consistent foliage tone to control contrast and seasonal continuity.

With these parameters fixed, you can specify plant mixes that meet your site conditions while delivering a cohesive visual outcome.

Define Border Style

How do you want your border to read from the house and along the path—formal and architectural, or loose and naturalistic? Start by mapping sightlines and circulation: the style must support how you move and where you pause.

For a formal scheme, you’ll use repeated forms, clipped evergreens, and strong verticals, backed by crisp garden edge design (steel, brick, or cut turf) to hold geometry.

For a naturalistic scheme, you’ll mass perennials in drifts, soften transitions, and let structural plants punctuate rather than dominate.

Audit constraints next: boundary length, sun/shade bands, and viewing distance. Then choose Border style variations by setting a rhythm—modules, repeated anchor plants, and predictable height steps from front to back.

Select Harmonious Color Palette

Although your border style sets the structure, your colour palette controls legibility from key viewpoints and determines whether the planting reads as calm, energetic, or cohesive. Start by evaluating backdrop and light: cool hues recede in shade, warm hues advance in sun. Limit your core scheme to two to three dominant colours plus one accent to maintain Color harmony across seasons.

Use plant pairing to control transitions. Pair repeatable evergreen forms with perennials in adjacent tones, then punctuate with structural plants in high-contrast colours at focal nodes. Manage value (light/dark) as carefully as hue; strong value contrast improves visibility from doors, paths, and windows.

Finally, map bloom sequence so the palette doesn’t swing abruptly between months—swap in foliage colour, berries, and stems to keep continuity and reduce maintenance decisions.

Use Evergreens as Your Garden Border Backbone

Start by selecting evergreen anchor plants that match your border’s mature height, spread, and light conditions, so you lock in year-round structure.

Then layer additional evergreens in staggered tiers—tall to low and coarse to fine texture—to build depth and controlled visual rhythm.

You’ll get a stable backbone that keeps the border readable in every season while supporting seasonal perennials and annual accents.

Choose Evergreen Anchor Plants

When you build your border around evergreen anchor plants, you lock in year-round structure and reduce the “empty season” problem in winter.

Start with Evergreen selection based on mature size, growth rate, and site limits (light, soil texture, drainage, and wind). Choose one or two long-lived, low-maintenance forms—compact conifers, clipped box, yew, or holly—so you don’t overcomplicate pruning cycles or create crowding later.

Apply Border planting techniques that prioritize stability: set anchors first, align them with key sightlines, and space for full canopy width plus maintenance access.

Plant slightly high in heavy soil, firm the rootball, and mulch without burying stems.

Add irrigation for the first two seasons to secure establishment and color retention.

Layer Evergreens For Depth

Evergreen anchor plants give your border fixed points, but you’ll get a fuller, more professional look by building a layered evergreen backbone between and around those anchors. Start with mid-height shrubs (60–120 cm) to stitch gaps, then add low mounding evergreens (20–45 cm) at the front edge to soften lines and suppress weeds. Use upright forms sparingly to create rhythm and guide sightlines.

For reliable Evergreen layering, alternate leaf texture and tone: fine conifers behind broadleaf evergreens, dark greens beside variegates. Maintain clear spacing at maturity to prevent congestion and disease.

With Structural plant placement, keep the tallest masses on corners or behind focal perennials, then step down toward paths for clean access, consistent maintenance, and year-round depth.

Add Structural Plants to Shape the Garden Border

Although flowering perennials bring seasonal color, structural plants set the border’s framework so it reads as intentional year-round. Use Structural plant placement to establish fixed reference points: repeat clipped evergreens, architectural grasses, or upright yuccas at measured intervals to create rhythm and guide sightlines. Anchor corners, gates, and path junctions with one dominant form, then echo it to prevent visual drift.

Apply Border shaping techniques by choosing strong silhouettes—globes, columns, fans—and aligning them to the border edge you want to emphasize. Keep spacing proportional to mature width so forms don’t merge and lose definition.

If you’re working along a curve, stagger structural plants to reinforce the arc rather than fighting it. Maintain crisp outlines with selective pruning and consistent mulched negative space between anchors.

Layer Garden Border Heights From Front to Back

Structural anchors give your border fixed reference points; height layering then turns those points into a readable planting plan from every viewing angle. Set your tallest plants at the back (or center in island beds) to screen fences and frame focal elements, then step down in 2–3 clear tiers to the path edge.

Use a 60/30/10 height ratio: 60% mid-layer for seasonal bulk, 30% low layer for edging and access, 10% tall layer for vertical emphasis. Keep front plants under 30 cm to prevent sightline blockage; place mid-layer at 40–80 cm; reserve 100–180 cm for back layers.

Plan Wildflower combinations in the mid tier for texture, and specify Butterfly attractants near the viewing edge for monitoring and maintenance access.

Repeat Key Plants for a Cohesive Garden Border

When you repeat a small set of “key” plants at regular intervals, you create visual rhythm that ties the entire border together and makes the layered heights read as one intentional design.

Choose 2–4 anchor species: one structural evergreen, one upright accent, and one mid-mass filler, then place them every 1.5–3 m depending on mature spread.

Use consistent plant pairing each time (for example, the same grass beside the same shrub) so the eye recognizes patterns quickly.

Maintain border symmetry by mirroring placements across gates, paths, or focal points, even if you vary quantities for site constraints.

Keep spacing uniform, align repeats with utilities and irrigation zones, and cluster in odd numbers for legibility.

You’ll get cohesion without over-planting.

Pick Perennials for Season-Long Garden Border Colour

season long colorful perennial border

To keep a garden border in colour from spring through frost, you’ll need perennials that stagger their bloom times and hold strong foliage between flushes. Start with early performers like hellebores and pulmonaria, then bridge gaps with hardy geraniums, salvias, and catmint. Finish strong with echinacea, rudbeckia, asters, and sedums for late-season saturation.

Use Seasonal flower combinations by pairing complementary hues and repeating a few anchor colours every 3–5 feet. Apply border planting techniques: place taller bloomers mid-to-back, mass plants in odd-number drifts, and interlock clump-formers to reduce bare soil.

Prioritize cultivars with long bloom or reliable rebloom, and deadhead strategically to extend peak colour.

Keep Your Garden Border Strong in Winter

How do you keep a border looking intentional after the last blooms fade? You build a winter framework: evergreen volume, structural stems, and clean edging that reads as deliberate design even under Winter snow. Anchor your plan with compact conifers, clipped box alternatives, or evergreen grasses set at repeating intervals to maintain rhythm.

Next, specify frost resistant plants that hold form: hellebores, bergenia, carex, and sedum heads you leave standing. Add woody structure with dogwood, viburnum, or hydrangea for winter silhouettes.

Manage performance: cut back only what collapses, tie flopping stems, and mulch to stabilize root zones. Finally, confirm sightlines from key windows and paths so winter texture stays visible and balanced.

Conclusion

Now you’ve assessed light, soil, and scale, and you’ve locked in a palette that won’t fight itself. You’ve built your border on evergreens, added structural anchors, layered heights, and repeated key plants for visual continuity. Perennials then deliver controlled, season-long colour—without gaps. But don’t stop yet. The final test comes when temperatures drop: if your framework holds, your border still reads as designed. Get winter right, and everything clicks.…

bathroom door lock replacement
General Property Repairs

The Easiest Way to Replace a Turn and Release Lock on a Bathroom Door

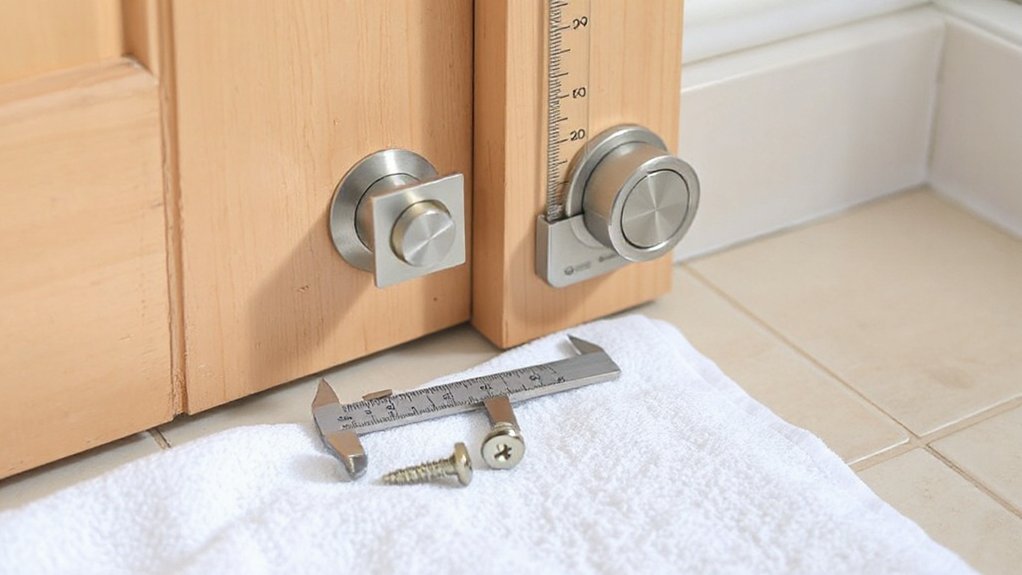
Start by measuring your existing lock’s backset, door thickness, spindle size (often 5 mm), and fixing type (through-bolts, surface screws, or a grub screw) so you can buy an exact match. Wedge the door, tape around the roses, pop off covers, and remove hidden screws while supporting the thumbturn. Pull out the spindle and latch, noting bevel orientation. Fit the new latch bevel toward the strike, tighten screws evenly, then test and adjust the strike if needed. Keep going to pick up quick fixes for sticking and wobble.

Key Takeaways

  • Measure spindle size, door thickness, backset, and fixing centres to buy a like-for-like turn and release set.
  • Photograph both sides and the door edge to match rosette size, faceplate shape, and screw positions.
  • Remove cover roses or grub screws, undo fixings, then slide out thumbturn, spindle, and the latch mechanism.
  • Fit the new latch with the bevel facing the strike, then reinstall spindle and roses, tightening screws evenly.
  • Test closing and turning; fix sticking or misalignment by adjusting the strike plate and using dry graphite lubricant.

Identify Your Turn-and-Release (Measurements + Fixings)

measure inspect record match

Before you buy anything, identify exactly what you’ve got by measuring the existing turn-and-release and noting how it’s fixed to the door. Keep the door open and latch engaged so you don’t trap yourself.

Measure the spindle size (typically 5 mm) and the door thickness. Record the backset and centre-to-centre spacing if it’s a combined handle/lock set.

Check whether it’s a mortice bathroom lock, a tubular latch with a privacy bolt, or a standalone thumbturn and emergency release.

Inspect the faceplate shape and screw centres, and confirm whether fixings are through-bolts or surface screws.

Photograph both sides and the edge.

Match these details to ensure lock security, then choose finishes from decorative options without changing dimensions or handing.

Gather Tools and Parts (No Drilling Needed)

Next, gather everything you’ll need so you can swap the turn-and-release in one controlled pass without drilling: a matching replacement set (same spindle size, screw centres, and door thickness range), a No.2 Pozi/Phillips screwdriver, a small flat screwdriver or pick for cover roses, a 3–5 mm Allen key if your thumbturn uses grub screws, a tape measure, a parts tray, and a door wedge.

Wear eye protection, keep the door propped open, and confirm the new screws match the existing holes so you don’t strip threads or force fixings.

Lay the new door hardware out in order: thumbturn, release, spindle, roses, screws.

Measure spindle length and compare to door thickness so the lock mechanism clamps without binding.

Check screw heads match your driver to prevent cam-out.

Keep a magnetic tray for tiny fixings, and have a torch ready to inspect alignment and wear.

Remove the Old Turn-and-Release (Hidden Screws, Grub Screws)

Once you’ve confirmed the door is wedged open and stable, start by finding how the roses (cover plates) are retained—most turn-and-release sets hide the fixings behind a snap-on cover or a tiny grub screw.

Protect decorative finishes with masking tape, then slide a thin plastic pry tool under the rose and pop it evenly, or loosen the grub screw with the correct hex key.

Pull the rose back to expose the fixing screws. Support the handle/turn with one hand, then remove screws with a screwdriver and set them aside.

If it’s through-bolted, undo both sides evenly to avoid twisting the spindle. Withdraw the turn, release, and spindle straight out.

Finally, remove the latch faceplate screws and slide the latch out, noting handing and locking mechanisms orientation.

Choose a Replacement Turn and Release Lock That Fits

Before you buy a new turn-and-release lock, measure the backset and the bore diameter so the latch and body seat correctly without forcing the door.

Then verify the spindle type, length, and orientation match your existing mechanism so the thumbturn engages smoothly and the emergency release works reliably.

Finally, check the rosette diameter and fixing points cover the old holes and align with the door thickness so you don’t compromise the door’s strength.

Match Backset And Bore

Although many turn-and-release locks look interchangeable, you need to match the backset and bore sizes so the new lock seats flat and latches reliably.

Start by opening the door and supporting it so it can’t swing while you measure door hardware.

Measure backset: from the door edge to the center of the existing bore, commonly 2-3/8 in. or 2-3/4 in.

Next, measure the cross-bore diameter (the big hole through the face), typically 2-1/8 in., and the edge-bore diameter for the latch, often 1 in.

Verify the door thickness, too, so the latch aligns with the strike.

If any dimension’s off, lock mechanisms can bind, the latch may not fully extend, and the lock can fail under force.

Confirm Spindle And Rosette

Because turn-and-release sets don’t share a universal spindle size or trim footprint, you should confirm the spindle type and rosette dimensions before you buy.

Remove one handle and thumbturn with a screwdriver, then pull the spindle out carefully so you don’t pinch fingers on sharp escutcheon edges. Measure spindle length end-to-end and note the cross-section (square, splined, or D). Check whether it’s fixed to one side or free-floating, since that affects compatibility and emergency-release function.

Next, measure the rosette’s outside diameter and thickness, and inspect the mounting pattern and screw spacing. Compare these to the new set’s rosette design so it fully covers old paint rings and screw holes.

Reassemble loosely to verify smooth rotation and no binding.

Install and Align the New Turn and Release Lock

Once you’ve confirmed the new lock matches the door thickness and backset, slide the latch into the edge bore with the bevel facing the strike plate, then secure it with the supplied screws without overtightening.

Insert the spindle through the latch hub and align both roses against the door faces. Hold the exterior release side steady while you seat the interior turn side, keeping the spindle centered so the lock mechanisms don’t bind.

Start mounting screws by hand, then tighten evenly in alternating turns to keep the trim square and support door security. Verify the turn rotates smoothly and the release slot engages without forcing.

Close the door and confirm the latch fully enters the strike; adjust strike screws only if needed. Recheck all fasteners.

Fix Common Turn-and-Release Problems (Sticking, Wobble, Misalignment)

Before you assume the new lock’s defective, diagnose the symptom so you fix the right cause.

If it sticks, open the door, remove the spindle, and confirm the latch retracts smoothly by hand. Lightly deburr paint or burrs on the strike and latch face, then apply a dry graphite lube—avoid oil that attracts grit.

If you feel wobble, tighten through-bolts evenly, confirm the rose sits flush, and replace stripped screws; don’t overtighten and crack the door.

For misalignment, mark where the latch hits the strike, then shift the strike plate, shim it, or deepen the mortise with a chisel, cutting away from your body.

Re-test the lock mechanism after each repair techniques step.

Conclusion

You’ve walked this little door-keeper’s path like a locksmith in a narrow castle corridor: measure first, match fixings, then loosen hidden or grub screws and lift the old set free. You didn’t drill; you controlled the risks. Now slide the new spindle through, seat both roses, tighten evenly, and test the turn and emergency release. If it sticks or wobbles, realign, re-seat, and re-tighten until the latch moves cleanly.…

stylish and comfortable bathroom upgrades
Home Upgrades & Renovations

Bathroom Renovation Ideas That Add Style and Improve Everyday Comfort

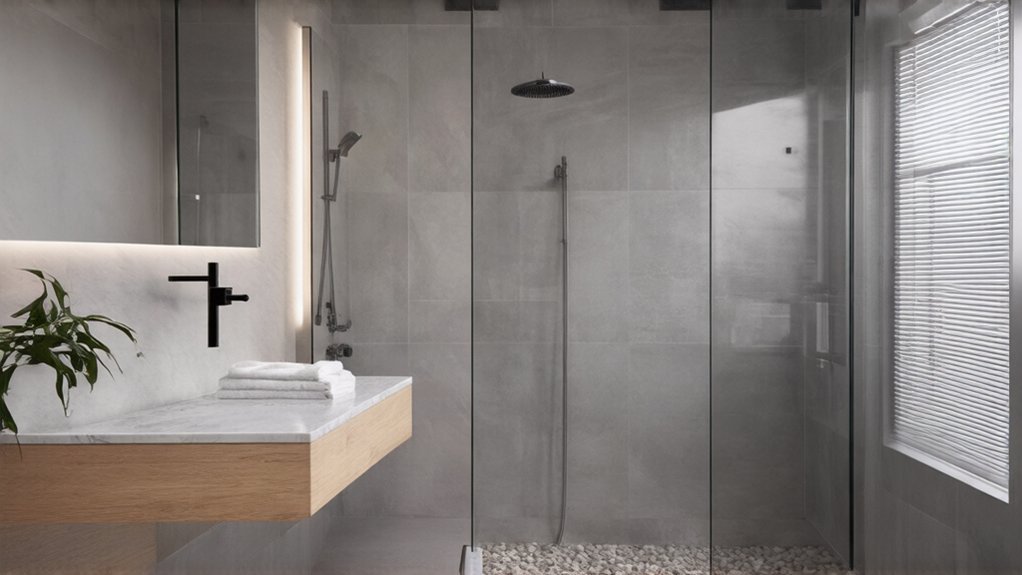
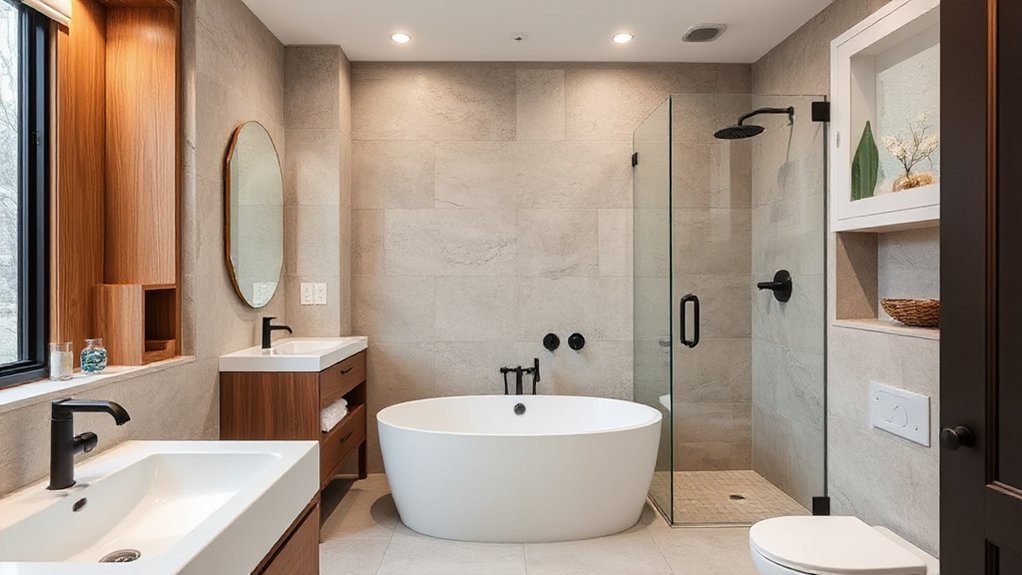
You’ll get more comfort fast by optimizing layout without moving plumbing: map door swings, keep clear pathways, and choose a wall-hung or shallow vanity to open knee space. Upgrade the shower with a thermostatic valve, a 2.0 gpm rain head, and a handheld on a slide bar, then use large-format porcelain tile for easier cleaning. Add vertical and recessed storage, layer high-CRI task plus dimmable ambient lighting, and install a quiet 80–110 CFM fan with a timer for what’s next.

Key Takeaways

  • Optimize layout without rerouting plumbing by mapping clearances and choosing wall-hung or shallow vanities to free floor space.
  • Upgrade the shower with thermostatic controls, a rain head, and a handheld on a slide bar for spa-like comfort.
  • Add vertical and hidden storage using recessed niches, mirrored medicine cabinets, and drawer organizers to reduce clutter in small bathrooms.
  • Layer lighting with high-CRI vanity fixtures, dimmable ambient LEDs, and motion-sensor night lights for comfort and safe navigation.
  • Improve finishes and moisture control with easy-clean large-format tiles, warm sealed wood accents, and a quiet 80–110 CFM exhaust fan.

Bathroom Renovation Layout Fixes Without Moving Plumbing

optimize bathroom layout efficiently

If you want a smarter bathroom layout without the cost and risk of rerouting pipes, you can still make major gains by rebalancing what’s already connected. Start by mapping door swings, clearances, and daily paths from entry to vanity to toilet, then shift fixtures within their current supply and drain reach.

Swap to a wall-hung vanity or a shallower cabinet to open knee and hip room. Replace a hinged door with a pocket or outswing to reclaim floor area. Use mirrored medicine storage and recessed niches between studs for vertical capacity without crowding.

Keep the wet wall intact to avoid a plumbing reroute, but allow small structural adjustments like moving non-load-bearing partitions, resizing openings, and aligning lighting with task zones.

Bathroom Renovation Shower Upgrades for a Spa Feel

Once your layout works hard without moving plumbing, put your upgrade budget into the shower—the one zone where small spec changes deliver the biggest “spa” payoff.

Start with a thermostatic valve and pressure-balancing cartridge so temperature stays locked even when fixtures run.

Add a Rain shower head on a correctly sized arm (8–12 inches) for full-body coverage; specify 2.0 gpm for comfort without waste.

Upgrade to a handheld on a slide bar for targeted rinse and easy cleaning.

Use large-format porcelain on walls to cut grout and improve hygiene.

If your electrical and ventilation can support it, a Steam shower generator with an insulated ceiling, vapor membrane, and dedicated exhaust timer turns daily rinses into recovery sessions.

Finish with a linear drain and slight slope for fast runoff.

Bathroom Renovation Storage Ideas for Small Spaces

In a small bathroom, you’ll reclaim floor space by specifying vertical storage—tall linen towers, wall-mounted cabinets, and recessed niches that use the full wall height.

You can also integrate hidden storage with mirrored medicine cabinets, vanity drawer organizers, and toe-kick pull-outs that keep essentials accessible but out of sight.

These upgrades reduce countertop clutter and improve daily comfort without expanding the room’s footprint.

Vertical Storage Solutions

How do you add serious storage without sacrificing elbow room? Go vertical and keep your floor clear. Install Floating shelves above the toilet or next to the mirror at eye level for daily-use items, then step them upward for backups. Specify moisture-rated materials, sealed edges, and stainless fasteners to prevent swelling and rust.

Add Overhead cabinets high on the wall to store bulk supplies while preserving sightlines; choose shallow depths (5–8 inches) so doors don’t clash with your head or lighting. Use adjustable shelf pins to fit tall bottles, and include soft-close hinges for quieter mornings.

Finish with wall-mounted towel bars or hooks stacked in a column to speed drying and reduce clutter, improving airflow too.

Hidden Storage Features

Where can you tuck away toiletries and backups without adding bulk to a tight bath? Build storage into what you already touch: the mirror, the vanity, and the wall cavity.

Specify a recessed medicine cabinet with Concealed shelving sized for bottles (3–4 in. depth) and add adjustable pins so you don’t waste vertical clearance.

Choose a vanity with toe-kick drawers for cleaning supplies and Hidden compartments behind a tilt-out false front for small items.

If you’re moving plumbing, frame a shallow niche beside the stack to create a service-friendly, code-clear chase with a hinged access panel.

Use soft-close hardware to cut noise, and line compartments with washable mats to control spills and keep daily routines smooth.

Bathroom Lighting Ideas for Task, Mood, and Night

optimal bathroom lighting setup

You’ll get the best daily performance by prioritizing vanity task lighting: place vertical fixtures at eye level on both sides of the mirror (or use a high-CRI, glare-controlled mirror light) to minimize shadows.

Then you’ll round out comfort with balanced ambient lighting that fills the room evenly without hot spots or harsh reflections.

For nights, add low-lumen, warm lighting on a motion sensor—at toe-kick or under-vanity height—so you can navigate safely without fully waking up.

Vanity Task Lighting Essentials

Although ambient fixtures set the overall tone, vanity task lighting does the precision work—shaving clean lines, accurate makeup, and comfortable contact lens handling. Place light at face height to eliminate under-eye shadows: mount vertical sconces 28–36 inches apart, centered on your cheeks, or use an LED bar above the vanity mirror paired with side lights.

Target 500–1,000 lux at the sink with a neutral 3,000–3,500K color temperature and 90+ CRI for true skin tones. Choose diffused lenses to reduce glare, especially with glossy tile.

Put task lighting on a dedicated dimmer so you can fine-tune brightness without losing color accuracy. Keep fixtures rated for damp locations and easy-clean finishes.

Ambient And Night Lighting

After you’ve dialed in vanity task lighting, set the room’s baseline comfort with layered ambient light plus a low-output night option. Use a sealed ceiling fixture or recessed LEDs to deliver even, shadow-free fill, sized for the room and rated for damp locations. Put it on dimmer switches so you can drop levels for baths, glare control, or early mornings without killing visibility.

For night guidance, add LED strips under the vanity toe-kick, along a recessed shelf, or inside a niche. Choose warm-white (2200–2700K) at 1–5 watts, aimed at the floor to protect dark adaptation and reduce stumble risk. Add a motion sensor or timer, keep drivers accessible, and separate night from ambient circuits for maximum comfort.

Warm Bathroom Finishes: Wood Tones, Brass, Earthy Tile

When cool white tile and chrome start to feel clinical, warm finishes bring balance and comfort without sacrificing performance. Choose Wood accents in sealed oak or teak for vanities, open shelves, or a mirror frame; they soften acoustics and feel warmer to the touch. Keep profiles slim to preserve clearance around doors and swings.

Specify brass fixtures in a brushed or PVD-coated finish for faucets, drains, and hardware; they add visual warmth while resisting fingerprints and tarnish. Pair them with earthy tile—clay, sand, or terracotta tones—in matte or lightly textured surfaces for better slip control.

Use larger-format tiles to reduce grout lines and simplify cleaning, or add a warm mosaic band to define zones without shrinking the room.

Bathroom Renovation Ventilation Upgrades to Stop Moisture

Warm wood tones and brass feel best in a bathroom that stays dry, so upgrade ventilation to control humidity at the source. Size airflow to your room: target 1 CFM per sq ft, or use 80–110 CFM for most baths, then vent outdoors with smooth, insulated duct to prevent backdraft and condensation.

Prioritize quiet operation (≤1.5 sones) so you’ll actually run it. Place the grille near the shower, add a timer or humidity sensor, and keep the door undercut for make-up air.

During exhaust fan installation, seal penetrations and slope horizontal duct runs slightly to the exterior. Finish with moisture resistant paint on ceilings and walls to slow vapor absorption and reduce peeling.

Conclusion

You don’t need a full re-plumb to get a smarter bathroom. Keep the layout, then upgrade the shower for spa-grade comfort, add tight-footprint storage, and layer lighting for task, mood, and safe night use. Choose warm wood tones, brass, and earthy tile to soften hard surfaces without sacrificing cleanability. Finally, improve ventilation with a right-sized fan and timer so humidity leaves fast, like a well-tuned exhaust system, protecting finishes and daily comfort.…

modern porcelain patio design
Garden & Outdoor

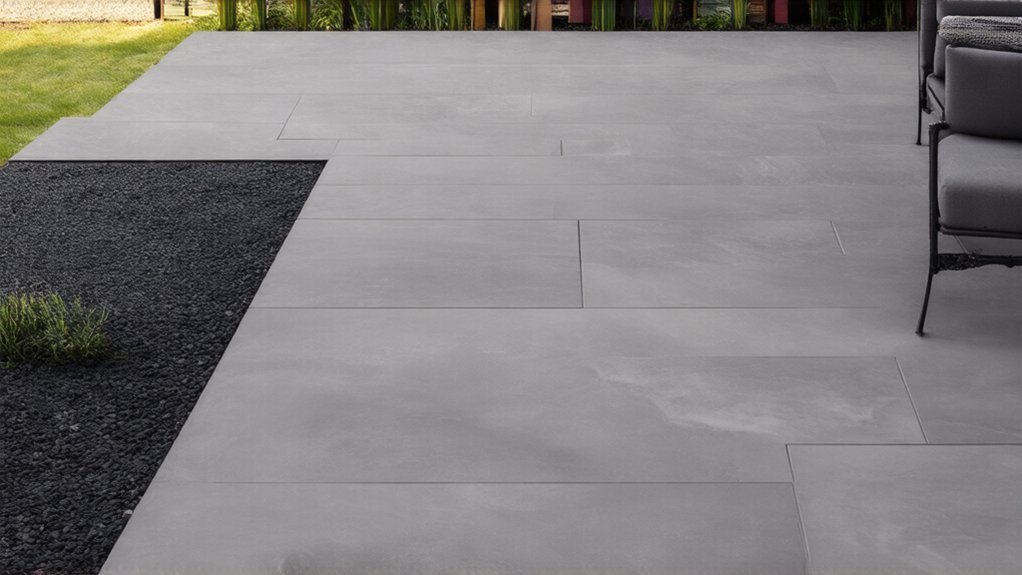
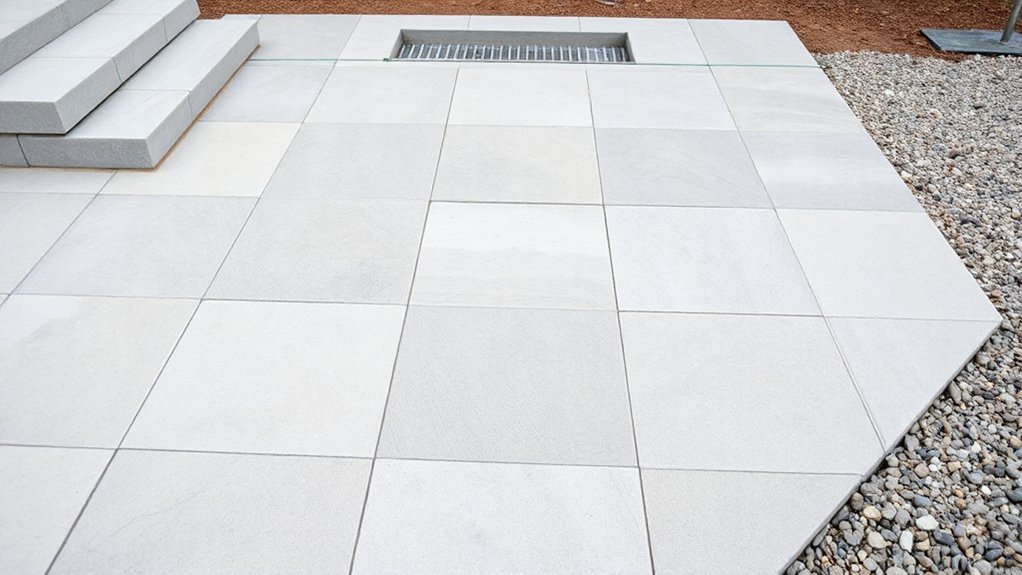
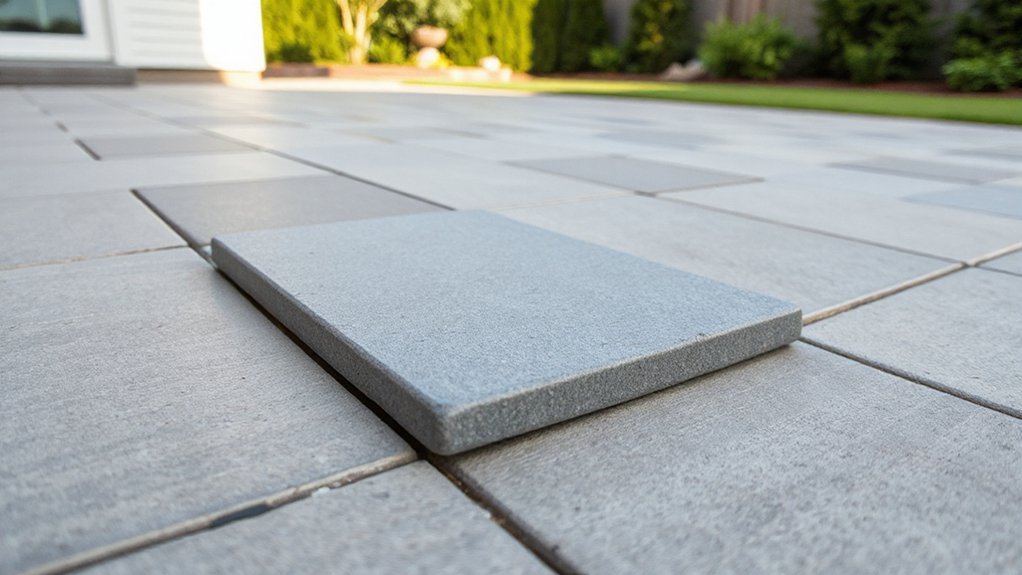
Creating a Modern Patio Space With Porcelain Paving Slabs

Map the patio footprint, snap datum lines, and set a 1:60–1:80 fall so water drains away from the house and stays below the DPC. Choose dense vitrified porcelain with an R11-style grip for wet or shaded zones, and match slab size and colour to your architecture for a crisp, joint-light look. Bed 20mm slabs on full mortar, tap level, and keep joints dead-straight with spacers and a straightedge. Keep going to master edges, steps, and finishing.

Key Takeaways

  • Plan the patio footprint and falls so water drains away from the house, keeping finished levels below the DPC.
  • Dry-lay slabs and snap datum lines to confirm joint lines, cuts, steps, and thresholds before committing to mortar.
  • Choose slab size, thickness, and finish to suit the space, using R11 slip-rated textures for wet or exposed areas.
  • Install on a solid mortar bed, work from a fixed edge, and use spacers and straightedges to keep joints uniform and aligned.
  • Use porcelain-safe grout, clean off haze promptly, and maintain with pH-neutral cleaning and leaf removal for lasting appearance.

Plan Your Porcelain Patio Layout and Drainage

plan drainage and layout

Before you order porcelain paving slabs or set out your first line, map the patio’s footprint and set your falls so water moves away from the house and doesn’t pond on the surface. Use taut stringlines and a laser level to hold a 1:60–1:80 gradient toward a channel drain, gully, or permeable edge. Keep finished levels below the DPC, and allow for slab thickness, adhesive bed, and compacted sub-base.

Dry-lay a few slabs to confirm joint lines, cuts, and any step or threshold interfaces.

Plan garden privacy by aligning the main seating zone away from overlooking windows and by leaving space for screens or planters without blocking drainage runs. Mark lighting options early, conduit routes and uplight pockets, so you don’t chase channels through cured mortar later.

Decide If Porcelain Paving Slabs Suit Your Budget

Next, you’ll want to price up porcelain paving slabs by the m², factoring in thickness, slip rating, and any trims or steps your design needs.

You should also budget for installation and labour—sub-base build-up, mortar or adhesive system, cuts, and jointing compound can shift the total as much as the slabs themselves.

Then weigh long-term value: porcelain’s low water absorption, stain resistance, and minimal maintenance can save you money on sealing, cleaning, and replacements over time.

Upfront Material Costs

A realistic budget starts with the slab price itself, and porcelain usually sits above standard concrete pavers but can compete with premium natural stone on a per‑square‑metre basis. You’ll see prices shift with thickness (often 20mm outdoors), edge rectification, and surface finish—textured, grip-rated options typically cost more than smooth indoor grades.

Factor in batch consistency and calibre, because tighter tolerances reduce visible lippage and waste. Large formats can raise the per-unit cost, but they cut joint lines for cleaner, modern geometry and stronger aesthetic appeal.

Check whether the slab is full-body or colour-through, and confirm stain and UV resistance ratings; these specs support material durability and protect your spend. Order 5–10% extra for cuts and future repairs, matching the same batch code.

Installation And Labor Expenses

Slab cost sets the baseline, but installation and labour often decide whether porcelain paving slabs stay within budget. You’ll pay for precise groundworks: excavation, geotextile, a well-compacted sub-base, and accurate falls for drainage.

Because porcelain is dense and less forgiving, installers often use a full mortar bed or pedestal system, plus primer on the back of each slab to secure adhesion.

Labour rises with tricky access, lots of cuts around steps, drains, and edges, or tight joints that demand careful spacers and clean grouting.

Factor in edge restraints, bonding products, and waste from mitres or pattern layout.

If you’re planning landscape integration, allow time for aligning levels to lawns, thresholds, and planting borders.

Heavy outdoor furniture may also require thicker slabs or extra support, increasing work.

Long-Term Value Savings

Where do porcelain paving slabs start paying you back—after the first winter, or years down the line? You’ll notice savings quickly because dense, vitrified porcelain resists staining, algae, and fading, so you won’t budget for frequent sealing, heavy chemical cleaning, or color restoration.

Its low porosity also boosts seasonal durability: freeze-thaw cycles don’t spall edges, and UV exposure won’t chalk the surface, keeping joints tighter and replacements rarer.

Plan your layout for landscape integration and you’ll reduce future rework. Because slabs stay dimensionally stable, you can align cuts to drains, steps, and thresholds without later lipping that forces relay.

Over time, fewer repairs, fewer cleaning products, and a consistently modern finish help your patio’s total cost trend downward.

Pick Porcelain Slab Size, Thickness, and Grip

choose slabs for durability

Because porcelain paving performs best when it’s matched to how you’ll actually use the patio, choose slab size, thickness, and slip rating as a set rather than in isolation. Start with your layout: larger formats reduce joints and look cleaner, while smaller slabs suit tight corners and make falls align with existing thresholds and drainage lines.

For Porcelain slab durability, match thickness to load and base build—around 20mm for pedestrian patios on a solid bed, thicker solutions where point loads, planters, or furniture legs concentrate pressure.

Then lock in grip: specify an outdoor slip rating (R11-style textures) for shaded, wet, or poolside zones, and keep smoother profiles for covered areas. You’ll still have broad aesthetic options without compromising performance.

Choose Porcelain Paving Slab Colours and Finishes

Now you’ll choose porcelain paving slab colours and finishes that suit your home’s exterior and the patio’s light levels. Coordinate your palette across slabs, grout, edging, and outdoor furniture so the space reads intentional rather than patchy.

Then match surface finish and texture—matt, structured, or stone-effect—to your design style and the underfoot feel you want.

Coordinating Colour Palettes

Even if your patio layout is nailed down, the colour palette you choose will determine whether the space reads crisp and contemporary or flat and mismatched. Start with one anchor tone that suits your architecture—cool greys for sharp lines, warm beiges for softer brickwork—then repeat it across the main field to keep the plane calm.

Lock in color coordination by sampling slabs against wall paint, fencing, and door frames in the same daylight your patio gets.

If you’re using two slab colours, set a clear hierarchy: 80/20 works well for borders or zoning around dining areas.

For pattern mixing, keep joint lines aligned and limit contrasts so the layout reads intentional, not busy.

Match grout colour to the dominant slab to avoid visual clutter.

Surface Finishes And Texture

Once you’ve settled on a palette, the surface finish and texture of your porcelain paving slabs will decide how the patio feels underfoot and how it performs in real weather.

For exposed sites, pick a structured, anti-slip finish (R11 or higher) so rain, algae, and pool splash don’t turn it slick.

On sheltered terraces, a satin or soft-lapped finish gives a cleaner look while staying practical if you keep joints tight and drains clear.

Use Textural contrast to zone the layout: a subtly ribbed dining area, smoother circulation routes, and a grip-focused threshold at doors.

Check Surface durability ratings and edge rectification, then align grout colour to hide staining and keep the surface reading crisp.

Build the Right Mortar Base for Porcelain Slabs

Because porcelain paving slabs need full, consistent support to stay level and crack-free, you’ll want to build a mortar base that’s flat, well-bonded, and designed for low-absorption tile. Start with substrate preparation: compact the sub-base, check falls, and lock in edge restraints so nothing creeps.

Screed a concrete or well-compacted bedding layer to a uniform plane, then remove dust and standing water before you bond.

For Mortar mixing, use a polymer-modified, frost-resistant mortar and measure water accurately; you’re aiming for a creamy, workable bed that won’t slump.

Spread a full mortar bed (not dabs), key it into the base with your trowel, and keep thickness consistent to avoid hollow spots.

Protect fresh mortar from sun, wind, and rain while it cures.

Lay Porcelain Paving Slabs With Tight, Straight Joints

maintain precise joint alignment

After you’ve screeded a true, fully supported mortar bed, the next job is to control your joint lines so the porcelain reads crisp and stays forgiving under foot. Snap datum lines, dry-lay a few slabs, and commit to a consistent module before you spread more mortar.

Use spacers sized for your grout system and check joint alignment every slab with a straightedge, not your eye. Tap slabs down with a rubber mallet and lift-and-add mortar where rocking appears.

Keep faces clean as you go; any grit in the joints will throw your gauge. Work from a fixed edge and continually re-square off your lines to maintain aesthetic consistency across the field. Adjust early, not after three rows.

Detail Edges, Steps, and Clean Porcelain Outdoors

While your field slabs set the visual rhythm, your edges, steps, and cleaning routine determine whether porcelain looks like a finished outdoor surface or a cut-up tile job. Handle edge detailing early: plan full slabs to boundaries, then use bullnose, mitred returns, or aluminium trims so cut faces aren’t exposed.

On steps, keep riser heights consistent, use a solid bedding, and add a projecting nosing or grip strip to manage splash and slip. Set falls away from thresholds and cap exposed upstands to stop water tracking.

Choose grout and jointing that suits porcelain’s low porosity, then rinse before haze sets. For maintenance, pH-neutral cleaner, stiff brush, and regular leaf removal prevent staining.

Pair crisp edges with outdoor lighting to highlight lines at night.

Conclusion

When you plan your layout and drainage, you set your porcelain patio up to perform. You’ve checked the budget, chosen the right slab size, thickness, and slip rating, and matched colour and finish to the site. With a full mortar bed and primed backs, you’ll get solid contact and fewer hollow spots. Keep joints tight and lines true, and treat edges and steps like trim—crisp as a cut tile, not an afterthought.…

replace broken window safely
General Property Repairs

How to Replace a Broken Glass Window Pane Safely and Securely

Put on cut-resistant gloves, safety glasses, and long sleeves, then clear the area, lay drop cloths, and use a HEPA vacuum to control shards and dust. Measure the opening in three spots each way, use the smallest numbers, and subtract 1/8 inch; match the original glass thickness and required safety rating. Tape and remove broken pieces, soften and scrape old putty, and pull glazing points. Bed the new pane, add points every 6–8 inches, tool fresh glazing, cure, and water-test for leaks. Next, you’ll see tips for tricky sashes and safer cleanup.

Key Takeaways

  • Wear cut-resistant gloves, safety glasses, and long sleeves; isolate the area with drop cloths and keep pets and bystanders away.
  • Measure the opening in multiple spots, use the smallest dimensions, and subtract 1/8 inch for safe glass clearance.
  • Choose the correct glass type and thickness; use tempered or laminated safety glass where codes or exposure risks require it.
  • Remove shards and old glazing safely: tape cracks, pull pieces inward, HEPA-vacuum debris, and scrape softened putty and glazing points.
  • Dry-fit and install the pane into fresh glazing compound, add glazing points every 6–8 inches, tool a sealed bead, then test for rattles and leaks.

Protect Yourself and Prep the Work Area

protect prepare contain illuminate

Before you touch the sash or remove any trim, suit up and control the area so you don’t get cut or spread glass shards. Put on Personal protective equipment: cut-resistant gloves, safety glasses, long sleeves, and sturdy shoes. If there’s lead paint risk, add a respirator and disposable coveralls. Keep bystanders and pets out, and post a warning.

Set up workspace organization next. Lay a drop cloth to catch fragments, then place a rigid board underneath to prevent punctures.

Position a sealed container for shards and a second bag for contaminated debris. Illuminate the pane with a work light so you can see hairline cracks. Vacuum loose particles with a HEPA unit, then mist and wipe surrounding surfaces to lock down dust.

Gather Tools and Choose the Right Glass

Once the area’s secure, gather your tools and confirm the replacement glass specs so you don’t force an ill-fitting pane into the sash. Set out cut-resistant gloves, safety glasses, a putty knife, glazing chisel, small pry bar, wire brush, glass pliers, and a vacuum with a HEPA filter. Keep a drop cloth and a rigid disposal container for shards.

Choose glass rated for the window’s location: tempered for doors, sidelites, or low sills; laminated for security or storm exposure. Match edge finish requirements and verify compatibility with existing glazing compound or gasket.

Inspect the sash for rot, corrosion, or loosened joints; plan Frame reinforcement before re-glazing. Confirm glass calibration marks, coatings orientation, and any insulated-unit labels before you proceed.

Measure the Window Opening and Glass Thickness

After you’ve removed loose shards and cleared the sash, measure the opening in three places—top, middle, and bottom for width, then left, center, and right for height—using a steel tape, and record the smallest values so the new pane won’t bind when the frame moves.

Subtract 1/8 inch from both the smallest width and height for safe clearance; note dimensions as W × H for accurate Glass measurement.

Next, determine glass thickness: measure an intact pane from the same window with calipers, or check the rabbet depth and subtract space needed for glazing.

Match the original when possible; too thin rattles, too thick stresses the frame.

For Thickness selection, confirm local code requirements for tempered safety glass in doors or low sills.

Remove Broken Window Pane and Old Glazing

How do you pull a broken pane without turning the sash into a hazard? Start with Safety precautions: wear cut-resistant gloves, eye protection, long sleeves, and a respirator if glazing is old. Lay a drop cloth, tape the cracked glass in a grid, and remove the sash if possible.

For Glass removal, pry out loose shards with pliers and lift larger pieces toward the center, never toward your hands. Vacuum fragments, then wipe with a damp disposable rag.

Soften old glazing with a heat gun on low or an infrared tool; keep heat moving to avoid scorching. Scrape putty with a stiff putty knife, then pull glazing points with needle-nose pliers.

Brush the rabbet clean and inspect for rot or bent muntins.

Install, Seal, and Test the New Window Pane

With the rabbet scraped clean and the glazing points removed, you’re ready to set the replacement pane and lock in a weather-tight seal.

Put on Safety equipment: cut-resistant gloves, eye protection, and a dust mask.

Dry-fit the glass, confirm even clearance, then bed it into a thin, continuous line of glazing compound or silicone rated for windows. Press the pane firmly until it seats, but don’t twist.

Install new glazing points every 6–8 inches, driving them flush to hold tension without cracking the glass.

Tool a smooth exterior bead, ensuring full contact with wood and glass; this is one of the most reliable Weatherproofing techniques. Let it cure per label.

Test by gently tapping, checking rattle, and running water to confirm no leaks.

Conclusion

You’ve now given that window a fresh start without guaranteeing any nasty surprises. Do a final sweep for “unwanted sparkles” of glass, then confirm the pane sits flat, centered, and fully supported. Press along the glazing to verify even contact, and check sealant continuity with no gaps or soft spots. Reinstall stops, tighten hardware just snug, and wipe the glass clean. Finally, open and close the sash to ensure smooth travel and a draft-free fit.…

Scroll to Top