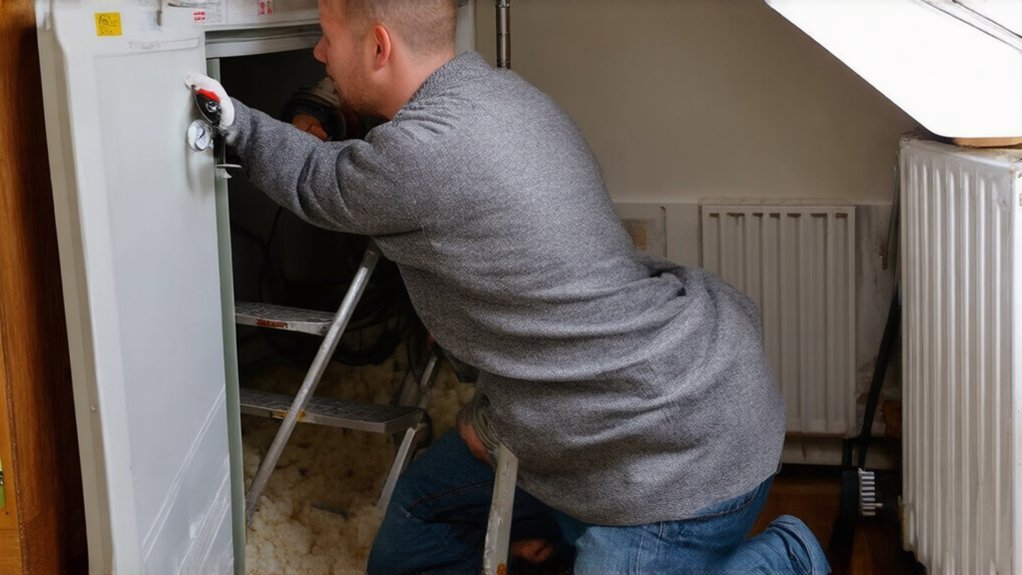
General Property Repairs

home maintenance checklist essentials
General Property Repairs

Essential Annual Maintenance Checks Every UK Homeowner Should Do

Each year, you should run a documented walk-round: inspect roof tiles from ground and loft, clear and flush gutters, and check downpipes, joints, and falls. You should book a Gas Safe annual boiler service and test controls, pressure, circulation, and safety interlocks. You should press-test smoke, heat, and CO alarms, replace batteries, and confirm interlinking. You should test RCD buttons, check sealant and mastic, and verify drainage, air bricks, and ventilation to prevent damp. Keep photos and receipts; the checklist below shows the full sequence.

Key Takeaways

  • Do an annual indoor/outdoor inspection: check damp, sealant, drainage away from walls, and keep air bricks, vegetation, and pipework clear.
  • Inspect roof and loft from ground level: spot missing tiles, failed flashings, and staining; investigate issues before redecorating or insulating.
  • Clean and test gutters and downpipes yearly: remove debris, flush outlets, check falls, joints, brackets, and repair leaks or sagging sections.
  • Service your boiler annually with a Gas Safe engineer: request flue-gas analysis, safety checks, and test thermostats, programmer, TRVs, and system pressure.
  • Test all smoke and CO alarms yearly: confirm interlinking works, replace batteries, and change expired detectors; ensure correct placement on each storey.

Your Annual Home Maintenance Checklist (DIY vs Pro)
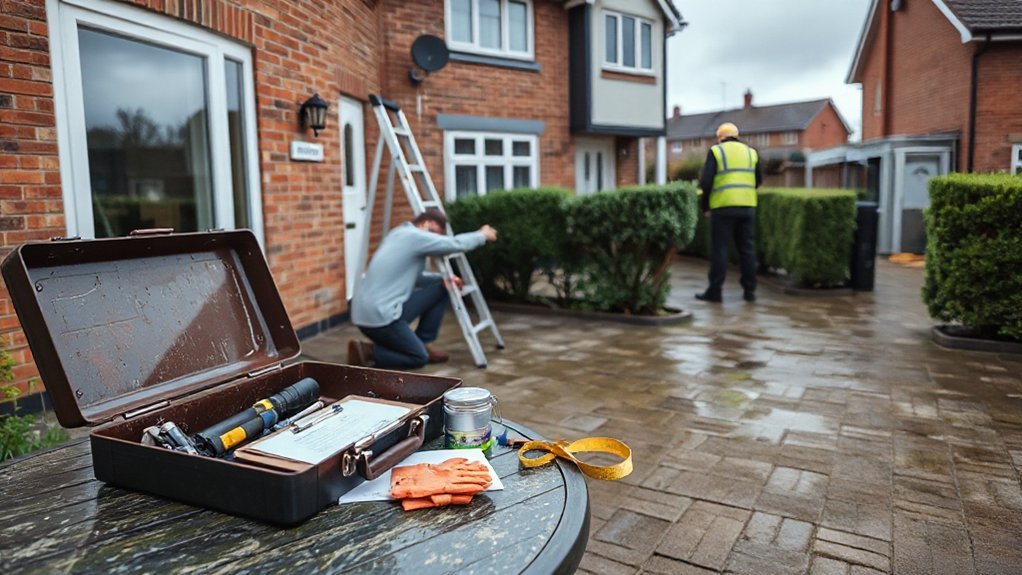
home maintenance inspection checklist

Although you can handle many annual home maintenance tasks yourself, you’ll get better results when you separate quick visual checks from inspections that require calibrated tools, code awareness, or licensed work.

Start DIY with a documented walk-round: check roof tiles from ground level, clear gutters safely, test smoke/heat alarms, and inspect sealant at baths, showers, and external frames.

Review outdoor landscaping: confirm falls drain away from walls, keep air bricks clear, and cut back vegetation from pipework and cables.

Indoors, verify RCD test buttons, look for damp staining, and adjust interior decor only after you’ve confirmed moisture sources.

Book pros for EICR electrics, gas safety, roof access, asbestos surveys, and drainage CCTV.

Keep dated photos, readings, and receipts for traceability and resale.

Annual Boiler and Heating Check: Service and Test

Before you rely on your heating for another season, book an annual boiler service and run a structured heating test to confirm safe combustion, correct controls, and efficient circulation.

Use a Gas Safe engineer for any gas appliance work; ask for flue-gas analysis, burner inspection, condensate trap check, and a tightness test where required.

Verify safety devices and interlocks, then confirm the boiler’s operating pressure, expansion vessel charge, and relief valve discharge path.

Test programmer, thermostat, TRVs, and zone valves for correct sequencing.

Bleed radiators, check pump operation, and measure system temperature drop across key emitters to confirm flow.

If sludge is suspected, schedule inhibitor dosing or powerflushing to restore heating efficiency and protect boiler lifespan.

Record results and keep certificates.

Annual Roof and Gutter Check: Tiles, Leaks, Clearing

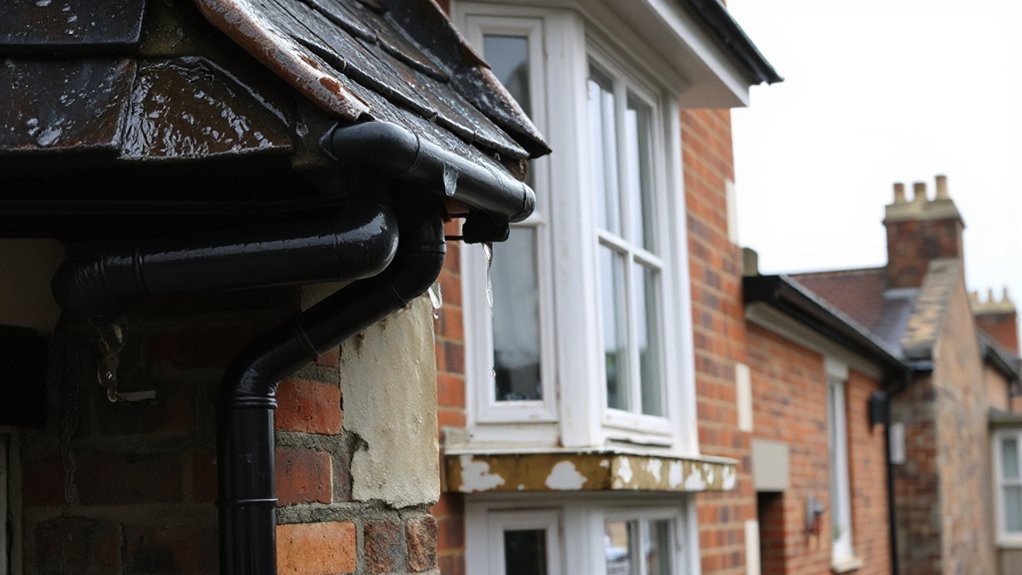
When you schedule an annual roof and gutter check, inspect the covering and rainwater system as one assembly so you catch small defects before they turn into water ingress.

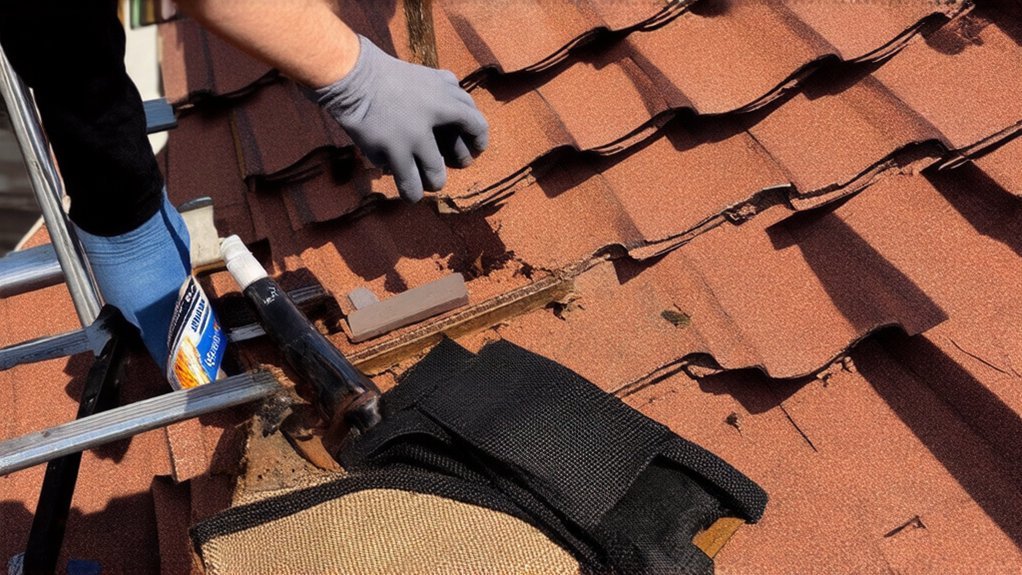
Start with a visual Roof inspection from ground and loft: look for slipped, cracked, or missing tiles and ridge units, failed mortar, lifted flashings at chimneys, and damp staining on rafters or felt.

Check valleys for debris and split linings.

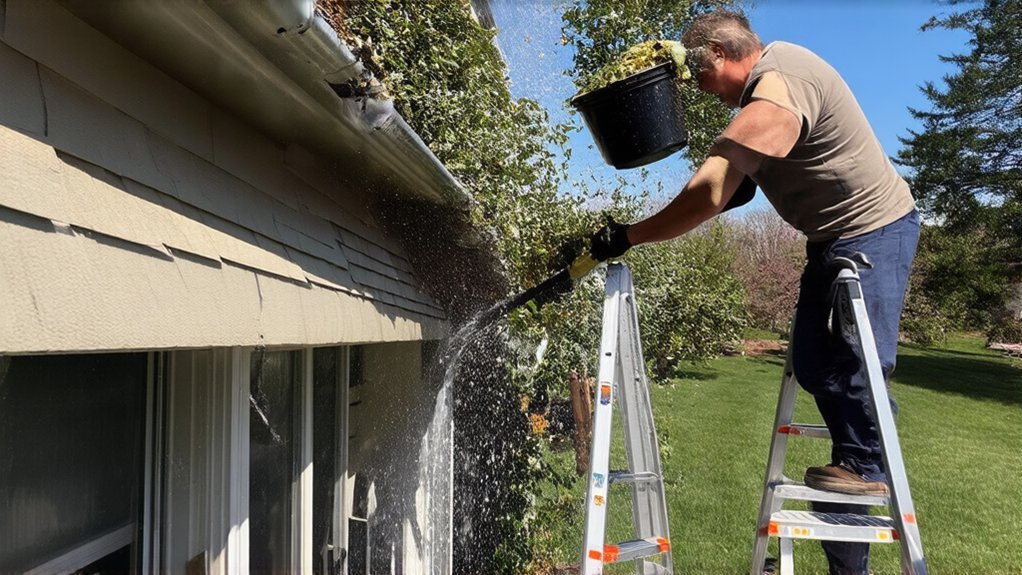
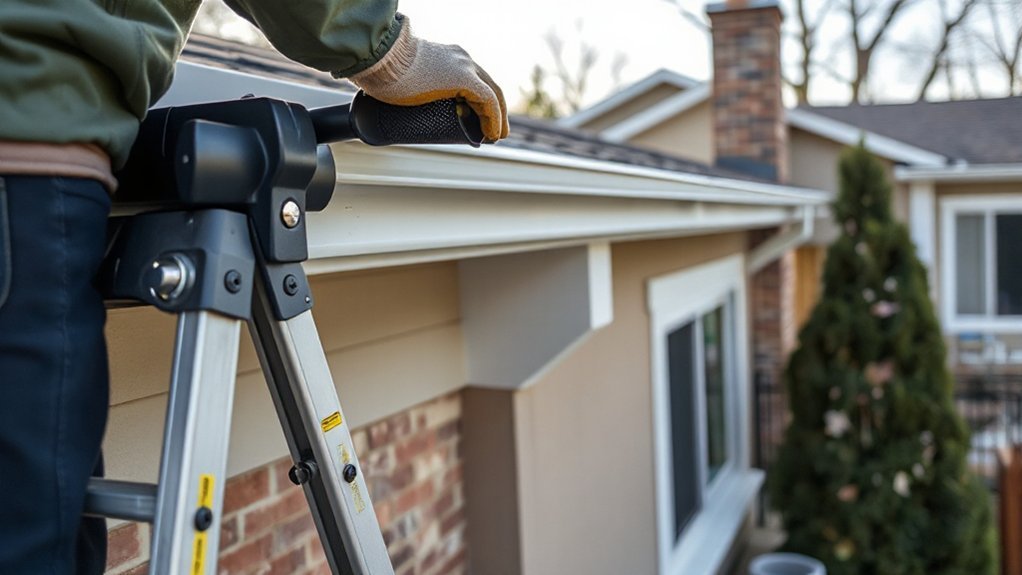
Then carry out Gutter cleaning: clear leaves, silt, and moss, and flush with water to confirm falls, joints, and outlets discharge freely.

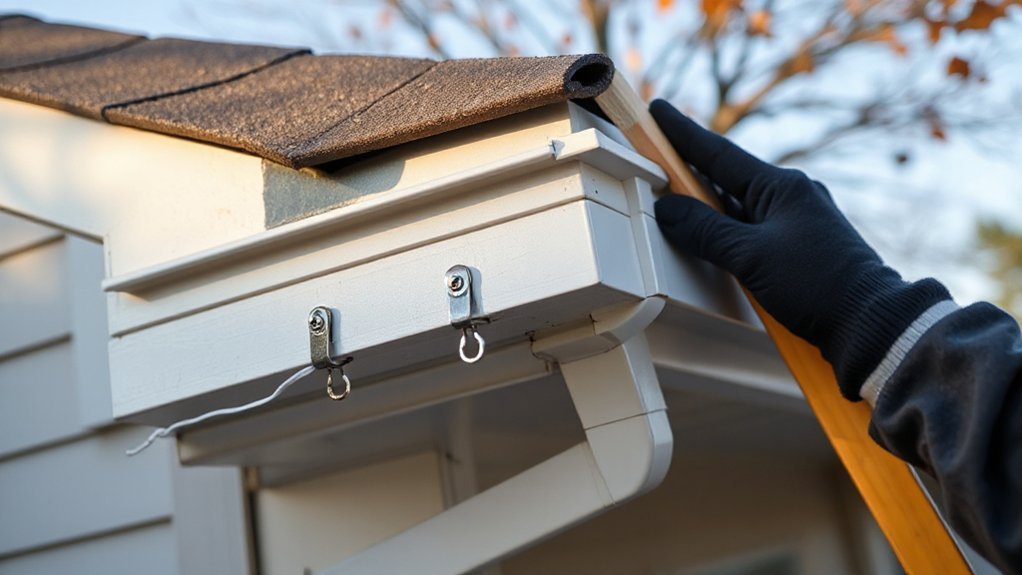
Inspect brackets for sag, and check downpipes for blockages and leaks at collars.

Reseal joints, refix clips, and replace defective sections promptly to maintain weather-tightness.

Annual Safety Check: Smoke and CO Alarms

Even if you only test them occasionally, you should run an annual safety check on every smoke alarm and carbon monoxide (CO) alarm to confirm they power up, sense correctly, and meet current siting requirements.

Press the test button on each unit and verify audibility at bedroom doors; interlinked alarms should all sound. Replace batteries where fitted, and record the change date; replace sealed units at end-of-life per manufacturer.

For fire safety, confirm you’ve got smoke alarms on each storey and on escape routes, and heat alarms in kitchens if installed.

Check alarm placement: mount smoke alarms on ceilings, away from vents; keep CO alarms 1–3m from appliances and not in cupboards.

Replace any yellowed, cracked, or expired detectors immediately.

Annual Winter-Ready Check: Damp, Leaks, and Draughts

Once your alarms pass their annual test, switch focus to the building fabric and weather-tightness. Inspect lofts, eaves, and external walls for staining, mould, salt bloom, or musty odours; trace sources before decorating.

Check gutters, downpipes, flashing, and roof penetrations, then run a hose test and look for internal wetting. Verify air bricks and extract fans aren’t blocked; maintain background ventilation to control condensation.

At windows and doors, confirm smooth operation, intact gaskets, and perimeter mastic; prioritise window sealing where gaps exceed 2–3 mm. Use a smoke pencil around frames, skirtings, and loft hatches to locate draught paths; seal with appropriate tapes, foams, or brush strips.

Complete Insulation improvements only after you’ve eliminated leaks and guaranteed ventilation remains compliant.

Conclusion

Treat your annual maintenance like a compliance audit: one pass, every system. You’ll log what you can DIY and schedule a Gas Safe boiler service, then verify heating performance. You’ll inspect rooflines and clear gutters to keep water paths open. You’ll function-test smoke and CO alarms to meet safety expectations. Before winter, you’ll check for damp, leaks, and draughts. Do it now, not later—small faults become storms on paper and in plaster.…

General Property Repairs

General Property Repairs: Keeping Your Home Safe, Functional and Well Maintained

Every property experiences wear and tear over time. Small issues such as cracked walls, damaged brickwork, loose tiles, or worn timber can gradually become larger and more expensive problems if left untreated. General property repairs help maintain the condition of your home, improve safety, and protect your investment for years to come.

Whether your property requires a few minor fixes or multiple repair works throughout the house, addressing problems early can prevent unnecessary disruption and costly renovations later.

Why Property Repairs Matter
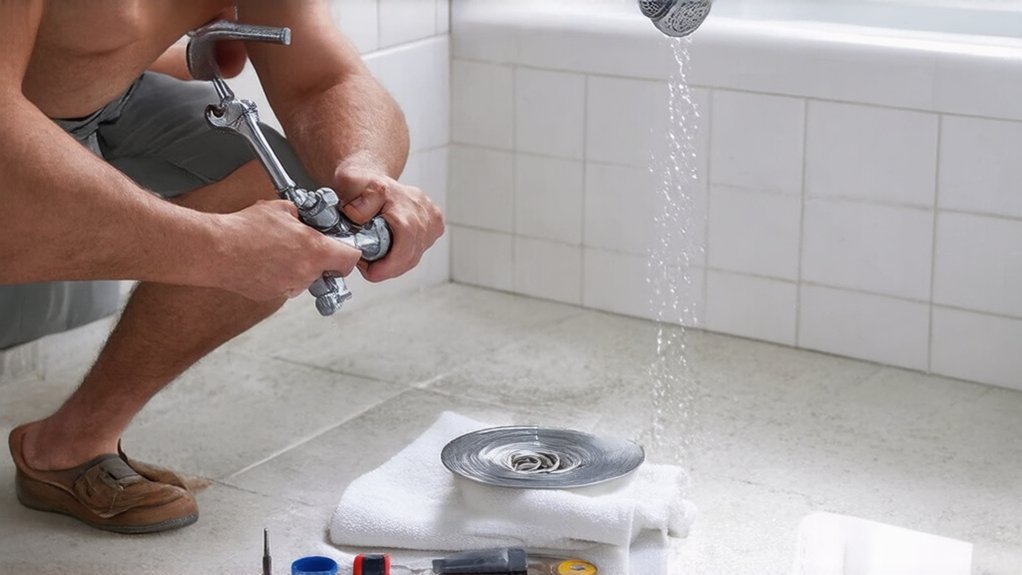
Routine maintenance keeps a property structurally sound and looking its best. Everyday exposure to weather, moisture, heavy use, and ageing materials can affect different parts of a home. Prompt repairs restore damaged areas before they develop into more serious structural concerns.

A well-maintained property also improves comfort, increases value, and creates a better living environment for everyone in the home.

Common Property Repairs

General property repairs cover a wide variety of maintenance work, including:

  • Cracked brickwork and mortar repairs
  • Damaged walls and ceilings
  • Loose or broken floor tiles
  • Minor structural repairs
  • Garden wall repairs
  • Door and window adjustments
  • Fence and gate repairs
  • Small plastering repairs
  • Timber repairs
  • General maintenance work

Each repair contributes to keeping the property safe, functional, and visually appealing.

Brickwork and Masonry Repairs

Brickwork naturally deteriorates over time due to weather exposure and age. Cracked bricks, damaged mortar joints, and unstable walls should be repaired promptly to prevent further deterioration.

Professional brickwork repairs restore both the strength and appearance of external walls, garden walls, and structural features while helping protect the building from water penetration.

Interior Repairs

Inside the home, everyday use can lead to damage that affects both appearance and functionality. Common interior repairs include patching damaged plaster, repairing ceilings, fixing skirting boards, replacing damaged timber, and restoring walls before decorating.

Carrying out these repairs before painting or redecorating creates a much smoother and longer-lasting finish.

Exterior Property Repairs

The outside of a property is constantly exposed to rain, sunlight, frost, and changing temperatures. Regular maintenance helps protect external surfaces and prevents deterioration.

Exterior repairs may include:

  • Repairing cracked render
  • Repointing brickwork
  • Replacing damaged paving
  • Repairing steps
  • Fixing boundary walls
  • Restoring exterior timber

Keeping the exterior in good condition improves kerb appeal while protecting the overall structure.

Preventing Bigger Problems

Many expensive repairs begin as small maintenance issues. A minor crack, loose brick, or damaged joint can allow moisture to enter the property, eventually leading to larger structural problems.

Regular inspections and timely repairs reduce the likelihood of extensive damage and help homeowners avoid unexpected repair costs.

Benefits of Professional Property Repairs

Using experienced tradespeople ensures repairs are completed safely and to a high standard. Professional workmanship provides:

  • Long-lasting repairs
  • Improved property safety
  • Better structural integrity
  • Enhanced appearance
  • Reduced future maintenance costs
  • Greater property value

Quality repairs blend with the existing structure while maintaining the character of the property.

Property Repairs During Renovation

General repairs are often carried out alongside larger home improvement projects. Completing repair work before plastering, decorating, flooring, or installing new fixtures ensures every stage of the renovation is built on a solid foundation.

This approach improves both the quality and longevity of the finished project.

Maintaining Your Property

Regular maintenance is the best way to reduce repair costs over time. Checking brickwork, walls, timber, roofs, pathways, and exterior surfaces throughout the year helps identify issues before they become serious.

Simple repairs completed at the right time can significantly extend the lifespan of your home.

Conclusion

General property repairs are an essential part of maintaining any home. From repairing damaged brickwork and walls to restoring timber, plaster, and exterior surfaces, professional repairs help keep your property safe, attractive, and structurally sound. Investing in routine maintenance today can prevent larger problems tomorrow while protecting the long-term value of your home.…

repairing winter fencing
General Property Repairs

How to Restore Weather‑Damaged Fencing After a British Winter

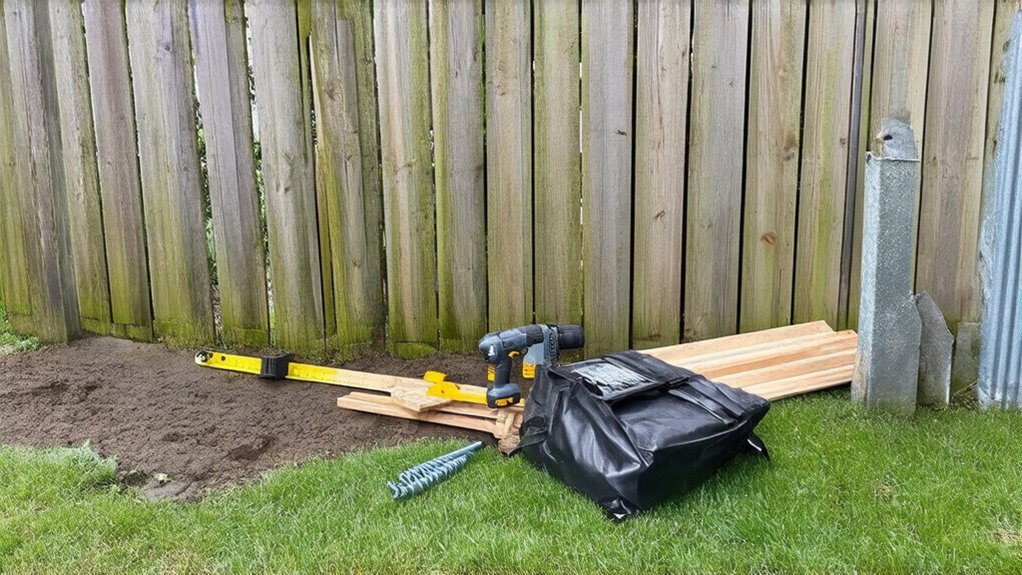
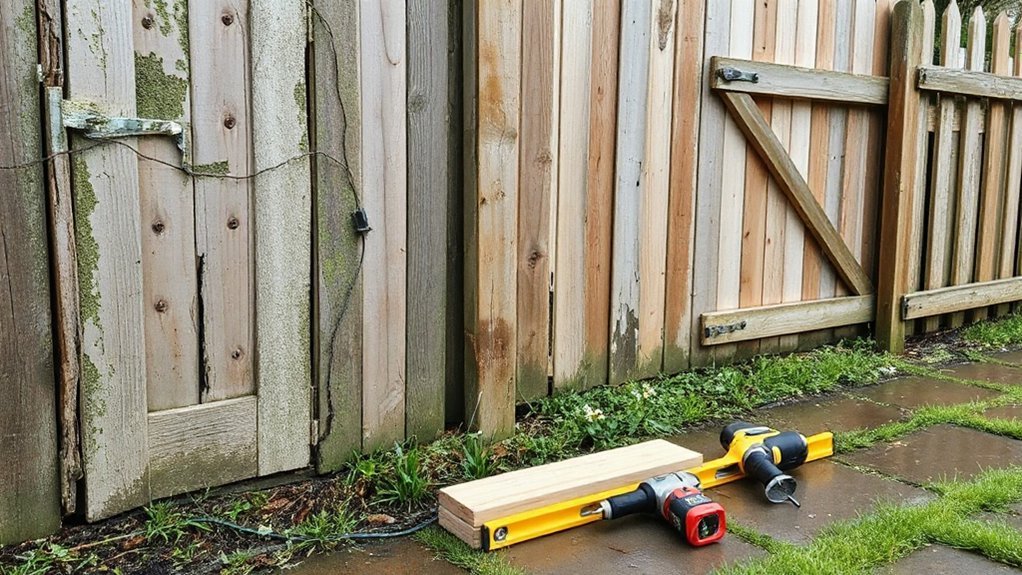
After snow melts, walk the fence line and check each bay for leaning posts, loose rails, bowed panels, split boards, and rusted fixings; push gently to spot movement. Replace rotten post bases or fit a galvanised spur, reset in postcrete, and keep timber 25–50mm above soil with a gravel board and DPC strip. Re-secure rails with exterior screws, swap damaged boards, seal cut ends with preservative, then sand, wash, and apply two thin coats—next you’ll pick up extra winter-proofing tips.

Key Takeaways

  • Inspect the full fence line after thaw; probe posts at soil line for rot, heave, cracks, loose rails, and panel bowing.
  • Repair minor damage by re-securing rails with exterior screws/brackets, replacing split boards, and swapping rusted fixings for galvanised fasteners.
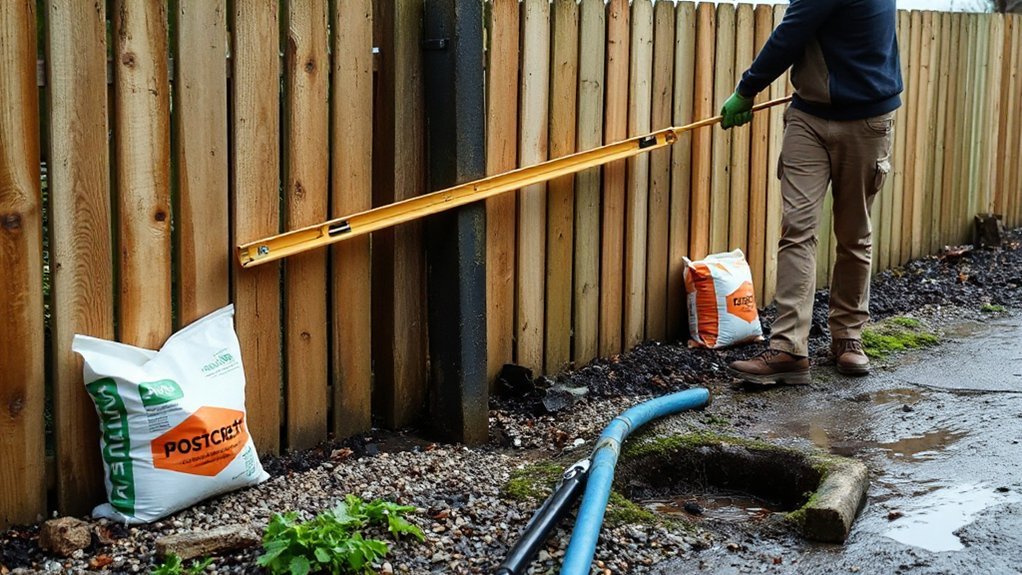
  • Replace whole bays when rails bow or multiple sections lean, then realign using a string line, level, and temporary ratchet-strap bracing.
  • Fix base rot by cutting back to sound timber or fitting a galvanised spur, then re-set posts with postcrete and let cure 24–48 hours.
  • Prevent repeat damage: fit gravel boards, cap post tops, keep timber 25–50mm above soil, clear vegetation, and seal end grain before staining.

Check Your Fence for Winter Damage and Hazards

inspect fence for winter damage

Once the snow melts and the ground starts to dry, walk your fence line and inspect every section for winter-related damage and safety hazards.

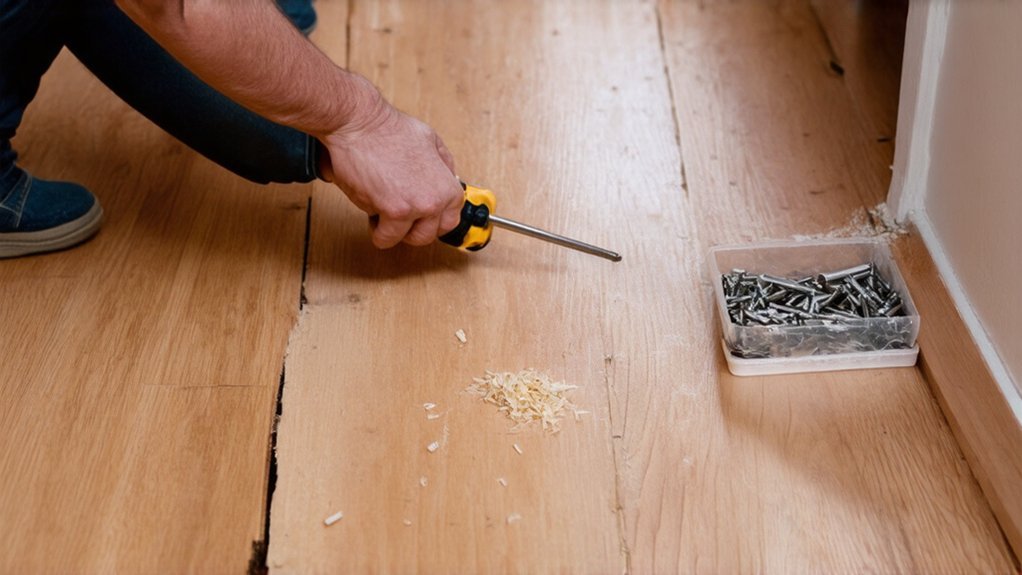
Check posts for lean, heave, or rot at the soil line; probe with a screwdriver to confirm sound timber. Look for rails pulled loose by winter wind, and for cracks at knots or fastener points.

Scan panels for bowing, split battens, and gaps where snow damage forced fixings apart.

Test stability by pushing each bay; you shouldn’t see rocking at the post base or movement at brackets. Confirm wire tension stays even and staples haven’t backed out.

Inspect gates: hinges, latches, and alignment, plus pinch points. Flag any protruding nails, sharp wire ends, or splintered edges to prevent injury.

Repair or Replace? Use a Quick Fence Checklist

After you’ve flagged winter damage, use a quick checklist to decide whether you should repair the section or replace it entirely. If fewer than 20% of boards are split, warped, or loose, you can usually refix with new screws, brackets, and straight replacement boards.

If rails are bowed or multiple bays lean, replacement often saves time and restores alignment.

Check fencing materials: softwood panels that have delaminated, crumbled, or lost preservative treatment don’t hold fasteners well, so swap them.

For featheredge runs, replace individual pales when the arris rails and fixings remain sound.

Consider Fence aesthetics: mismatched staining, patchy colour, and uneven panel heights can justify replacing a full bay for a consistent line and finish.

Stop Rot at the Base (Posts and Gravel Boards)

If your fence is failing, start at ground level where moisture sits and rot spreads fastest.

Cut out and replace any rotting post bases, then set the new section properly in concrete or a post-repair spur to restore strength.

Upgrade your gravel board protection with treated timber or concrete boards and keep a small clearance to soil so water can’t wick back into the panels.

Replace Rotting Post Bases

Because moisture lingers where timber meets soil, the base of each fence post and the bottom edge of your gravel boards usually rot first.

If a post wobbles, probe the timber at ground line; soft fibres mean you need a base repair, not just Fence paint.

Support the bay with a prop, then remove fixings from rails and decorative panels on that span.

Dig out around the post, break up old concrete, and cut the post back to sound wood above rot.

Fit a galvanised post-repair spur or a new treated section with a half-lap joint, then re-set it plumb in fresh postcrete, keeping the spur fully buried.

Refix rails and panels, and seal cut ends with end-grain preservative.

Recheck alignment after cure.

Upgrade Gravel Board Protection

Where does rot usually restart even after you’ve fixed a post? At the ground line, where splashback soaks end grain and traps debris against the fence.

Upgrade your Gravel board protection to break that wet zone. Fit a concrete or UC4-treated timber gravel board, set 25–50 mm above soil, and keep a clear drainage gap behind it.

Cap cut ends with end-grain preservative, then seal joints with exterior-grade mastic where boards meet posts. If you use timber gravel boards, add a DPC strip between board and post to stop wicking.

Rake back soil and gravel, then lay a 100 mm shingle strip along the run for better weather protection and reduced splash.

Recheck fixings after storms.

Straighten Leaning Fence Posts and Panels

straighten leaning fence posts

After strong winds or saturated soil shift your fence line, you’ll usually see the problem first at the posts—one or two start leaning, and the panels follow.

Start by checking Fence alignment with a taut string line between sound posts, then measure the lean with a spirit level on each suspect post.

Dig out soil on the high side, expose the footing, and pull the post plumb using a ratchet strap anchored to a stake or vehicle tow point.

Pack the void with compacted MOT Type 1 or concrete, tamping in 100mm layers for Post stabilization.

For panels, lift and re-seat them so their top edge tracks the string line, then re-check level and spacing.

Leave concrete to cure 24–48 hours before removing straps.

Fix Loose Rails, Broken Boards, and Nails/Screws

After you’ve straightened posts and panels, lock the fence structure back together by securing any loose rails to solid posts with exterior-rated screws or brackets.

Swap out broken boards by cutting them free at the fasteners, matching the board size, and reinstalling with proper spacing and corrosion-resistant hardware.

Then recheck every nail and screw, refasten or replace any that have backed out, and set them flush so the fence can’t rack in the next storm.

Secure Loose Fence Rails

Even if the storm damage looks minor, loose fence rails can quickly rack the whole panel and pop fasteners under the next gust. Start by checking each rail-to-post joint for movement; lever the rail true and clamp it if needed.

Pull bent nails, then refix with exterior-grade, corrosion-resistant screws (5–6 mm) driven through the rail into solid post timber. If the screw holes have ovalled, pack them with treated timber slivers and waterproof wood glue, then re-drive offset by 10–15 mm.

Add galvanised angle brackets or a timber cleat beneath the rail for extra bearing. Finish by sealing exposed end grain and touching up with Fence paint so moisture can’t creep in and disrupt your Garden landscaping plans.

Replace Broken Boards

Once the rails sit firm and square, turn to any split, snapped, or missing boards, because a single weak picket can let the panel flex and start tearing fasteners back out. Remove damaged boards cleanly, then inspect adjacent timber for rot at the ends and around knots.

Measure the gap, match thickness and profile, and cut a replacement from pressure‑treated softwood or the same species as the fence to prevent uneven weathering. Seal all cut ends with end‑grain preservative to slow water uptake.

Keep the board’s base 25–50 mm off soil or gravel to reduce splashback decay and improve wildlife protection by avoiding sharp, ragged edges. Before Fence staining, let new timber dry, then spot‑prime to prevent patchy colour.

Refasten Nails And Screws

Where do you start when rails wobble and pickets rattle? Begin with a full line check: push each rail, then mark every loose fixing. Pull rusted nails with a claw bar, and don’t reuse bent shanks. For Nail maintenance, swap to hot‑dip galvanised ring‑shank nails or exterior screws where timber’s split-prone.

Pre-drill near board ends to prevent further cracking, and drive fixings flush, not countersunk, so water doesn’t pool.

For Screw replacement, choose stainless or coated structural screws sized to bite 35–50 mm into sound posts/rails. If holes are stripped, plug with treated hardwood dowel and waterproof exterior glue, then re-screw.

Re-seat rails using brackets or coach screws, and recheck alignment with a straightedge. Tighten, don’t over-torque.

Sand, Treat, and Repaint or Stain Weathered Fencing

prepare treat repaint stain

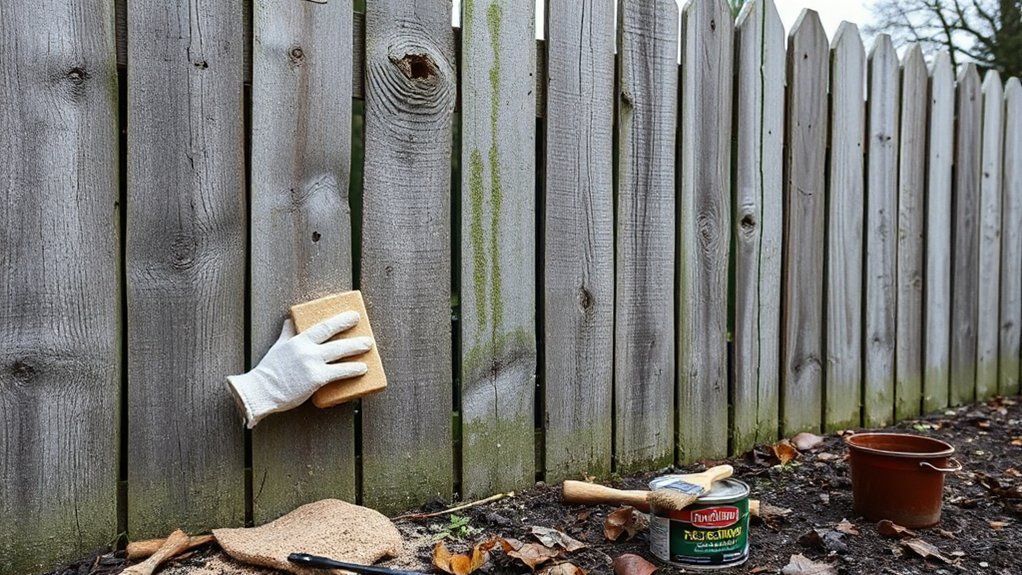
After you’ve cleaned and let the fence dry fully, sand weathered boards to remove loose fibers, peeling finish, and gray oxidation so the new coating can bond.

For Sand preparation, start with 80–100 grit on rough areas, then finish with 120 grit for a uniform key. Feather edges where old paint remains, and vacuum or brush off dust.

Treat black specks or green staining with a fungicidal wash, then rinse and let it dry.

Spot-prime bare softwood with an exterior wood primer; use a knotting solution on resinous knots to prevent bleed.

If you’re repainting, apply two thin coats of exterior masonry/wood paint with a brush to work into grain.

For Fence staining, choose an exterior stain and apply along the grain, back-brushing to avoid lap marks.

Protect Your Fence Before Next Winter Hits

Fresh paint or stain buys you time, but winter moisture and freeze–thaw cycles will still find weak points if you don’t lock them out now. Check posts for wobble, then pack post holes with compacted gravel and re-tighten fixings. Cap every exposed post end; water entry here triggers rot and splitting. Seal end grain and cut edges with a brush-on preservative before topcoating.

For Seasonal maintenance, clear soil and mulch away from rails so timber can dry, and trim plants to restore airflow. Rehang sagging gates, lubricate hinges, and fit a drop bolt to stop racking in high winds. Inspect for hairline cracks, then caulk joints and knot holes. You’ll protect structure and improve Fence aesthetics through winter and storms.

Conclusion

Now you’ve checked hazards, decided what to repair, stopped base rot, and squared up posts and panels. You’ve tightened rails, replaced broken boards, and swapped tired fixings for proper exterior screws. After sanding and treating, you’ve sealed everything with stain or paint so water can’t creep back in. Think of your fence like a coat of armour: maintain it now, and it’ll take next winter’s hits without buckling.…

squeaky floorboard repair tips
General Property Repairs

Quick Fixes for Squeaky Floorboards in British Homes

Track the squeak by walking heel-to-toe and marking where the board flexes, then check for proud nails, open joints, or a loose tongue. Dust talc or graphite into the seam and around nail heads, brush it in, and wipe off excess. If there’s a gap, tap in a tapered wooden wedge with light pressure. Add temporary weight for 24 hours to re-seat the board. For a lasting fix, find joists and screw down with pre-drilled holes. Next, you’ll see when shims, joist checks, or pipe clearances are required.

Key Takeaways

  • Pinpoint the squeak by walking heel-to-toe, marking noisy spots and noting whether it occurs on compression or release.
  • Check for loose boards, open joints, or proud nails; tap nails down and re-seat boards by evenly weighting the area overnight.
  • Dust talc or graphite into tongue-and-groove seams and around nail heads, then work it in and wipe away residue.
  • Tighten the floor by driving 50–75 mm screws into joists at squeak points, pre-drilling to prevent splitting and ensure heads sit flush.
  • If accessible from below, insert thin timber shims at moving joints or add packing to loose noggins, avoiding pipes and cables.

Find What’s Squeaking Under the Floorboards

identify and fix squeaks

Where’s the squeak actually coming from—your boards, the joists, or the fixings between them? Start with controlled loading: walk heel-to-toe across the suspect area and mark the exact point of noise and deflection.

For Squeak diagnosis, check whether the sound occurs on compression (board-to-joist rub) or release (nail shank slip).

Perform a Floorboard inspection from above: look for open tongue-and-groove joints, cupped edges, and nail heads proud of the surface. Use a straightedge to confirm localised bowing.

If you’ve got access below, verify joist spacing, check for noggins that have loosened, and confirm services haven’t notched members beyond typical UK limits.

Record findings before selecting any remedy.

Fast Fixes for Squeaky Floorboards (No Lifting Boards)

Once you’ve pinned down the noise point, you can usually suppress the squeak from above without disturbing the boards by locking the board-to-joist interface and eliminating relative movement.

First, check for loose tongues or gaps at board edges; drive in tapered wooden wedges only where there’s clear void, keeping pressure light to avoid jacking.

Next, apply Floorboard lubricants (graphite/talc) into tight joints and around nail shanks; work it in by stepping and wiping excess to prevent slip.

If the noise is impact-related, add Acoustic insulation by laying a compliant underlay or felt between board and finish floor covering, maintaining BS EN 14440/impact-sound intent.

Finally, re-seat boards by evenly loading the area for 24 hours to stabilise contact.

Long-Term Fix: Stop Squeaky Floorboards With Screws

Quick surface treatments can quieten a board for a while, but if the squeak returns you’ll usually need to mechanically clamp the floorboard to the joist with screws so the two can’t slip against each other.

Locate joists with a stud finder or by lifting one board end; mark centres at 400 or 600 mm spacing typical in UK floors. Check services before drilling.

For common floorboard materials (softwood boards, chipboard, or plywood), pre-drill a clearance hole through the board and a pilot into the joist to prevent splitting and mushrooming. Use homeowner tools: drill/driver, countersink, and depth stop.

Drive 4.0–5.0 mm wood screws, 50–75 mm long, so the head sits flush without over-torquing. Repeat at each squeaky point.

Quiet Squeaky Floorboards With Talc and Shims

If you can access the board edge from above or below, you can often stop a light squeak by reducing friction with talc and locking out movement with shims.

First, identify the moving joint by stepping and listening, then expose the gap at the tongue-and-groove or between boards.

Apply plain talc (not perfumed) into the seam, work it in with a stiff brush, and cycle the board with foot pressure to distribute it.

For shims, use thin timber wedges compatible with your floorboard materials; avoid metal.

Insert from below where possible, drive gently until resistance increases, then trim flush.

Don’t overpack; you’re stabilising, not lifting.

Recheck after 24 hours, as household humidity can reopen gaps seasonally.

When Squeaky Floorboards Mean Joist or Pipe Issues

Where does the squeak originate when talc and shims don’t change it—at the board joint, or deeper in the structure? You’ll need to treat it as a load-path and services check, not a cosmetic fix. Mark the squeak line, then walk slowly to isolate the bay and direction of movement.

Lift a board if accessible and perform joist inspection: confirm tight bearing, no split ends, and that nails haven’t loosened or missed the joist. Check for notching or drilling that exceeds UK good practice (keep holes centred and within allowable zones).

If the noise coincides with heating or hot-water use, suspect pipe vibrations: verify clips, sleeving through joists, and clearance from timber. Add compliant restraints or isolation, then refix boards with screws to reduce flex.

Conclusion

You’ve now isolated the noise source, applied no-lift stabilisers, and, where required, upgraded the fixing with screws to BS-style best practice for timber floors. Talc and shims let you tune friction and clearances with controlled, repeatable results. If squeaks persist, treat it like a warning light: check joist integrity, pipe contact, and movement paths before cosmetic work. Document what you changed, retest under load, and confirm the floor runs quiet.…

inspect tighten prevent damage
General Property Repairs

How to Spot and Repair Loose Roof Tiles Before They Cause Damage

You’ll spot loose roof tiles by looking for lifted, rotated, or misaligned courses, cracked corners at ridges/hips/eaves, and fresh fragments or granules in gutters. Inside, watch for stains that grow after rain, damp insulation, musty odors, or bubbling drywall near valleys and penetrations. Inspect safely with a tied-off extension ladder, 3-point contact, and fall arrest if you access the roof. Re-seat or replace tiles without prying, keep underlayment intact, and verify headlap and ventilation—next you’ll see the exact tools and steps.

Key Takeaways

  • Scan for lifted, rotated, cracked, or misaligned tiles, especially at ridges, hips, eaves, valleys, and around roof penetrations.
  • Check gutters and ground for fresh tile fragments or granules, and note rusted fasteners or exposed underlayment at tile laps.
  • Look indoors for expanding stains after rain, damp insulation, musty odors, or peeling paint directly beneath suspect roof areas.
  • Inspect safely using a secured ladder and fall protection; hand-test tiles for lift or chatter without prying or walking on unsupported tile edges.
  • Re-seat or replace damaged tiles while preserving underlayment and headlap, then confirm alignment, uplift resistance, and clear ventilation paths.

Loose Roof Tile Warning Signs and Leak Clues

early roof tile damage detection

If you catch a loose roof tile early, you can often prevent a code-relevant moisture intrusion that compromises the roof assembly. Look for displaced, lifted, or rotated profiles, uneven courses, and cracked corners, especially at hips, ridges, and eaves where roof design concentrates wind uplift.

Note fresh debris in gutters, granules, or broken fragments matching the tile material. Inside, track stains that expand after rain, damp insulation, musty odor, peeling paint, or bubbling drywall below penetrations and valleys.

Check for daylight at roof-to-wall connection points from attic vantage, and watch for rusted fasteners, darkened underlayment, or mineral deposits indicating chronic wetting.

Correlate clues with prevailing wind direction and recent storms to pinpoint likely loosened tiles.

How to Check for Loose Roof Tiles Safely

Once you’ve identified likely loose-tile locations from exterior and interior clues, confirm them with a methodical inspection that keeps you off fragile profiles and within basic fall-protection practices. Set a rated extension ladder on firm grade, maintain 3-point contact, and tie it off.

If you must access the roof, use a personal fall-arrest system anchored to a structural member and avoid stepping on tile ribs, hips, or valleys. Walk only on supported areas near the lower third of each tile, distributing weight with foam pads or a roof ladder.

Lightly hand-test suspect tiles for lift, chatter, or sliding; don’t pry. Document locations, then clear debris during Tile cleaning to expose fasteners and underlayment edges as part of routine Roof maintenance.

When to Call a Roofer for Loose Tiles

If loose tiles follow a severe storm or a noticeable impact, you should call a licensed roofer to assess hidden damage and restore the roof’s required weatherproofing.

If you’re seeing persistent leaks, stained decking, or sagging areas, stop any DIY work and get a roofer on-site because these conditions can indicate structural or underlayment failure.

You’ll reduce fall risk and help keep repairs code-compliant by letting a professional handle walkability, fastening, and any needed substrate replacement.

Severe Storm Or Impact

Although a loose tile can look like a simple fix, severe storms or impact events (hail, falling branches, wind-borne debris) often compromise the roof system in ways you can’t verify safely from the ground.

After hail damage or wind impact, tiles may be fractured, fasteners may be loosened, and underlayment may be torn, creating hidden uplift paths. You shouldn’t climb up for a quick reset; wet surfaces, displaced tiles, and unstable battens increase fall risk and can worsen damage.

Call a licensed roofer to perform a code-compliant inspection, including tile soundness testing, attachment verification, and perimeter/hip/ridge detailing checks per manufacturer specs. You’ll also get documentation for insurance and confirmation that repairs maintain required wind-resistance ratings and flashing continuity.

Persistent Leaks Or Sagging

When loose tiles coincide with persistent interior leaks or visible roofline sagging, you’re no longer dealing with a cosmetic reset—you’re looking at a probable assembly failure that needs a licensed roofer. Water entry often means compromised underlayment, flashing, or fasteners.

Sagging can signal saturated decking, failed rafters, or overloaded spans. Don’t attempt a spot fix from a ladder—building codes require proper fall protection, evaluated structural capacity, and manufacturer-approved attachment patterns.

A roofer will perform a leak trace, moisture mapping, and deck probe, then replace damaged sheathing and restore the waterproofing layer before resetting tiles.

Protect Roof tile aesthetics by matching profile and color, especially on historical architecture where approvals and heritage rules may apply. You’ll prevent mold, rot, and progressive collapse risks.

Why Roof Tiles Come Loose Over Time

roof tiles loosen over time

Because roofs flex, breathe, and take constant weather loads, roof tiles don’t stay locked in place forever. Thermal cycling expands and contracts the deck and underlayment, slowly working fasteners loose and breaking sealant bonds. Wind uplift exploits small gaps at laps and eaves, and repeated vibration can shift profiles out of engagement.

Freeze-thaw action widens hairline cracks, while foot traffic concentrates point loads that can fracture brittle units. Poor attic ventilation raises heat and moisture, accelerating underlayment aging and corrosion at nails or clips.

Roof tile manufacturing tolerances vary, so slight dimensional differences can reduce interlock strength over time. Historical roofing styles may rely on minimal mechanical fastening, which today’s codes often supplement to meet uplift and fire-resistance requirements.

Tools for Fixing Loose Roof Tiles

Loose tiles usually start with minor movement, but you’ll fix them faster and safer if you bring the right gear to the roof and follow manufacturer instructions and local uplift requirements.

Start with fall protection: harness, certified anchor, lifeline, and non-slip footwear. Use an extension ladder with stabilizer, plus roof jacks or a scaffold where code requires.

For inspection and roof tile maintenance, pack a flat bar, plastic shims, pry tool, and a thin trowel to clear debris without cracking edges.

Match tools to roof tile materials: rubber mallet for clay or concrete, carbide scraper for underlayment flashings, and a torque-limited driver for tile screws/clips.

Keep a tape measure, chalk line, and camera for documentation, and wear cut-resistant gloves and eye protection.

Secure or Replace a Loose Roof Tile (Step by Step)

Start by removing the suspect tile carefully so you don’t crack adjacent courses. Then inspect the tile, fasteners, underlayment, and battens for damage or moisture intrusion.

If the components are serviceable, you’ll refasten the tile using code-approved corrosion-resistant hardware and compatible sealant where permitted, maintaining required headlap and uplift resistance.

If you find cracks, spalled edges, or compromised fastening points, you’ll replace the tile with a matching unit and secure it to the manufacturer’s specifications and local code.

Remove And Inspect Tile

Before you secure or replace a loose roof tile, you’ll need to remove it and inspect both the tile and its fastening points so the repair meets manufacturer instructions and local code requirements. Set ladder and fall protection.

Then lift the adjacent course with a slate ripper or flat bar to relieve interlock pressure. Slide the tile out without cracking corners; note the Tile material (clay, concrete, or composite) because nail type and fastening method vary.

Examine the tile for hairline fractures, spalling, and underside wear. Inspect nail holes, clips, battens, underlayment, and flashing for corrosion, elongation, or rot.

Confirm Roof ventilation paths aren’t blocked by debris, mortar, or displaced underlayment. Photograph findings and measure exposure to match the existing layout before proceeding.

Refasten Or Replace Tile

Once you’ve confirmed the tile’s condition and checked the fastening points, refasten it only with hardware and methods approved for that tile type and your local code (typically IRC with manufacturer specs).

Set roof jacks and a harness, then lift adjacent tiles gently to access the batten or deck.

If the nail hole’s sound, drive the specified corrosion-resistant fastener in the approved location; don’t overdrive and crack the tile.

If the hole’s enlarged, install an approved clip, foam, or screw-and-seal system as required.

Replace any cracked or spalled tile, matching Tile color to maintain heat performance and appearance.

Re-seat the tile, confirm headlap, and keep underlayment intact.

Don’t block Roof ventilation paths at eaves or ridge.

Recheck alignment and uplift resistance.

Conclusion

Don’t wait—*a stitch in time saves nine*. If you’ve spotted shifted, cracked, or missing tiles, you should act before wind-driven rain compromises the underlayment and decking. You’ll stay safer by using fall protection, stable ladders, and avoiding wet or steep slopes, per local code and OSHA basics. If tiles won’t re-seat, fasteners are corroded, or flashing is suspect, you should call a licensed roofer and document repairs.…

preventing damp in heritage homes
General Property Repairs

The Ultimate Guide to Preventing Damp in Older British Properties

You’ll prevent damp in an older British property by first confirming the type: take repeat moisture readings (calibrated capacitance meter and, if needed, carbide testing) and match symptoms—tide marks and salts suggest rising damp, isolated patches suggest penetrating damp, mould and RH above 60% suggest condensation, and localised wetting can indicate leaks. Then fix the pathway: clear gutters, repair roofs/flashings, repoint with lime, lower external ground, improve drainage and sub-floor ventilation, and keep finishes breathable for compliance. Continue for step-by-step checks and remedies.

Key Takeaways

  • Diagnose damp type with symptoms plus moisture profiling, using calibrated meters and confirmatory tests like carbide and salt analysis.
  • Inspect exteriors: roofs, flashings, gutters, downpipes, pointing, render cracks, and window seals; ensure rainwater discharges correctly.
  • Prevent rising damp by removing bridging, lowering external ground levels, improving drainage, and enhancing sub-floor ventilation before considering DPC works.
  • Stop penetrating damp by repairing roofs and leadwork, repointing with breathable lime mortar, and clearing or realigning leaking gutters and downpipes.
  • Reduce condensation by maintaining 40–60% indoor RH, using effective extraction and trickle vents, and keeping steady heating to avoid cold surfaces.

How to Tell What Type of Damp You Have

identify damp type accurately

Before you choose a remedy, you need to confirm whether you’re dealing with rising damp, penetrating damp, condensation, or a plumbing leak, because each has distinct causes and compliance implications.

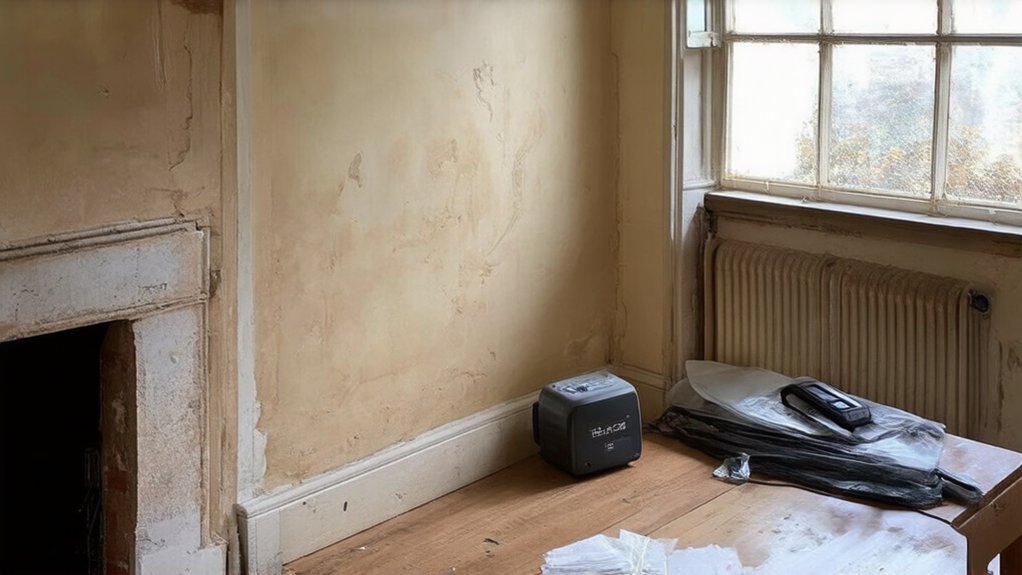
Start by mapping symptoms and measuring wall moisture with a calibrated capacitance meter, then verify with carbide (CM) testing where access allows.

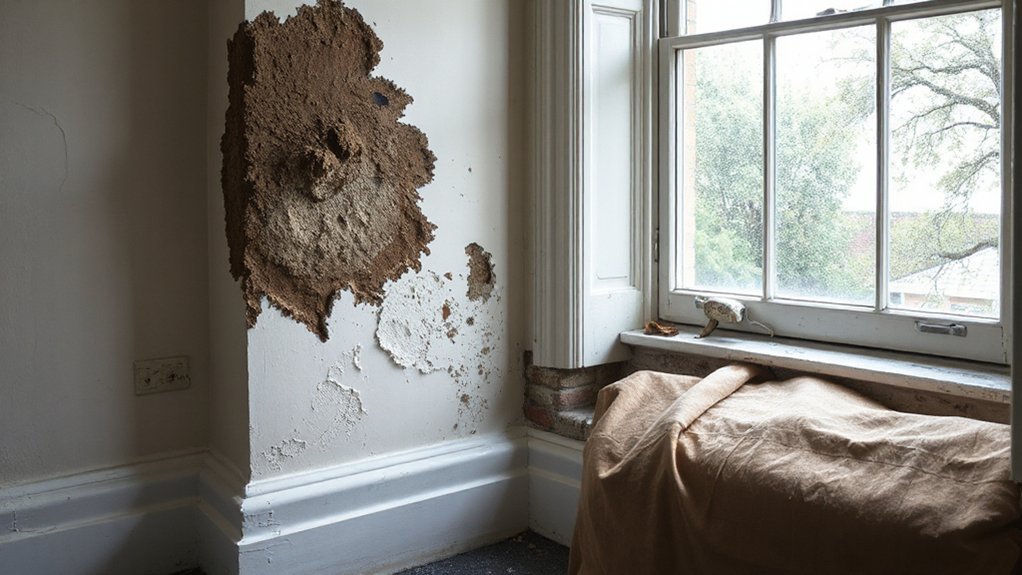
Rising damp typically shows a low-level “tide mark,” hygroscopic salts, and paint deterioration up to about 1m.

Condensation presents as surface droplets, mould in corners, and peaks when indoor RH exceeds 60% without equivalent fabric wetting.

Plumbing leaks create localised, persistent damp, often with pressure-drop evidence or thermal anomalies.

Penetrating damp tends to correlate with wind-driven rain and isolated patches, but confirm with repeat readings over time to meet evidential standards.

Outside Checks for Damp in Period Homes

Although indoor symptoms often look convincing, you’ll get more defensible evidence by starting outside on a period home, where fabric defects and ground conditions usually explain moisture pathways.

Walk the elevations and note cracked render, open pointing, spalled brick, and failed seals around windows and service penetrations.

Check gutters, hoppers, and downpipes for leaks, misalignment, and overflowing at joints; confirm discharge reaches a gully, not the wall base.

Inspect roof coverings, flashings, and parapets for slipped units and defective leadwork.

Assess External paint: blistering and peeling can indicate trapped moisture or poor vapour permeability.

Review ground levels, hardstanding, and garden drainage; you should see falls away from walls, clear channels, and no ponding.

Record findings with photos for survey compliance.

Rising Damp in Old Houses: Causes and Fixes

You’ll typically see rising damp in old houses when the damp-proof course is missing, bridged, or failed, or when high external ground levels and defective drainage drive moisture up porous masonry by capillary action.

You should confirm the diagnosis with moisture profiling and salt analysis to distinguish it from condensation or penetrating damp. Then, align remedial work with relevant British Standards and good practice.

You can then fix it by lowering external ground levels, removing bridging, improving sub-floor ventilation and drainage, and installing a compliant DPC system where justified, followed by salt-resistant replastering.

Common Causes Of Rising Damp

When moisture from the ground can’t be blocked or diverted, it rises through masonry by capillary action and shows up as “tide marks,” crumbling skirtings, and salt contamination at low level.

You’ll usually trigger it where the damp-proof course is missing, bridged, or compromised: pre-1875 walls without a DPC; later repairs that cover it with render, insulation, decking, or raised paths; or internal plaster that continues below floor level.

You also increase risk when external ground sits too high against the wall, or when cavity walls contain debris that transfers water across.

In Historical building preservation, you must verify materials and detailing before altering breathability.

Poor Interior moisture control can mask diagnosis by elevating hygroscopic salts’ readings on meters.

Effective Fixes For Rising Damp

Rising damp fixes start by proving the moisture source and removing the defect that lets ground water wick up the wall, not by masking symptoms with tanking or “waterproof” paints. Confirm diagnosis with hygrometer profiles, salt analysis, and inspection of DPC continuity per BS 6576, ruling out condensation and leaks.

Lower external ground levels to at least 150 mm below the DPC, clear bridged cavities, and replace hard cement renders with breathable lime where appropriate for Historical preservation. Repair or install a compliant damp-proof course (chemical injection or physical DPC) only after you’ve removed bridging; otherwise it’ll fail.

Improve sub-floor ventilation and reinstate air bricks to control moisture load. Use compatible internal finishes and capillary-break moisture barriers at floors, not impermeable wall coatings. Document works for Building Control and conservation officers.

Penetrating Damp: Roofs, Walls, Gutters, Windows

roof and wall waterproofing

Penetrating damp occurs where rainwater breaches the external envelope—typically via defective roof coverings, porous masonry, failed pointing, blocked or leaking gutters/downpipes, and poorly sealed windows. It then migrates through the fabric by gravity and capillary action. You’ll confirm it by correlating staining patterns with rainfall, checking moisture profiles, and inspecting junctions, flashings, valleys, and parapets to BS 5534 principles.

Repair roofs with compatible slates/tiles and sound leadwork to BS EN 12588, then reinstate underlay laps and ventilation paths without altering the Historical interior.

On walls, you should repoint with lime where the original Building material requires permeability; avoid hard cement that drives moisture inward.

Clear, realign, and test gutters/downpipes; guarantee correct falls and sealed joints. Reseal window frames, repair sills, and maintain drip details.

Condensation Damp: Ventilation and Heating Fixes

Condensation damp can look like rain ingress, but it’s driven by internal moisture meeting cold surfaces, so you’ll treat the building’s ventilation and heat balance rather than its external envelope.

You’ll confirm with hygrometer readings (aim 40–60% RH) and surface temperatures; persistent mould indicates poor Indoor air quality.

Improve extract ventilation to meet Building Regulations Part F: fit humidistat-controlled fans in kitchens and bathrooms, ducted to outside, and keep trickle vents open.

If background airflow is low, specify whole-house mechanical ventilation where feasible.

For Humidity control, cover pans, vent tumble dryers, and dry clothes with extraction running.

Heat consistently to reduce cold spots: maintain steady setpoints, use timed thermostats/TRVs, and avoid intermittent “blast heating” that spikes RH.

Breathable Damp-Proofing Upgrades for Older Properties

Because many pre‑1919 homes were built to “breathe” through lime mortars, porous brick, and suspended floors, you’ll often make damp worse if you retrofit impermeable barriers that trap moisture and drive salts to the surface. Specify vapour‑permeable repairs: repoint in NHL lime, replace cement renders with lime render, and redecorate with mineral or limewash paints.

Improve subfloor airflow by clearing airbricks and maintaining cross‑ventilation; don’t block vents with insulation. Where you need a DPC, choose breathable systems (e.g., silane/siloxane cream) only after moisture profiling and salts analysis, and follow BS 6576 and BS 5250.

For Heritage preservation, you’ll document significance, use reversible methods, and match finishes for aesthetic considerations. Use competent contractors and keep test results.

Conclusion

If you ignore damp in an older British property, it won’t “settle down”—it’ll spread like it owns the place, undermining timbers, salts, plaster, and indoor air quality. You’ll stop guessing once you’ve identified rising, penetrating, or condensation damp with systematic checks and moisture measurements. Then you’ll fix causes: drainage, fabric defects, ventilation, and heat balance—using breathable, heritage-compatible materials. Follow manufacturer specs, Building Regulations, and conservation guidance, and you’ll keep the building dry for decades.…

diy shower leak repairs
General Property Repairs

Fixing a Dripping Shower: Simple Repairs Homeowners Can Do Themselves

Start by pinpointing the drip: check the showerhead/arm joints with a dry paper towel, inspect the tub spout diverter for backflow, and look for staining or scale at fittings. Shut off the shower’s stop valves or the main, verify zero flow, and cover the drain and finishes. Snug loose joints and reseal threads with 3–5 wraps of PTFE tape. If the valve still drips, replace the washer or cartridge and retest hot/cold. Next, you’ll see the step-by-step checks.

Key Takeaways

  • Identify the leak source by checking showerhead joints, arm threads, diverter backflow, trim caulk gaps, and mineral staining at fittings.
  • Shut off water at shower stop valves or the main, then open the valve to confirm flow stops and relieve pressure.
  • Cover the drain, protect surfaces, and organize trim screws; clean the valve bore and lubricate O-rings with silicone grease before reassembly.
  • Reseal showerhead or arm threads with 3–5 clockwise PTFE tape wraps, then hand-tighten and snug with a cloth-protected wrench.
  • Replace worn washers or cartridges, reassemble, restore water, and test hot/cold operation; call a plumber if leaks persist or walls may be wet.

Pinpoint Where Your Dripping Shower Starts

identify precise leak source

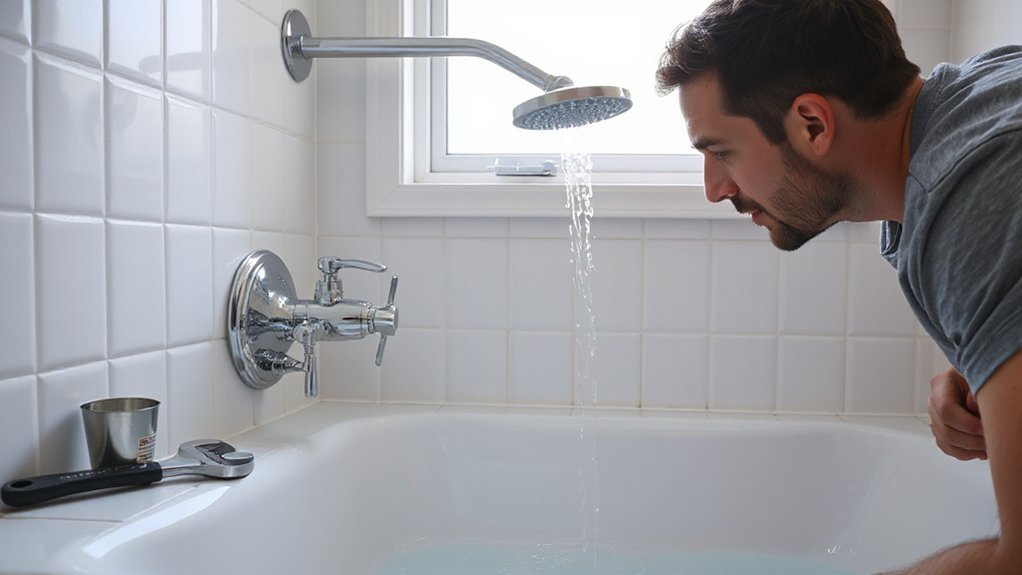
Before you replace any parts, isolate the exact source of the drip by watching when it occurs and where the water tracks. Run the shower, then shut it off; note whether dripping continues, which can indicate valve or cartridge leakage.

Check the showerhead and arm: wrap a dry paper towel at the escutcheon and along threaded joints to confirm seepage.

Inspect the tub spout diverter for backflow that mimics a “shower” drip.

Look for Caulking issues at the trim plate and tile junctions; water behind the wall violates moisture-control best practices and can damage framing.

If staining, green/white scale, or rust appears at fittings, suspect Pipe corrosion and confirm with an access panel inspection where permitted.

Document findings before disassembly.

Shut Off Water and Protect the Shower Area

Locate the shower’s integral shutoff valves if present, and close them fully. If you can’t isolate the fixture, shut off the main water supply to comply with safe service practices.

Verify the water is off by opening the shower valve and confirming flow stops. Then relieve residual pressure.

Cover the drain with a strainer or plug and protect the tub or shower pan surfaces with a drop cloth so small parts can’t fall into the trap or damage the finish.

Locate Shower Shutoff Valves

If you can’t isolate the shower’s water supply quickly, a minor drip can turn into a leak while you work, so identify the shutoff points and secure the area first.

Look for a dedicated shower shutoff near the bathroom: inside an access panel behind the valve wall, in an adjacent closet, or in the basement/crawlspace directly below.

Some installations use integral stop valves on the mixing valve body; you’ll find them behind the trim plate and they’re turned with a flathead or hex key.

Verify valve locations by tracing hot and cold lines to the shower drop.

Confirm the valve is rated for potable water and fully operational.

Lay down a non-slip drop cloth, cover the drain, and keep tools dry to reduce shock and slip hazards.

Turn Off Main Supply

Once you’ve confirmed the shower’s local shutoffs—or found none—shut down the home’s main water supply to control pressure and prevent an uncontrolled leak while you open the valve.

Locate the Main supply shutoff at the meter, curb stop, or where the service line enters the building; turn the valve fully off (clockwise for most gate/stop valves, lever perpendicular for ball valves).

Open the shower valve to relieve residual water pressure and verify flow stops.

If you’ve got a water heater, set gas control to “Pilot” or switch electric power off to prevent dry-firing while lines are depressurized.

Keep a flashlight handy, work with dry hands, and don’t force a stuck valve; call a licensed plumber if it won’t move safely.

Cover Drain And Surfaces

Before you open the valve body, cover the shower drain with a fine-mesh strainer or a rag and protect the tub or shower floor with a drop cloth so screws, clips, and small parts can’t disappear into the trap or chip finished surfaces. Tape the drop cloth edges so it won’t shift underfoot, and keep the work area dry to reduce slip hazards.

If you’re removing trim, place a towel under tools to prevent enamel or tile damage. Do quick drain cleaning around the grate and weep holes so debris won’t wash into the trap when you flush lines later.

After reassembly, perform surface sealing as required: replace cracked escutcheon gaskets, re-caulk per manufacturer specs, and keep sealant off moving valve components.

Tighten and Reseal a Dripping Showerhead

seal and tighten showerhead

Verify the drip’s source at the showerhead, arm threads, or swivel joint so you’re addressing the correct fitting.

Use a wrench with a protective cloth to snug the showerhead connection—don’t overtighten and risk damaging the threads.

If it still weeps, remove the head and wrap PTFE plumber’s tape clockwise on clean, dry threads, then reinstall and tighten to a secure, leak-free seal.

Identify Leak Source

Where’s that drip actually coming from—the showerhead face, the swivel joint, or the threaded connection at the shower arm? Start with Leak detection: dry the head, then run water for 30 seconds and watch for first moisture.

If droplets form on the spray face after shutoff, suspect trapped debris or a worn internal seal.

If water beads at the swivel joint while running, the ball-and-socket washer may be failing.

If the wall-side area dampens, the shower arm penetration or escutcheon may be letting water migrate; that’s a building-cavity risk.

Before testing, confirm water pressure isn’t excessive; many codes expect a pressure-reducing valve above 80 psi.

Shut off, then wipe and recheck after 10 minutes.

Tighten Showerhead Connection

Now that you’ve pinpointed the leak, tighten and reseal the showerhead connection to stop seepage at the threads and prevent water from migrating behind the escutcheon. Shut off the shower valve, then open it briefly to relieve trapped pressure.

Protect the finished nut with a cloth and use an adjustable wrench to snug the showerhead or swivel nut clockwise; don’t over-torque, or you can crack the fitting or distort gaskets.

Verify the arm is secure in the drop-ear elbow and that the escutcheon sits flat to keep wall cavities dry and code-compliant.

Restore flow and inspect for drips at full hot and cold. If spray is harsh, perform a Water pressure adjustment at the main regulator.

Regular Showerhead maintenance includes checking tightness after cleaning.

Reseal With Plumber’s Tape

If tightening alone doesn’t stop the drip, reseal the threaded joint with PTFE plumber’s tape to create a watertight, code-appropriate seal.

Shut off the shower valve, then protect the finish with a cloth and use an adjustable wrench to remove the showerhead.

Inspect threads for cracks, corrosion, or cross-threading; replace damaged parts to meet safe plumbing practice.

Clean old tape and debris, then dry the male threads.

Wrap Plumber’s tape clockwise (the direction you’ll tighten) for 3–5 full turns, keeping it flat and taut so it doesn’t bunch and restrict flow.

Reinstall hand-tight, then snug 1/4 turn with the wrench—don’t overtighten.

Run water and verify no leaks.

These sealing techniques prevent drips and reduce galvanic binding.

Replace the Shower Valve Washer to Stop Drips

Although a worn washer seems like a minor part, it’s often the primary seal that stops water from bypassing the shower valve seat and causing a steady drip.

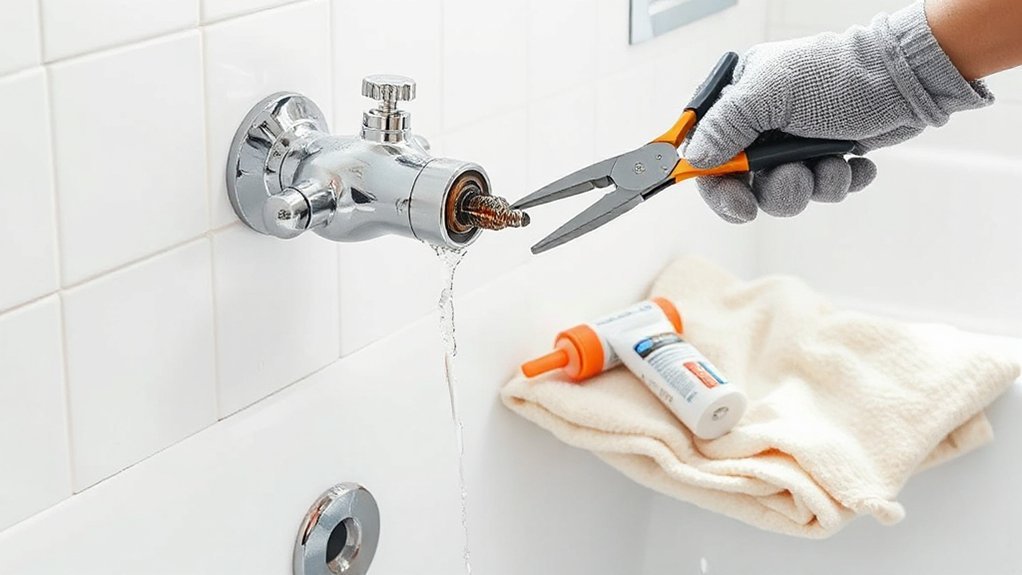
Shut off the branch supply at the stop valves or main, then verify zero flow by opening the shower. Plug the drain, remove the handle and trim, and keep fasteners organized.

For code-compliant shower valve maintenance, don’t use heat or solvents near plastic parts.

Back out the stem assembly, then inspect the rubber washer on the stem end. Match the diameter and thickness exactly, and replace the brass screw if it’s stripped or corroded.

Use proven washer replacement techniques: seat the washer flat, tighten snugly, and don’t over-torque.

Reassemble, restore water, and check for leaks.

Replace a Shower Cartridge Causing a Steady Drip

replace worn shower cartridge

A steady shower drip that persists after a washer replacement usually points to a worn or scored cartridge that can’t seal the valve body correctly.

Shut off the water at the stop valves or main, then open the shower to relieve pressure and verify flow stops.

Remove the handle and trim, keeping the escutcheon gasket intact for preventing leaks.

Note the cartridge orientation, then pull the shower cartridge using the manufacturer’s tool to avoid damaging the valve body.

Inspect the bore for debris or mineral scale; clean it without scratching.

Lubricate O-rings with silicone grease rated for potable water, and install the new cartridge fully seated.

Reassemble, restore water, and test both hot and cold for smooth operation and no drips.

Know When to Call a Plumber for Shower Drips

When a shower drip keeps returning or the valve won’t shut off cleanly after you’ve replaced the washer or cartridge, call a licensed plumber before you risk damaging the valve body or creating a concealed leak.

You should also stop DIY work if the shutoff won’t fully isolate the fixture, if the stop valves are missing, or if you must open a wall to access soldered or crimped joints.

Code-compliant repairs require proper supports, rated materials, and tested connections; a pro can pressure-test and verify anti-scald operation on pressure-balance or thermostatic valves.

Treat any active seepage behind tile, swelling drywall, or mold odor as Emergency plumbing. That’s when to call a pro to prevent structural damage and contamination.

Conclusion

A dripping shower is a small leak with a big message: ignore it, and it becomes corrosion, mold, and higher bills. If you’ve pinpointed the source, shut off the supply, protected the work area, and corrected the showerhead, washer, or cartridge, you’ve restored the system’s seal. Recheck for leaks, confirm smooth handle operation, and verify temperature control. If valves won’t seat, piping shows damage, or codes apply, call a licensed plumber.…

moss free british paving
General Property Repairs

Patio Cleaning Made Easy: Keeping British Paving Slabs Moss‑Free All Year

Check the forecast and don’t start if rain, frost, or high winds are due; wear gloves, eye protection, and non-slip boots, then sweep grit and clear furniture. Dry-scrape thick moss, lightly wet slabs, and scrub joints downhill with a stiff brush, keeping runoff controlled. Rinse with low-pressure water and re-scrub dark patches. Match cleaners to your paving type to avoid etching. Pressure wash gently, then top up jointing sand. Next, you’ll tighten the routine.

Key Takeaways

  • Check weather, clear clutter, sweep grit, and protect plants and vents before cleaning to prevent slips, damage, and runoff.
  • Dry-scrape thick moss, then lightly wet slabs and brush joints downhill; keep the surface damp to limit mess and regrowth.
  • Use paving-safe cleaners: alkaline for concrete, pH-neutral for sandstone/limestone, and non-acidic low-residue products for granite, porcelain, or brick.
  • If pressure washing, use a fan nozzle at low pressure from 30–45 cm, working diagonally across joints to avoid etching and joint loss.
  • Refill joints with kiln-dried sand, then apply a patio biocide in spring and autumn; improve drainage and sweep weekly to deter moss.

Quick Patio Cleaning Prep and Safety Checks

prepare safety and protection

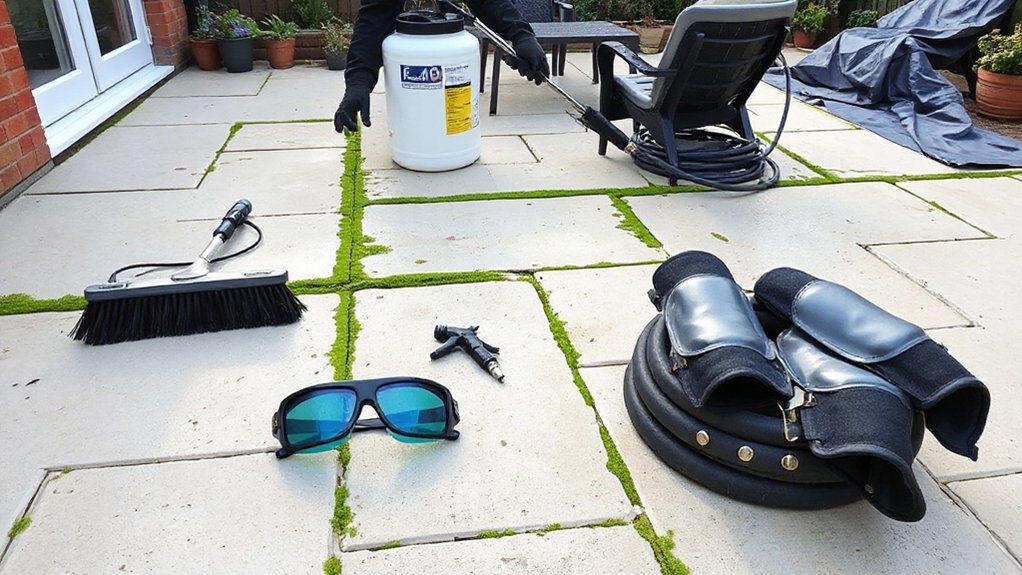
Before you start spraying or scrubbing, take two minutes to prep the area and confirm it’s safe to work. Check the forecast and stop if frost, heavy rain, or high winds are expected. Put on gloves, eye protection, and non-slip footwear, and keep children and pets indoors. Sweep off loose grit to reduce slip risk and prevent abrasive damage.

Move Garden furniture, pots, and mats off the slabs, then cover nearby plants and air bricks. Inspect paving for rocking slabs, cracked joints, and trip edges; mark hazards and avoid loading them.

Identify drainage routes so runoff won’t enter ponds or borders, supporting Wildlife protection. If you’ll use electricity, route cables away from water and use an RCD.

Remove Moss and Algae Fast (Step-by-Step)

With the area cleared, hazards marked, and runoff routes checked, you can tackle moss and algae while keeping slips and plant damage under control. Put on gloves, goggles, and grippy footwear.

Lift remaining Garden furniture onto dry ground, not the lawn, to avoid scuffing during lawn maintenance.

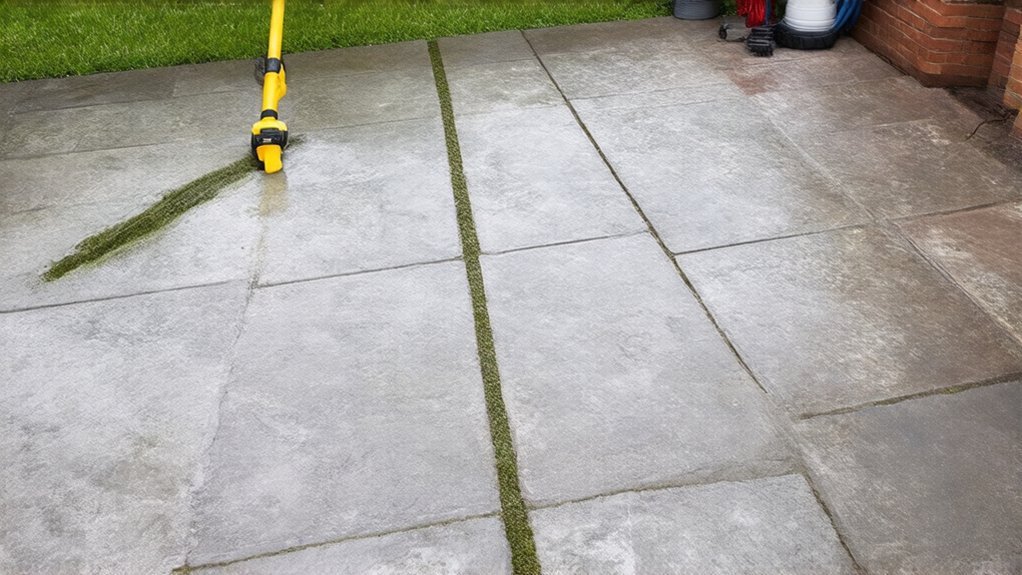
Dry-scrape thick moss with a plastic scraper, then sweep debris into a bag.

Wet the slabs lightly to reduce dust, then scrub joints with a stiff brush, working downhill so you don’t step onto slimy sections. Keep the surface damp, not flooded, to limit runoff.

Rinse with a low-pressure hose, directing water to your planned drain point.

Re-scrub any dark patches immediately.

Finish by brushing clean, checking for slick spots before reopening the area.

Choose a Patio Cleaner by Paving Type

How do you pick a cleaner that won’t etch, stain, or weaken your paving? Start by identifying the slab: concrete, sandstone/limestone, granite, porcelain, or brick.

For concrete, use an alkaline patio detergent or sodium percarbonate; avoid strong acids that dissolve cement paste.

For sandstone and limestone, choose a pH‑neutral stone cleaner; acids and bleach can bleach pigments and attack calcite.

For granite and porcelain, use a non‑acidic, low‑residue cleaner; solvents can leave films on textured finishes.

For brick, use a mild alkaline cleaner; avoid hydrochloric acid unless the manufacturer approves.

Protect garden furniture with covers and rinse overspray.

Plan plant placement: shield borders, wet leaves first, and avoid runoff into soil.

Avoid Damage: Pressure Washing and Joint Care

Although a pressure washer can strip grime fast, it can just as quickly erode soft stone, etch concrete paste, and blast out jointing sand if you run too much pressure or hold the lance too close.

Set the machine to a fan nozzle, start at the lowest effective bar, and keep a 30–45 cm standoff. Work diagonally across joints, not along them, and test a hidden slab first.

Wear eye protection, gloves, and boots; keep cables and pets clear.

After washing, inspect joints for voids. Replace lost sand with kiln‑dried sand or compatible jointing compound, brushing it in dry and tamping lightly.

For Eco friendly solutions, avoid acids; use water, stiff brushing, and controlled rinse during DIY maintenance.

Stop Moss Returning: Aftercare and Yearly Routine

Once you’ve washed the patio and re-packed any lost jointing, lock in those results with aftercare that removes spores and keeps the surface dry between cleans. Apply a patio-safe biocide on a still, dry day; wear gloves, goggles, and long sleeves, and keep pets off until fully dry. Rinse overspray from planting and collect runoff where possible.

For Moss prevention, improve drainage: clear gullies, sweep grit weekly, and trim overhanging shrubs to increase sunlight and airflow. Inspect joints monthly; top up kiln-dried sand or resin jointing before gaps widen.

For Seasonal maintenance, treat in spring and early autumn, then do a quick winter check after storms for pooling, algae film, and lifted slabs. Record dates and products so you don’t over-apply chemicals unnecessarily.

Conclusion

In the UK, surveys suggest around 60% of householders see moss return within a year if they skip aftercare—so don’t. You’ve prepped safely, removed growth methodically, and matched cleaner to your slab type. Now lock in results: rinse residues, re-sand joints, and keep drainage clear. If you pressure wash, use a fan nozzle and low PSI to protect pointing. Schedule a light biocide treatment and quarterly sweeps, and you’ll stay moss-free.…

gutter maintenance prevents leaks
General Property Repairs

How to Maintain Your Gutters: Essential Homeowner Guide for Preventing Leaks

Maintain your gutters by inspecting seams, end caps, and fasteners for gaps, stains, and corrosion, and confirm consistent slope to downspouts (about 1/16–1/8 inch per foot) so water can’t pond. Clean debris with gloves and eye protection from a stable ladder, bag it, then hose-flush runs and snake downspouts to verify free discharge at least 5 feet from the foundation. Reseal minor leaks, resecure hangers, and consider guards; more details follow.

Key Takeaways

  • Inspect gutters each season for seam gaps, loose fasteners, corrosion, and proper slope toward downspouts to prevent standing water and leaks.
  • Clean gutters regularly by scooping debris, bagging it, and flushing with a hose to confirm unobstructed flow and no joint overflow.
  • Clear downspouts using a snake or jet nozzle, and ensure discharge routes carry water at least 5 feet away from the foundation.
  • Repair issues early by rehanging sagging sections, replacing failed hangers, and sealing dry, clean seams with compatible gutter sealant.
  • Prioritize safety: use a stable ladder, wear gloves and eye protection, avoid overreaching, and hire a professional for high or complex work.

Inspect Your Gutters: Seams, Slope, Hangers

inspect repair secure verify

Before you clean or repair anything, inspect your gutters for seam separation, improper slope, and loose hangers so you can correct failures before they cause leaks or overflow.

Work from a stable ladder set per manufacturer instructions, maintain three points of contact, and don’t overreach.

Check Seam integrity at joints, end caps, and miters; look for gaps, fastener back-out, and staining that indicates leakage.

Verify slope with a level: you should see consistent fall toward downspouts, without reverse pitch or standing water.

Examine hangers and fascia attachment; replace corroded or undersized fasteners and ensure spacing meets local practice for your snow and wind loads.

Confirm compatibility of Gutter materials to prevent galvanic corrosion and premature joint failure.

Clean Gutters Safely (Tools + Step-by-Step)

Before you start, you’ll stage code-compliant access and wear essential PPE: cut-resistant gloves, safety glasses, non-slip footwear, and a stable extension ladder with a standoff (and a spotter when required).

You’ll then clear roofline debris, scoop and bag gutter buildup, flush with a hose to confirm unobstructed flow, and verify downspouts discharge away from the foundation.

You’ll finish by checking for leaks and loose fasteners, then dispose of debris per local rules and clean up the work area to prevent slips.

Essential Safety Gear

Why risk a fall or electrical contact when the right PPE and access equipment can keep gutter cleaning code-compliant and controlled? Start with ANSI-rated protective helmets and eye protection to manage impact and debris hazards.

Wear cut-resistant gloves, long sleeves, and non-slip footwear to reduce laceration and slip risk on wet roofs and ladders.

If you’ll work above lower-level edges, use safety harnesses with a compatible anchor point and lanyard rated for fall arrest; don’t rely on the gutter as an anchor.

Choose a Type IA or I ladder with levelers, stabilizer standoff, and a load rating that covers you and tools.

Keep ladders 10 ft from energized conductors, and use fiberglass rails near utilities.

Carry a basic first-aid kit.

Step-By-Step Cleaning Process

Once you’ve staged the right PPE and access equipment, you can clean gutters in a controlled sequence that limits fall exposure, protects the roof edge, and prevents downspout blockages.

Set your ladder per ANSI A14, maintain three-point contact, and standoff from the fascia.

Start at a downspout outlet, scoop debris into a bucket with a gutter spoon, and bag it—don’t drop it to grade.

Verify hangers and seams, then flush with a hose toward the downspout while watching for overflow at joints.

Clear the downspout with a plumber’s snake or jet nozzle, confirming free discharge.

Finish by rinsing the exterior to restore Gutter aesthetics.

If DIY challenges arise, stop and call a qualified contractor.

Set Your Gutter-Cleaning Schedule by Season

Because debris loads change throughout the year, you’ll get the most reliable drainage by setting a seasonal gutter-cleaning schedule that aligns with local tree drop, storm frequency, and roof runoff volume.

In spring, clear seed pods and granules after thaw to protect fascia and maintain Gutter aesthetics.

In summer, inspect after heavy rains and trim overhangs to improve landscaping integration and reduce organic load.

In fall, clean twice if you’ve got deciduous trees; schedule the final pass after leaf drop but before freezing nights.

In winter, verify downspouts remain unobstructed and remove accessible accumulations only from the ground using extension tools.

Follow ladder-angle and tie-off practices, wear cut-resistant gloves and eye protection, and comply with local runoff and debris-disposal rules.

Spot Gutter Overflow Signs Before Water Damage

spot gutter overflow signs

A seasonal cleaning plan keeps debris predictable, but you still need to spot overflow early to prevent fascia rot, foundation saturation, and interior leaks.

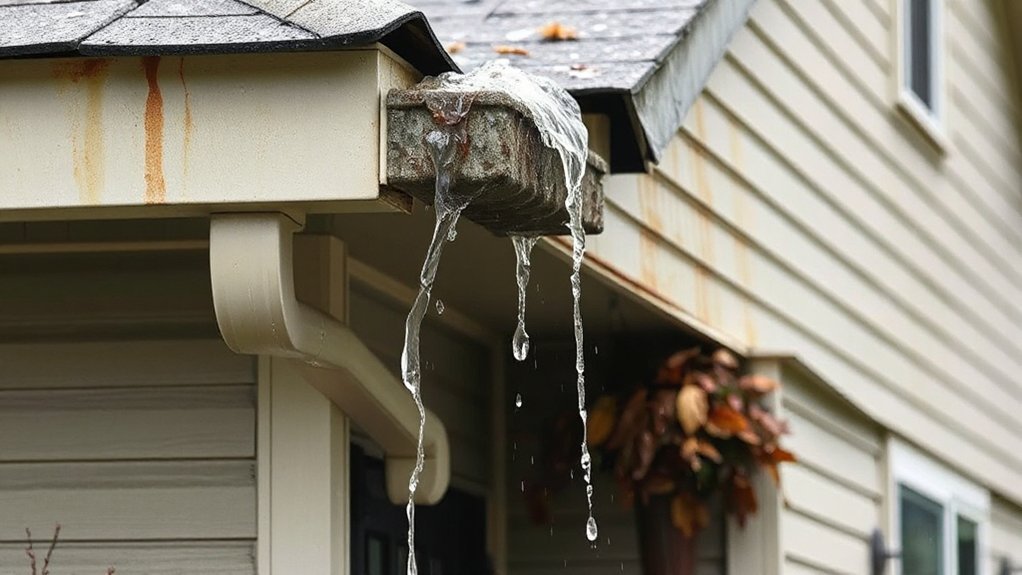
During rain, watch the drip line: if water sheets over the gutter edge or splashes behind it, you’ve got capacity or flow restriction issues.

Check for water pooling at downspout discharge, at slab edges, or along the basement wall; pooling signals improper drainage and can violate site-drainage requirements.

Inspect soffit and siding for dark streaks, peeling paint, or algae bands that mark repeated overtopping.

Inside, track musty odors, damp rim joists, and window-head staining near exterior walls.

Confirm discharge routes to a storm drain or approved dispersal area, never toward walkways.

Use a ladder stabilizer and keep three points of contact.

Fix Sagging Gutters, Leaks, and Loose Downspouts

You’ll correct sagging gutters by checking hanger spacing, fascia rot, and slope so runoff meets code and doesn’t overload the system.

You’ll seal leaks by cleaning and drying seams, then applying a compatible gutter sealant or replacing failed joints per manufacturer instructions.

You’ll secure loose downspouts with approved straps and fasteners, verify the discharge path stays clear, and use ladder and fall protection to meet safety requirements.

Identify Sagging Causes

When gutters start to sag, it usually signals a load or fastening failure that can quickly lead to leaks, fascia rot, and loose downspouts. You should first confirm slope and support spacing; most manufacturers and local codes require hangers at roughly 24 inches o.c. (closer in snow zones).

Next, isolate sagging causes by inspecting the gutter material and its connections. Heavy debris, ice, or standing water indicates poor pitch or blocked outlets. Soft fascia, missing drip edge, or fasteners pulled through suggests substrate decay or incorrect screw length.

Look for bent brackets, separated joints, and downspout straps that don’t restrain movement. Work from a stabilized ladder, wear gloves and eye protection, and don’t overload the gutter during checks.

Seal Gutter Leaks

Sagging often opens seams and fastener holes, so the next step is stopping leaks before water reaches the fascia and soffit. Set a stable ladder on firm ground, use fall protection where required, and wear gloves and eye protection. Clean and dry the leaking section; sealants won’t bond to sludge or wet metal.

For Gutter sealing, tighten or replace loose screws with corrosion-resistant fasteners, then tool a continuous bead of exterior-rated gutter sealant along seams, end caps, and around fastener heads. If you’ve got separated joints, realign them and add a rivet per manufacturer instructions before sealing.

Verify slope after repairs so water drains to the outlet without pooling. After cure time, run a controlled hose test to confirm leak prevention and check for hidden drips.

Secure Loose Downspouts

One loose downspout can dump hundreds of gallons against the foundation and overload the gutter outlet during a storm. Inspect straps, elbows, and the outlet every season, and after high winds.

Reattach the downspout to framing with corrosion-resistant screws; don’t rely on nails or brittle plastic anchors. Keep hangers within manufacturer spacing and verify proper gutter fastening at the outlet to prevent shear and leaks.

Replace missing straps and add a second strap near joints to limit movement. Seal seams with approved gutter sealant only after the downspout is aligned and supported.

Confirm discharge meets local code: direct flow at least 5 feet from the foundation using downspout extensions.

Work from a stabilized ladder, wear gloves, and avoid overhead power lines.

Prevent Clogs With Gutter Guards and Downspout Upgrades

gutter guards and upgrades

Although routine cleaning helps, you’ll prevent most clogs by adding properly sized gutter guards and upgrading downspouts to move water and debris through the system without restriction. Choose Gutter protection rated for your roof type and local leaf load, and verify it doesn’t reduce effective cross-sectional area below the gutter’s design flow.

Fasten guards per manufacturer specs, maintain required slope (about 1/16–1/8 in. per ft), and keep hangers accessible for inspection.

For Downspout enhancements, upsize where allowed, add smooth-wall extensions, and minimize tight elbows that trap debris. Secure joints with corrosion-resistant screws, seal only at approved seams, and terminate discharge per local code away from foundations.

Use stable ladders, fall protection where required, and cut-resistant gloves.

When to Repair vs Replace (and When to Call a Pro)

Even with well-sized gutter guards and upgraded downspouts, components wear out, fasteners loosen, and joints open under thermal cycling and heavy runoff.

Repair if you’ve got isolated pinholes, a single loose hanger, or a minor seam leak—clean, dry, then seal with manufacturer-rated gutter sealant and replace corroded screws with exterior-grade fasteners.

Replace when the gutter material shows widespread corrosion, cracking, oil-canning, or repeated joint failures, or when slope can’t be corrected without re-hanging long runs.

Compare replacement costs against recurring labor and water-damage risk.

Call a pro if you see fascia rot, concealed leaks behind siding, ice-dam deformation, or if work requires ladders above one story.

Follow fall protection and local code-required discharge clearances.

Conclusion

Keep your gutter system in good working order, and you’ll gently steer water away from your foundation instead of inviting “unexpected indoor moisture.” Inspect seams, slope, and hangers, then clean with ladder safety, gloves, and eye protection. Set seasonal checks, watch for overflow stains, and tighten downspouts before they “take a walk.” Seal small leaks, correct sagging, and add guards where debris is persistent. If corrosion, separation, or fascia damage appears, you’ll want a licensed pro.…

interior door jam fix
General Property Repairs

Fixing a Jammed Interior Door That Won’t Close Properly

Close the door slowly and stop at the first bind; mark the contact line with painter’s tape and run a sheet of paper around the perimeter to find pinch points. Support the door, then tighten hinge screws (top first) and replace any stripped ones with longer #8/#9 screws into the stud. Check for even reveals and shim or realign hinges if it’s sagging. If the latch drags, shift the strike plate slightly. Next, you’ll see when planing helps.

Key Takeaways

  • Close the door slowly and use painter’s tape or paper to pinpoint where it rubs or pinches in the jamb.
  • Tighten all hinge screws, starting at the top, and replace stripped screws with longer #8/#9 screws into the stud.
  • Check door reveals for uneven gaps; realign or shim hinges so hinge barrels line up and the door hangs square.
  • Correct sag or rubbing by supporting the door, improving hinge pull with longer screws, or lightly sanding/planing the tight edge.
  • Reposition the strike plate so the latch seats cleanly; shift it slightly, elongate holes if needed, and retest until it latches smoothly.

Find Where Your Interior Door Sticks

identify door binding points

Before you reach for tools, pinpoint the exact spot where the door binds. Close the door slowly and watch the reveal between the slab and jamb; stop the moment resistance starts. Use painter’s tape to mark the contact line on the jamb or edge.

Run a thin strip of paper around the perimeter; where it snags or tears, you’ve found the pinch point. Inspect for rub marks, shiny burnishing, or a scraped door paint finish, especially near the latch stile and top corner.

Check that Decorative hardware isn’t striking the jamb or trim; verify knobs, levers, and strike plates clear. Keep fingers clear of pinch zones, and support the door while testing. Document locations before adjustments.

Check Hinge Screws and Door Gaps First

Before you plane or sand anything, check the hinges: support the door, then tighten every hinge screw with the correct driver to prevent stripping.

Next, inspect the door gaps along the hinge side, latch side, and head jamb, looking for uneven reveals or rubbing points.

If the gaps change as you move the door, you’ve likely got loose hardware or misalignment that you can correct first.

Tighten Loose Hinge Screws

If your interior door rubs or sticks, start by inspecting the hinge screws and the gaps around the door because even slight hinge movement can throw the door out of alignment.

Open the door halfway, support it with a wedge or shims, and keep fingers clear of pinch points.

Using the correct screwdriver or bit, tighten each hinge screw clockwise until snug—don’t over-torque and strip the wood.

If a screw spins, remove it and drive a longer #8 or #9 wood screw into the stud behind the jamb for a solid bite.

Tighten top hinge screws first, then middle and bottom.

Recheck closing action and listen for hinge squeaks.

Confirm door handle issues and door lock mechanisms operate smoothly afterward.

Inspect Door Gap Alignment

Where exactly does the door go out of square—at the latch edge, the hinge edge, or the header? Close it slowly and watch the reveal (gap) all around. You want an even 1/8 in. gap at the jambs and a consistent head gap. If the latch-side gap pinches at the top or bottom, mark the tight spot with painter’s tape.

Next, check hinge alignment. With the door half-open, look for a stepped hinge barrel or gaps between hinge leaves and the door frame. Run a straightedge along the hinge barrels; they should line up.

Tighten any loose screws, then test again. Keep fingers clear of the hinge knuckles, and support the door if you remove screws.

Tighten or Shim Hinges to Fix Door Sag

Although a sagging interior door often feels like a latch problem, you can usually correct it at the hinge side by tightening fasteners or adding a thin shim to realign the slab. Support the door with a wedge or helper so it can’t drop.

Inspect each hinge leaf for loose screws, then drive them snug by hand to avoid stripping. If holes are worn, replace one short screw per hinge with a 3-inch screw into the stud for better pull.

If sag remains, remove the hinge-pin, swing the leaf open, and insert a cardstock or veneer shim behind the jamb-side leaf; reinstall and test closure.

Recheck strike alignment after door lock maintenance or handle replacement, since hardware changes can shift loading slightly.

Fix an Interior Door That Rubs the Frame

adjust door for even clearance

Tight hinges and a properly aligned strike fix many sagging doors, but rubbing usually means the slab’s contacting the jamb or head as it swings. Mark the rub spot with painter’s tape, then open and close the door to confirm the contact line.

Wear safety glasses and a dust mask. If the rub is on the latch side, remove the door by pulling hinge pins, then plane or sand the edge lightly, keeping the bevel consistent; take off minimal material and test-fit often.

If the rub is at the head or hinge side, check for a proud hinge leaf or loose jamb stop; tighten screws and set hardware flush. Reinstall the door, verify uniform reveal, and reinstall any Decorative hardware and door accessories without binding.

Adjust the Strike Plate so the Latch Catches

Close the door slowly and watch where the latch bolt hits the strike plate; if it contacts the plate edge or misses the hole, you’ve confirmed misalignment.

Keep your fingers clear of the jamb, then loosen the strike plate screws and shift the plate up, down, in, or out until the latch seats fully in the opening.

Retighten the screws and test the latch several times, adjusting in small increments until it catches smoothly without forcing the door.

Identify Latch Misalignment

When the door sticks or won’t latch, start by confirming the latch bolt is missing the strike plate opening. Close the door slowly and watch where the bolt contacts the plate: above, below, or to one side. Mark the contact point with painter’s tape or a pencil, then open the door and inspect the marks against the strike opening.

Next, check for Latch engagement by holding the latch retracted and testing the door’s swing for binding. If the door moves freely but the bolt still hits metal, you’ve got true misalignment, not hinge drag.

Measure the offset between bolt centerline and strike opening center. Keep fingers clear of the jamb, and don’t force the knob—controlled pressure prevents splinters and injury during Misalignment correction.

Reposition Strike Plate

If the latch bolt hits the strike plate instead of dropping into the opening, reposition the strike plate to match your alignment marks. Close the door gently and confirm where the latch contacts.

Open the door, remove the strike-plate screws, and keep them for reinstallation. Score paint lines with a utility knife to prevent splintering, then shift the plate up, down, in, or out until the latch aligns with the hole.

Tighten screws, test the latch, and recheck alignment. If needed, elongate screw holes with a file; wear eye protection and cut away from your body.

Chisel the mortise slightly only if the plate won’t sit flush. Reinstall Decorative hardware neatly to address Privacy concerns and guarantee a secure close.

Plane or Rehang the Door for Bigger Problems

Although minor rubbing often disappears with a hinge tweak, a door that binds hard along the jamb or drags across the floor usually needs either planing or a full rehang.

Mark the tight spots with painter’s tape, then remove the door and set it on sawhorses. Wear eye and hearing protection and secure the workpiece.

If the door material is hollow-core, plane lightly and stop before you expose the skin; for solid wood, take controlled passes with a sharp hand plane or power planer, keeping the edge square.

Test-fit often. Seal the fresh edge, then do paint touch ups so moisture won’t swell the fibers again.

If the gap is uneven top to bottom, rehang: reset hinges, shim, and square the jamb.

Conclusion

You’ve tracked the bind point, snugged hinge screws, and confirmed even door gaps—but the final test is next. Swing the door slowly and listen: a faint scrape means you still need a thin shim or a careful plane pass. Keep fingers clear of hinges, wear eye protection, and clamp the door before trimming. If the latch hesitates, nudge the strike plate and retest. Close it again… and wait for that clean click.…

Scroll to Top