Home Upgrades & Renovations

brightening dark basement spaces
Home Upgrades & Renovations

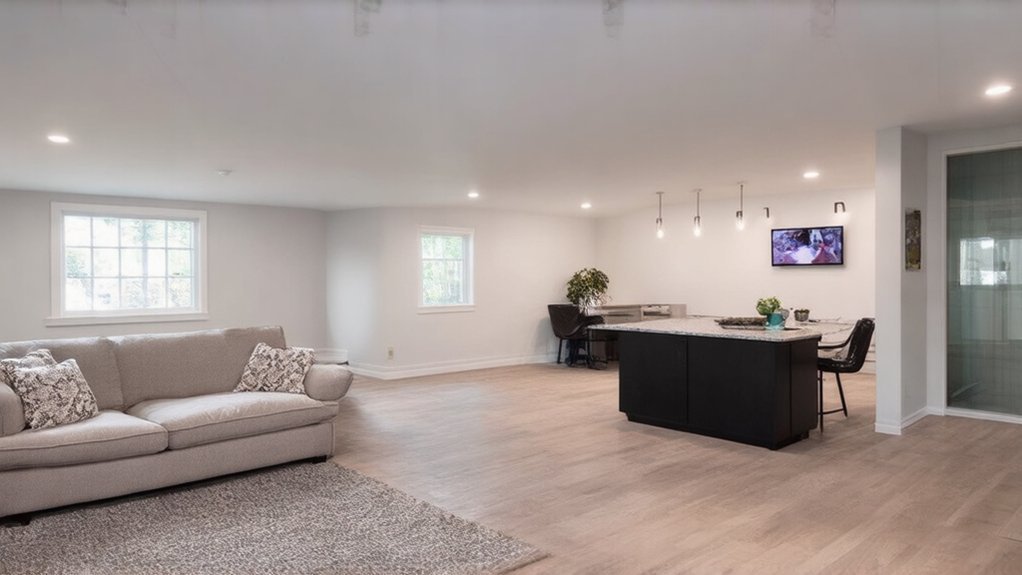
Basement Transformations: Turning Dark Spaces Into Bright, Practical Rooms

You’ll get a bright, practical basement by fixing moisture first: stop bulk water, extend downspouts, seal penetrations, and keep humidity at 30–50% with a dehumidifier. Remove moldy materials, HEPA-vacuum dust, and avoid unvented combustion appliances; test for radon if needed. Plan your layout around stairs, posts, and HVAC with clear egress paths and service access. Use low-profile LEDs, light paint, and moisture-resistant finishes. Keep going to see smart layout and lighting moves.

Key Takeaways

  • Stop water entry, seal penetrations, and keep basement humidity at 30–50% with dehumidifiers and hygrometers.
  • Plan the layout around posts, stairs, and mechanicals, preserving clear egress paths and service access to all equipment.
  • Maximize perceived height by keeping soffits tight and straight, using low-profile flooring, and painting walls and ceilings light, flat colors.
  • Brighten the space with evenly spaced low-profile LED downlights, dimmers, and high-CRI lamps, plus wall-wash lighting to reduce shadows.
  • Choose moisture-resistant finishes like LVP or tile, use treated bottom plates and fireblocking, and keep key shutoffs and junctions accessible.

Fix Basement Moisture and Air Quality First
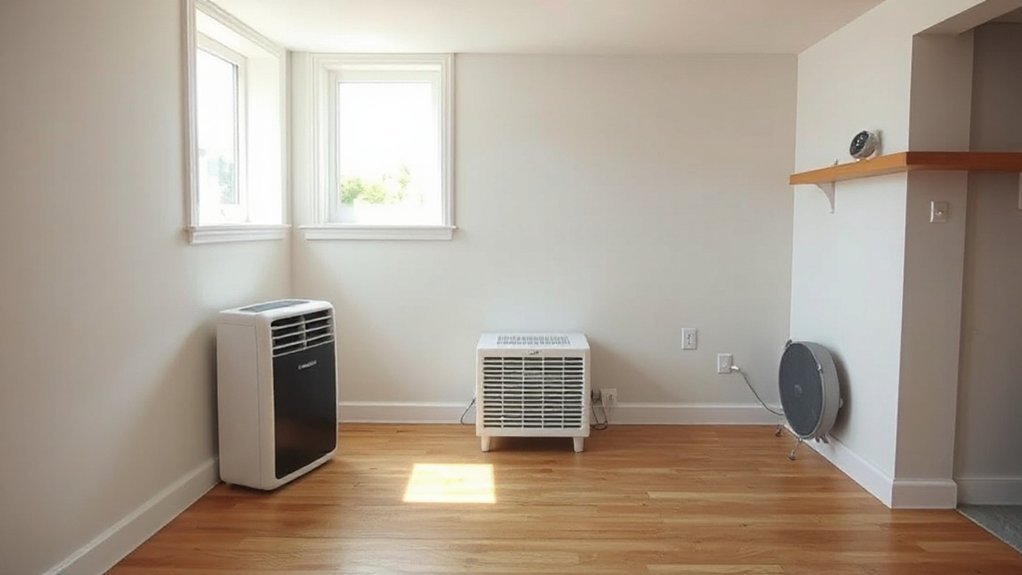
control moisture improve air

Before you frame a wall or lay new flooring, you need to control basement moisture and clean up the air, because both can ruin finishes and create health and safety issues.

Start with moisture control: fix bulk water entry, extend downspouts, and confirm the slab and wall surfaces stay dry after storms. Seal penetrations, then install a continuous vapor retarder where your assembly requires it, and keep relative humidity at 30–50% with a properly drained dehumidifier. Use a hygrometer to verify conditions.

For air quality, remove moldy materials, HEPA-vacuum dust, and avoid unvented combustion appliances. Apply code-appropriate Ventilation techniques: provide continuous mechanical exhaust or balanced ventilation, and route ducts to the exterior with backdraft dampers. Test radon and mitigate if needed.

Plan a Basement Layout Around Stairs, Posts, and HVAC

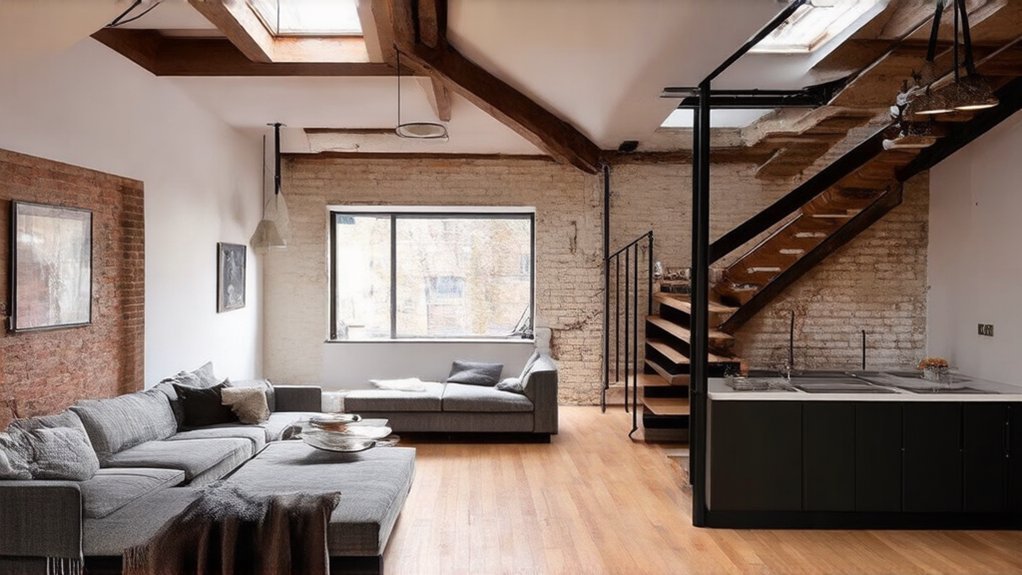
With moisture and air quality under control, you can lock in a basement layout that works with the immovable parts: the stair, structural posts and beams, and HVAC equipment and duct runs.

Start by mapping clear egress paths, then keep corridors wide and free of obstructions.

Prioritize Staircase design that meets tread/riser consistency, handrail height, headroom, and landing requirements, and don’t narrow the bottom run with built-ins or doors.

Treat Post placement as fixed: wrap posts only with noncombustible, removable covers, and align partitions to create straight walls and clean door openings.

Place mechanical rooms where service access stays code-clear, and maintain required clearances around furnaces, water heaters, panels, and cleanouts.

Route ducting to avoid sharp turns and preserve airflow performance.

Make a Low-Ceiling Basement Feel Taller

Although you can’t change joist depth or duct drops without major structural work, you can make a low-ceiling basement read taller by controlling headroom-critical elements and keeping everything inside code limits.

Confirm minimum Ceiling height and required clearances at stairs, landings, and egress routes, then keep ducts, beams, and soffits tight to structure and aligned to avoid random drops. Where you must build soffits, run them straight and stop them short of door openings to preserve headroom.

Choose a flat, light Wall color on both walls and ceiling to reduce shadow lines, and keep trim shallow so it doesn’t visually lower the lid. Use low-profile flooring assemblies and maintain required stair rise/run and handrail heights.

Add Basement Lighting That Brightens Every Corner

Since basements often suffer from limited daylight and deep shadows, you’ll get the biggest improvement by layering lighting—ambient, task, and accent—so no corner relies on a single fixture.

Start with evenly spaced, low-profile LED downlights on a switch, then add wall sconces or cove lighting to wash surfaces and reduce shadows.

For task areas, use dedicated fixtures over desks, laundry, or hobby benches, and keep them on separate controls.

Add dimmers rated for your LED loads, and choose high-CRI lamps for color enhancement and accurate visibility.

Follow NEC basics: protect circuits with GFCI where required, use listed fixtures in damp locations, and maintain required clearances.

Label breakers, and don’t overload boxes.

Pick Basement Flooring, Walls, and Ceilings That Last

Once you’ve brightened the space, choose finishes that can handle basement realities—moisture, temperature swings, and occasional seepage—without hiding problems or creating mold.

Start at the slab: confirm moisture levels, add a code-accepted vapor barrier where required, and use stylish flooring options like LVP, porcelain tile, or sealed concrete; avoid carpet and solid hardwood.

If you install sleepers or subfloor panels, keep them off damp concrete and maintain edge gaps for drying.

For walls, frame with treated bottom plates, leave a capillary break, and use closed-cell foam or mineral wool with the correct fire-rated covering.

Choose Decorative wall finishes rated for below-grade use.

On ceilings, keep access to shutoffs, junction boxes, and cleanouts, and fireblock penetrations.

Set Up Basement Zones for How You’ll Use It
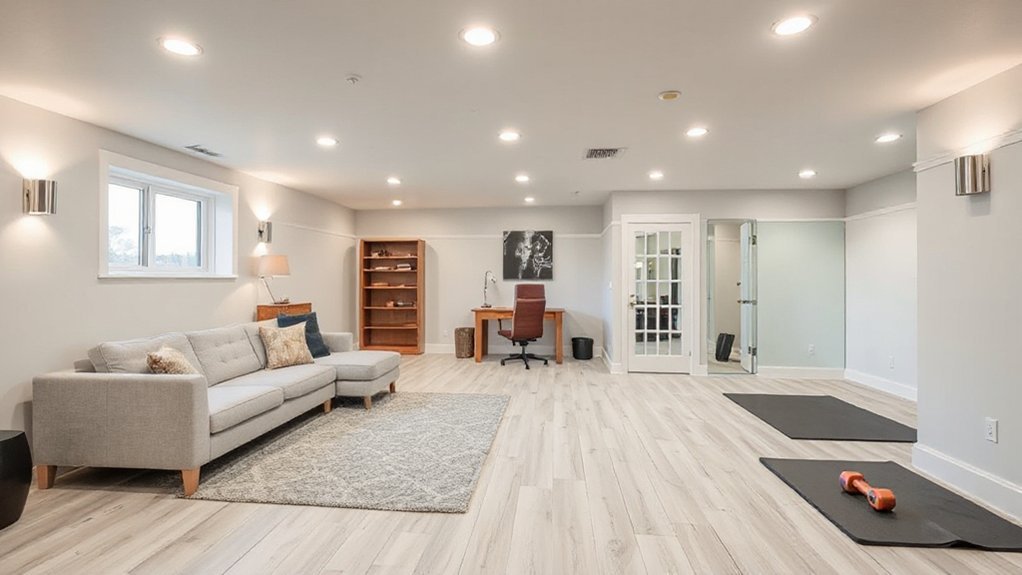
define zones plan layout

Start by defining your primary activity areas—such as living, work, fitness, or guest space—so you can assign clear boundaries and confirm each zone meets egress, ceiling height, and clearance requirements.

Next, plan traffic-flow paths that keep walkways unobstructed, maintain access to exits and service panels, and separate quiet areas from mechanical noise.

Finally, add storage and utilities in dedicated locations that don’t block shutoffs, sumps, or ventilation, and label or protect them to reduce trip, moisture, and fire risks.

Define Primary Activity Areas

Three clear zones usually make a basement remodel safer and more functional: where you move (paths and stairs), where you live (seating, play, or work areas), and where you support the space (storage, mechanical, and laundry).

Start by naming your primary uses, then assign each to a defined footprint so safety systems match the risk.

Place Entertainment zones where you can meet ceiling-height requirements and keep required egress windows or doors unobstructed.

For Workout areas, choose a dry, well-ventilated spot and plan for impact-rated flooring and a GFCI-protected receptacle for equipment.

Keep the support zone accessible for service clearances around the furnace, water heater, and electrical panel, and don’t store combustibles nearby.

Use moisture-resistant finishes at slab level and label shutoffs for quick response.

Plan Traffic Flow Paths

How will people move through your basement without cutting through hazards or blocking required exits? Map your primary entry points, stair landing, and any egress window well, then sketch direct Movement pathways between activity zones.

Keep Traffic patterns clear of door swings, low beams, and floor level changes. Maintain code-required clear widths for corridors and stairs, and don’t narrow routes with furniture placement.

Provide a continuous, slip-resistant walking surface and avoid area rugs that can curl.

Separate loud or active zones from quiet ones by routing paths along perimeter walls instead of through seating or work areas.

Add lighting at turns and stairs, and verify switches are reachable from each entry. Recheck paths with doors fully open.

Add Storage And Utilities

Once you’ve mapped safe traffic paths, lock in dedicated zones for storage and utilities so you don’t block access to egress points, shutoffs, or service panels. Keep a clear working aisle to the electrical panel, water heater, sump, and cleanouts, and label valves and breakers for fast emergency response.

Use Custom shelving to lift bins off the slab, prevent moisture damage, and maintain clearance from vents, combustion air intakes, and heat sources. Anchor units to studs or masonry with rated fasteners, and avoid storing combustibles near furnaces or boilers.

For Utility installation, follow manufacturer spacing, provide GFCI where required, protect wiring in conduit, and maintain access for inspection and servicing. Add task lighting and a drip pan or floor drain where equipment demands.

Conclusion

Start by sealing moisture, improving ventilation, and confirming safe egress, because comfort follows compliance. Then plan around stairs, posts, and HVAC so clearances stay correct and access stays easy. Raise the feel with lighter finishes, tighter soffits, and consistent sightlines; brighten the space with layered LEDs, switched zones, and GFCI/AFCI-protected circuits. Choose durable flooring, mold-resistant walls, and fire-rated ceilings. Finally, zone for work, play, and storage, and you’ll get a basement that’s safe, bright, and built to last.…


restoring hardwood floors step by step
Home Upgrades & Renovations

A Step By Step Guide To Restoring Original Hardwood Floors

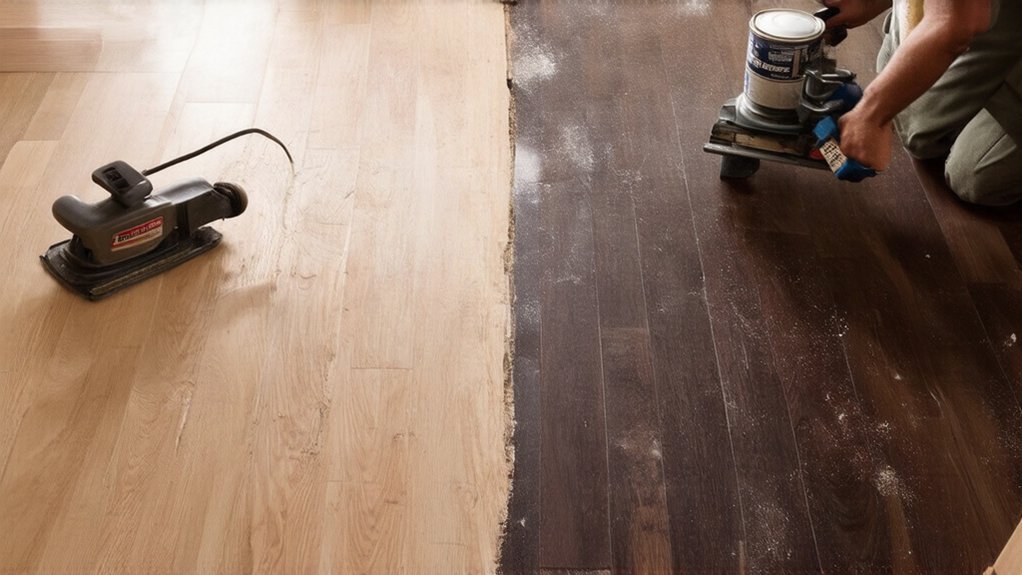
First, you confirm the floor’s refinishability by measuring wear layer above the tongue at a register and checking for cupping, rot, pet stains, or engineered delamination. Next, you clear the room, seal vents and openings with plastic, set exhaust ventilation, and wear a P100 respirator, eye and hearing protection. Then you sand systematically from 36–60 grit through 120–150, edge-sand each pass, and screen to remove swirls. Repair loose boards, gaps, and stains, then stain (optional) and seal with a compatible sealer and low-VOC waterborne polyurethane. Keep going for detailed grit choices, repair fixes, and finish timing.

Key Takeaways

  • Confirm the floor can be refinished by measuring wear layer thickness, checking damage, and identifying prior coatings needing special handling.
  • Empty and seal the room, protect HVAC openings, and set ventilation to control dust while preventing appliance backdrafting.
  • Sand in grit stages from coarse to fine, vacuum between passes, and use raking light to verify the previous scratch pattern is removed.
  • Repair loose boards, gaps, stains, and nail pops before finishing, then spot-sand repairs flush and tack thoroughly.
  • Test stain colors, apply evenly, then seal and topcoat with low-VOC waterborne polyurethane within recoat windows for a durable finish.

Decide If Your Hardwood Floors Are Refinishable

check wood and condition

Before you rent a drum sander or buy finish, confirm your floor can actually take a refinish. Identify the wood and its Hardwood history: strip flooring, plank, or parquet may dictate thickness and repair strategy.

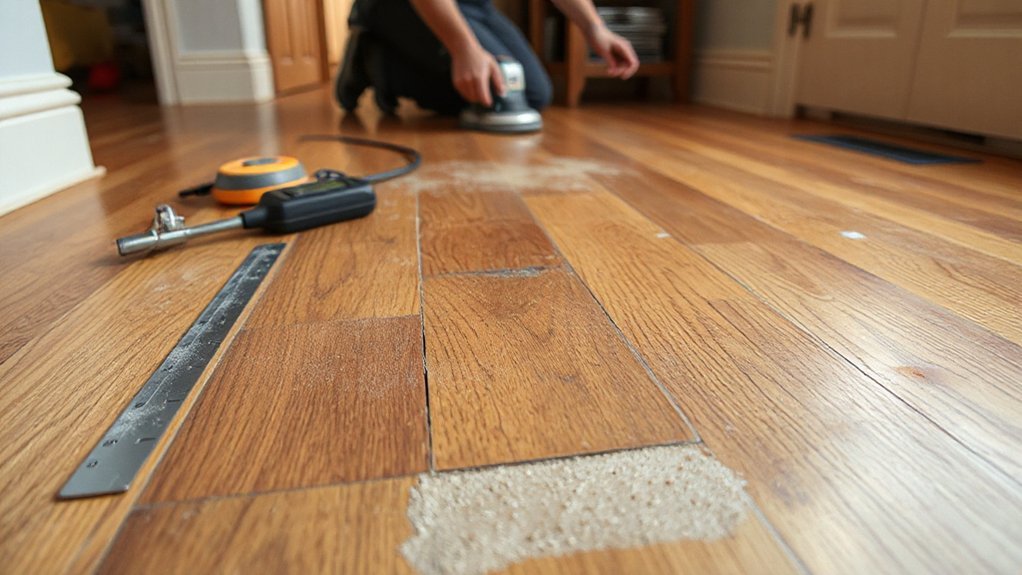
Remove a floor register and measure remaining wear layer above the tongue; you’ll generally need enough meat for one more sanding. Check for cupping, deep pet stains, rot, active insect damage, or widespread delamination in engineered boards—these can make refinishing unsafe or ineffective.

Verify the subfloor feels rigid; excessive bounce can crack future finish. Note prior coatings: wax, acrylic, or lead-era paint overspray require special testing and may push you toward Flooring alternatives like replacement or overlay.

If boards are thin or split throughout, don’t sand; plan another approach.

Prep the Room, Safety Gear, and Floor Tools

Once you’ve confirmed the floor can be refinished, clear the room to create a controlled, dust-managed work zone and stage the right PPE and tools. Complete Furniture removal, then take down curtains, rugs, grilles, and doors you can’t protect. Seal HVAC registers, hang 6-mil plastic at openings, and tape seams to limit migration.

For Ventilation setup, exhaust air with a box fan in a window and crack an opposite window for make-up air; avoid backdrafting combustion appliances.

Wear a P100 respirator, safety glasses, hearing protection, gloves, and knee pads. Keep a Class A/B/C extinguisher nearby and manage cords to prevent trips. Stage a HEPA vacuum, tack cloths, painter’s tape, utility knife, pry bar, nail set, putty knife, and wood filler for fast, safe corrections.

Sand Hardwood Floors Smooth (Grits + Swirl Tips)

After you’ve sealed the space and suited up, sand the floor in controlled passes that step through grits—coarse to cut old finish and flatten high spots, then progressively finer to erase scratch patterns without leaving swirls.

Start with 36–40 grit on heavy finish or cupping, or 60 grit on lighter wear; that’s your Grit selection baseline. Run the drum/belt sander with the grain, keep it moving, and lift before stopping to prevent divots.

Edge-sand after each main pass using the same grit sequence so the field and perimeter match. Vacuum between grits and inspect under raking light to confirm the previous scratch pattern is gone.

For Swirl technique, use a buffer with a 100–120 grit screen, overlapping passes and feathering edges. Finish with 120–150 grit for uniformity.

Fix Boards, Gaps, and Stains Before Finishing

Even if your sanding looks uniform, you’ll lock flaws in permanently if you don’t correct loose boards, open seams, and discoloration now. Walk the floor slowly and mark squeaks, movement, dark pet stains, water marks, and nail pops. Wear eye protection and a respirator when cutting or scraping.

Secure loose boards by driving finish nails into joists or adding trim screws where plugs will hide. For split, cupped, or rotten planks, plan to replace boards: cut back to the nearest joist, remove fasteners, and fit a matching board with proper expansion.

Start filling gaps only after humidity stabilizes. Pack narrow seams with latex wood filler, and use slivers for wider gaps. Spot-sand repairs flush, then vacuum and tack thoroughly.

Stain or Go Natural, Then Seal for Protection

Although a freshly sanded floor looks clean, you still need to choose a stain (or stay natural) and lock the surface down with a compatible sealer before foot traffic, UV light, and spills start degrading the wood.

Start with Color matching: test stains on offcuts or an inconspicuous corner, then let samples dry fully under your actual lighting. If you go natural, confirm the wood’s undertone won’t amber excessively under finish.

Wear gloves and a respirator; maintain cross-ventilation and eliminate ignition sources.

Apply stain with a pad, wipe evenly, and control lap marks by working in manageable rows.

After cure, vacuum and tack carefully, then seal with a dewaxed shellac or manufacturer-approved sealer.

Choose Eco friendly finishes like low-VOC waterborne polyurethane, and follow recoat windows precisely.

Conclusion

You’ve checked refinishability, cleared the room, and geared up, so finish strong. Sand with the right grits, vacuum between passes, and keep the sander moving to prevent swirls. Repair loose boards, fill gaps, and treat stains, so defects don’t telegraph through the finish. Choose stain or natural, then seal with even coats, proper dry times, and solid ventilation. Work clean, work level, work safe—and you’ll restore durable, original hardwood.…

loft renovation for living
Home Upgrades & Renovations

How to Renovate a Loft Space Into a Comfortable, Usable Living Area

Start by measuring headroom along stairs, circulation paths, and occupancy zones, then verify joist species, span, spacing, and bearing for required loads and deflection limits; add sistering, LVLs, or beams if needed. Confirm planning permission for dormers, windows, or roofline changes, and submit drawings to Building Control for staged inspections and final sign-off. Design continuous insulation, airtightness, and ventilation to prevent condensation, then upgrade wiring, lighting, and HVAC zoning. Next, you’ll see how to optimize stairs, storage, and daily flow.

Key Takeaways

  • Confirm structural capacity and code-compliant headroom, stairs, guardings, and egress before planning finishes or furniture.
  • Plan circulation first, then place stairs, doors, and built-ins to keep clear pathways and safe, consistent riser/tread geometry.
  • Build a continuous insulation and airtightness system, with correct ventilation and fireblocking to prevent condensation and meet regulations.
  • Upgrade electrical, lighting, and mechanical ventilation; keep junction boxes, duct runs, and penetrations accessible and code-compliant.
  • Use low-profile, securely anchored storage at eaves and under stairs, preserving required egress width, airflow paths, and daily usability.

Can Your Loft Renovation Meet Height and Structure Rules?

loft height and structure compliance

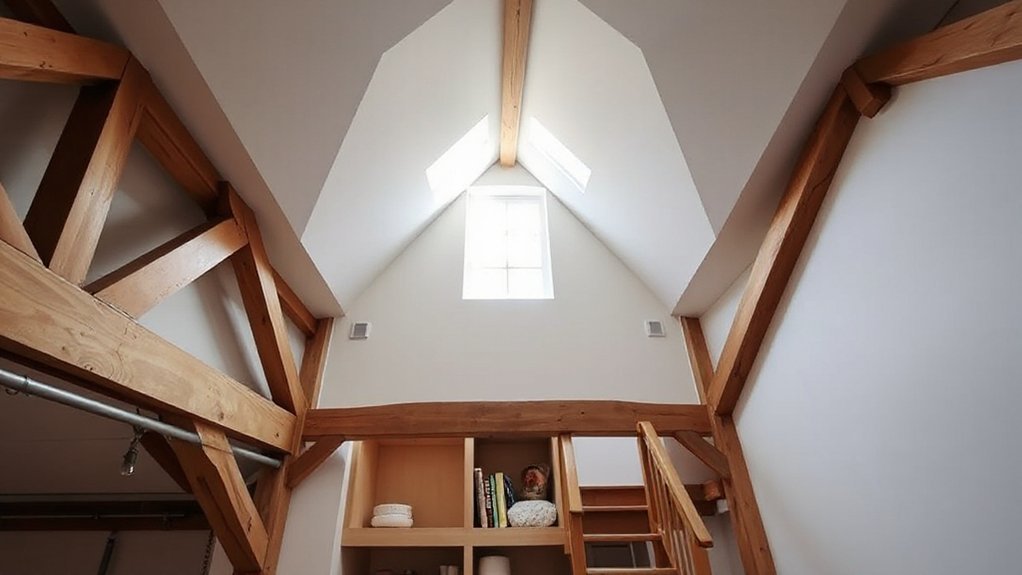
Before you finalize a loft renovation plan, verify that the space can meet code-required ceiling heights and that the existing structure can carry the new dead and live loads without overstress. Measure headroom at proposed circulation paths, stairs, and any areas intended for regular occupancy, then compare results to applicable Building codes. If height is marginal, you’ll need engineered solutions such as dormers or lowered ceilings below—don’t assume exceptions apply.

Next, confirm Structural integrity by inspecting joist species, span, spacing, bearing conditions, and any notches or bore holes. Calculate tributary loads for finishes, partitions, and furnishings, and check deflection limits to control bounce and cracking. If capacity falls short, specify sistering, LVLs, or new beams with proper connections.

Pick the Right Use for Your Loft Renovation

Once you’ve confirmed the loft can meet height and structural requirements, define its primary use early because occupancy type drives nearly every downstream code decision.

If you’re creating a bedroom, you’ll need space for a compliant egress route and clearances that won’t be blocked by furniture placement.

If it’s an office or studio, prioritize workstation zones, glare control, and dedicated circuits for equipment loads.

For a lounge, plan seating sightlines, media wall backing, and guard locations to keep fall protection intact.

Map circulation first, then assign built-ins so you don’t compromise headroom at slopes.

Keep storage low at kneewalls, and reserve tall elements for the ridge line.

Finish with decorative accents that don’t reduce required clear widths or access panels.

Planning Permission, Building Regs, and Inspections

Although a loft conversion can feel like an internal remodel, you still need to confirm whether it triggers planning permission and must satisfy Building Regulations, then schedule inspections so each hidden element gets signed off before you cover it up.

Check local planning rules for dormers, roofline changes, new windows, and added floor area; in conservation zones, you’ll often need consent. Submit drawings, structural notes, and a spec to Building Control, then follow applicable Building codes for structure, stairs, headroom, fire separation, smoke/heat alarms, escape windows, and guardings.

Use approved contractors where required and keep certificates for electrics and any new drainage connections. Book staged inspections for structural supports, fire protection details, and stair installation.

You’ll need final sign-off and occupancy permits before you move in.

Insulation and Heating/Cooling for a Comfortable Loft

Because a loft sits directly under the roof deck and outside air, you’ll only get year-round comfort if you design insulation and HVAC as a single, code-compliant system: set a target U‑value/R‑value that meets your local energy code, maintain continuous insulation at rafters, gables, and eaves to eliminate thermal bridging, and protect performance with an airtight layer plus correctly sized ventilation paths (or an approved warm-roof assembly) to prevent condensation.

Then size heating/cooling to the new heat-loss and solar-gain calculations, not the house’s original plant. You’ll improve thermal comfort and energy efficiency by using room-by-room load calculations, zoning, and low-temperature emitters (radiant panels or hydronic loops) or a properly commissioned mini-split.

Seal ducts to code, insulate pipework, and verify airflow and refrigerant charge. Add smart controls and balance the system so the loft doesn’t overheat or lag.

Add Light, Electrics, and Ventilation Up Top

You’ll plan loft lighting around headroom and task zones, specifying IC-rated recessed fixtures or low-profile surface luminaires. You’ll also verify any skylight work meets local egress and tempered-glazing requirements.

You’ll upgrade wiring to current code by sizing circuits for the added load, installing AFCI/GFCI protection where required, and routing cables with proper protection and staple spacing.

You’ll also provide code-compliant ventilation by verifying exhaust CFM, insulating and sealing ducts to prevent condensation, and maintaining required roof/soffit vent pathways for balanced airflow.

Plan Lighting For Lofts

Before you close in the ceiling or finish the knee walls, map the loft’s lighting, electrical runs, and high-level ventilation so every junction box, cable route, and duct penetration stays accessible and code-compliant.

Lay out ambient lighting first: place recessed or low-profile fixtures to avoid headroom conflicts and maintain required clearances from insulation and framing. Add task lighting at desks, reading nooks, and stair landings, and specify IC-rated, airtight housings where assemblies demand it.

Use smart controls so you can zone slopes, dormers, and the center bay independently; include 3-way switching at both stair and loft entries.

Plan receptacle locations around furniture and egress paths, and reserve chases for future low-voltage runs. Coordinate vent grille placement with lighting to prevent glare and drafts.

Upgrade Wiring And Ventilation

Where do you add capacity and airflow without tearing finished surfaces back open? Start by tracing existing circuits, then size a new subpanel or feeder to meet load calculations per NEC Article 220.

Pull new cable through chase walls, soffits, or surface-mounted raceway, and staple or strap within code limits. Add AFCI/GFCI protection where required, bond metal boxes, and label breakers for electrical safety.

Upgrade lighting feeds with 14/2 or 12/2 as amperage dictates, and keep junction boxes accessible.

For ventilation systems, run insulated ducting to a roof or gable cap, slope condensate lines, and seal joints with mastic. Meet ASHRAE 62.2 rates, provide makeup air for fans, and verify clearances at insulation and rafters.

Stairs, Storage, and Layout That Work Daily

You’ll start by specifying stairs that meet local code for rise/run, minimum clear width, headroom, and guard/handrail requirements while staying compact with winders or alternating treads where permitted.

You’ll then lock in built-in storage—knee-wall cabinets, under-stair drawers, and rated access panels—so it preserves egress paths, doesn’t block required clearances, and supports HVAC/electrical serviceability.

Finally, you’ll plan the daily-flow layout by mapping circulation from the stair landing to sleep, work, and bath zones, keeping door swings, clear walking paths, and furniture footprints conflict-free.

Safe, Space-Smart Stairs

Although a loft stair can double as storage and circulation, it still has to meet daily-use safety basics: size the run for code-compliant headroom and landing clearances, keep risers uniform, and provide a continuous handrail with proper graspability and guard protection at open edges.

For stair safety, confirm tread depth and riser height stay within your adopted code, and keep nosings consistent to prevent trips. If you need space-efficient stairs, favor a compact straight run or switchback over alternating treads unless permitted and clearly justified.

Maintain a clear walking width, limit steepness, and avoid encroaching doors at landings. Add slip-resistant nosings, bright step-edge contrast, and lighting controlled from both levels.

Verify guard heights and infill spacing at the loft opening.

Built-In Storage Solutions

Once your stair run and loft opening meet code and feel predictable underfoot, you can make the circulation zone earn its keep with built-in storage that doesn’t steal clearance. Keep required egress width and headroom intact by recessing cabinets between studs or under treads, and stop faces flush to avoid snag points.

Use drawer boxes on full-extension slides rated for the load, and anchor to framing with structural screws, not finish nails. Add Hidden compartments behind removable toe-kicks or false risers, but keep access panels tool-free and labeled for maintenance.

Specify Modular shelving with adjustable standards fastened into blocking so shelves stay plumb and don’t rack. Vent any enclosed volumes near HVAC returns, and maintain fireblocking where cavities connect to concealed spaces.

Daily-Flow Layout Planning

Because lofts compress circulation into a few critical feet, plan the daily-flow path around the stair run, the landing/loft opening, and the doors or drawers you’ll touch most, then lock those clearances in before you place storage or furniture.

Keep egress routes unobstructed: maintain a clear stair width per local code, provide uniform riser/tread geometry, and preserve headroom at the opening and along the run.

Size the landing so you can turn, open a door, or pull drawers without stepping into the stair.

For furniture arrangement, align the bed or desk so you don’t narrow the path; avoid low beams at primary walking lines.

Add guardrails at edges and consider privacy considerations with partial-height screens that don’t block required ventilation or light.

Conclusion

You’ve turned your loft from dead air into working square footage by proving headroom, joist capacity, and safe load paths. You’ve matched the space to its use, then cleared permissions, Building Regs, and inspections so nothing’s left to chance. With continuous insulation, sealed vapor control, and sized HVAC, comfort won’t leak away. You’ve poured in daylight, compliant wiring, and balanced ventilation. Finally, code-safe stairs, smart storage, and a tight layout make it liveable daily.…

restoring vintage wooden windows
Home Upgrades & Renovations

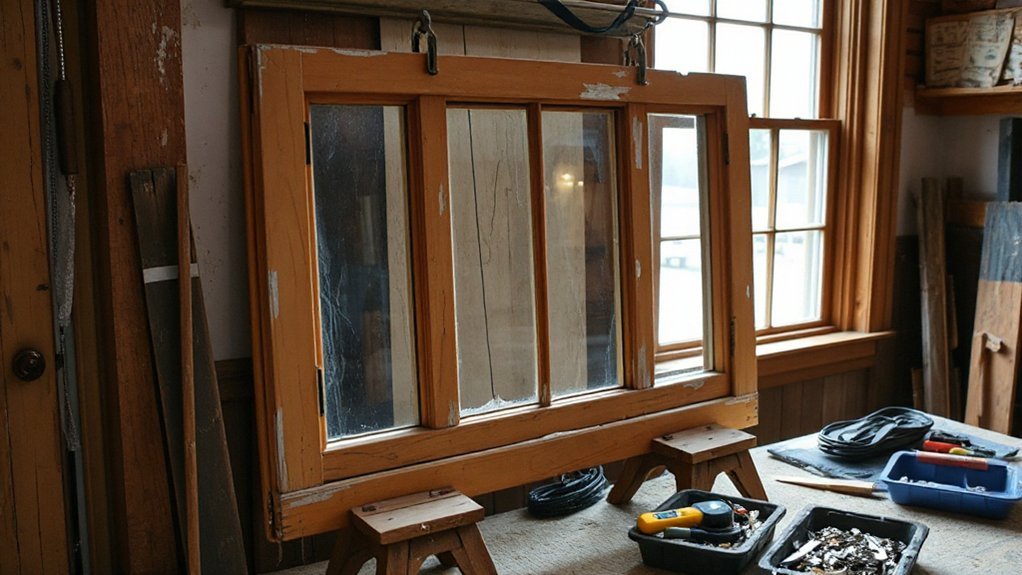
A Step By Step Guide To Restoring Vintage Wooden Sash Windows

Start by inspecting each sash for twist, open joints, and rot at the lower rail and sill line, then decide what’s sound enough to repair. Score paint lines, remove staff stops, lift out the lower sash, tie off cords, pull the parting bead, and withdraw the upper sash, labeling everything. Strip paint only on moving edges, clean channels, and wax for glide. Repair rot and loose mortise-and-tenon joints, re-cord, renew beads, then prime and paint, lapping onto glass—more details follow.

Key Takeaways

  • Inspect sashes, joints, muntins, and rot at rails and sill line to decide repair versus replacement, documenting all findings.
  • Gather sharp tools, low-heat paint removal gear, clamps, and PPE; choose compatible materials like hide glue, linseed putty, and sash cord.
  • Remove interior stops, lower sash, parting bead, then upper sash; label parts, tie off cords, and bag hardware for reassembly.
  • Strip paint only in moving channels, clean tracks, set nails below surface, and lubricate sash edges and beads with paraffin or beeswax.
  • Repair rot and loose joints, replace cords and beads, service pulleys, then prime and paint, slightly overlapping glass for a weather-tight seal.

Assess Wooden Sash Windows: Repair or Replace?

inspect assess repair document

Before you reach for replacement units, take a careful inventory of what you’ve got, because original sash often repays repair when its core timber remains sound. You’ll inspect rails, stiles, and meeting rails for spring, twist, and open joints; probe suspected decay at the lower rail and sill line, and note whether damage is localized or structural.

Check muntins for fractures, glazing bars for thinning, and mortise-and-tenon shoulders for tight bearing. If putty has failed yet the arrises remain crisp, you can justify repair for Historical accuracy.

If previous alterations have erased profiles, or rot has advanced through joints and pins, consider modern alternatives, but match sightlines, horn details, and glass thickness to the opening exactly. Document findings for measured decisions.

Tools, PPE, and Materials for Sash Restoration

Once you’ve decided the sash deserves saving, set yourself up with the same disciplined kit a joiner would recognize: sharp cutting tools, controlled heat for paint and putty, accurate measuring and clamping, and materials that respect old-growth timber and traditional glazing.

Keep chisels honed, add a narrow pry knife, and use a carbide scraper; pair them with an infrared heater or low-temp heat gun to soften coatings without scorching profiles.

Wear a P100 respirator, goggles, nitrile gloves, and disposable coveralls for dust and lead paint.

Stock hide glue or reversible epoxy sparingly, linseed-oil putty, shellac-based primer, and sash cord, waxed if specified.

Choose brass screws and period pulleys to maintain Historical accuracy while managing Restoration cost sensibly.

Remove the Sashes and Protect the Trim

Although the joinery looks simple at a glance, you’ll get the cleanest removal by treating the frame and its mouldings as finished furniture, not demolition. Score paint lines with a sharp knife, then ease off the interior stop with a thin putty knife and a small pry bar, levering against a wood shim. Label each stop and its location.

Lower the bottom sash a few inches, cut any paint bridging, and lift it free. Tie off the sash cords immediately so the weights don’t drop, then tag left/right. Remove the parting bead carefully, working from the meeting rail area, and withdraw the upper sash the same way.

Bag screws, lifts, and locks for hardware restoration, and cushion the glass for later Glass replacement. Mask the trim with low-tack tape and cardboard.

Strip Paint and Ease Tight Sash Channels

With the sashes out and the trim protected, you’ll strip the paint that’s bridged the parting beads and jamb liners, using a low-heat gun and sharp scraper or a solvent stripper where heat would scorch the old growth.

You’ll keep the work lead-safe with wet methods, containment, and a HEPA vacuum as you go.

Then you’ll clear the channels to bare, true wood, dress high spots lightly, and apply a dry film lubricant or a rubbed paraffin coat so the sashes run free without attracting grit.

Safe Paint Stripping Methods

Because old sash paint often bridges the meeting rails and packs into the parting and staff channels, you’ll get the best results by stripping only where the window must move, not by scouring the whole frame. Score the paint line with a sharp knife, then pull the sash and parting bead carefully so you don’t splinter brittle profiles. Protect glass with foil tape and a thin sheet of metal.

Choose non toxic solvents for flat areas where you can keep dwell time controlled; brush on, wait, then lift softened paint with a shave hook, working with the grain.

For stubborn ridges, use a heat gun on low, keep it moving, and stop as soon as the paint turns dull and pliable. Scrape immediately, then wipe residue clean.

Lubricate And Clear Channels

Where does a sash usually bind after you’ve broken the paint seal? Most often at the parting bead, staff bead, and the jamb channels where old paint has bridged. Pull the sash, then scrape only the high ridges with a sharp, narrow chisel held flat; don’t gouge the stile. Follow with a cabinet scraper and a few passes of fine paper on a hardwood block to true the bearing surfaces.

For channel cleaning, vacuum the pockets, then wipe the channels with mineral spirits to lift grit and waxy residue. Check for protruding brads and set them below the surface.

For window lubrication, rub dry paraffin or beeswax along the sash edges and beads; avoid oily lubricants that attract dust. Rehang and test for smooth travel.

Repair Rot and Tighten Loose Sash Joints

Before you touch paint or putty, inspect the sash for rot and joint failure, since both will undo an otherwise careful restoration. Probe suspect rails, stiles, and the bottom meeting edge with an awl; punky fibers and dark staining signal sash window rot. Excavate to sound wood, then flood the cavity with consolidant and pack it with a dutchman patch or epoxy filler shaped to the original profile.

For loose mortise-and-tenon corners, do wooden joint repair: strip the joint, scrape out failed glue, and test-fit square. Re-glue with hot hide glue for period correctness, clamp diagonally, and verify equal diagonals. If the tenon’s worn, peg it with a small hardwood dowel, then plane flush after cure. Prime end grain immediately.

Replace Sash Cords, Pulleys, and Balance Weights

Once the sash itself is sound, you can restore the counterbalance by renewing the cords, servicing the pulleys, and confirming the weights match the sash.

Start by opening the weight pocket and retrieving each weight; keep left and right sets paired.

Weigh the sash and compare: the combined weights should slightly underbalance it so it closes firmly.

For Sash cord replacement, cut new braided cotton sash cord to length, melt the ends, and tie a figure-eight to the weight ring.

Feed the cord over the pulley, then pin it temporarily at the stile while you rehang the sash and set the knot in the sash groove.

For Pulley repair, remove paint, oil the axle, and true the wheel so it spins freely, without wobble.

Draught-Proof Timber Sash Windows (Beads and Seals)

After you’ve restored the counterbalance, turn to draught-proofing by renewing the parting and staff beads and fitting discreet seals that stop rattle without tightening the sash.

Ease out the staff bead with a thin chisel, keeping the old profile as a pattern. For bead replacement, mill or buy matching ovolo sections in straight-grained softwood, then pre-drill and pin with lost-head nails so you don’t split it.

Replace the parting beads next, ensuring the sash runs freely in the groove. Rout or saw a neat kerf and press in brush pile or sprung bronze, keeping the carrier continuous at meeting rails.

Rehang and test: the sash should slide under its own weight. Finish with seal maintenance: vacuum the piles, wipe wax, and replace crushed strips early.

Prime and Paint Sash Windows So It Lasts

Although the joinery now runs sweetly and seals neatly, you’ll only keep rot and sticking at bay if you prime and paint the sash in the traditional order and with thin, well-worked coats.

Start by spot-priming bare timber and end-grain with an oil-based wood primer; don’t flood it, just work it into pores and joints. Prime the glazing bars and meeting rails next, then lightly denib.

Apply undercoat, brushing out with the grain and keeping the paint off the draught seals.

Lay on the topcoat last, and “strike” the paint line to the glass with a slight overlap to seal the putty edge.

For color matching, take a clean paint scrape to a specialist and match the aged tone. That supports historical accuracy.

Conclusion

Once you’ve re-hung the sashes, sealed the beads, and laid on your final coats, you’ll feel the window come back to life. A joiner I apprenticed under timed it: after cords and parting-bead seals, his draught strip cut the candle-flicker test from 10 seconds to none. That’s the point—like resetting a pocket watch, each pin, scrape, and brushstroke restores steady movement. Keep the channels waxed, and it’ll run true for decades.…

bedroom makeover with textures
Home Upgrades & Renovations

Refreshing a Master Bedroom With New Textures, Lighting and Layout Tweaks

Start by capping your spend and sketching a quick floor plan, then center the bed on the strongest wall and keep 24–30 inches clear on each side for easy flow. Swap bulky pieces for low, calm furniture and align drawers away from pathways. Refresh the bed with crisp percale, a quilt, and a chunky knit throw, then add nubby or velvet accents. Layer warm, dimmable 2700–3000K lighting and hang drapes high and wide with sheers behind blackout panels. Keep going for more simple upgrades.

Key Takeaways

  • Assess the room day and night, measure clearances, and sketch a floor plan to fix glare, shadows, and dead corners.
  • Recenter the bed on the strongest wall, keeping 24–30 inches of clearance per side for smoother traffic flow.
  • Refresh the palette with one neutral and one accent color, repeating the accent in pillows, art, and throws for cohesion.
  • Upgrade textures by layering percale sheets with linen, knits, and a quilt or coverlet to add depth without clutter.
  • Improve lighting with layered, dimmable ambient and bedside task lights using warm 2700K–3000K bulbs for a calmer mood.

Plan Your Master Bedroom Refresh: Budget + Checklist

bedroom refresh planning checklist

Before you shop for a single new textile or swap a bulb, map out your master bedroom refresh with a tight budget and a quick checklist so every change earns its footprint. Set a spending cap, then list what you’ll keep, move, replace, or repair.

Walk the room at day and night; note glare, shadows, and dead corners. Use Color psychology to pick one calming hue family, then decide where it lands: wall, art, or a single accent piece.

Apply feng shui principles by clearing pathways, anchoring the bed to a solid wall, and balancing nightstands for visual weight.

Measure clearances around drawers and doors, sketch a simple floor plan, and confirm your lighting layers: ambient, task, and soft dimmable glow.

Refresh Bedding With Layers and Texture

Start with a crisp base and mix fabrics and weaves—cotton percale, linen, and a chunky knit—so your bed catches light with subtle highs and lows.

Add cozy layering pieces like a quilt, coverlet, and a throw you can fold at the foot to keep the layout tidy and inviting.

Finish with texture-rich accents—matelassé shams, velvet pillows, or a nubby lumbar—that read warm under bedside lamps without adding visual clutter.

Mix Fabrics And Weaves

When the light shifts across your bed throughout the day, mixed fabrics make the difference between flat and layered. Start with crisp cotton sheets that catch morning brightness, then add a matte linen duvet cover to soften glare.

Introduce Textile combinations through a subtle herringbone sham or a ribbed knit euro—small-scale weaves read rich without busy pattern. Use Fabric contrasts intentionally: smooth percale beside nubby bouclé, or satin piping against washed canvas, so lamplight grazes edges and defines contours.

Keep the palette tight and let texture do the work. If your headboard sits low, choose thinner, tailored shams so the bed looks taller; if it’s tall, wider weaves balance the vertical plane. Rotate one fabric per season.

Add Cozy Layering Pieces

Although your sheets and duvet set the base, cozy layering pieces give the bed its lived-in depth and control how light plays across it. Add a quilt or coverlet you can fold at the foot so morning sun catches subtle ridges, while lamplight softens shadows at night.

Drape a lightweight throw diagonally to break up flat planes and guide the eye toward the pillows, making the whole surface feel intentional, not overstyled.

For tactile comfort, stack layers by weight: breathable blanket closest, warmer topper above, then your duvet. You’ll sleep cooler, adjust faster, and keep the bed looking fuller without bulk.

Keep edges aligned with the mattress corners for a cleaner footprint, and let one layer peek out by an inch or two for contrast.

Choose Texture-Rich Accents

Because light exaggerates every surface in a bedroom, choose accents that bring texture you can actually see—think nubby lumbar pillows, a boucle bench cushion, a woven basket for throws, or a ribbed ceramic lamp base. Keep your palette quiet so shadow and sheen do the work, especially beside a bright window or under warm bedside sconces.

Refresh bedding by stacking contrast: crisp percale sheets, a gauzy coverlet, then a chunky knit throw at the foot to anchor the bed visually. Add tactile decorative accents in pairs to balance the layout—two mismatched pillows, two low trays—so the room feels composed, not cluttered.

If your walls look flat at night, introduce textured wall treatments behind the headboard to catch raking light and deepen the whole scene.

Choose a Simple Color Palette (Fast Wins)

simple cohesive bedroom palette

To get fast wins in a master bedroom refresh, lock in a simple color palette and let texture and light do the heavy lifting. Pick one warm neutral or one cool neutral, then add a single accent hue for depth. Keep color coordination tight: repeat that accent in pillows, art, and a throw, while staying within two to three tones overall.

Nail paint selection by matching undertones to your daylight: north light likes warmer whites; south light can handle crisper ones. Use a matte or eggshell on walls to soften glare, then bring in sheen with a lacquered tray, satin lampshades, or metallic hardware.

Layer whites, creams, and wood grains to feel intentional, not flat.

Improve Layout for Better Flow Around the Bed

Once your palette feels tight, the room’s comfort comes down to how you move around the bed—especially in morning light when every shadow and hard edge feels sharper.

Start by centering the bed on the strongest wall, then measure clearances: aim for 24–30 inches on each side so you don’t brush the duvet or bang a knee on a nightstand.

Keep furniture placement low and calm near pathways; swap bulky chests for a slim bench with a woven top that catches light without blocking steps.

Protect traffic flow by aligning drawers to open away from the main route to the door and bath.

If a rug feels bunched, shift it so your first step lands on soft pile, not cold floor.

Upgrade Lighting for Mood and Reading

Even if your layout finally feels effortless, the wrong lighting can flatten every texture and turn bedtime reading into a squint. Start by layering: a dimmable ceiling fixture or soft cove glow sets ambient ambiance, while bedside sconces keep surfaces clear and shadows controlled.

Aim beams across the headboard fabric and rug pile so their weave reads rich, not muddy.

For reading, choose adjustable arms or swivel shades that deliver task illumination directly onto the page, not into your partner’s eyes. Place switches where your hand naturally lands, and add warm bulbs (2700K–3000K) for skin-friendly calm.

Use two circuits or smart scenes: “Wind Down” for low glow, “Read” for crisp contrast, and “Rise” for gentle morning lift.

Add Hidden Storage to Make the Room Feel Bigger

Because a calm layout depends as much on what you *don’t* see as what you style, hidden storage can make your bedroom feel instantly larger without changing its footprint. Start with the bed: choose a platform with drawers or lift-up slats so bulky linens disappear and the floor reads as open, breathable negative space.

Add a nightstand with Hidden compartments to stash chargers, books, and eye masks, keeping the top surface clean for light to bounce.

Slide a slim dresser into a shadowy wall zone and use drawer dividers as quiet storage solutions that stop piles from spreading.

If your headboard sits proud, build a shallow ledge behind it for rarely used items.

Tuck hampers into closets so corners stay crisp and uncluttered.

Finish the Refresh With Rugs, Drapes, and Accents

You’ll lock in the refresh by layering rugs that warm up bare floors and define the bed zone underfoot. Hang drapes high and wide so they soften hard edges, filter daylight, and make the ceiling feel taller.

Then curate a tight edit of accent accessories—mixed textures, a few reflective touches—to catch lamplight without cluttering the layout.

Layer Rugs For Warmth

When the floor still feels a little bare after the big moves, layered rugs add instant warmth without stealing light or crowding your layout. Start with a low-pile, neutral base that tucks under the front two-thirds of the bed to anchor the frame and keep pathways crisp.

Then add a smaller, higher-texture topper—wool loop, vintage flatweave, or plush shearling—offset to one side where your feet land first.

Use Layer rugs to guide circulation: leave 18–24 inches of visible border so edges read intentional, not cramped.

If you’ve got Fireplace ambiance, choose a rug with subtle sheen or mottled pattern that catches flicker and lamplight, boosting depth while hiding everyday lint and footprints.

Hang Drapes To Soften

After you’ve anchored the floor with rugs, hang drapes to soften the hard lines of windows and walls while giving the light a prettier filter. Choose window treatments with enough fabric softness to look relaxed, not limp—think linen blends or brushed cotton that catch shadows and move slightly when air shifts.

Mount the rod wider and higher than the frame so panels stack off the glass and make the ceiling feel taller. Let hems kiss the floor for a tailored line, or hover a half inch for cleaner circulation near vents.

If you wake with strong morning sun, layer a sheer behind a blackout panel to tune brightness without flattening the room. Keep folds generous so light grazes the texture instead of bouncing hard.

Curate Accent Accessories

With drapes filtering the light and softening the window edges, let accent accessories carry that same layered feel across the rest of the room. Anchor the nightstands with decorative trays that corral a candle, hand cream, and a catchall, keeping surfaces calm while reflecting lamplight in small, controlled glints.

Add a ceramic vase or ribbed glass to echo the drape’s vertical fall, then balance it with a nubby box or woven bowl for tactile contrast.

Use artificial plants where daylight fades—on a dresser corner or high shelf—so greenery reads fresh without chasing the sun. Keep heights staggered, leave breathing room around the bed path, and repeat one metal finish to tie lighting, hardware, and accents into a cohesive glow.

Conclusion

You’ve turned your master bedroom into a quiet retreat that feels like a deep exhale. With layered bedding and touchable textures, the space reads warm and intentional. A simple palette keeps the eye calm while smart layout tweaks open clear paths around the bed, like smoothing wrinkles from a sheet. Dialed-in lighting—soft glow for mood, focused beams for reading—sets the tone. Hidden storage tucks clutter away, and rugs, drapes, and accents finish it.…

victorian fireplace restoration guide
Home Upgrades & Renovations

A Step By Step Guide To Restoring Ornate Victorian Fireplaces

Start by inspecting the breast, throat, liner, hearth, tiles, and cast iron for cracks, bulges, soot leaks, loose bedding, and maker’s marks. Protect the room with dust sheets, sealed polythene, floor paths, and a fan exhausting outward plus HEPA filtration. Test every paint layer for lead before you strip. Clean soot first, then apply a low-odor gel stripper and scrape gently. Re-bed tiles and pack gaps with lime mortar, then refinish with heat-tolerant, breathable coatings, and you’ll uncover further practical specifics ahead.

Key Takeaways

  • Inspect the fireplace for cracks, flue leaks, loose hearths, and cast-iron damage; record maker’s marks and original fixings before disturbing anything.
  • Protect the room with dust sheets, floor barriers, sealed polythene, and HEPA extraction; ventilate outward using a box fan in a window.
  • Test all painted surfaces for lead using certified swabs or lab samples; stop and hire specialists if lead is confirmed.
  • Clean soot first with HEPA vacuum and soot sponge, then strip paint with low-odor gel; scrape gently and dry thoroughly between passes.
  • Repair and refit using lime-based mortar, tighten surrounds, seal gaps for expansion, then finish with breathable, heat-tolerant primers and topcoats.

Inspect Your Victorian Fireplace (and DIY Red Flags)

inspect victorian fireplace thoroughly

Before you pick up a scraper or order replacement tiles, inspect the fireplace the way a Victorian builder would’ve—starting with what carries heat and load. Check the breast for hairline cracks, bulging plaster, and soot ghosts that mark flue leaks.

Shine a torch up the throat; you’re looking for a sound clay liner, intact parging, and no tarry glaze.

Test the hearth for movement and examine bedding mortar for crumbling lime.

Tap cast iron with a knuckle: a clear ring beats a dull thud.

Note stamped maker’s marks, tile dimensions, and original fixings for Historical accuracy and Material preservation.

DIY red flags: spalled brick, loose lintels, salt bloom, or any smoke smell when cold. Call a sweep or mason.

Protect the Room: Dust Control and Ventilation

Although the fireplace is the star of the job, the room takes the first hit if you don’t control soot and lime dust. Clear the hearth area, roll up rugs, and cover cornices, mantels, and nearby furniture with cotton dust sheets, then tape the seams.

Lay rosin paper and hardboard paths to protect original boards and tiles. Seal the opening with polythene and painter’s tape, leaving a small flap for tools.

Set a box fan in a cracked window to exhaust outward, and open a second window for make-up air.

Add Air filtration with a HEPA unit positioned behind you, not blowing at the work.

For odor control, place bicarbonate trays and change them daily.

Test for Lead Paint Before You Strip

With the room sealed and air moving out through the window fan, turn to the paint on the surround, mantel, and any cast-iron insert—Victorian layers often include lead. You’ll confirm before you disturb a single flake.

Choose an EPA-recognized swab kit or collect chips for a lab; the latter suits thick, multiple-coat finishes common to late-19th-century work.

For Lead paint testing, score through all layers with a sharp knife at an inconspicuous edge, then test the cut, not the surface glaze. Use fresh gloves, label each location, and note colors and strata in a notebook, as restorers did with shop records.

If any result reads positive or uncertain, stop and plan Hazardous materials removal with a qualified professional, and protect children and pets in adjacent rooms.

Clean Soot and Strip Paint Safely

Once you’ve cleared the lead question, tackle soot and paint in separate, controlled passes so you don’t grind carbon into the grain or drive softened finish into joints. Start dry: vacuum with a soft brush, then use a soot sponge on cast iron, marble, or timber, working top to bottom. Follow with a barely damp cloth and pH-neutral soap; keep water away from seams and porous stone.

For fireplace restoration, shift to paint removal techniques only after surfaces are clean. Score paint edges with a knife, then apply a low-odour, non-caustic gel stripper in thin coats. Let it dwell, lift with a plastic scraper, and detail crevices with brass bristles or wooden picks. Rinse per product instructions and dry thoroughly.

Repair Tiles, Hearth Gaps, and Loose Surrounds

After you’ve removed soot and stripped back paint, inspect the tiled slips, hearth, and surround for movement, hairline cracks, and open joints that will only worsen under heat cycling. Tap tiles lightly; a hollow note signals failed bedding. Lift loose pieces carefully, keep every original, and re-bed with a lime-based mortar for historical accuracy, not hard cement that can spall edges.

Rake out crumbling joints to sound material, then repoint neatly, matching joint width around ornate detailing. At the hearth, chase out gaps, vacuum dust, and pack with lime mortar or fire-rated rope where expansion demands it.

Tighten a loose surround by checking cramps and screws, then reset with discreet shims so lines stay true. Allow repairs to cure fully before refitting.

Finish Your Victorian Fireplace: Paint, Polish, Seal

restore protect finish preserve

Although the structural repairs now look sound, you’ll only keep them that way if you finish the fireplace with breathable, heat-tolerant materials that suit Victorian fabric.

Begin with careful cleaning: de-dust mouldings, degrease, then lightly abrade gloss to key.

For cast iron, wire-brush to bright metal, spot-prime with a heat-resistant metal primer, then apply stove black or graphite paste, buffing to an even sheen.

For timber surrounds, choose an oil-based or shellac primer if resinous, then a satin or eggshell topcoat; avoid modern vinyls that trap moisture.

Prioritise Color matching from surviving paint layers, and keep historical accuracy by testing small panels in daylight.

Finally, seal porous stone or tile grout with a vapour-permeable, heat-rated impregnator. Let each coat cure fully.

Conclusion

You’ve inspected every casting, sealed the room against soot, and tested for lead before you ever scraped. You’ve lifted paint methodically, reset loose tiles, packed hearth gaps, and tightened the surround. Now you finish with the right period coating—iron blacking, shellac, or breathable paint—then polish, seal, and cure. Remember, about 90% of Victorian fireplaces were coal-fired, so residual grime hides deep. Work slowly, ventilate well, and you’ll restore its proper, crisp relief.…

smart storage durable materials
Home Upgrades & Renovations

Utility Room Upgrades: Clever Storage and Durable Materials That Work Hard

Upgrade your utility room by zoning it for washing, folding, messy tasks, and a drop zone, and keep a 36-inch path for baskets. Choose easy-wipe cabinets with full-extension drawers, plus a tall pantry for vacuums and refill jugs. Add wall rails, rubberized hooks, and labeled peg strips within reach. Use dead space with slim pull-outs, toe-kick drawers, and over-appliance cabinets. Finish with quartz or stainless counters and sealed, spill-proof flooring—next up, even smarter built-ins.

Key Takeaways

  • Plan distinct zones for washing, folding, messy tasks, and drop-off, maintaining 36-inch walkways and clear door swings.
  • Choose storage by item type: full-extension drawers for daily supplies and tall pantries with adjustable shelves for vacuums and jugs.
  • Add wall-mounted rails, hooks, and short track systems for brooms, mops, and pet gear, anchored into studs and labeled.
  • Convert dead space with slim pull-outs, toe-kick drawers, over-appliance cabinets, and fold-down shelves to maximize every inch.
  • Specify hard-working surfaces: quartz or stainless counters, caulked seams, porcelain tile or sealed LVP flooring, plus epoxy grout and washer drain pan.

Plan Your Utility Room Layout and Zones

design efficient utility zones

Before you buy shelves or move appliances, map out how you’ll actually use the room and divide it into clear zones. Set a wash zone with straight access to hookups and enough door-swing clearance. Place a fold-and-sort zone beside it, leaving a 36-inch path so baskets and hampers don’t choke traffic.

Create a utility zone near the sink or drain pan area for messy tasks and quick wipe-downs. Add an entry drop zone by the door with a bench-width landing strip for bags and shoes.

Plan outlets and switches per zone, then layer bright task light with decorative lighting for visibility. Finish by confirming airflow: choose ventilation solutions that exhaust humidity and keep the room comfortable.

Choose Utility Room Cabinets by What You Store

Once you list what needs to live in your utility room—detergents, cleaning tools, pet supplies, bulk paper goods, or a vacuum—you can match cabinet type and size to the job instead of guessing.

Put daily items in base cabinets with full-extension drawers so you can see everything at a glance.

Reserve a tall pantry cabinet for brooms, a vacuum, and refill jugs; add adjustable shelves for changing bottle heights.

For messy supplies, choose easy-wipe Cabinet materials like thermofoil, laminate, or sealed plywood, and skip raw MDF near damp floors.

Use closed cabinets for visual calm, and add clear bins inside to tighten Storage organization.

Measure your largest items, then size door openings and shelf spacing so nothing gets wedged.

Add Wall Storage: Hooks, Rails, and Hangers

Because cabinets can’t hold everything you reach for mid-task, add wall storage with hooks, rails, and hangers to keep tools visible, dry, and off the floor.

Start with Wall organization: map zones for cleaning, laundry, and pet gear, then assign each item a dedicated hanger or hook.

Mount a sturdy rail for brooms and mops so handles don’t topple, and add S-hooks for spray bottles and dustpans.

Use rubberized hooks for wet coats, leashes, or garden gloves to prevent slipping.

Install a pegboard strip or short track system for frequently used tools, and label positions so everything returns fast.

Keep hanging solutions within arm’s reach, leave clearance for doors, and anchor into studs for safe weight limits.

Use Dead Space for Utility Room Built-Ins

Even if your utility room feels maxed out, you can squeeze in major function by turning dead space—awkward corners, the gap beside a washer, the wall behind a door, or the area above appliances—into simple built-ins. Measure clearances first, then add a slim pull-out tower for detergents, a toe-kick drawer for rags, or an over-appliance cabinet for bulk paper goods.

Use adjustable shelves so tall bottles and baskets fit without wasted height. Add Hidden compartments like a false-front panel that stores lint tools, stain sticks, and spare filters.

Choose multi purpose fixtures: a fold-down sorting shelf, a tilt-out hamper, or a narrow bench with bins below. Finish with labeled fronts so you grab items fast and keep clutter contained.

Pick Utility Room Surfaces That Handle Spills and Heat

If you choose utility-room surfaces the same way you’d spec a workbench, you’ll prevent most stains, warping, and scorch marks before they happen. Start with Spill resistant countertops such as quartz, stainless steel, or solid-surface; they shrug off detergent, bleach splashes, and wet baskets. Use a tight backsplash seam and caulked edges so spills can’t wick into substrate.

For Heat tolerant surfaces, add a stainless landing zone beside irons, garment steamers, or hot tools. If you prefer laminate, specify postformed edges and a heat pad policy; it’s durable but can blister.

For flooring, pick porcelain tile or sealed LVP with welded seams at thresholds. Finish with epoxy grout and a drain pan under the washer for insurance.

Conclusion

When you upgrade your utility room, you’re not just adding storage—you’re adding order. Plan zones so washing, folding, and cleaning don’t collide. Choose cabinets that fit what you stash, not what looks nice. Add hooks, rails, and hangers so tools stay visible and reachable. Build into dead space so nothing’s wasted. Pick durable surfaces that resist spills, heat, and scrapes. Work smarter, store cleaner, maintain easier, and keep everything ready.…

modern dining room ideas
Home Upgrades & Renovations

How to Modernise a Dining Room With Colour, Furniture and Feature Walls

Modernise your dining room by starting with a warm white, greige, or soft clay base, then add one saturated accent like inky navy, forest green, or oxblood. Paint a feature wall behind the table in matte or low-sheen colour, or try limewash for soft texture. Swap bulky pieces for a slim-leg table and airy, low-back chairs. Mix oak or walnut with black metal, glass, and boucle or linen. Add a sculptural pendant on a dimmer, with more ideas ahead.

Key Takeaways

  • Start with a warm neutral base (warm white, greige, soft clay), then add one saturated accent colour like navy, forest green, or charcoal.
  • Create a feature wall behind the dining table using matte paint, limewash, or subtle mural gradients, and echo that tone in accessories.
  • Swap bulky furniture for clean-lined pieces: slim-leg tables, low-back chairs, and streamlined silhouettes to improve sightlines and feel current.
  • Mix modern materials—wood with black metal, glass details, and textured upholstery—to balance warmth and sharpness without visual heaviness.
  • Upgrade lighting with a sculptural pendant and dimmers, using 2700K–3000K bulbs and wall lights to add modern ambience and depth.

Choose a Modern Dining Room Colour Palette

color sets modern dining mood

Although your dining room’s furniture and lighting matter, your colour palette sets the modern tone first. Start with a restrained base: warm white, greige, or soft clay to keep the room crisp yet inviting.

Then add one saturated accent—inky navy, forest green, oxblood, or charcoal—so the space feels current, not busy. Use Color psychology to steer mood: blue calms long dinners, green feels balanced, and deep red sparks conversation when used sparingly.

Track Cultural influences by borrowing proven pairings, like Japanese-inspired taupe with black, or Mediterranean chalk white with terracotta.

Finally, repeat your key tone in textiles and ceramics to create a clean, intentional rhythm across the room.

Add a Feature Wall That Looks Intentional

If your dining room needs a modern lift without a full overhaul, add a feature wall that reads deliberate, not decorative. Anchor it behind the table so it frames gatherings and photographs well. Choose one colour move: a matte clay, inky navy, or smoky olive, then echo that tone in small accents for cohesion.

For artistic wall treatments, consider limewash, colour-blocked panels, or a micro-mural with soft gradients; keep edges crisp with careful taping and aligned switch plates.

Prefer statement wall art? Go oversized and centered, or hang a tight grid with consistent frames and generous spacing. Skip random minis.

Finish with a low-sheen paint or textured plaster so light shifts subtly across the wall.

Swap Bulky Pieces for Clean-Lined Dining Furniture

When your dining set feels heavy in both scale and style, clean-lined furniture instantly sharpens the room’s silhouette and lets your feature wall breathe. Choose a table with slim legs and a refined profile so your wall colour reads crisp, not crowded. Keep chair backs low and airy to open sightlines and highlight contrast between paint, art, and trim.

If you love Traditional styles, edit them rather than erase them: swap carved, oversized chairs for streamlined silhouettes in a classic shape, and keep one familiar detail like a gentle curve. Add Vintage accents through a single statement piece—a petite sideboard with updated hardware or a framed mirror—so the palette stays modern.

Aim for cohesive tones: warm neutrals, inky blacks, or muted greens that look current under evening light.

Mix Modern Materials (Wood, Metal, Glass, Fabric)

Clean-lined dining furniture sets a sharp foundation, and mixing modern materials gives it depth without adding visual weight. Pair a warm oak or walnut tabletop with slim black metal legs to sharpen the silhouette and make colour pop—think clay, olive, or inky navy nearby. Add a glass-front sideboard or a clear centerpiece to keep sightlines open and reflect your wall tones.

Bring in fabric through upholstered chairs in boucle, performance velvet, or textured linen; choose a saturated shade for drama or a pale neutral to soften contrast. Balance sleek surfaces with rustic textures like woven rush seats, raw-edge timber, or a stoneware vase.

Finish with Vintage accents—brass cutlery, smoked-glass carafes, or a patinated tray—for curated, modern character.

Finish With Modern Dining Room Lighting (Layers + Bulbs)

Because lighting lands like jewellery in a dining room, layer it with intention: hang a sculptural pendant low over the table for a focused pool of glow. Add slim wall sconces or a picture light to wash the walls, then tuck a discreet lamp or LED strip in a sideboard for soft after-hours ambience.

Choose bulbs like you choose paint: warm 2700K flatters food and timber; crisp 3000K sharpens black metal and stone. Use dimmers so artificial lighting shifts from dinner-party sparkle to late-night calm.

Let color psychology guide finishes: brass warms greens and terracotta, chrome cools blues and greys, matte black grounds blush and cream. Pick opal glass for soft diffusion, or clear glass to spotlight a statement filament.

Conclusion

Bring your dining room into the now by choosing a confident, modern palette—think warm neutrals punched up with inky blue, sage, or terracotta. Make your feature wall look deliberate with crisp lines, textured paint, or graphic wallpaper. Trade bulky pieces for clean silhouettes, then layer wood, metal, glass, and soft upholstery for contrast. Finish strong with statement lighting plus subtle ambient glow. With these updates, you’ll hit the nail on the head.…

restoring antique radiator guide
Home Upgrades & Renovations

A Step By Step Guide To Restoring Antique Cast Iron Radiators

You’ll start by confirming it’s cast iron, then photograph and inspect for cracks, bulges, pitting, and missing plugs while measuring thread type and unions so you don’t force mismatched fittings. Next, flush outdoors on blocks with hot water, backflushing and probing tappings until clear, then dry fully. Strip paint safely with ventilation and a P100 respirator, using gel stripper or infrared heat. Sand, degrease, prime for heat, paint, refit valves, bleed, pressurize, and check leaks—there’s more ahead.

Key Takeaways

  • Identify the radiator as cast iron, photograph it, and inspect for cracks, missing plugs, and damaged threads or fittings.
  • Measure pipe thread type and sizes, including unions and vent location, to ensure compatible valves and avoid forcing mismatched threads.
  • Flush the radiator outdoors with hot water, agitation, and backflushing until clear, probing tappings to remove sludge and blockages.
  • Strip old paint safely with a respirator, gel stripper or infrared heat, then sand, degrease, and mask threads before priming.
  • Apply heat-rated primer and enamel in thin coats, reinstall valves with fresh sealing materials, then fill, bleed air, and leak-test.

Check Radiator Type, Damage, and Fittings

radiator inspection and documentation

Before you strip paint or loosen a single union nut, identify exactly what you’re working on and document its condition. Confirm the radiator material is cast iron (not steel or aluminum) by checking weight, casting lines, and a magnet test. Photograph every side, note the number of sections, and record any stamping, vent location, and valve orientation for reassembly accuracy.

Inspect for damage methodically: look for hairline cracks around tappings, feet, and push nipples; check for bulging sections, missing plugs, and heavy pitting. Use a bright light and mirror, and mark defects with tape.

Verify fitting compatibility by measuring pipe thread size and type (NPT vs BSP), union dimensions, and center-to-floor height. Don’t force mismatched threads; plan adapters or correct valves.

Flush the Cast Iron Radiator and Clear Blockages

Once you’ve confirmed the radiator’s type and fittings, flush it to remove rust scale, sludge, and casting sand that can restrict flow and trap moisture. Set it outdoors on blocks, cap one end, and position a drain pan.

Follow Safety precautions: wear gloves, eye protection, and a respirator if dust is present.

Use Cleaning tools like a garden hose, pressure nozzle, and a flexible radiator brush.

Fill the sections with hot water, agitate by rocking the unit, then drain fully. Repeat until water runs clear.

If flow stalls, probe gently through the tappings with a plastic rod, not steel, to avoid gouging threads.

Backflush from the opposite end, and clear trapped debris with a shop vac at the outlet.

Dry it completely.

Strip Paint Safely From the Cast Iron Radiator

Although old radiator paint can look stable, it often hides lead and fails under heat, so strip it with controlled methods rather than sanding or dry scraping. Set up outdoors or in a ventilated area, lay 6-mil plastic, and keep a spray bottle to mist dust. Wear a P100 respirator, chemical-resistant gloves, goggles, and disposable coveralls—basic safety precautions.

For paint removal, choose a low-odor gel stripper or infrared heater that softens layers without scorching iron. Work in small sections, apply stripper, dwell per label, then lift paint with a putty knife and nylon brush for crevices. Collect residue into a lined container, seal it, and dispose per local rules.

Wipe surfaces with damp rags; don’t rinse into drains.

Sand, Clean, and Prime for Radiator Paint

After you’ve stripped the bulk of the old coating, you need to smooth, degrease, and seal the iron so the new radiator paint bonds under heat.

Start with a vacuum and stiff brush to remove residue from fins and seams.

Sand by hand or with a detail sander: 80–120 grit to knock down pits and edges, then 180–220 grit for an even tooth.

Wear eye protection, gloves, and a P100 respirator; cast-iron dust and old paint particles are hazardous.

Wipe with mineral spirits or a degreaser, then rinse and dry completely—moisture will flash-rust.

Mask threads and openings.

Apply a high-heat, rust-inhibiting metal primer in thin, complete coverage, choosing one that supports your Color options and historical accuracy.

Paint, Refit Valves, and Test for Leaks

When the primer cures, you can move straight into paint and reassembly without contaminating the surface.

Start with careful Color selection: choose a heat-rated enamel compatible with your primer and system temperature.

Mask threads, vents, and union faces so you don’t trap paint where seals must bite.

For paint application, spray light, even coats, keeping the nozzle moving to prevent runs between fins; ventilate well and wear a respirator and gloves.

Let each coat flash off, then cure per label before handling.

Refit valves and the air vent using new fiber washers or PTFE tape where specified, then snug unions without over-torquing.

Reinstall, fill slowly, bleed air, and pressurize.

Check all joints with soapy water; fix bubbles immediately.

Conclusion

You’ve now checked the type, assessed damage, flushed debris, stripped paint safely, and prepped every surface before repainting and refitting valves. Work slowly, ventilate well, and keep PPE on until cleanup’s complete. Here’s why the details matter: the U.S. EPA estimates proper air-sealing and insulation can cut home energy use by about 15%—and a fully restored, leak-free radiator helps guarantee that heat you’ve paid for actually reaches the room.…

stylish hallway transformation ideas
Home Upgrades & Renovations

Hallway Makeovers: Flooring, Lighting and Decor That Make a Big Impact

Start by mapping your hallway’s real traffic flow, door swings, and drop zones so you keep clear walking width and choose wall-hugging furniture. Brighten fast with high-LRV warm white or greige paint, plus a mirror that bounces light down the corridor. Layer lighting: a flush or semi-flush ceiling fixture, sconces mounted 60–66 inches high, and warm 2700–3000K dimmable LEDs. Anchor it with durable flooring and a runner leaving 4–6 inch borders, then finish with aligned art and tight, curated styling—there’s more ahead on layout, storage, and impact.

Key Takeaways

  • Map traffic flow and keep the lower zone clear; use narrow benches or shelves so the hallway stays open and functional.
  • Upgrade flooring in high-wear areas with durable matte finishes, and add a runner with 4–6 inch borders secured by non-slip pads.
  • Brighten walls with high-LRV paint and a tight, consistent palette that continues into adjacent rooms for a longer, calmer visual line.
  • Layer lighting with a dimmable ceiling fixture plus sconces at 60–66 inches high to reduce shadows and visually widen narrow walls.
  • Create impact with one oversized artwork or a matching-frame gallery grid, hung 57–60 inches to center, with minimal, curated accessories.

Plan Your Hallway Makeover for Traffic and Light

map light measure plan

Before you pick paint or hang art, map how people actually move through your hallway and where natural and artificial light land throughout the day. Measure clear walking width, note pinch points at door swings, and track where bags and shoes naturally drop.

Use that data to choose durable flooring at high-wear zones and slip-resistant runners where turns happen. Layer lighting by task: brighter at closets, softer near bedrooms, and glare-free at eye level.

Plan outlets and switch locations so you don’t block them with consoles or hooks. Keep color coordination tied to adjacent rooms so progressions feel intentional, not chopped.

Lock in furniture arrangement with tape outlines, ensuring drawers open, radiators breathe, and sightlines stay clean.

Brighten the Hallway With Paint, Mirrors, and Walls

Once you’ve mapped traffic and lighting, use your walls as light multipliers: choose a high-LRV paint (warm white, greige, or a soft clay) in an eggshell or satin that bounces light without spotlighting every scuff. Then place mirrors where they’ll reflect a window or fixture—not a blank wall—so the hallway reads wider and brighter.

Keep color schemes tight: run the same wall color through adjacent rooms or shift one shade lighter to extend sightlines. Add crisp contrast with a deeper door color or tonal trim for depth without narrowing the passage.

For wall treatments, try vertical beadboard, slim battens, or micro-paneled wainscoting to lift the eye and disguise dings. In longer corridors, create a gallery grid with matching frames to calm visual noise.

Layer Hallway Makeover Lighting (Ceiling, Sconces, Lamps)

Start with the ceiling fixture, because it sets the hallway’s overall brightness and scale—flush mounts for low ceilings, semi-flush or a slim pendant for taller runs.

Then add wall sconces to layer light at eye level, reduce shadows, and visually stretch narrow walls with evenly spaced, warm LEDs.

Finish with a small lamp on a console or shelf to bring in that boutique-hotel glow and make the pass-through feel lived-in.

Ceiling Fixtures First

Because a hallway’s lighting has to work hard in a narrow, high-traffic space, your ceiling fixture should set the tone and provide the baseline brightness you’ll build on with sconces and lamps.

Start by measuring ceiling height and width so you don’t choose a piece that crowds the sightline. For low ceilings, go with a slim flush-mount; for standard heights, a semi-flush adds depth; for tall entries, a small chandelier elongates the corridor.

Current ceiling fixture styles that read elevated include opal-glass globes, ribbed shades, and matte black or aged brass.

Prioritize fixture placement: center it on the hallway’s axis, then space multiples evenly (about 6–8 feet apart) to eliminate dark pockets and shadows.

Use dimmable LEDs at 2700–3000K.

Add Wall Sconce Layers

With your ceiling fixture setting the baseline brightness, wall sconces add the side-to-side glow that keeps a hallway from feeling like a lit tunnel. Use wall sconce layering to widen the visual field, soften shadows at doorways, and highlight artwork without glare.

Mount sconces 60–66 inches from the floor, then stagger pairs along longer runs so light overlaps instead of creating bright spots. For tighter halls, choose slim profiles or up/down styles that wash the wall and make it read taller.

Trend-forward finishes—aged brass, matte black, or plaster—double as decorative wall lighting while staying quiet in a narrow space. Put sconces on a dimmer so evening circulation feels calm, and match bulb color to your ceiling fixture for a seamless, gallery-like corridor.

Lamps For Warmth

Even if your ceiling light and sconces cover the basics, a small lamp adds the warm, low-level glow that makes a hallway feel lived-in instead of purely pass-through.

Place one on a slim console, a wall-mounted shelf, or a closed shoe cabinet so it doesn’t pinch the walkway. Choose cozy lamps with tapered linen shades, opal glass, or pleated fabric—textures that diffuse warm lighting and soften hard angles.

Scale matters: keep the base narrow, but let the shade sit near eye level to reduce glare and bounce light onto the walls. Add a dimmable LED (2700K) and a plug-in timer so it clicks on at dusk.

In long halls, repeat a matching lamp every 8–10 feet for rhythm.

Choose Durable Hallway Flooring and Runners

In a hallway that gets constant foot traffic, you’ll want flooring that can take a beating—think engineered hardwood, LVP, or porcelain tile in a matte, low-glare finish.

You can visually stretch the space with a runner that’s scaled to the corridor, leaving a slim border of floor showing on both sides and stopping a few inches short of door swings.

You’ll keep everything secure and quiet with a non-slip pad, then stay ahead of wear by vacuuming often, spot-cleaning fast, and rotating the runner for even fading.

High-Traffic Flooring Materials

Where does your hallway take the biggest beating—right at the front door, along the pinch-point by the stairs, or in that narrow strip between rooms? Map those wear zones first, then match them to Durability considerations like scratch resistance, dent tolerance, and easy-clean finishes that won’t show every scuff under raking light.

For Material options, you can’t beat porcelain tile for grit, salt, and wet boots; choose a matte, slip-resistant finish and tight grout lines for a calmer visual rhythm.

Engineered hardwood brings warmth without the movement issues of solid planks, especially in long, linear corridors.

Luxury vinyl plank is trend-forward, quieter underfoot, and forgiving if you’ve got pets.

If you crave softness, pick low-pile, solution-dyed carpet tiles you can swap individually.

Runner Size And Placement

Once you’ve nailed down your wear zones, size and place a runner to protect the traffic line without making the hallway feel pinched. Aim for a runner size that leaves 4–6 inches of floor showing on each side; that border frames the path and keeps narrow halls from feeling like a carpeted tunnel.

In wider corridors, scale up so the runner reads intentional, not lost.

For runner placement, start 6–10 inches from the first threshold and stop short of the last doorway so doors swing cleanly and transitions feel crisp. Center it on the main sightline, not necessarily the wall, especially if you’ve got radiators or built-ins.

Use stripes to elongate, or a low-contrast pattern to hide daily scuffs and grit.

Non-Slip Pads And Care

A well-sized runner only works if it stays put, so lock it down with a non-slip pad and a simple care routine that matches your hallway’s traffic. Choose felt-rubber blends for hardwood, and grippy PVC for tile; trim to sit 1 inch inside the runner’s edge so it disappears visually while gripping the full stride zone.

For hallway safety, vacuum weekly with the beater bar off to protect low-pile trends and prevent edge curl. Spot-clean spills fast, working from the outer ring inward, then blot dry so moisture doesn’t migrate to seams.

Every month, lift the runner to air out both sides, check for pad residue, and rotate end-to-end to even wear at the entry and turn points. Replace non-slip pads once they flatten.

Add Slim Hallway Storage (Hooks, Shelves, Benches)

slim vertical hallway storage

Even if your hallway measures only a few feet wide, you can carve out high-function storage by keeping everything slim, wall-hugging, and vertically stacked. Choose slim storage like a 4–6-inch-deep picture ledge for keys and mail, and mount hallway hooks in a tight grid to hold coats, bags, and dog leashes without spreading out.

Add a shallow floating shelf above the hooks to park hats or baskets, and keep the lower zone clear for smooth traffic flow. If you need seating, pick a narrow bench (10–12 inches deep) with a lift-top or cubbies; it gives you a landing spot for shoes while hiding clutter.

Finish with matching hardware and aligned heights so the wall reads calm, not crowded.

Finish Your Hallway Makeover With Art and Styling

Because a hallway is mostly movement and first impressions, art and styling have to work fast: set a clear focal line at eye level, then build a tight, intentional vignette that doesn’t pinch the pathway.

Anchor the space with one oversized piece, or run a clean gallery in matching frames with consistent mat widths for a crisp art arrangement. Keep spacing 2–3 inches, and align centers at about 57–60 inches from the floor.

Use a picture light or wall-wash sconce to flatten shadows and boost color.

On a slim console, layer styling accessories with varied heights: a catchall tray, a narrow vase, and one sculptural object.

Edit hard, then repeat one metal finish to tie it together.

Conclusion

It’s funny how the “in-between” space ends up doing the most. When you plan for traffic flow and tame the light, your hallway stops feeling like a pass-through and starts reading like a room. You’ll bounce daylight with paint and mirrors, stack lighting from ceiling to sconces, and ground it all with a durable runner. Add slim hooks or a perch, then finish with tight-framed art—suddenly, the smallest footprint makes the loudest statement.…

Scroll to Top