underfloor heating retrofit method
Plumbing & Electric Fixes

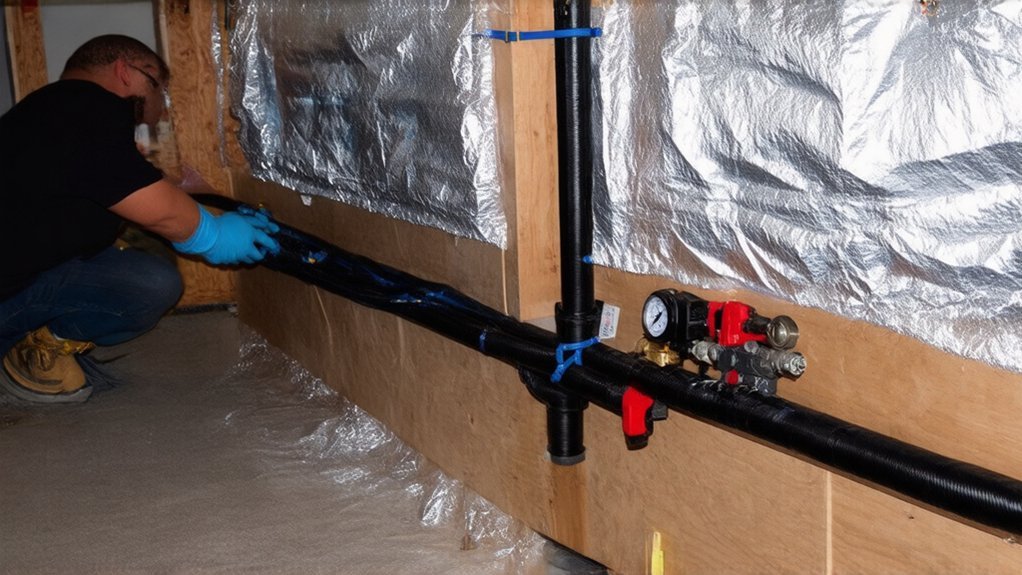
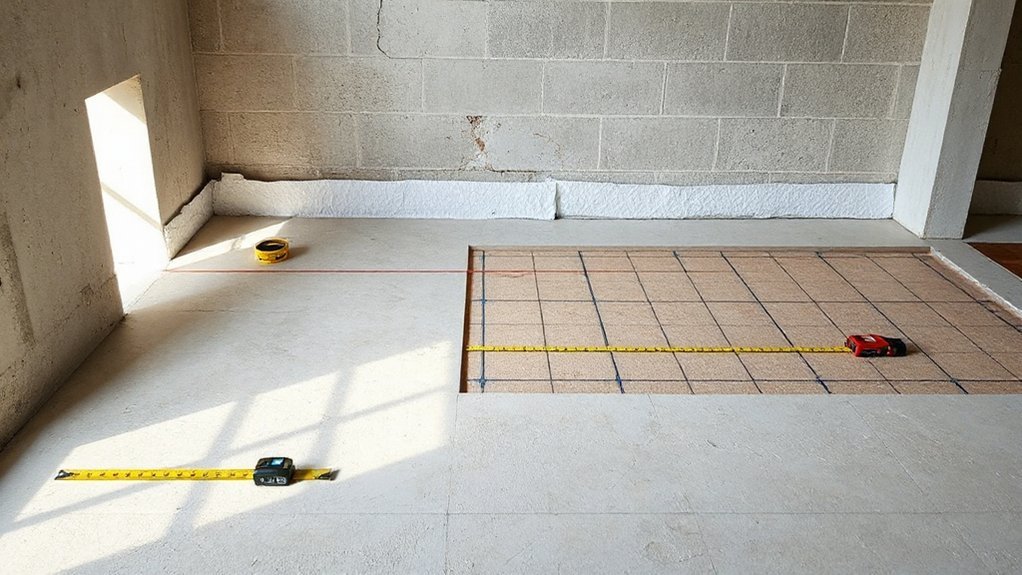
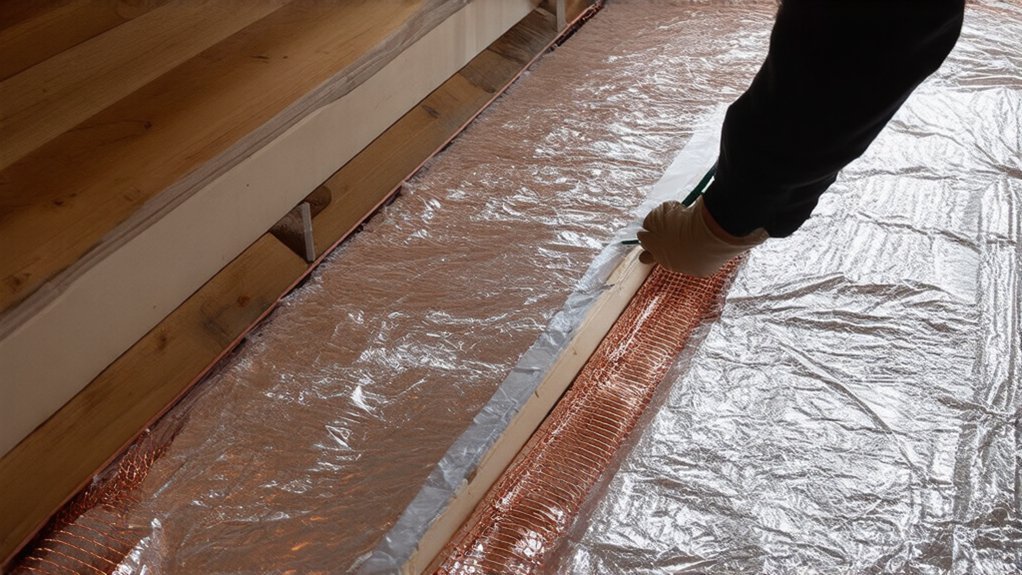
Retro‑Fitting Electric Underfloor Heating Without Lifting the Whole Floor

You can retrofit electric underfloor heating without lifting the whole floor by first confirming headroom, door clearances, subfloor dryness/flatness, and that you’ve got RCD protection and spare circuit capacity. Patch, prime, and self-level as needed, then dry-lay a low-profile mat/foil/loose cable, avoid overlaps, and log resistance tests. Route the floor sensor in its own conduit, encapsulate fully with approved leveller/adhesive, respect curing times, and commission by ramping temperatures—next you’ll see how system choice and floor finish change the method.

Key Takeaways

  • Verify headroom, door clearances, subfloor flatness/dryness, and electrical capacity/RCD protection before committing to a retrofit system.
  • Use low-profile heating mats, foil, or loose cable matched to your floor type to avoid full floor removal.
  • Prep the existing subfloor: clean residues, repair cracks, prime, and apply self-levelling compound for a stable, flat bed.
  • Plan cable routes and sensor conduit to avoid overlaps, fixtures, and kinks, and record layouts plus resistance readings.
  • Encapsulate elements with approved adhesive/compound, respect minimum cover depths and curing times, then have an electrician complete final connections and commissioning.

Check If Your Room Suits Retrofit Electric Underfloor Heating
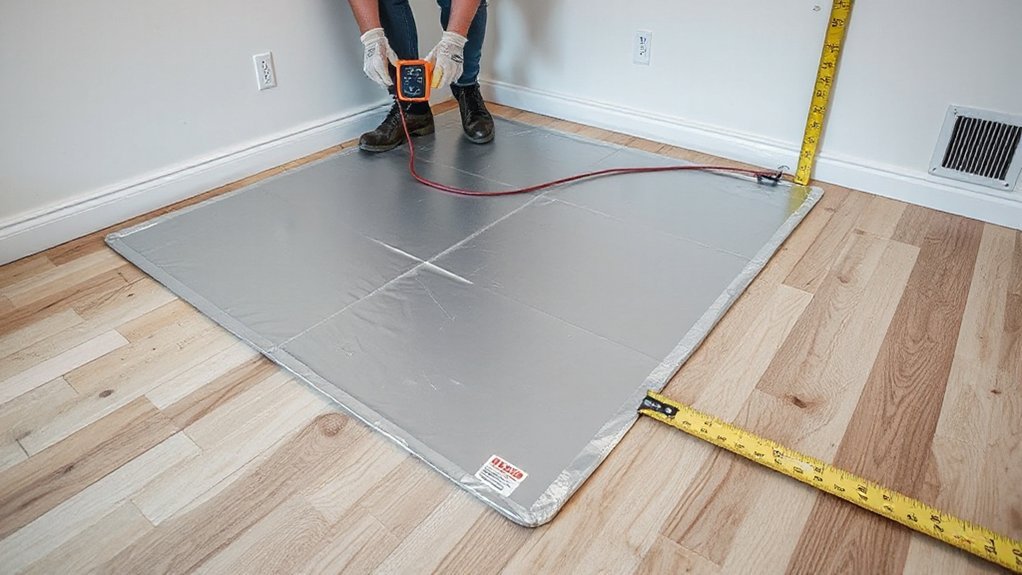
room suitability for electric heating

Before you buy a retrofit electric underfloor heating kit, confirm your room can handle the added height, power load, and moisture risk. Measure door clearances, skirting gaps, and threshold changes.

Then verify your subfloor is flat, rigid, and dry. Check existing floor build-ups for historical installation methods (e.g., bitumen residues, old screeds, or lath systems) that may need testing or remediation before bonding compounds are used.

Calculate the circuit load, confirm RCD protection, and verify the consumer unit has capacity for a dedicated fused spur and thermostat.

In wet zones, verify IP ratings, insulation resistance testing access, and compliant floor sensors.

If headroom or electrics fail checks, shortlist alternative heating solutions like upgraded radiators or infrared panels.

Choose a Low-Profile System: Mats vs Foil vs Loose Cable

Next, you’ll choose a low-profile electric UFH system by checking finished floor height limits, subfloor type, and the manufacturer’s minimum covering requirements.

Start by comparing low-profile mats for consistent watt density and faster layout on open areas. Then consider foil for floating laminate/engineered wood versus loose cable where you need tight turns, irregular zones, or spacing control.

Before you commit, you’ll verify RCD protection, thermostat sensor placement, and carry out insulation-resistance and continuity tests to keep the install safe.

Low-Profile Mats Comparison

How do you choose a low-profile electric underfloor heating system that delivers the output you need without forcing you to raise the floor? Start by comparing mat thickness (typically 3–5 mm) and watt density (usually 100–200 W/m²) against your room’s heat-loss.

Next, check the carrier type: mesh-backed mats suit tile adhesive and self-leveller; uncoupling-mat systems add crack isolation but can increase build-up.

Verify cable spacing is fixed and consistent for predictable output, and choose pre-sized mats to reduce on-site cutting (only cut mesh, never the cable).

Confirm IP rating, floor sensor compatibility, and RCD protection.

For Smart home integration, pick thermostats supporting scheduling.

Apply energy efficiency strategies by zoning rooms and using setback temperatures.

Foil Vs Loose Cable

Although low‑profile mats cover most tile and stone retrofits with minimal build‑up, you’ll choose between foil and loose cable when the floor type or layout demands a different approach.

Use Foil heating under floating laminate or engineered timber: first lay insulation underlay, then roll foil strips, tape joints, and keep them clear of fixings and thresholds. Next, route cold tails to a back box, and fit the floor sensor centrally between runs.

Choose Loose cable for awkward rooms, tight borders, or fixed fixtures: plan spacing to hit the watt density, then clip cable to a decoupling membrane or fixing strips without crossing or kinking.

Finally, test continuity and insulation resistance before, during, and after covering, and connect via RCD-protected circuit.

Add Retrofit Insulation Boards (Without Major Build-Up)

Before you lay heating mats or cables, fit thin retrofit insulation boards to cut downward heat loss without creating a big floor height build-up. Choose high‑compressive XPS or cement‑faced boards approved for floors and compatible with your levelling compound.

Vacuum and degrease the subfloor, then check it’s dry and sound; repair cracks so boards won’t rock. Dry‑lay to confirm coverage, then bond with a notched trowel using flexible tile adhesive or manufacturer‑specified primer/adhesive.

Stagger joints, keep edges tight, and tape seams with alkali‑resistant mesh. Add corrosion‑resistant fixings only where permitted and clear of future cable runs.

Skim‑coat for a flat surface. Pair with a smart thermostat to improve energy efficiency and limit overheating.

Calculate Floor Height, Door Clearance, and Trims
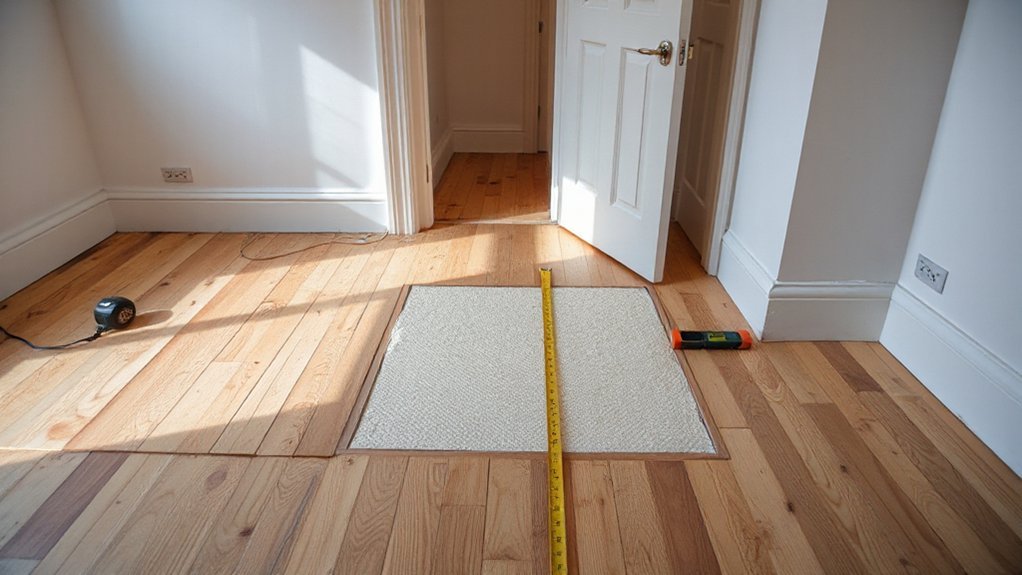
floor build up measurement guidelines

Once you’ve chosen your insulation boards and heating system, map the full floor build-up so you don’t trap doors, foul skirting, or create trip lips at thresholds. List each layer thickness: board, adhesive, mat/cable, primer, leveller, and your flooring materials. Add them, then compare to the existing finished floor line in every doorway and at stairs.

Next, measure door undercuts and swing clearance with a tape and feeler gauge; you’ll want at least 3–5 mm above the finished surface, more for rugs. Mark the required trim-off on the door, and plan for threshold strips where levels change.

Check skirting: either undercut it or remove and refit higher. Use installation tools like a straightedge, laser level, and calipers to verify totals.

Prep and Level the Subfloor for Electric UFH Longevity

Before you lay electric UFH, you’ve got to verify the subfloor is dry, dust-free, and free of oils or adhesives. You should wear a respirator and eye protection while vacuuming and abrading.

Patch cracks, fill voids, and replace any loose sections so you’re not trapping movement or moisture under the heating layer.

Then prime as specified and pour a self-leveling compound to a uniform thickness, keeping the area ventilated and off-limits until it fully cures.

Subfloor Moisture And Cleanliness

Because moisture and debris can trap heat and weaken adhesives, you’ll get a safer, longer‑lasting electric UFH retrofit by treating the subfloor like a controlled substrate, not “whatever’s under the covering.”

Start by removing all loose material (dust, paint flakes, old glue, oils) with a scraper and HEPA vacuum. Then check moisture with a meter and confirm it’s within the heating‑mat and levelling‑compound limits. Document readings across the room; don’t assume corners match the center.

Maintain subfloor moisture below the manufacturer maximum before you prime or bond anything. Verify cleanliness standards by wiping with a white cloth; if it picks up residue, vacuum again and degrease.

Keep the area dry, ventilated, and off‑limits until priming starts.

Spot Repairs And Patching

Where do retrofits fail fastest? At weak spots you didn’t repair—cracks, divots, loose boards, or hollow tiles—so your heater flexes, overheats, or delaminates.

Start by isolating power, then mark defects with chalk and measure depth with a straightedge. Vacuum dust, then abrade glossy areas for bond.

For timber, re-fix squeaky zones with screws into joists; don’t pierce existing services.

For concrete, chase cracks, remove friable edges, and fill with a compatible repair mortar or epoxy patch; feather edges flat. Verify flatness again and re-clean.

Keep cables away from patches until they cure. Log repairs for future maintenance tips and pair them with your Wireless control settings so heat ramps gently.

Self-Leveling Compound Application

Even if your subfloor looks “good enough,” a self-leveling compound (SLC) gives electric UFH the flat, fully supported bed it needs to avoid hot spots, cable lift, and premature delamination.

Vacuum dust, then prime per the SLC manufacturer—skip primer and you’ll trap bubbles or lose bond. Dam edges, seal gaps, and tape doorways so the pour can’t leak.

Set heating mats/cables per layout, protect the cold leads, and verify resistance before you bury anything. Mix with a paddle at the specified water ratio; overwater weakens the pour and hurts Energy efficiency.

Pour and gauge-rake to minimum cover, then spike-roll to release air. Keep traffic off until cured, then recheck resistance before hooking up your Smart thermostat.

Retrofit Electric Underfloor Heating Under Tile, Vinyl, and Laminate
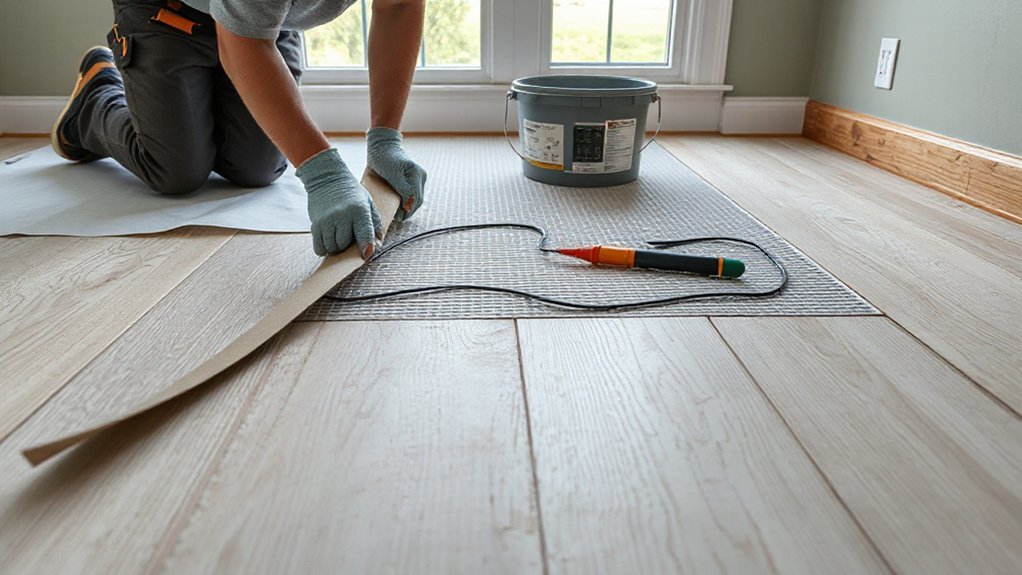
retrofit electric underfloor heating

Although each floor finish has its own limits, you can usually retrofit electric underfloor heating under tile, vinyl, or laminate by adding a low‑profile heating mat or cable layer, embedding it in a thin levelling compound (or tile adhesive), and reconnecting it to a correctly rated thermostat on an RCD‑protected circuit.

First, confirm the substrate is sound, dry, and flat, then prime to suit the compound. For tile, trowel adhesive, bed the mat, and fully encapsulate to prevent voids and hot spots.

For vinyl, use a manufacturer‑approved smoothing compound to achieve a perfectly even surface and stay within maximum temperature limits.

For laminate, add an underlay rated for UFH and keep cable crossings impossible.

Plan routes around fixings, consider color options, and note maintenance requirements: record layouts and resistance readings.

Thermostat, Sensors, and Wiring (What to DIY vs Electrician)

Once you’ve encapsulated the mat or cable and recorded your resistance readings, focus on the control gear that makes the system safe and predictable: the thermostat, floor sensor, and fixed wiring.

Plan Thermostat placement first: mount it on an internal wall, away from sun, drafts, and heat sources, at a usable height.

Next, route the floor sensor in its own conduit from the thermostat box to the floor, ending centrally between two heating runs. Keep the sensor tip fully embedded and serviceable by leaving a gentle pull path.

DIY tasks: chase and fit back boxes, install conduit, label cold tails, and document routes.

Electrician-only: mains supply, RCD protection checks, fixed connections, and commissioning.

Prioritise Wiring safety: isolate circuits, use correct cable sizes, and verify continuity and insulation resistance.

Common Retrofit UFH Mistakes: Hotspots, Cracked Tiles, Failed Adhesive

Before you switch the system on, work through the retrofit failure points that cause hotspots, cracked tiles, and adhesive breakdown: uneven mat coverage, poor heat transfer through the levelling layer, and using the wrong adhesive/grout for thermal cycling.

First, dry-lay and measure spacing; don’t overlap cables, kink them, or bridge expansion joints. Keep consistent coverage around fixtures to avoid cold rings and local overheating.

Next, prime properly and pour a manufacturer-approved, fully encapsulating leveller; trapped air insulates and concentrates heat. Maintain minimum cover depth and cure time before tiling.

Then, select flexible S1/S2 adhesive and grout rated for UFH; rigid products shear as the floor expands.

Finally, commission gradually: ramp temperature daily, log resistance readings, and verify sensor placement for energy efficiency, especially in historic design retrofits.

Conclusion

You’ve checked suitability, picked a low‑profile mat/foil/cable, added slim insulation, and confirmed height, doors, and trims. Now prep: clean, prime, and level the subfloor so the heater sits flat and lasts. Install the correct build‑up for tile, vinyl, or laminate, then test resistance and insulation before and after covering—write readings down like it’s a telegraph log. Fit the floor sensor correctly, and leave final connections and RCD protection to a qualified electrician.…
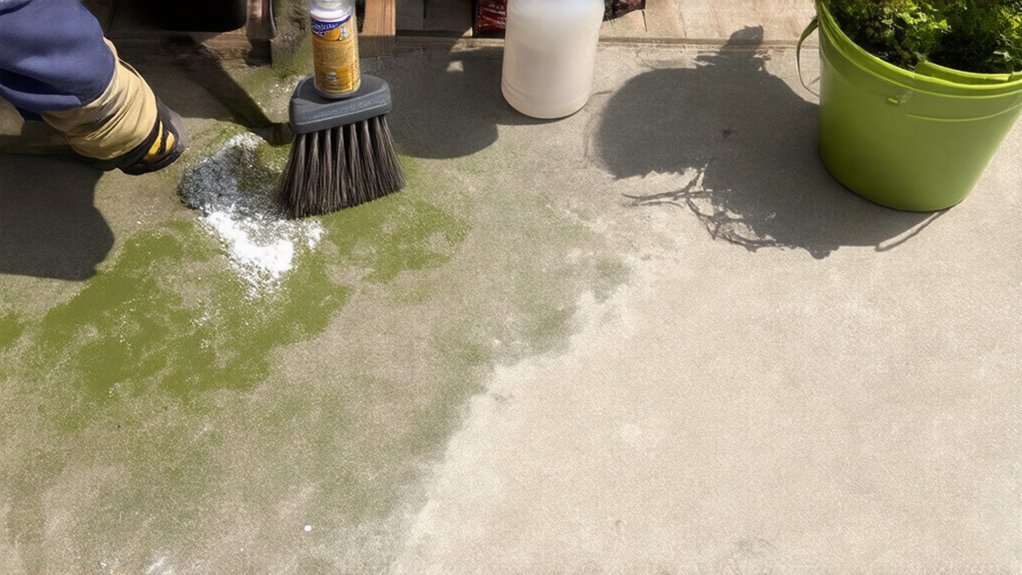
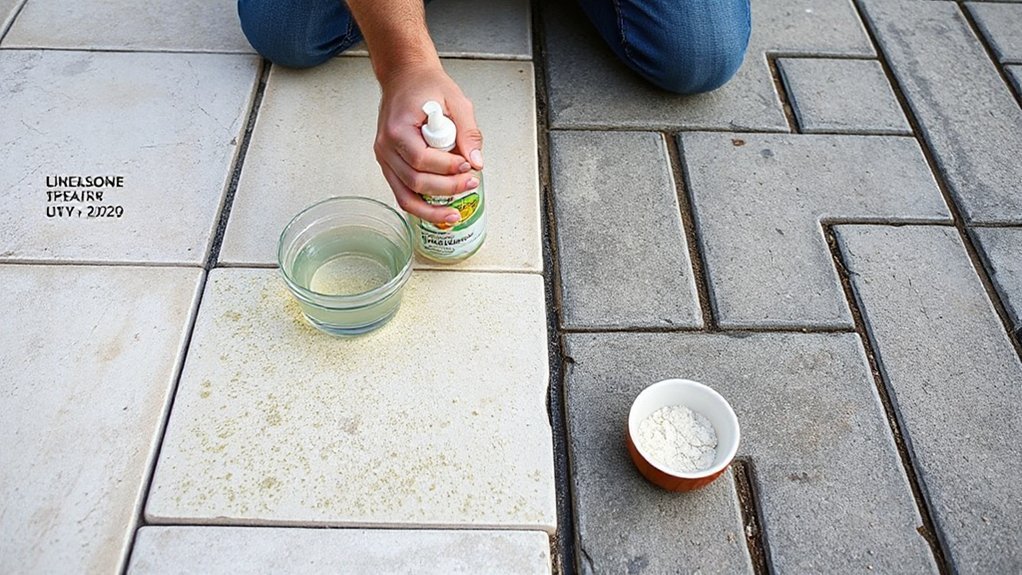
gentle patio slab cleaning
Garden & Outdoor

How to Clean and Restore Weathered Patio Slabs Without Harsh Chemicals

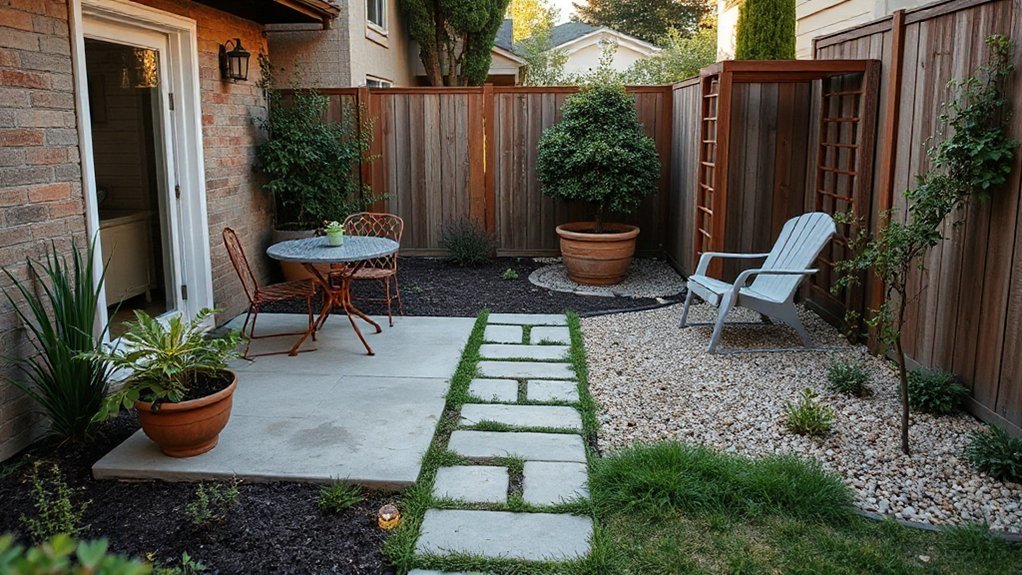
Identify your slab material first (water-drop test) and stick to pH-neutral soap or oxygen-based cleaner; avoid acids on limestone/marble and strong alkalis on reconstituted stone. Clear and sweep the patio, mist and shield plants, then pre-wet the surface. Scrub small sections with hot soapy water and a stiff nylon brush, rinse well, and treat stains with a baking-soda paste. Use diluted vinegar only on concrete after a spot-test. Let slabs dry fully, then apply a breathable sealer for longer-lasting results, with more step-by-step safeguards ahead.

Key Takeaways

  • Identify slab material and porosity with a water-drop test, then choose pH-neutral soap or oxygen bleach; avoid acids on limestone and marble.
  • Clear furniture, sweep debris, pre-rinse thoroughly, and ensure slabs are dry and uniformly matte before deeper cleaning or sealing.
  • Scrub small sections with warm water and pH-neutral soap using a stiff nylon brush, keeping the surface wet 2–3 minutes, then rinse well.
  • Remove algae, moss, and organic stains with oxygen-based cleaner; dwell 10–15 minutes, scrub again, and rinse with low pressure.
  • After full drying, apply a breathable water-based sealer in thin coats, avoiding puddles, and let cure 24–72 hours before replacing furniture.

Identify Slab Material and Safest Cleaner

identify test match clean

Before you reach for any cleaner, you’ll get safer, more predictable results by identifying what your patio slabs are made from, because each material reacts differently to acids, alkalis, abrasives, and even “natural” products like vinegar.

Start with Material identification: check invoices, look for manufacturer stamps, and compare texture and porosity—dense, speckled concrete differs from layered sandstone; limestone and marble often show fine veining and feel “softer” under a key scratch.

Run a small water-drop test to gauge absorption.

Then match Safe cleaning agents: use pH‑neutral soap for most concrete and porcelain; use diluted oxygen bleach for organic staining on concrete and sandstone; avoid acids on limestone, marble, and cement-based slabs; avoid strong alkalis on aluminum-based reconstituted stone.

Patch-test first.

Prep the Patio and Protect Plants

Now that you’ve matched the slab material to a low-risk cleaner, set up the patio so runoff and overspray don’t damage plants or track grime back onto clean areas. Clear loose items first: move garden furniture, pots, grills, and doormats off the slabs. Sweep debris away from doors and drains, then cordon off the work zone with tape or cones.

Protect vegetation next. Lightly mist nearby leaves with clean water to reduce uptake, then cover beds with breathable fabric or cardboard shields, keeping covers off foliage tips. Block runoff paths using rolled towels or sand-filled socks along edges and thresholds.

Unplug or isolate outdoor lighting circuits, cap connectors, and route extension cords overhead. Wear gloves, eye protection, and non-slip footwear throughout.

Clean Patio Slabs With Hot Soapy Water

Once the area’s prepped, start with hot soapy water to lift surface grime without etching or bleaching the slabs. Fill a bucket with very warm water and a few drops of pH-neutral dish soap; avoid degreasers that can leave residue.

Wet the surface first to reduce streaking, then scrub in small sections with a stiff nylon brush, working along joints and textured faces. Keep the solution wet for 2–3 minutes, then agitate again to break the soil film.

Rinse thoroughly with clean water so soap doesn’t attract dirt and dull your patio design. Wear gloves and non-slip footwear, and keep electrical tools dry.

Move outdoor furniture only after the slabs dry completely.

Remove Moss and Algae Without Bleach

Although moss and algae look stubborn, you can remove them without bleach by combining mechanical agitation with an oxygen-based cleaner or a mild vinegar solution, then controlling moisture so regrowth slows.

Start dry: sweep grit, then use a stiff nylon brush to break the biofilm. Pre-wet joints lightly so cleaners spread evenly, but don’t flood.

Apply an oxygen-based cleaner at label dilution, or spray 1:1 white vinegar and water for Eco friendly alternatives; keep it off nearby plants.

Let dwell 10–15 minutes, scrub again, then rinse with low-pressure water to avoid etching and joint loss.

Wear gloves and eye protection, and avoid inhaling aerosols.

For Organic moss removal, pull thick clumps from joints, then top up jointing sand and improve drainage.

Treat Patio Slab Stains With Baking Soda Paste

Mix baking soda with a small amount of water until you’ve got a thick paste, and wear gloves to protect your skin while you work.

Apply the paste directly to the stain, scrub with a stiff nylon brush using controlled pressure, and keep the area damp so you don’t create dust.

Let it sit briefly, then rinse thoroughly with clean water and confirm runoff drains safely away from plants and nearby surfaces.

Mix Baking Soda Paste

When you need a low-toxicity spot treatment for mild to moderate patio slab staining, a baking soda paste gives you controlled abrasion and gentle alkalinity without harsh fumes.

For reliable stain removal, you’ll mix Baking soda with just enough water to form a thick, spreadable paste that won’t run into joints or drains. Start with a clean, dedicated container and a non-metal spoon; avoid reactive aluminum.

Add three parts Baking soda to one part water, then adjust by teaspoons until it holds soft peaks. Wear nitrile gloves and eye protection to prevent irritation, and avoid inhaling dust during measuring.

If you’re treating porous stone, test the paste on an inconspicuous area first to confirm it won’t lighten the surface. Use immediately; don’t store mixed paste.

Scrub And Rinse Stains

Once the paste is in place, scrub the stain with a nylon-bristle brush using tight circular strokes and light-to-moderate pressure. Then let it dwell for 5–10 minutes without allowing it to dry.

Work from the outer edge inward to prevent rings, and keep the area lightly misted if conditions are hot or windy. For embedded stain treatment, reapply a thin layer and repeat the scrub once, avoiding metal brushes that can gouge concrete.

Rinse thoroughly with clean water, directing runoff away from plants and drains if required. Use a low-pressure hose stream; don’t power-wash, which can erode the slab surface.

For Efflorescence removal, rinse twice and brush while rinsing to lift loosened salts. Let the slab air-dry, then inspect and spot-treat remaining marks.

Use Vinegar Safely on Concrete Slabs Only

Use vinegar only on concrete slabs, and keep it diluted to control etching risk—start at 1:1 vinegar to water, and don’t exceed 2:1 for stubborn residue.

Apply it to a small, inconspicuous spot first, wait 5–10 minutes, then rinse and check for whitening or surface roughness.

If the test area stays stable, you can proceed in sections, keeping contact time short and rinsing thoroughly.

Dilute Vinegar Ratios

Although vinegar can lift light mineral haze and mildew, you’ll need to dilute it carefully to avoid etching concrete and weakening the surface paste.

For routine film, mix 1 part white vinegar (5% acetic acid) with 4 parts water (about 1% acid).

For heavier grime, use 1:2, but don’t exceed that ratio on concrete.

Keep Vinegar concentration low and control contact time to protect the cement binder while maintaining Cleaning effectiveness.

Apply with a pump sprayer or microfiber mop, keeping the slab damp, not flooded.

Let it dwell 3–5 minutes, then scrub with a nylon brush.

Rinse thoroughly with clean water to stop the reaction.

Wear nitrile gloves and eye protection, and avoid metal tools that can stain.

Spot-Test Concrete Areas

Before you treat the full patio, spot-test your diluted vinegar on a small, inconspicuous section of the concrete slab to confirm it won’t etch, lighten the color, or expose aggregate.

Choose a corner near an edge, wet the area with clean water, then apply the vinegar mix with a nylon brush for 60–90 seconds. Don’t let it dry; keep it damp and controlled.

Rinse thoroughly and neutralize with a light baking-soda-water wipe, then rinse again.

Let the spot dry fully (at least 2 hours) and inspect in angled light. If you see chalking, roughened paste, or uneven Color enhancement, stop and increase dilution.

If the finish looks even and you get subtle texture improvement, you can proceed safely.

Rinse Thoroughly and Let Patio Slabs Dry

rinse dry clear surface

Once you’ve finished scrubbing and spot-treating, rinse the patio slabs thoroughly with clean water to flush away loosened grime and any remaining residue that could dry into a film. Work from the highest edge down, using a hose with a gentle spray; avoid pressure that can etch soft concrete.

Keep runoff out of drains by sweeping slurry toward soil or a collection area. Wear eye protection and non-slip footwear, and keep children and pets off the wet surface.

After rinsing, remove obstacles and reset furniture arrangement only after the slabs dry. Promote even drying with airflow and sunlight; don’t cover the area.

Pause lawn maintenance nearby to prevent clippings and soil from recontaminating the surface. Wait until the slabs feel dry and look uniformly matte.

Seal Patio Slabs and Prevent New Grime

When the slabs have dried to a uniform, matte finish, seal them to lock out moisture, reduce staining, and slow algae regrowth. Choose a breathable, water-based paving sealer rated for your slab material and slip resistance.

Wear nitrile gloves, eye protection, and a respirator if the label requires it, and keep pets away.

Mask decorative borders you don’t want darkened, and test a small corner for color change.

Apply with a low-pressure sprayer or roller in thin, even coats; don’t puddle in joints.

Maintain ventilation and avoid open flames.

Let the first coat tack, then apply the second within the recoat window.

Keep outdoor furniture off until fully cured, typically 24–72 hours.

Sweep regularly to prevent grit abrasion.

Conclusion

You’ve restored your weathered patio slabs without harsh chemicals by matching the cleaner to the material, working from a protected, prepped surface, and escalating from hot soapy water to targeted treatments. You’ve removed moss and algae safely, used baking soda for stains, and limited vinegar to concrete only. After a thorough rinse and full dry, seal the slabs to lock out moisture and grime. Treat maintenance like calibrating a tool: precise, repeatable, and safe.…

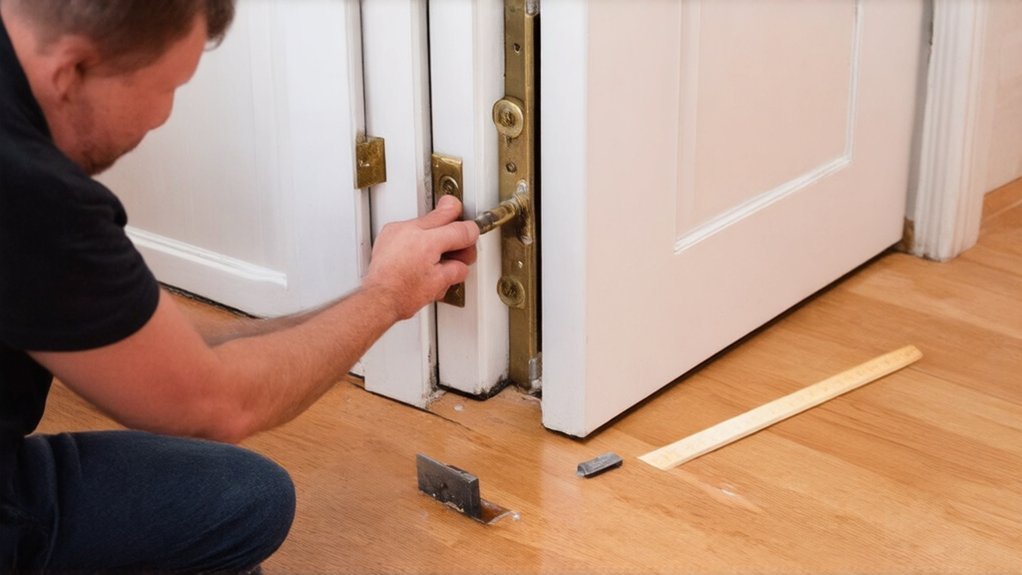
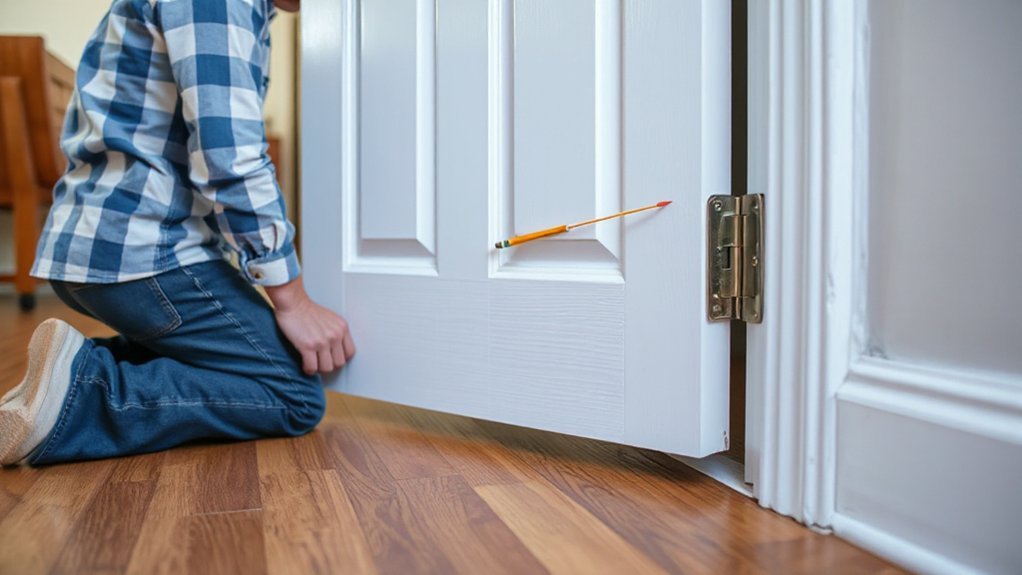
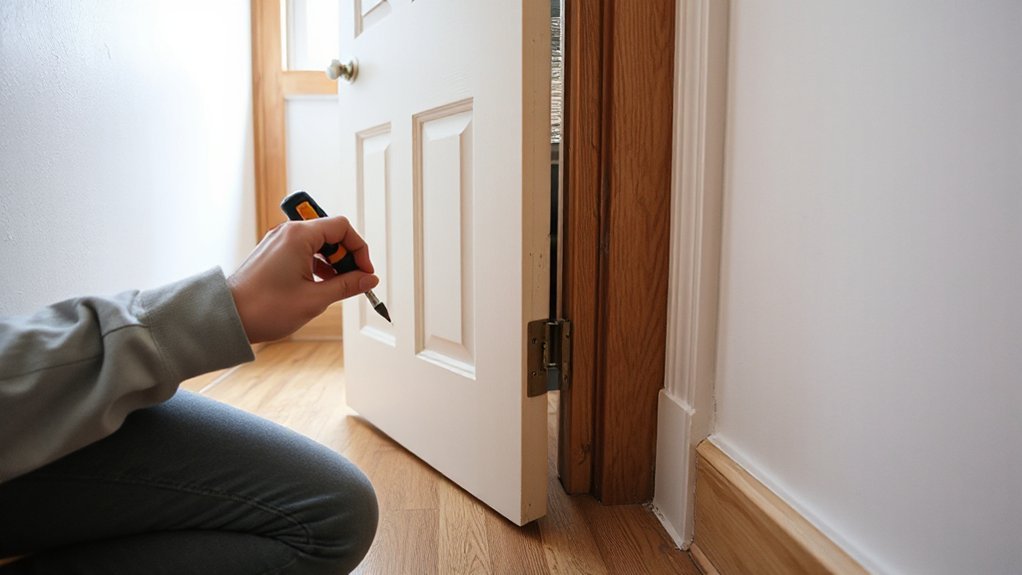
interior door jam fix
General Property Repairs

Fixing a Jammed Interior Door That Won’t Close Properly

Close the door slowly and stop at the first bind; mark the contact line with painter’s tape and run a sheet of paper around the perimeter to find pinch points. Support the door, then tighten hinge screws (top first) and replace any stripped ones with longer #8/#9 screws into the stud. Check for even reveals and shim or realign hinges if it’s sagging. If the latch drags, shift the strike plate slightly. Next, you’ll see when planing helps.

Key Takeaways

  • Close the door slowly and use painter’s tape or paper to pinpoint where it rubs or pinches in the jamb.
  • Tighten all hinge screws, starting at the top, and replace stripped screws with longer #8/#9 screws into the stud.
  • Check door reveals for uneven gaps; realign or shim hinges so hinge barrels line up and the door hangs square.
  • Correct sag or rubbing by supporting the door, improving hinge pull with longer screws, or lightly sanding/planing the tight edge.
  • Reposition the strike plate so the latch seats cleanly; shift it slightly, elongate holes if needed, and retest until it latches smoothly.

Find Where Your Interior Door Sticks

identify door binding points

Before you reach for tools, pinpoint the exact spot where the door binds. Close the door slowly and watch the reveal between the slab and jamb; stop the moment resistance starts. Use painter’s tape to mark the contact line on the jamb or edge.

Run a thin strip of paper around the perimeter; where it snags or tears, you’ve found the pinch point. Inspect for rub marks, shiny burnishing, or a scraped door paint finish, especially near the latch stile and top corner.

Check that Decorative hardware isn’t striking the jamb or trim; verify knobs, levers, and strike plates clear. Keep fingers clear of pinch zones, and support the door while testing. Document locations before adjustments.

Check Hinge Screws and Door Gaps First

Before you plane or sand anything, check the hinges: support the door, then tighten every hinge screw with the correct driver to prevent stripping.

Next, inspect the door gaps along the hinge side, latch side, and head jamb, looking for uneven reveals or rubbing points.

If the gaps change as you move the door, you’ve likely got loose hardware or misalignment that you can correct first.

Tighten Loose Hinge Screws

If your interior door rubs or sticks, start by inspecting the hinge screws and the gaps around the door because even slight hinge movement can throw the door out of alignment.

Open the door halfway, support it with a wedge or shims, and keep fingers clear of pinch points.

Using the correct screwdriver or bit, tighten each hinge screw clockwise until snug—don’t over-torque and strip the wood.

If a screw spins, remove it and drive a longer #8 or #9 wood screw into the stud behind the jamb for a solid bite.

Tighten top hinge screws first, then middle and bottom.

Recheck closing action and listen for hinge squeaks.

Confirm door handle issues and door lock mechanisms operate smoothly afterward.

Inspect Door Gap Alignment

Where exactly does the door go out of square—at the latch edge, the hinge edge, or the header? Close it slowly and watch the reveal (gap) all around. You want an even 1/8 in. gap at the jambs and a consistent head gap. If the latch-side gap pinches at the top or bottom, mark the tight spot with painter’s tape.

Next, check hinge alignment. With the door half-open, look for a stepped hinge barrel or gaps between hinge leaves and the door frame. Run a straightedge along the hinge barrels; they should line up.

Tighten any loose screws, then test again. Keep fingers clear of the hinge knuckles, and support the door if you remove screws.

Tighten or Shim Hinges to Fix Door Sag

Although a sagging interior door often feels like a latch problem, you can usually correct it at the hinge side by tightening fasteners or adding a thin shim to realign the slab. Support the door with a wedge or helper so it can’t drop.

Inspect each hinge leaf for loose screws, then drive them snug by hand to avoid stripping. If holes are worn, replace one short screw per hinge with a 3-inch screw into the stud for better pull.

If sag remains, remove the hinge-pin, swing the leaf open, and insert a cardstock or veneer shim behind the jamb-side leaf; reinstall and test closure.

Recheck strike alignment after door lock maintenance or handle replacement, since hardware changes can shift loading slightly.

Fix an Interior Door That Rubs the Frame

adjust door for even clearance

Tight hinges and a properly aligned strike fix many sagging doors, but rubbing usually means the slab’s contacting the jamb or head as it swings. Mark the rub spot with painter’s tape, then open and close the door to confirm the contact line.

Wear safety glasses and a dust mask. If the rub is on the latch side, remove the door by pulling hinge pins, then plane or sand the edge lightly, keeping the bevel consistent; take off minimal material and test-fit often.

If the rub is at the head or hinge side, check for a proud hinge leaf or loose jamb stop; tighten screws and set hardware flush. Reinstall the door, verify uniform reveal, and reinstall any Decorative hardware and door accessories without binding.

Adjust the Strike Plate so the Latch Catches

Close the door slowly and watch where the latch bolt hits the strike plate; if it contacts the plate edge or misses the hole, you’ve confirmed misalignment.

Keep your fingers clear of the jamb, then loosen the strike plate screws and shift the plate up, down, in, or out until the latch seats fully in the opening.

Retighten the screws and test the latch several times, adjusting in small increments until it catches smoothly without forcing the door.

Identify Latch Misalignment

When the door sticks or won’t latch, start by confirming the latch bolt is missing the strike plate opening. Close the door slowly and watch where the bolt contacts the plate: above, below, or to one side. Mark the contact point with painter’s tape or a pencil, then open the door and inspect the marks against the strike opening.

Next, check for Latch engagement by holding the latch retracted and testing the door’s swing for binding. If the door moves freely but the bolt still hits metal, you’ve got true misalignment, not hinge drag.

Measure the offset between bolt centerline and strike opening center. Keep fingers clear of the jamb, and don’t force the knob—controlled pressure prevents splinters and injury during Misalignment correction.

Reposition Strike Plate

If the latch bolt hits the strike plate instead of dropping into the opening, reposition the strike plate to match your alignment marks. Close the door gently and confirm where the latch contacts.

Open the door, remove the strike-plate screws, and keep them for reinstallation. Score paint lines with a utility knife to prevent splintering, then shift the plate up, down, in, or out until the latch aligns with the hole.

Tighten screws, test the latch, and recheck alignment. If needed, elongate screw holes with a file; wear eye protection and cut away from your body.

Chisel the mortise slightly only if the plate won’t sit flush. Reinstall Decorative hardware neatly to address Privacy concerns and guarantee a secure close.

Plane or Rehang the Door for Bigger Problems

Although minor rubbing often disappears with a hinge tweak, a door that binds hard along the jamb or drags across the floor usually needs either planing or a full rehang.

Mark the tight spots with painter’s tape, then remove the door and set it on sawhorses. Wear eye and hearing protection and secure the workpiece.

If the door material is hollow-core, plane lightly and stop before you expose the skin; for solid wood, take controlled passes with a sharp hand plane or power planer, keeping the edge square.

Test-fit often. Seal the fresh edge, then do paint touch ups so moisture won’t swell the fibers again.

If the gap is uneven top to bottom, rehang: reset hinges, shim, and square the jamb.

Conclusion

You’ve tracked the bind point, snugged hinge screws, and confirmed even door gaps—but the final test is next. Swing the door slowly and listen: a faint scrape means you still need a thin shim or a careful plane pass. Keep fingers clear of hinges, wear eye protection, and clamp the door before trimming. If the latch hesitates, nudge the strike plate and retest. Close it again… and wait for that clean click.…

restoring antique radiator guide
Home Upgrades & Renovations

A Step By Step Guide To Restoring Antique Cast Iron Radiators

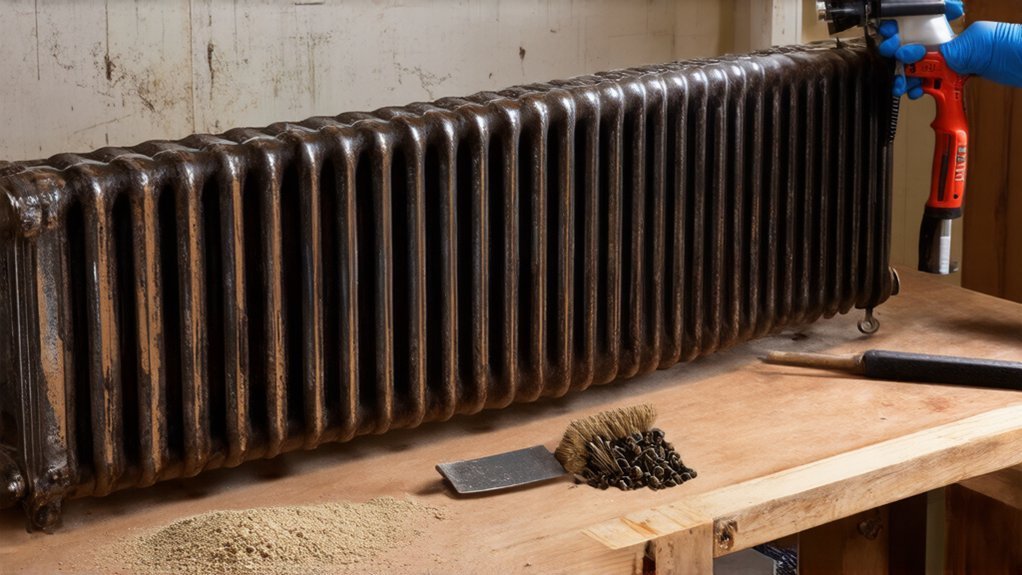
You’ll start by confirming it’s cast iron, then photograph and inspect for cracks, bulges, pitting, and missing plugs while measuring thread type and unions so you don’t force mismatched fittings. Next, flush outdoors on blocks with hot water, backflushing and probing tappings until clear, then dry fully. Strip paint safely with ventilation and a P100 respirator, using gel stripper or infrared heat. Sand, degrease, prime for heat, paint, refit valves, bleed, pressurize, and check leaks—there’s more ahead.

Key Takeaways

  • Identify the radiator as cast iron, photograph it, and inspect for cracks, missing plugs, and damaged threads or fittings.
  • Measure pipe thread type and sizes, including unions and vent location, to ensure compatible valves and avoid forcing mismatched threads.
  • Flush the radiator outdoors with hot water, agitation, and backflushing until clear, probing tappings to remove sludge and blockages.
  • Strip old paint safely with a respirator, gel stripper or infrared heat, then sand, degrease, and mask threads before priming.
  • Apply heat-rated primer and enamel in thin coats, reinstall valves with fresh sealing materials, then fill, bleed air, and leak-test.

Check Radiator Type, Damage, and Fittings

radiator inspection and documentation

Before you strip paint or loosen a single union nut, identify exactly what you’re working on and document its condition. Confirm the radiator material is cast iron (not steel or aluminum) by checking weight, casting lines, and a magnet test. Photograph every side, note the number of sections, and record any stamping, vent location, and valve orientation for reassembly accuracy.

Inspect for damage methodically: look for hairline cracks around tappings, feet, and push nipples; check for bulging sections, missing plugs, and heavy pitting. Use a bright light and mirror, and mark defects with tape.

Verify fitting compatibility by measuring pipe thread size and type (NPT vs BSP), union dimensions, and center-to-floor height. Don’t force mismatched threads; plan adapters or correct valves.

Flush the Cast Iron Radiator and Clear Blockages

Once you’ve confirmed the radiator’s type and fittings, flush it to remove rust scale, sludge, and casting sand that can restrict flow and trap moisture. Set it outdoors on blocks, cap one end, and position a drain pan.

Follow Safety precautions: wear gloves, eye protection, and a respirator if dust is present.

Use Cleaning tools like a garden hose, pressure nozzle, and a flexible radiator brush.

Fill the sections with hot water, agitate by rocking the unit, then drain fully. Repeat until water runs clear.

If flow stalls, probe gently through the tappings with a plastic rod, not steel, to avoid gouging threads.

Backflush from the opposite end, and clear trapped debris with a shop vac at the outlet.

Dry it completely.

Strip Paint Safely From the Cast Iron Radiator

Although old radiator paint can look stable, it often hides lead and fails under heat, so strip it with controlled methods rather than sanding or dry scraping. Set up outdoors or in a ventilated area, lay 6-mil plastic, and keep a spray bottle to mist dust. Wear a P100 respirator, chemical-resistant gloves, goggles, and disposable coveralls—basic safety precautions.

For paint removal, choose a low-odor gel stripper or infrared heater that softens layers without scorching iron. Work in small sections, apply stripper, dwell per label, then lift paint with a putty knife and nylon brush for crevices. Collect residue into a lined container, seal it, and dispose per local rules.

Wipe surfaces with damp rags; don’t rinse into drains.

Sand, Clean, and Prime for Radiator Paint

After you’ve stripped the bulk of the old coating, you need to smooth, degrease, and seal the iron so the new radiator paint bonds under heat.

Start with a vacuum and stiff brush to remove residue from fins and seams.

Sand by hand or with a detail sander: 80–120 grit to knock down pits and edges, then 180–220 grit for an even tooth.

Wear eye protection, gloves, and a P100 respirator; cast-iron dust and old paint particles are hazardous.

Wipe with mineral spirits or a degreaser, then rinse and dry completely—moisture will flash-rust.

Mask threads and openings.

Apply a high-heat, rust-inhibiting metal primer in thin, complete coverage, choosing one that supports your Color options and historical accuracy.

Paint, Refit Valves, and Test for Leaks

When the primer cures, you can move straight into paint and reassembly without contaminating the surface.

Start with careful Color selection: choose a heat-rated enamel compatible with your primer and system temperature.

Mask threads, vents, and union faces so you don’t trap paint where seals must bite.

For paint application, spray light, even coats, keeping the nozzle moving to prevent runs between fins; ventilate well and wear a respirator and gloves.

Let each coat flash off, then cure per label before handling.

Refit valves and the air vent using new fiber washers or PTFE tape where specified, then snug unions without over-torquing.

Reinstall, fill slowly, bleed air, and pressurize.

Check all joints with soapy water; fix bubbles immediately.

Conclusion

You’ve now checked the type, assessed damage, flushed debris, stripped paint safely, and prepped every surface before repainting and refitting valves. Work slowly, ventilate well, and keep PPE on until cleanup’s complete. Here’s why the details matter: the U.S. EPA estimates proper air-sealing and insulation can cut home energy use by about 15%—and a fully restored, leak-free radiator helps guarantee that heat you’ve paid for actually reaches the room.…

enhances home automation efficiency
Plumbing & Electric Fixes

Why Smart Tech Is A Good Investment For Your Home

Smart tech is a good home investment because you can tie upgrades to real savings, lower risk, and stronger resale appeal. You’ll cut utility costs with smart thermostats, room sensors, and lighting that uses occupancy schedules and daylight harvesting. You’ll also reduce costly losses with video doorbells, smart locks, monitored alarms, and leak sensors—especially when paired with an auto-shutoff valve. If you choose Matter/Thread-ready devices with local control, you’ll avoid obsolescence. Next, you’ll see which upgrades pay back fastest.

Key Takeaways

  • Smart thermostats and sensor-based lighting cut energy waste, lowering utility bills and often paying back quickly with rebates.
  • Connected security devices deter theft, speed emergency response, and reduce loss risk with smarter alerts and monitoring.
  • Leak detectors and auto-shutoff valves prevent costly water damage by catching small problems before they become major repairs.
  • Air and humidity sensors reveal HVAC, ventilation, and mold risks early, reducing maintenance costs and avoiding bigger health-related issues.
  • Standards-based, locally controllable systems improve resale appeal, reduce obsolescence, and keep your home manageable from one unified setup.

Which Smart Home Upgrades Give the Best ROI?

smart upgrades maximize home value

Although smart-home features can feel like “nice-to-haves,” the upgrades with the best ROI are the ones that cut operating costs, reduce risk, and make your home easier to market when you sell.

Start with a smart thermostat and zoned sensors so you control heating and cooling without daily micromanagement. Add smart lighting with occupancy and daylight settings to trim wasted usage and improve comfort.

Prioritize security basics—video doorbell, smart locks, and leak detectors—because they lower perceived risk for buyers and can prevent expensive water damage.

Choose devices that look integrated; Smart home aesthetics matter when buyers scan photos and walk through.

Finally, address user privacy concerns: pick brands with local control options, clear data policies, and strong app permissions.

How to Estimate Payback Time and Savings

Before you buy another device, you can estimate its payback time by treating it like a small capital project: measure the upfront cost, forecast monthly savings (or avoided losses), and stress-test the assumptions.

Add hardware, installation, subscriptions, and Smart home maintenance to get total cost.

Then quantify benefits: lower bills, fewer service calls, reduced water damage risk, or time saved you’d otherwise pay for.

Use conservative inputs and model best/expected/worst cases.

Payback time = total cost ÷ monthly net savings; annual ROI = (annual net savings ÷ total cost).

Validate savings with a baseline month of utility and repair spend, then track post-install changes.

Finally, confirm device compatibility with your hub, wiring, and network so you don’t burn savings on adapters, replacements, or downtime.

Are Smart Thermostats the Best ROI Upgrade?

If you’re chasing the best ROI smart upgrade, you’ll want to compare a smart thermostat’s energy-savings payback against its upfront cost and your real usage patterns.

You can often shorten that payback by stacking utility rebates and local incentives, so it’s worth verifying what you qualify for before you buy.

You’ll also factor in HVAC wear reduction, since smoother runtimes and fewer extreme cycles can cut maintenance and replacement costs over time.

Energy Savings Payback

Where does the payback on smart home tech show up fastest? Usually in heating and cooling, because HVAC is your biggest energy load. A smart thermostat trims waste by learning your schedule, tightening setpoints, and reducing runtime when you’re away.

To estimate your payback, start with Energy audits so you know whether leaky ducts or poor insulation will limit savings. Then review your utility bills to baseline seasonal usage and compare it against post-install trends.

Pair the thermostat with room sensors and a tighter comfort band to capture consistent gains without sacrificing comfort. If your utility offers utility rebates, factor them into your upfront cost, but don’t rely on them to justify the upgrade.

Your best ROI comes from measured, repeatable reductions month after month.

Rebates And Incentives

Although smart thermostats often lead the ROI conversation, rebates and incentives can change the math faster than the energy savings alone. Start by checking your utility’s marketplace, state energy office, and federal tax credits, since many programs stack. A $50–$150 rebate can offset most of the device cost, turning payback from years to months.

You’ll get the best results when you confirm eligibility before you buy: approved model lists, required installers, and submission deadlines can decide whether you qualify. Keep receipts, take screenshots of product pages, and file promptly.

If you rent, ask your landlord about split-incentive programs that reward upgrades even when you don’t pay the full bill. Prioritize offers tied to Energy efficiency and user convenience, not gimmicks.

HVAC Wear Reduction

Rebates can slash your upfront cost, but the quieter ROI often comes from reducing HVAC wear—because the system’s lifespan and repair frequency drive real expenses.

A smart thermostat trims run time by avoiding overshoots and short-cycling, so your compressor and blower face fewer hard starts and heat-soak events. That means less strain, fewer callbacks, and longer intervals between major replacements.

You also get tighter control that supports system efficiency: adaptive schedules, occupancy-based setbacks, and better humidity management keep your equipment operating in steadier ranges. Pair that with alerts for filter changes and abnormal runtimes, and you’ll make HVAC maintenance more proactive.

If your home has wide temperature swings or irregular occupancy, the wear reduction can beat simple energy savings. ROI improves further when you tune setpoints and lock in schedules.

Which Smart Lighting and Plugs Save the Most Power?

When you’re investing in smart home upgrades, smart lighting and plugs deliver the most measurable savings when they cut wasted “always-on” use and prevent lights and devices from running longer than needed.

Start with Smart lighting that supports occupancy sensors, daylight harvesting, and scheduled scenes; you’ll reduce over-lighting in hallways, bathrooms, and exterior fixtures. Choose dimmable LED smart bulbs or smart switches, then set shutoff timers and “away” routines so lights don’t idle.

For outlets, prioritize power plugs with energy monitoring and strong standby control for TVs, game consoles, printers, and chargers. Use auto-off rules tied to inactivity, bedtime, or geofencing, and set thresholds that cut power when loads drop to standby watts.

Review monthly usage reports and adjust schedules to keep savings compounding year-round.

Which Smart Security Devices Prevent Costly Losses?

To prevent expensive losses, you’ll get the best ROI from smart security devices that reduce both the chance and the impact of incidents. Smart doorbell cameras deter porch theft and document events. Connected alarm systems shorten response times, and water leak sensors catch small leaks before they become major repairs.

Next, you’ll compare costs, monitoring options, and alert reliability to choose the setup that protects your home and your budget.

Smart Doorbell Cameras

Even if you already have solid exterior lighting and a basic alarm, a smart doorbell camera can close a costly security gap at the one place every intruder, porch pirate, or scammer has to approach: your front door.

Smart doorbell cameras let you verify visitors in real time, speak through two-way audio, and deter theft by making your home feel monitored.

You’ll also build a record: time-stamped security footage that helps you dispute chargebacks, support police reports, or prove a delivery never arrived.

Look for motion zones that reduce false alerts, person detection that prioritizes relevant events, and cloud or local storage you can access quickly.

Mounted correctly, you’ll capture faces and packages, not just the sidewalk, and you’ll respond faster before loss occurs.

Connected Alarm Systems

Because a siren alone doesn’t stop loss, a connected alarm system ties sensors, cameras, and alerts into one fast decision loop that helps you act before damage or theft escalates.

You get verified events: a motion trip paired with a camera clip reduces false alarms and speeds the right response.

With security integration, you can link door/window sensors, glass-break detectors, and smart locks so the system automatically arms, disarms, and logs access.

You’ll also add outdoor sirens and monitored dispatch to cut response time when you’re away.

User convenience matters: one app manages modes, schedules, and instant notifications, so you don’t ignore alerts.

Choose systems with battery backup, cellular failover, and encrypted data to avoid downtime and protect footage and access codes.

Water Leak Sensors

Connected alarms help you respond fast to intrusions, but water damage often racks up losses quietly, long before an alert reaches you. Water leak sensors reduce that risk by triggering immediate leak detection where failures start: under sinks, behind toilets, near water heaters, washing machines, and sump pumps.

You’ll get a push notification the moment moisture appears, so you can shut off a valve, dispatch a plumber, or pause appliances before floors, drywall, and cabinetry absorb water.

For best ROI, place sensors at every high-risk fixture and pair them with a smart shutoff valve for automated response. You’ll also support Water conservation by catching slow drips that inflate bills and waste supply.

Choose models with loud local alarms, battery health alerts, and app history for audit-ready proof.

Smart Leak and Air Sensors: Avoid Expensive Damage

When small problems hide behind walls or under sinks, they can quietly turn into five-figure repairs before you notice. Smart leak sensors reduce water damage by alerting you at the first sign of moisture, and better sensor accuracy means fewer false alarms that you’ll ignore.

Place sensors near water heaters, dishwashers, toilets, and sump pits, and pair them with an auto-shutoff valve to stop flow fast.

Add smart air sensors to catch humidity spikes, VOCs, and CO—signals that mold risk, ventilation failures, or combustion issues may be building. Set thresholds that match your home’s baseline, then review trends weekly to spot slow leaks, damp basements, or HVAC problems early.

You’ll prevent claims, repairs, and disruption.

Does Smart Home Tech Raise Resale Value in 2026?

Although “smart home” still sounds like a nice-to-have to some buyers, in 2026 it can raise resale value—but only if you treat it as a reliability and efficiency upgrade, not a gadget bundle.

Focus on features buyers can appraise: programmable thermostats that document savings, smart locks that simplify access, and monitored smoke/CO alarms that signal safety.

When you keep controls unified in one app and provide clear setup notes, you reduce buyer friction and help your listing stand out.

Smart home aesthetics matter, too: hide hubs, match switch plates, and avoid cluttered wall tablets.

Address privacy concerns upfront by wiping devices, disabling unneeded data sharing, and explaining local-control settings.

Done right, smart tech supports a higher offer and faster sale.

How to Avoid Obsolete Smart Home Devices

As smart-home standards and app ecosystems keep shifting, you’ll avoid obsolescence by buying for longevity instead of novelty. Choose devices that support Matter, Thread, or widely adopted Wi‑Fi, and favor brands with clear update policies and published support timelines. Don’t lock yourself into a single app; prioritize local control and open integrations so your system still works if a cloud service shuts down.

Before you buy, audit your home’s needs: security, energy savings, accessibility. Then select modular hubs, replaceable sensors, and devices with standard protocols to reduce obsolete gadgets. Budget for technology upgrades by selecting products with firmware updates, backward compatibility, and strong third‑party ecosystems.

Finally, keep documentation, update regularly, and plan a refresh cycle for batteries, routers, and critical controllers.

Conclusion

Smart tech pays you back when you pick upgrades with measurable savings and risk reduction. Start with a smart thermostat, leak sensors, and targeted lighting controls, then track usage in your utility app to estimate payback time. One standout stat: the average insurance claim for water damage and freezing runs about $12,500, so a $50–$150 leak sensor can prevent a five‑figure hit. Buy devices with Matter support so you won’t replace them soon.…

constructing a vegetable bed
Garden & Outdoor

Building a Raised Bed Vegetable Garden From Scratch

Start by picking a site with 6–8+ hours of direct sun, good airflow, and easy water access; confirm exposure through the day. Build a bed you can reach into (typically 4 ft wide if accessible from both sides) with rot-resistant, non-leaching lumber and corrosion-resistant screws. Fill it using a 40/40/20 blend of screened topsoil, finished compost, and aeration material, adjusting pH to 6.2–7.0. Plant cool- then warm-season crops, water with drip, mulch 2–3 inches, and keep going for step-by-step details.

Key Takeaways

  • Pick a sunny, open site with 6–8+ hours of direct light, good airflow, and paths wide enough for comfortable access.
  • Size beds for reach and maintenance: 48 inches wide for two-sided access, 30–36 inches for one-sided, and 6–12 feet long.
  • Build with non-toxic, rot-resistant lumber and corrosion-resistant screws; square corners, predrill holes, and follow basic tool safety.
  • Fill with a well-draining mix: 40% topsoil, 40% finished compost, 20% aeration; aim for pH 6.2–7.0 and test if possible.
  • Plant by season and maintain with drip/soaker watering, 2–3 inch mulch, weekly weeding, and regular pest and disease scouting.

Pick a Sunny Spot for Your Raised Bed Vegetable Garden

optimal sunny garden location

Although you can grow some crops in partial shade, your raised bed will perform best in a location that receives at least 6–8 hours of direct sun per day.

8+ hours of sun is ideal for fruiting vegetables like tomatoes, peppers, cucumbers, and squash. Verify sun exposure by observing the site at 2–3 hour intervals or using a solar-path app; note midday obstructions from trees and buildings.

Favor southern exposure and keep the bed away from reflective heat traps that elevate soil temperature beyond ideal root-zone ranges.

Guarantee convenient access to water, because consistent moisture improves nutrient uptake and reduces stress-related pest outbreaks.

For garden pest management, choose an open, breezy spot to lower foliar humidity and disease pressure.

Plan nearby composting techniques so finished compost is easy to apply without shading.

Choose Raised Bed Dimensions That Fit Your Space

You’ll start by measuring your site’s usable footprint while confirming sun exposure and access for tools, water, and maintenance.

You’ll then set bed width and length to match your reach—typically keeping beds about 3–4 ft wide if you can access both sides—so you can work efficiently without compacting soil.

Finally, you’ll choose a bed height that fits your mobility and drainage goals and leave pathways wide enough for safe, frequent traffic.

Measure Sun And Access

Where does the sun actually fall across your yard from morning to late afternoon? Track it for 2–3 clear days, logging full sun hours at the proposed bed footprint. Use a phone compass or solar app to note azimuth and obstructions, then map shade considerations from trees, fences, and buildings at 9 a.m., noon, and 3 p.m.

Aim for 6+ hours of direct light for fruiting crops. Next, evaluate wind exposure: flag prevailing wind direction and speed, and watch for turbulence near corners and walls that can desiccate seedlings.

Finally, measure access. Mark door-to-bed travel lines, hose reach, and wheelbarrow turns. Keep paths straight, level, and wide enough for tools without stepping into soil.

Optimize Bed Width And Length

How wide and long should your raised bed be to maximize planting area without sacrificing reach and access? Set bed width by your comfortable reach: most adults manage 24 inches from one side, so 48 inches works when you can access both sides; choose 30–36 inches if access is from one side only. Use these ranges to reduce compaction and make harvesting faster.

Set bed length to fit your site and materials, not an arbitrary number. Keep runs manageable for watering uniformity and structural straightness; 6–12 feet typically stays square with standard lumber lengths and minimizes bowing.

If you need more area, replicate modules rather than stretching one bed. This standardizes crop rotation, supports consistent spacing, and simplifies season planning.

Plan Height And Pathways

Next, set bed height and pathway width together, because they control drainage, root volume, ergonomics, and long-term access.

For most vegetables, build 10–12 inches of soil depth; go 18–24 inches if you’ll grow carrots, parsnips, or tomatoes and want stronger drought buffering.

Keep the top edge 16–24 inches high if you need easier bending; don’t exceed what you can fill with quality soil.

Size pathways for your tools and gait. Aim for 24–30 inches for foot traffic, 36–48 inches if you’ll wheel a cart.

Use compacted mulch or gravel to reduce mud, improve pest prevention by limiting slug habitat, and sharpen garden aesthetics with consistent lines.

Leave turning space at bed ends.

Build Your Raised Bed Frame (Safe Materials + Tools)

safe precise raised bed construction

Before you cut a single board, choose frame materials and fasteners that won’t leach harmful compounds into your soil. Then stage the right tools so you can build square, level, and structurally rigid beds.

Use naturally rot-resistant lumber (cedar, redwood) or heat-treated pine; avoid creosote ties and older pressure-treated stock. Fasten with exterior-grade, corrosion-resistant screws (stainless or ceramic-coated), not drywall screws.

Measure twice, cut once with a miter saw or circular saw and guide. Clamp corners, predrill to prevent splitting, then drive screws to consistent depth.

Confirm squareness by matching diagonals; check level on every side before final tightening. Follow safety precautions: eye/ear protection, gloves, stable work surface.

Prioritize tool maintenance—sharp blades, charged batteries, calibrated squares—so cuts stay true and joints don’t rack.

Fill Your Raised Bed (Soil Recipe + How Much to Buy)

You’ll get better yields if you fill your raised bed with a consistent, well-draining mix—typically a balanced blend of screened topsoil, finished compost, and aeration material (like coarse vermiculite or pine bark fines).

Before you buy anything, you’ll calculate the soil volume you need by multiplying bed length × width × fill depth, then convert to cubic feet or cubic yards to match supplier units.

With those numbers, you can source ingredients in the right proportions and avoid underfilling, overbuying, or settling-related sinkholes.

Raised Bed Soil Recipe

Although raised beds give you tight control over drainage and fertility, the bed performs only as well as the soil blend you put in it. Build a stable, biologically active mix by combining 40% screened topsoil, 40% mature compost, and 20% aeration material (pumice, perlite, or coarse sand).

This compost mixture supplies nutrients and microbes, while topsoil anchors structure and water-holding. Aim for a crumbly texture that forms a weak ball when squeezed, then breaks with a tap.

Adjust pH toward 6.2–7.0 using lab-tested lime or elemental sulfur. Add soil amendments based on crop demand: 1–2 cups rock phosphate per 10 sq ft for root crops, and 1 cup greensand for potassium. Mix thoroughly to prevent nutrient hotspots.

Calculate Soil Volume Needed

How much soil do you actually need to fill a raised bed to working depth without overbuying? Measure interior length, width, and target depth (in feet), then multiply: L × W × D = cubic feet.

Convert to cubic yards by dividing by 27. Example: a 4×8 bed filled to 1.0 ft needs 32 ft³, or 1.2 yd³.

Subtract 10–15% if you’re topping existing soil, but add 10% for settling after watering.

Buy bulk by the cubic yard when volume exceeds ~1 yd³; use bagged soil (labeled in ft³) for small beds.

Before final purchase, run Soil testing to confirm texture and pH, then adjust your mix using composting techniques and targeted amendments.

Choose Vegetables for Your Raised Bed by Season

Because soil warms and cools faster in a raised bed, you’ll get the best yields by matching crops to seasonal temperature ranges rather than planting everything at once.

In early spring, target cool-season crops that tolerate 40–70°F soils: peas, spinach, lettuce, radish, and brassicas.

After your last frost and once soil holds near 65°F, switch to warm-season fruiting crops: tomatoes, peppers, cucumbers, beans, and squash; these stall below ~55°F.

In late summer, re-seed fast cool-season greens for fall as nights drop; choose varieties with short days-to-maturity.

Use companion planting to reduce pest pressure: interplant alliums with carrots to disrupt fly location, and pair basil with tomatoes for improved pest control.

Rotate plant families yearly to limit soilborne disease.

Water, Mulch, and Maintain Your Raised Bed Garden

water mulch maintain properly

Once you’ve planted, consistent moisture and surface protection become the main controls on growth, yield, and disease pressure in a raised bed. Use watering techniques that target the root zone: drip lines or soaker hoses deliver uniform wetting and reduce leaf wetness.

Water early, and apply enough to moisten 6–8 inches; then let the top inch dry slightly to limit damping-off and fungus. Check moisture with your finger or a probe, and adjust frequency as temperatures rise.

Select mulch types based on crop and climate: shredded leaves or straw insulate and suppress weeds; compost mulch feeds soil but can crust if overapplied. Maintain 2–3 inches, keep mulch off stems, and top-dress midseason.

Pull weeds weekly, scout pests, and re-level irrigation.

Conclusion

You’ve picked sun, sized the bed, built a safe frame, and filled it with a calibrated soil mix. You’ve matched crops to season, then set water and mulch to stabilize moisture and temperature. Now the variables narrow: light, nutrients, and consistent irrigation. But there’s one final test you can’t shortcut—observation. Over the next 7–14 days, you’ll track emergence, leaf color, and soil dampness at 2 inches deep. Miss it, and yield slips quietly.…

fix outdoor tap leak
General Property Repairs

How to Stop a Leaking Outdoor Tap Before It Causes Bigger Problems

Shut off the stop valve (or main) and open the outdoor tap fully to bleed pressure; keep it open while you work. Identify the first wet point: spout, handle, or threads. If it leaks at the handle, snug the packing nut in 1/8 turns while holding the body. If it drips from the spout, replace the washer and inspect the valve seat. For thread leaks, reseat and wrap PTFE tape clockwise 3–5 turns—next you’ll see deeper fixes.

Key Takeaways

  • Shut off the stop valve or main supply, then open the tap fully to depressurize and drain residual water before repairs.
  • Identify the leak source by drying the tap and watching where water first appears: spout, handle, or threaded connections.
  • Stop handle leaks by tightening the packing nut in 1/8-turn increments while holding the valve body to avoid twisting pipes.
  • Fix thread leaks by reseating fittings and applying PTFE tape clockwise 3–5 wraps on dry threads, then tightening snugly.
  • End spout drips by replacing worn washers, O-rings, or cartridges; replace the entire tap if cracked or frost-damaged.

Turn Off the Water and Bleed Pressure

turn off open verify drain

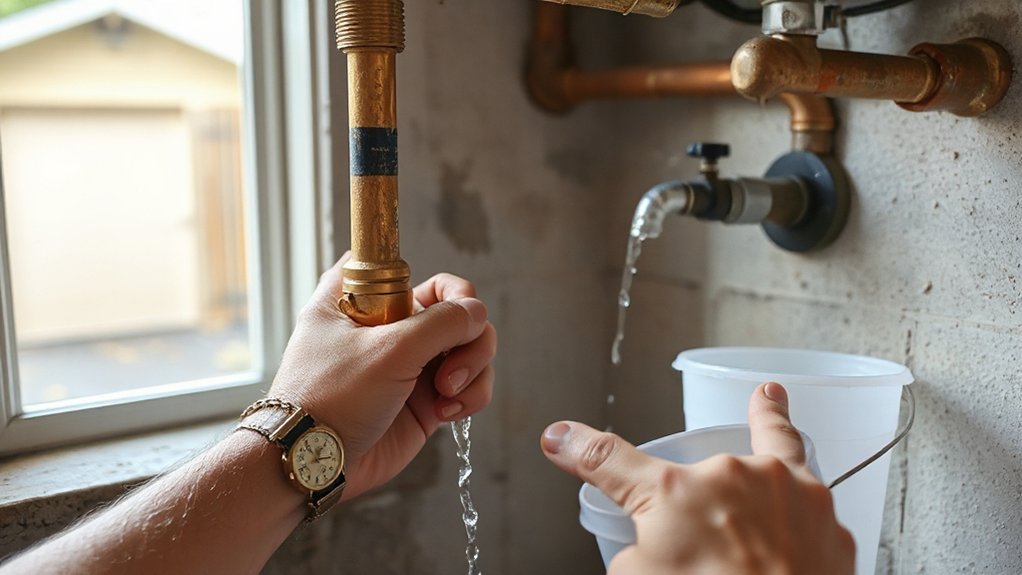
Before you touch the outdoor tap or pull any parts, shut off the water supply at the dedicated stop valve (if installed) or at the home’s main shutoff. Then open the tap fully to bleed off line pressure and drain residual water.

Verify the shutoff holds by confirming flow stops after a few seconds; if it doesn’t, don’t proceed until you can isolate the line. Keep the spout open while you work so trapped pressure can’t force water past seals or fittings.

If a hose or backflow device is attached, remove it to prevent siphon issues and comply with outdoor plumbing best practices.

Capture the drained water in a bucket for water conservation, and keep the area dry to prevent slips and electrical hazards.

Find the Outdoor Tap Leak: Spout, Handle, or Threads

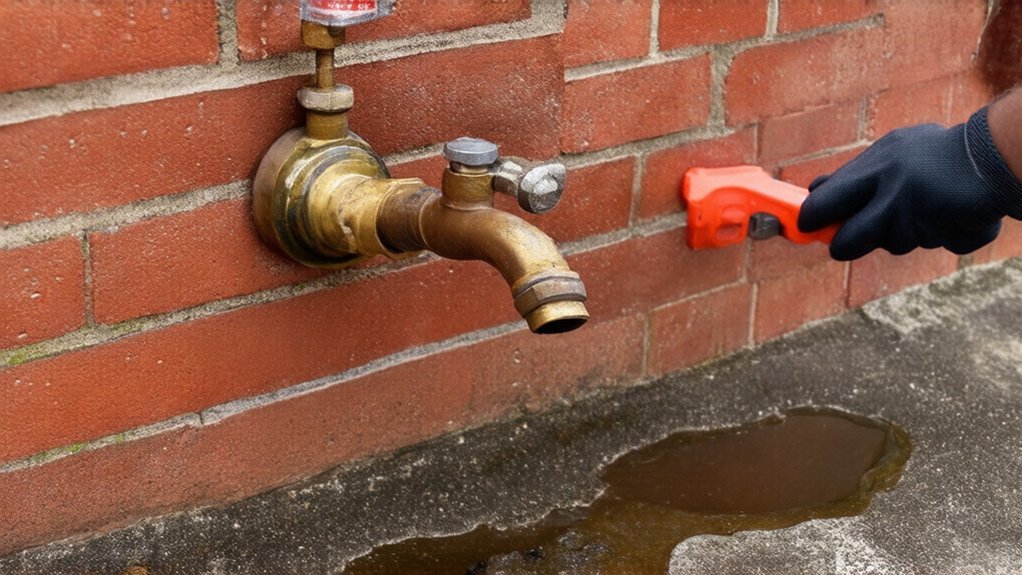
Once the line is depressurized, pinpoint the leak source by watching where water first appears: the spout (drip from the outlet), the handle/stem (water weeping from under the handle or packing nut), or the hose threads/vacuum breaker (leaks only when a hose or cap is installed).

Dry the assembly with a rag, then place paper towel strips under each suspect point to reveal the first wet spot.

For spout drips, confirm the valve is fully closed and note whether dripping continues after several minutes; persistent flow suggests a worn internal seal.

For thread leaks, inspect gasket condition, cross-threading, and the vacuum breaker’s seating; replace cracked washers and confirm a code-required backflow device remains installed.

Document findings for outdoor plumbing repairs and safer garden maintenance.

Leaking at the Handle? Tighten the Packing Nut

If water seeps from under the handle or around the stem while the spout itself stays dry, the packing nut has likely loosened and needs a controlled retighten.

Shut off the branch supply at the interior stop valve, then open the outdoor tap to verify pressure is relieved.

Hold the valve body with a wrench to avoid twisting soldered or threaded joints, and use an adjustable wrench to turn the packing nut clockwise in 1/8-turn increments.

Recheck by cycling the tap handle from fully closed to fully open; you want smooth movement without seepage.

Don’t overtighten—excess compression can bind the stem and damage packing.

Restore water, inspect for leaks, and confirm the handle stays dry under full line pressure.

Dripping From the Spout? Replace the Washer

If your outdoor tap drips from the spout when it’s fully closed, you’ve likely got a worn washer on the valve stem.

Shut off the water supply at the isolation valve (or main), then open the tap to relieve pressure before you disassemble it.

Fit a matching, code-approved washer squarely in the retainer and tighten it securely so it seats flat and seals without binding.

Identify Worn Tap Washer

When water drips steadily from the spout even with the tap fully closed, a worn washer inside the valve usually fails to seal against the valve seat.

For Tap maintenance, confirm the leak path: dry the spout, close the handle firmly (don’t overtighten), and watch for renewed droplets within 60 seconds. If dripping returns, the washer or seat interface is suspect, not the packing nut.

For Washer inspection, note handle feel and sound. A gritty, notchy turn or metal-on-metal squeal suggests the rubber washer has hardened, cracked, or detached from its screw.

Check for pulsing drips that worsen with higher upstream pressure; that pattern also points to poor sealing.

Plan to replace the washer with a matching size and material rated for potable water use.

Shut Off Water Supply

A confirmed spout drip puts the washer and valve seat at the top of the suspect list, so shut off the water supply before you open the tap body. Locate the dedicated stop valve for the outdoor bibb or shut the main if none exists, as many codes require an accessible, serviceable shutoff.

Turn the valve clockwise until it seats; don’t force it. Open the outdoor tap fully to depressurize and drain the line, then close it once flow stops.

Verify isolation with Leak detection: watch the spout for continued flow and confirm the meter isn’t advancing.

Protect Water conservation by limiting discharge into landscaping and capturing runoff in a bucket. If the shutoff won’t hold, stop and replace that valve first.

Fit New Washer Properly

After you’ve isolated and drained the line, pull the old washer from the bibb’s stem and fit the replacement so it matches the original diameter and thickness, seats flat, and aligns cleanly with the valve seat.

Use OEM or plumbing-rated rubber/neoprene, not generic soft washers that deform and fail.

For code-compliant, leak-free sealing, inspect the screw and retainer: replace corroded hardware and tighten to snug, not crushed.

Confirm the stem face is clean; remove grit with a non-marring pad.

Your tool selection matters—use a correctly sized screwdriver to avoid cam-out and stem damage.

Before reassembly, check for a nicked valve seat; if damaged, dress it with a seat tool or replace the bibb.

Restore water slowly, test under pressure, and verify no drip during garden maintenance.

Handle Still Leaks? Replace the O-Ring or Cartridge

If tightening the packing nut and handle hardware doesn’t stop the drip, the faucet’s internal seal has likely failed, so you’ll need to replace the O-ring or the cartridge.

Shut off the fixture’s supply at the interior stop and open the tap to relieve pressure; follow local code requirements for isolation and backflow protection.

Remove the handle, then pull the stem or cartridge per the manufacturer’s diagram.

Inspect the O-ring for nicks, flattening, or mineral scoring; replace with the exact size and material (EPDM for potable water).

If the valve uses a cartridge, install an OEM replacement and align ports correctly.

Lightly lubricate O-rings with silicone grease only.

Restore flow slowly, check for drips, and confirm reliable Garden irrigation while supporting Water conservation year-round.

Leak at Outdoor Tap Threads? Reseat and Seal Connections

If water’s seeping from the hose bibb threads, confirm the leak is at the threaded joint—not the stem or vacuum breaker. Then shut off the supply and relieve pressure.

Reseat the hose or fitting by backing it off, cleaning the threads and gasket face, and threading it on straight to avoid cross-threading.

Wrap PTFE thread seal tape in the tightening direction (as permitted for the connection type) and re-tighten snugly with a wrench—don’t over-torque and crack the fitting.

Identify Thread Leak Source

Although a drip at the outdoor tap often looks like a valve failure, water that beads or runs from the threaded outlet typically points to a compromised hose-thread seal rather than an internal washer.

Confirm the source by drying the spout, then cracking the valve open briefly and watching where moisture first appears. If the threads wet up while the body and stem stay dry, you’ve isolated a thread-side leak.

Inspect for cross-threading, flattened hose washers, debris on the male threads, or a damaged vacuum breaker; replace parts only with listed components that meet local code.

Shut off pressure before touching fittings, and relieve residual pressure to prevent spray injuries.

Address leaks promptly to protect Garden irrigation reliability and support Pest prevention by eliminating standing water.

Reseat Hose Or Fitting

Once you’ve confirmed the moisture starts at the hose threads, shut off the water supply, open the outdoor tap to relieve residual pressure, and then reseat the connection.

Disconnect the hose and inspect the female coupling for grit, cross-threading, or a distorted swivel. Check the washer or O-ring; replace it if it’s cracked, flattened, or missing.

Clean both mating faces, then thread the hose on by hand to avoid damaging the spout’s male threads. Tighten until snug; don’t use pliers unless the fitting is designed for it, since over-torque can split plastic couplings and violate manufacturer instructions.

Restore water and verify no drips under normal garden irrigation flow. Add this check to routine outdoor faucet maintenance to prevent repeat leaks.

Apply Thread Seal Tape

When water beads at the outdoor tap’s threaded joint even after you’ve reseated the hose or fitting, wrap the male threads with PTFE (thread seal) tape to improve sealing without overstressing the connection.

Shut off the supply, open the tap to depressurize, and dry the threads. Wrap Thread seal tape clockwise (as you face the end) 3–5 turns, keeping it back from the first thread so debris can’t enter the line. Smooth it into the grooves, then reinstall the hose or adapter hand-tight plus a small wrench nudge; don’t crack the bibb or fitting.

Restore pressure and check for seepage. If the tap sits in a freeze zone, add pipe insulation to the supply stub to reduce stress from icing.

Replace the Outdoor Tap If It’s Cracked or Frost-Damaged

If freezing temperatures cracked the tap body or split the frost-proof stem, you’ll need to replace the outdoor tap rather than keep tightening parts that can’t seal.

Shut off the interior isolation valve, open the spigot to depressurize, and verify zero flow. If none exists, shut off the main.

Disconnect the supply using two wrenches to prevent twisting the piping, and cut back to sound copper/PEX as required by local code.

Install a listed frost-proof sillcock of correct length so the shutoff seats inside conditioned space, with the barrel pitched slightly downward.

Use approved fittings, tape/dope per manufacturer, and restore flow while checking for leaks.

Outdoor faucet maintenance includes replacing damaged units promptly; winterizing outdoor taps prevents recurrence.

Conclusion

Don’t let that outdoor tap drip turn into a “Trojan horse” behind your siding. You’ve already shut off the supply, bled pressure, and verified whether the leak starts at the handle, spout, or threads. By tightening the packing nut, replacing washers, O-rings, or cartridges, and resealing threaded joints with approved tape or compound, you’ll restore a watertight seal. If you spot cracks or frost damage, replace the faucet to code and prevent structural water damage.…

stylish hallway transformation ideas
Home Upgrades & Renovations

Hallway Makeovers: Flooring, Lighting and Decor That Make a Big Impact

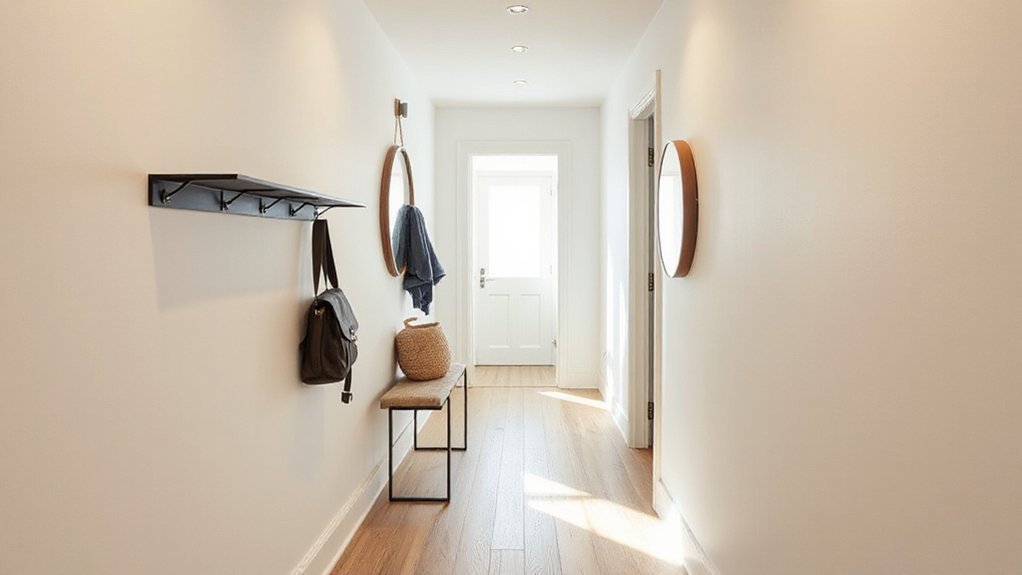
Start by mapping your hallway’s real traffic flow, door swings, and drop zones so you keep clear walking width and choose wall-hugging furniture. Brighten fast with high-LRV warm white or greige paint, plus a mirror that bounces light down the corridor. Layer lighting: a flush or semi-flush ceiling fixture, sconces mounted 60–66 inches high, and warm 2700–3000K dimmable LEDs. Anchor it with durable flooring and a runner leaving 4–6 inch borders, then finish with aligned art and tight, curated styling—there’s more ahead on layout, storage, and impact.

Key Takeaways

  • Map traffic flow and keep the lower zone clear; use narrow benches or shelves so the hallway stays open and functional.
  • Upgrade flooring in high-wear areas with durable matte finishes, and add a runner with 4–6 inch borders secured by non-slip pads.
  • Brighten walls with high-LRV paint and a tight, consistent palette that continues into adjacent rooms for a longer, calmer visual line.
  • Layer lighting with a dimmable ceiling fixture plus sconces at 60–66 inches high to reduce shadows and visually widen narrow walls.
  • Create impact with one oversized artwork or a matching-frame gallery grid, hung 57–60 inches to center, with minimal, curated accessories.

Plan Your Hallway Makeover for Traffic and Light

map light measure plan

Before you pick paint or hang art, map how people actually move through your hallway and where natural and artificial light land throughout the day. Measure clear walking width, note pinch points at door swings, and track where bags and shoes naturally drop.

Use that data to choose durable flooring at high-wear zones and slip-resistant runners where turns happen. Layer lighting by task: brighter at closets, softer near bedrooms, and glare-free at eye level.

Plan outlets and switch locations so you don’t block them with consoles or hooks. Keep color coordination tied to adjacent rooms so progressions feel intentional, not chopped.

Lock in furniture arrangement with tape outlines, ensuring drawers open, radiators breathe, and sightlines stay clean.

Brighten the Hallway With Paint, Mirrors, and Walls

Once you’ve mapped traffic and lighting, use your walls as light multipliers: choose a high-LRV paint (warm white, greige, or a soft clay) in an eggshell or satin that bounces light without spotlighting every scuff. Then place mirrors where they’ll reflect a window or fixture—not a blank wall—so the hallway reads wider and brighter.

Keep color schemes tight: run the same wall color through adjacent rooms or shift one shade lighter to extend sightlines. Add crisp contrast with a deeper door color or tonal trim for depth without narrowing the passage.

For wall treatments, try vertical beadboard, slim battens, or micro-paneled wainscoting to lift the eye and disguise dings. In longer corridors, create a gallery grid with matching frames to calm visual noise.

Layer Hallway Makeover Lighting (Ceiling, Sconces, Lamps)

Start with the ceiling fixture, because it sets the hallway’s overall brightness and scale—flush mounts for low ceilings, semi-flush or a slim pendant for taller runs.

Then add wall sconces to layer light at eye level, reduce shadows, and visually stretch narrow walls with evenly spaced, warm LEDs.

Finish with a small lamp on a console or shelf to bring in that boutique-hotel glow and make the pass-through feel lived-in.

Ceiling Fixtures First

Because a hallway’s lighting has to work hard in a narrow, high-traffic space, your ceiling fixture should set the tone and provide the baseline brightness you’ll build on with sconces and lamps.

Start by measuring ceiling height and width so you don’t choose a piece that crowds the sightline. For low ceilings, go with a slim flush-mount; for standard heights, a semi-flush adds depth; for tall entries, a small chandelier elongates the corridor.

Current ceiling fixture styles that read elevated include opal-glass globes, ribbed shades, and matte black or aged brass.

Prioritize fixture placement: center it on the hallway’s axis, then space multiples evenly (about 6–8 feet apart) to eliminate dark pockets and shadows.

Use dimmable LEDs at 2700–3000K.

Add Wall Sconce Layers

With your ceiling fixture setting the baseline brightness, wall sconces add the side-to-side glow that keeps a hallway from feeling like a lit tunnel. Use wall sconce layering to widen the visual field, soften shadows at doorways, and highlight artwork without glare.

Mount sconces 60–66 inches from the floor, then stagger pairs along longer runs so light overlaps instead of creating bright spots. For tighter halls, choose slim profiles or up/down styles that wash the wall and make it read taller.

Trend-forward finishes—aged brass, matte black, or plaster—double as decorative wall lighting while staying quiet in a narrow space. Put sconces on a dimmer so evening circulation feels calm, and match bulb color to your ceiling fixture for a seamless, gallery-like corridor.

Lamps For Warmth

Even if your ceiling light and sconces cover the basics, a small lamp adds the warm, low-level glow that makes a hallway feel lived-in instead of purely pass-through.

Place one on a slim console, a wall-mounted shelf, or a closed shoe cabinet so it doesn’t pinch the walkway. Choose cozy lamps with tapered linen shades, opal glass, or pleated fabric—textures that diffuse warm lighting and soften hard angles.

Scale matters: keep the base narrow, but let the shade sit near eye level to reduce glare and bounce light onto the walls. Add a dimmable LED (2700K) and a plug-in timer so it clicks on at dusk.

In long halls, repeat a matching lamp every 8–10 feet for rhythm.

Choose Durable Hallway Flooring and Runners

In a hallway that gets constant foot traffic, you’ll want flooring that can take a beating—think engineered hardwood, LVP, or porcelain tile in a matte, low-glare finish.

You can visually stretch the space with a runner that’s scaled to the corridor, leaving a slim border of floor showing on both sides and stopping a few inches short of door swings.

You’ll keep everything secure and quiet with a non-slip pad, then stay ahead of wear by vacuuming often, spot-cleaning fast, and rotating the runner for even fading.

High-Traffic Flooring Materials

Where does your hallway take the biggest beating—right at the front door, along the pinch-point by the stairs, or in that narrow strip between rooms? Map those wear zones first, then match them to Durability considerations like scratch resistance, dent tolerance, and easy-clean finishes that won’t show every scuff under raking light.

For Material options, you can’t beat porcelain tile for grit, salt, and wet boots; choose a matte, slip-resistant finish and tight grout lines for a calmer visual rhythm.

Engineered hardwood brings warmth without the movement issues of solid planks, especially in long, linear corridors.

Luxury vinyl plank is trend-forward, quieter underfoot, and forgiving if you’ve got pets.

If you crave softness, pick low-pile, solution-dyed carpet tiles you can swap individually.

Runner Size And Placement

Once you’ve nailed down your wear zones, size and place a runner to protect the traffic line without making the hallway feel pinched. Aim for a runner size that leaves 4–6 inches of floor showing on each side; that border frames the path and keeps narrow halls from feeling like a carpeted tunnel.

In wider corridors, scale up so the runner reads intentional, not lost.

For runner placement, start 6–10 inches from the first threshold and stop short of the last doorway so doors swing cleanly and transitions feel crisp. Center it on the main sightline, not necessarily the wall, especially if you’ve got radiators or built-ins.

Use stripes to elongate, or a low-contrast pattern to hide daily scuffs and grit.

Non-Slip Pads And Care

A well-sized runner only works if it stays put, so lock it down with a non-slip pad and a simple care routine that matches your hallway’s traffic. Choose felt-rubber blends for hardwood, and grippy PVC for tile; trim to sit 1 inch inside the runner’s edge so it disappears visually while gripping the full stride zone.

For hallway safety, vacuum weekly with the beater bar off to protect low-pile trends and prevent edge curl. Spot-clean spills fast, working from the outer ring inward, then blot dry so moisture doesn’t migrate to seams.

Every month, lift the runner to air out both sides, check for pad residue, and rotate end-to-end to even wear at the entry and turn points. Replace non-slip pads once they flatten.

Add Slim Hallway Storage (Hooks, Shelves, Benches)

slim vertical hallway storage

Even if your hallway measures only a few feet wide, you can carve out high-function storage by keeping everything slim, wall-hugging, and vertically stacked. Choose slim storage like a 4–6-inch-deep picture ledge for keys and mail, and mount hallway hooks in a tight grid to hold coats, bags, and dog leashes without spreading out.

Add a shallow floating shelf above the hooks to park hats or baskets, and keep the lower zone clear for smooth traffic flow. If you need seating, pick a narrow bench (10–12 inches deep) with a lift-top or cubbies; it gives you a landing spot for shoes while hiding clutter.

Finish with matching hardware and aligned heights so the wall reads calm, not crowded.

Finish Your Hallway Makeover With Art and Styling

Because a hallway is mostly movement and first impressions, art and styling have to work fast: set a clear focal line at eye level, then build a tight, intentional vignette that doesn’t pinch the pathway.

Anchor the space with one oversized piece, or run a clean gallery in matching frames with consistent mat widths for a crisp art arrangement. Keep spacing 2–3 inches, and align centers at about 57–60 inches from the floor.

Use a picture light or wall-wash sconce to flatten shadows and boost color.

On a slim console, layer styling accessories with varied heights: a catchall tray, a narrow vase, and one sculptural object.

Edit hard, then repeat one metal finish to tie it together.

Conclusion

It’s funny how the “in-between” space ends up doing the most. When you plan for traffic flow and tame the light, your hallway stops feeling like a pass-through and starts reading like a room. You’ll bounce daylight with paint and mirrors, stack lighting from ceiling to sconces, and ground it all with a durable runner. Add slim hooks or a perch, then finish with tight-framed art—suddenly, the smallest footprint makes the loudest statement.…

installing water underfloor heating
Plumbing & Electric Fixes

How to Install Water Underfloor Heating: A Practical Step‑by‑Step Guide

Start by measuring from the structural slab to thresholds so you can set the full build-up: DPM/vapour barrier, insulation, edging strip, pipe system, screed/panels, and floor finish, while maintaining required screed cover and insulation compressive strength. Choose a UFH system that suits screed, timber, or retrofit constraints. Design pipe spacing (100–200 mm), loop lengths, and zones from heat-loss calculations. Install insulation tight, fix pipes per drawings, then flush and pressure-test (typically 6 bar) before commissioning. Keep going to see detailed layouts, joint protection, and balancing tips.

Key Takeaways

  • Measure slab-to-threshold height, then plan layers: DPM, insulation, edge strip, UFH pipe, screed/board, and final floor covering.
  • Choose a UFH system suited to build-up and structure: screeded clip-rail/panels, timber diffuser plates, or thin overlays for retrofits.
  • Design zones and pipe loops from heat-loss calculations; use 100–200 mm spacing and keep loop lengths within supplier limits for balancing.
  • Install insulation tightly with taped joints, fit continuous perimeter edging, then fix and lay pipe without kinks, protecting crossings and marking circuit IDs.
  • Connect circuits to the manifold, flush each loop, pressure-test to specified bar, record results, and keep pressure on during screeding if required.

Plan Your Water UFH Floor Build-Up and Height

plan floor build up details

Before you fix pipe centres or choose a manifold location, you need to confirm the full UFH floor build-up and the finished floor level you must hit. Measure from structural slab to threshold, then allocate depth for insulation, vapour barrier/DPM continuity, edge strip, pipe, screed or low‑profile panel, and final covering.

Verify compressive strength of insulation and minimum screed cover to meet manufacturer instructions and relevant standards, and allow for movement joints.

Check door clearances, stair nosings, and appliance plinths so you don’t create trip hazards.

Lock in your Floor layout only after you’ve run Heating calculations for required output and surface temperature limits, then adjust build-up, not safety margins.

Record dimensions and tolerances for inspection and commissioning.

Choose a Water Underfloor Heating System for Your Floor

Once you’ve confirmed the available build-up and finished floor level, choose a hydronic UFH system that matches your floor construction, load limits, and heat output requirement without compromising compliance.

For screeded floors, use clip-rail or castellated panels with barrier pipe rated for temperature and pressure, and specify insulation meeting local energy regulations.

For timber or suspended floors, use low-profile diffuser plates or modular panels that protect joists and avoid exceeding allowable deflection.

In retrofits, consider thin overlay boards where door clearances are tight, but verify declared thermal resistance of coverings.

Select manifolds with flow isolation, air venting, pressure test points, and WRAS-approved components.

If you’re integrating Alternative energy sources, confirm compatible flow temperatures.

Pair thermostats with smart control systems and failsafe limits to prevent overheating.

Design Water UFH Pipe Spacing, Loops, and Zones

Because pipe layout controls both heat output and hydraulic balance, you should design your water UFH pipe spacing, loop lengths, and zones as a single, coordinated plan rather than as separate choices.

Start from your room-by-room heat loss and target floor surface temperature, then select spacing (typically 100–200 mm) to meet output without exceeding manufacturer limits.

Keep each loop length within the pipe supplier’s maximum and aim for similar lengths per manifold to simplify balancing and avoid excessive pump head.

Use a serpentine or spiral pattern consistently to manage temperature striping at edges.

Apply zoning strategies that match occupancy and glazing: separate high-load areas, bathrooms, and large spaces, and avoid mixing different floor coverings on one loop.

Document drawings, design flow rates, and control setpoints for commissioning and compliance.

Install Insulation, Edging Strip, and UFH Pipes

Although your pipe layout is already defined, you must install the insulation boards, perimeter edging strip, and UFH pipework to the manufacturer’s fixing method and the approved drawings so the system meets design output, stays hydraulically balanced, and complies with building and fire-safety requirements.

Prepare a clean, level sub-base and fit a DPM where specified. Lay thermal insulation tightly butt-jointed, staggered, and taped to prevent screed ingress and thermal bridging.

Install the edging strip continuously at all upstands, columns, and thresholds to allow expansion and reduce flanking losses.

Set clip-rail, staples, or fixing panels to the required centres, then uncoil pipe straight, avoiding kinks and minimum bend-radius breaches.

Fix at specified intervals, keep loop IDs readable, and protect pipe where it crosses movement joints or service penetrations.

Pressure-Test Water UFH and Connect the Manifold

With the insulation, edging strip, and pipe loops fixed to the drawings, you now need to prove the pipework is leak‑free and correctly identified before any screed or floor build‑up hides it.

Label each circuit, then connect flow/return tails to the manifold using the specified fittings and torque. Fit isolating valves, air vents, drain points, and fill/flush hoses.

Carry out Hydraulic testing with clean water, purging air circuit by circuit until clear flow returns. Pressurise to the design test pressure (typically 6 bar or 1.5× working pressure) using a calibrated gauge, then hold for the required period, checking every joint and pipe route for drops or weeps. Record results.

Keep the system under test pressure during screeding where specified. Complete System sealing, cap unused ports, and lock actuators closed until commissioning.

Conclusion

You’ve planned your build-up, chosen the right system, designed tight pipe spacing and sensible zones, and fixed insulation, edging, and pipes like a pro—now don’t get complacent. A sloppy manifold connection or skipped pressure test can turn a “simple” UFH job into a floor‑up, wallet‑emptying disaster. Pressure-test to spec, record results, and keep pipes pressurised during screeding. Purge air, balance circuits, and verify flow/return temperatures. Do it right, and your floor won’t just warm—it’ll perform flawlessly.…

smart garden zone transformation
Garden & Outdoor

Transforming a Small Garden With Smart Zoning and Hardscape Features

You’ll transform a small garden fastest by zoning it around your daily routes and giving hardscape multiple jobs. Put harvest plants along pass-by paths, and tuck storage, compost, or pollinator corners out of prime sightlines. Trace desire lines from doors to bins, then add gentle curves that extend views toward a single focal anchor. Define areas with consistent edging radii and subtle level shifts. Choose one durable, slip-resistant path material, then add bench-walls, hidden hose storage, and trellises—next you’ll see how each zone locks together.

Key Takeaways

  • Zone the garden by daily routines, placing micro-areas for coffee, herbs, bins, and watering along natural walking routes.
  • Establish clear desire-line pathways and sightlines, using gentle curves and focal anchors to create depth without clutter.
  • Define zones with consistent edging and subtle level changes, like raised beds and slightly sunken seating, to add structure and scale.
  • Choose a durable primary hardscape material for main paths, then use secondary finishes to signal transitions and match home architecture.
  • Add multifunctional hardscape features—bench walls, under-seat storage, hose hiding, slim paths, and trellises—to save space and improve usability.

Map Small Garden Zones to Your Daily Routines

align zones with routines

If you align your small garden’s zones with what you already do each day, you’ll use the space more often and waste less effort. Start by listing routine touchpoints: morning coffee, quick herb clipping, kid pickup, bin day, evening watering.

Anchor each action to a dedicated micro-zone sized to the task, not to an idealized plan.

Place harvest crops where you’ll pass daily, and reserve lower-traffic corners for storage, compost, or pollinator habitat.

Let sun, wind, and hose reach set boundaries; you’ll reduce dragging tools and stressing plants.

Use plant selection to match each zone’s conditions: drought-tough edging, shade herbs, heat lovers against masonry.

Plan seasonal planting by rotating short-lived crops into high-use beds while perennials stabilize the rest year-round.

Lay Out Small Garden Flow With Paths and Sightlines

Because a small garden reads in one glance, your paths and sightlines do most of the design work: they decide where you walk, what you notice first, and which areas feel reachable instead of cramped. Start by tracing your natural desire lines from door to patio, tap, shed, or compost, then set a clear primary route.

Keep turns purposeful: a slight curve can hide the end point and stretch perceived depth, but tight zigzags feel fussy. Aim key views at anchors—an urn, small tree, or water bowl—and keep clutter out of that cone.

Use plant selection to frame, not block: low groundcovers near edges, airy stems midline, taller screens at boundaries. Add garden lighting to pull you forward at dusk and keep steps legible.

Define Small Garden Zones With Edging and Level Changes

Even when the footprint stays the same, you can make a small garden feel organized and larger by drawing crisp boundaries with edging and subtle level shifts. Start by mapping use: a seat nook, a working garden bed, and a narrow circulation strip. Run edging lines to reinforce those shapes, keeping curves intentional and radii consistent so the eye reads order.

Next, use grade to separate planting zones without adding clutter. Raise a garden bed 4–8 inches to improve drainage and signal “tended area,” or drop a sitting pad slightly to create enclosure. Keep shift safe: one low step or a gentle 2% slope works in tight yards.

Align edges with door thresholds and key views to lock the layout in place.

Choose Hardscape Materials for Budget and Style

Once you’ve drawn clear zones, your hardscape choices should reinforce them while matching the site’s wear patterns and your budget. Start with the paths and thresholds that take the most traffic, then pick durable, slip-resistant surfaces there: clay pavers, broom-finished concrete, or compacted gravel with stabilizer.

Use one primary material to unify the layout, and a secondary finish to signal passages without clutter.

Let your architecture set the palette: warm brick suits older homes, while large-format porcelain reads crisp and modern. Check drainage and soil movement before you buy; flexible bases handle settling better.

Coordinate garden lighting with joint lines and edges so fixtures feel intentional. Your plant selection should echo textures—fine foliage softens rough stone, bold leaves balance smooth slabs.

Add Space-Saving Small Garden Hardscape Features

When every square foot has to work, you can turn hardscape into furniture, storage, and circulation at the same time. Build a low retaining wall that doubles as a bench and edge it with a narrow cap for setting tools or drinks.

Tuck lidded storage into stair risers or under a seat so hoses and cushions stay off the patio.

Use slim pavers or gravel strips to define a single, direct path; keep joints tight to reduce trip points and simplify sweeping.

Add Vertical gardening by mounting trellis panels to fences or on the sunny side of a shed, then anchor planters to the base.

Choose Water feature options that fit: a wall-mounted spout into a basin, or a self-contained bubbling urn that masks street noise.

Conclusion

When you map zones to your routines, you stop forcing a small garden to “fit” and start letting it work. Paths pull you forward; sightlines pull your attention. Edging and subtle level shifts draw clean borders without shrinking the space. Choose hardscape materials that match your budget and your architecture, then layer in space-saving features—bench walls, slim planters, folding surfaces. Like a well-edited story, every line stays because it earns its place.…

Scroll to Top