Home improvement

electrical switch replacement guide
Plumbing & Electric Fixes

Replacing a Faulty Light Switch: Safe and Simple Electrical Steps

If your switch flickers, feels gritty, runs warm, crackles, or shows discoloration, replace it with a like‑for‑like unit (single‑pole has 2 brass screws; 3‑way has a common plus 2 travelers). Shut off the correct breaker, then prove the circuit is dead with a voltage tester on all conductors. Remove the plate, pull the switch out, label line/load/ground, reconnect tightly, reassemble, restore power, and test; keep going for extra tips.

Key Takeaways

  • Confirm the switch is faulty by checking flickering, heat, arcing sounds, loose mounting, or burning smell before replacing it.
  • Identify the switch type (single-pole or 3-way) by terminal count and labels; don’t rely on wire colors alone.
  • Turn off the correct breaker and verify all wires are de-energized using a voltage tester before touching conductors.
  • Label and disconnect wires carefully, inspect for damage, and match the replacement switch’s voltage/amperage and terminal style to the original.
  • Reconnect hot, load, and ground securely, mount the switch flush, reinstall the cover, restore power, and test for normal operation without arcing.

Spot the Signs You Need to Replace a Light Switch
signs of faulty light switch

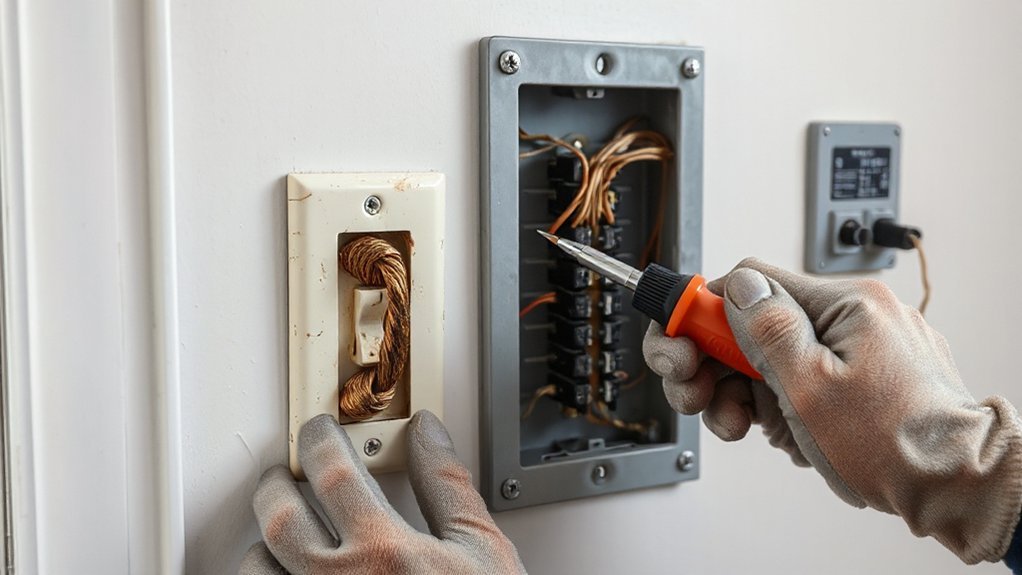
Although many switch problems look minor at first, you should replace a light switch if it shows clear failure or heat damage: intermittent operation (lights flicker when the toggle is steady), arcing or crackling sounds, visible discoloration or melting on the device or cover plate, a loose yoke that won’t tighten securely in the box, or a warm faceplate under normal load.

You should also act if the switch feels gritty, binds, won’t latch positively, or if the lights stay on/off inconsistently, indicating worn contacts. If you smell burning insulation, see soot at the strap, or find brittle conductors when you remove the cover plate, stop and de-energize at the breaker.

A failing switch can undermine Lighting design by causing nuisance flicker and can reduce Energy efficiency through poor contact resistance and heat. Replace with a listed device of correct rating.

Identify Your Switch Type (Single-Pole vs. 3-Way)

Once you’ve decided the switch really is failing, identify whether you’re dealing with a single-pole or a 3-way before you buy parts or move any conductors.

A single-pole controls a light from one location and typically has two brass terminal screws plus a green ground.

A 3-way controls the same load from two locations and has three current-carrying terminals: one common (often a dark screw) and two travelers (brass), plus ground; it won’t have ON/OFF markings.

Confirm by removing the cover plate and looking for a 3-conductor cable (often red/black/white) on a 3-way.

Don’t rely on wire colors alone—verify with wiring diagrams and terminal labeling for switch compatibility and correct conductor placement.

If anything looks nonstandard, stop.

Grab the Tools and the Correct Replacement Switch

Before you shut off any power, gather what you’ll need and buy a switch that matches the exact function and ratings of the original: single-pole or 3-way, the same voltage (typically 120/277V), and an amperage rating at least equal to the circuit (most commonly 15A or 20A).

Check switch compatibility by matching terminal style (screw, backwire clamp), grounding provision, and whether you need a neutral for smart controls.

If you’re replacing a dimmer, confirm it’s rated for the lamp type (LED/CFL/incandescent) and total wattage.

For tool organization, lay out an insulated screwdriver set, wire stripper, needle-nose pliers, non-contact voltage tester, flashlight, and a small parts cup for screws.

Bring a UL/CSA-listed cover plate if the old one’s cracked.

Turn Off the Breaker for the Light Switch Circuit

At your service panel, identify the correct circuit breaker feeding the light switch by using the panel directory and confirming by turning the switch load on/off.

Move that breaker fully to OFF to de-energize the circuit, and don’t rely on the wall switch for isolation.

Verify the switch is dead at the box with a properly rated voltage tester on all conductors to ground and neutral before you touch any wiring.

Identify Correct Circuit Breaker

How do you make sure you’ve killed power to the switch you’re replacing? Start at your service panel and use the directory label as a guide, but don’t trust it blindly. For circuit safety, you’ll confirm the branch circuit by testing, not guessing.

Turn the light on, then have a helper toggle breakers one at a time while you note which breaker controls that load. If the light is fed by a multi-location setup, check every related switch position to confirm consistent control.

Re-label the panel directory immediately using clear room and load descriptions so it matches Electrical codes expectations for identification. If breakers aren’t labeled or multiple rooms go dead, stop and map the circuit before proceeding.

Never assume “off” equals de-energized.

Shut Off Breaker Power

Keep the panel cover closed, stand to the side, and use one hand when operating the handle to reduce shock exposure.

Don’t rely on wall switches, dimmers, or smart controls to de-energize conductors; only the breaker provides the required disconnect.

Set out your Switch installation tools now—insulated screwdriver, wire strippers, and a listed replacement device—so you won’t leave the work area.

Planning ahead also protects Lighting aesthetics by preventing rushed, misaligned hardware.

Verify Switch Is Dead

With the breaker switched off and your tools within reach, prove the circuit is actually de-energized before you touch any conductors. Flip the wall switch on, then try the light; it should stay dark. Don’t rely on the lamp alone—use a non-contact voltage tester at the switch yoke and at each insulated conductor in the box.

Next, pull the switch out slightly and use a two-pole tester or multimeter: test hot-to-neutral and hot-to-ground; you should read 0 volts. Confirm your tester works by checking a known live receptacle before and after.

Follow wire color coding (black/red hot, white neutral, green/bare ground), but still test—miswires happen. These checks align with electrical code standards and reduce shock risk.

Verify Power Is Off With a Voltage Tester

Before you touch any conductors, confirm the circuit is de-energized using a properly rated voltage tester. For electrical safety, use a CAT III (or better) tester and verify it works on a known live source first.

Then test the switch box: place one probe on the suspected hot and the other on neutral or the equipment grounding conductor. You should read 0 V.

Test hot-to-ground and hot-to-neutral, because an open neutral can mislead you.

If you’re using a non-contact tester, treat it as a screening tool only and confirm with a contact meter.

Re-check the live source afterward to prove the tester didn’t fail.

This voltage testing sequence meets safe work practice expectations and reduces shock risk.

Remove the Old Switch and Label the Wires

With power confirmed off, remove the wall plate, then loosen the mounting screws and pull the switch straight out to expose the terminals.

Before you loosen any terminal screws or wire connectors, label each conductor with tape (line/hot, load/switched hot, neutral if present, and ground) to preserve the correct connections.

Keep the wires separated and supported so they can’t touch the metal box or each other while you work.

Unscrew And Remove Switch

Once you’ve confirmed the circuit is de-energized, how do you remove the old switch without losing track of the wiring? Start by removing the cover plate screw, then back out the two mounting screws securing the switch to the box. Pull the device straight out a few inches, keeping conductors undisturbed to maintain wiring safety. Don’t force it; if it binds, check for paint, drywall pressure, or a misaligned yoke.

With the switch exposed, inspect the box fill and grounding path. Confirm the device type (single-pole, 3-way, 4-way) and verify switch compatibility with your replacement. If you see brittle insulation, overheated terminals, or a damaged strap, stop and correct the issue before proceeding.

Keep the switch supported so wires aren’t strained.

Label Wires Before Disconnecting

Even though the switch wiring may look straightforward, you’ll save time and prevent miswires by labeling every conductor before you loosen a single terminal. With power confirmed off, take a clear photo, then apply tape flags and write “LINE,” “LOAD,” “TRAVELER,” and “GROUND” as applicable.

Don’t rely only on wire color codes; repainting, age, or prior repairs can defeat expectations. Identify the common on 3-way/4-way switches and mark it distinctly.

Next, loosen terminal screws and pull each conductor free using insulated tools, keeping bends gentle to avoid nicking copper. Cap any loose hot candidates with a wire connector until you’re ready to reconnect.

Proper labels also verify switch compatibility, ensuring you reinstall the correct single-pole, 3-way, or smart-rated device.

Connect the New Light Switch, Then Test It Safely

After you’ve confirmed the circuit is de-energized at the box with a non-contact tester, connect the new switch to match the original wiring: land the hot feed and switched-hot on the switch’s brass terminals (or the two leads on a standard single-pole).

Bond the bare/green equipment ground to the green screw and the metal box if present, and keep all splices tight under listed wire connectors. Use color coding and verify wire insulation is intact; re-strip to clean copper if nicked.

Fold conductors neatly, keep grounding continuous, and mount the switch with the yoke flush to the box. Install the cover plate.

Restore the breaker, then test with the switch in both positions and confirm the fixture operates normally. If it trips or arcs, shut off power and recheck connections.

Conclusion

You’ve spotted the warning signs, identified whether you’ve got a single-pole or 3-way switch, gathered the right tools, and shut off the correct breaker. You’ve verified de-energized conductors with a voltage tester before touching anything. After labeling and transferring each wire to the matching terminal, you’ve tightened connections to manufacturer torque and reinstalled the device and cover. Restore power and test operation. Follow these steps, and you’ll feel a million times safer working in the box.…

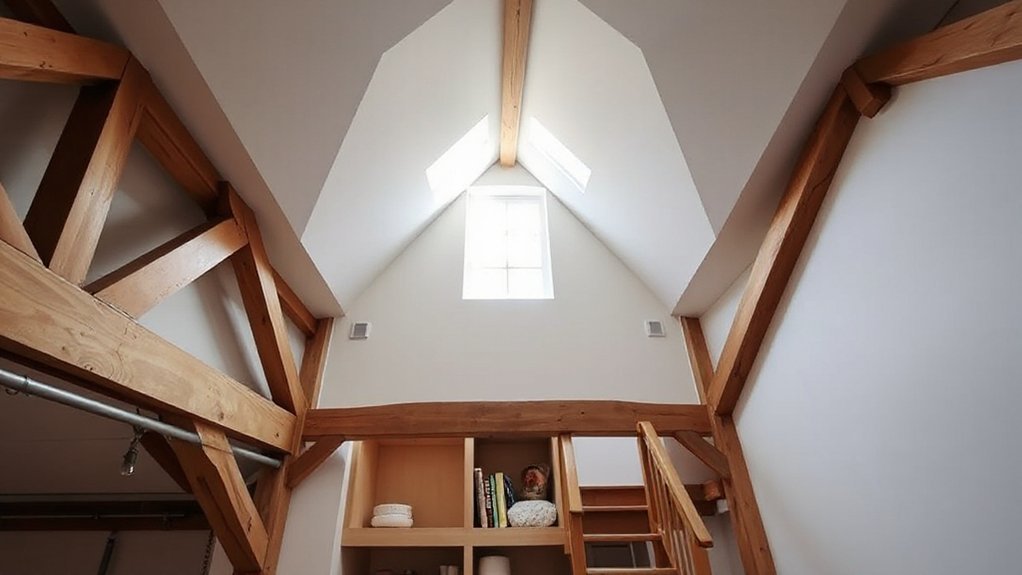
loft renovation for living
Home Upgrades & Renovations

How to Renovate a Loft Space Into a Comfortable, Usable Living Area

Start by measuring headroom along stairs, circulation paths, and occupancy zones, then verify joist species, span, spacing, and bearing for required loads and deflection limits; add sistering, LVLs, or beams if needed. Confirm planning permission for dormers, windows, or roofline changes, and submit drawings to Building Control for staged inspections and final sign-off. Design continuous insulation, airtightness, and ventilation to prevent condensation, then upgrade wiring, lighting, and HVAC zoning. Next, you’ll see how to optimize stairs, storage, and daily flow.

Key Takeaways

  • Confirm structural capacity and code-compliant headroom, stairs, guardings, and egress before planning finishes or furniture.
  • Plan circulation first, then place stairs, doors, and built-ins to keep clear pathways and safe, consistent riser/tread geometry.
  • Build a continuous insulation and airtightness system, with correct ventilation and fireblocking to prevent condensation and meet regulations.
  • Upgrade electrical, lighting, and mechanical ventilation; keep junction boxes, duct runs, and penetrations accessible and code-compliant.
  • Use low-profile, securely anchored storage at eaves and under stairs, preserving required egress width, airflow paths, and daily usability.

Can Your Loft Renovation Meet Height and Structure Rules?

loft height and structure compliance

Before you finalize a loft renovation plan, verify that the space can meet code-required ceiling heights and that the existing structure can carry the new dead and live loads without overstress. Measure headroom at proposed circulation paths, stairs, and any areas intended for regular occupancy, then compare results to applicable Building codes. If height is marginal, you’ll need engineered solutions such as dormers or lowered ceilings below—don’t assume exceptions apply.

Next, confirm Structural integrity by inspecting joist species, span, spacing, bearing conditions, and any notches or bore holes. Calculate tributary loads for finishes, partitions, and furnishings, and check deflection limits to control bounce and cracking. If capacity falls short, specify sistering, LVLs, or new beams with proper connections.

Pick the Right Use for Your Loft Renovation

Once you’ve confirmed the loft can meet height and structural requirements, define its primary use early because occupancy type drives nearly every downstream code decision.

If you’re creating a bedroom, you’ll need space for a compliant egress route and clearances that won’t be blocked by furniture placement.

If it’s an office or studio, prioritize workstation zones, glare control, and dedicated circuits for equipment loads.

For a lounge, plan seating sightlines, media wall backing, and guard locations to keep fall protection intact.

Map circulation first, then assign built-ins so you don’t compromise headroom at slopes.

Keep storage low at kneewalls, and reserve tall elements for the ridge line.

Finish with decorative accents that don’t reduce required clear widths or access panels.

Planning Permission, Building Regs, and Inspections

Although a loft conversion can feel like an internal remodel, you still need to confirm whether it triggers planning permission and must satisfy Building Regulations, then schedule inspections so each hidden element gets signed off before you cover it up.

Check local planning rules for dormers, roofline changes, new windows, and added floor area; in conservation zones, you’ll often need consent. Submit drawings, structural notes, and a spec to Building Control, then follow applicable Building codes for structure, stairs, headroom, fire separation, smoke/heat alarms, escape windows, and guardings.

Use approved contractors where required and keep certificates for electrics and any new drainage connections. Book staged inspections for structural supports, fire protection details, and stair installation.

You’ll need final sign-off and occupancy permits before you move in.

Insulation and Heating/Cooling for a Comfortable Loft

Because a loft sits directly under the roof deck and outside air, you’ll only get year-round comfort if you design insulation and HVAC as a single, code-compliant system: set a target U‑value/R‑value that meets your local energy code, maintain continuous insulation at rafters, gables, and eaves to eliminate thermal bridging, and protect performance with an airtight layer plus correctly sized ventilation paths (or an approved warm-roof assembly) to prevent condensation.

Then size heating/cooling to the new heat-loss and solar-gain calculations, not the house’s original plant. You’ll improve thermal comfort and energy efficiency by using room-by-room load calculations, zoning, and low-temperature emitters (radiant panels or hydronic loops) or a properly commissioned mini-split.

Seal ducts to code, insulate pipework, and verify airflow and refrigerant charge. Add smart controls and balance the system so the loft doesn’t overheat or lag.

Add Light, Electrics, and Ventilation Up Top

You’ll plan loft lighting around headroom and task zones, specifying IC-rated recessed fixtures or low-profile surface luminaires. You’ll also verify any skylight work meets local egress and tempered-glazing requirements.

You’ll upgrade wiring to current code by sizing circuits for the added load, installing AFCI/GFCI protection where required, and routing cables with proper protection and staple spacing.

You’ll also provide code-compliant ventilation by verifying exhaust CFM, insulating and sealing ducts to prevent condensation, and maintaining required roof/soffit vent pathways for balanced airflow.

Plan Lighting For Lofts

Before you close in the ceiling or finish the knee walls, map the loft’s lighting, electrical runs, and high-level ventilation so every junction box, cable route, and duct penetration stays accessible and code-compliant.

Lay out ambient lighting first: place recessed or low-profile fixtures to avoid headroom conflicts and maintain required clearances from insulation and framing. Add task lighting at desks, reading nooks, and stair landings, and specify IC-rated, airtight housings where assemblies demand it.

Use smart controls so you can zone slopes, dormers, and the center bay independently; include 3-way switching at both stair and loft entries.

Plan receptacle locations around furniture and egress paths, and reserve chases for future low-voltage runs. Coordinate vent grille placement with lighting to prevent glare and drafts.

Upgrade Wiring And Ventilation

Where do you add capacity and airflow without tearing finished surfaces back open? Start by tracing existing circuits, then size a new subpanel or feeder to meet load calculations per NEC Article 220.

Pull new cable through chase walls, soffits, or surface-mounted raceway, and staple or strap within code limits. Add AFCI/GFCI protection where required, bond metal boxes, and label breakers for electrical safety.

Upgrade lighting feeds with 14/2 or 12/2 as amperage dictates, and keep junction boxes accessible.

For ventilation systems, run insulated ducting to a roof or gable cap, slope condensate lines, and seal joints with mastic. Meet ASHRAE 62.2 rates, provide makeup air for fans, and verify clearances at insulation and rafters.

Stairs, Storage, and Layout That Work Daily

You’ll start by specifying stairs that meet local code for rise/run, minimum clear width, headroom, and guard/handrail requirements while staying compact with winders or alternating treads where permitted.

You’ll then lock in built-in storage—knee-wall cabinets, under-stair drawers, and rated access panels—so it preserves egress paths, doesn’t block required clearances, and supports HVAC/electrical serviceability.

Finally, you’ll plan the daily-flow layout by mapping circulation from the stair landing to sleep, work, and bath zones, keeping door swings, clear walking paths, and furniture footprints conflict-free.

Safe, Space-Smart Stairs

Although a loft stair can double as storage and circulation, it still has to meet daily-use safety basics: size the run for code-compliant headroom and landing clearances, keep risers uniform, and provide a continuous handrail with proper graspability and guard protection at open edges.

For stair safety, confirm tread depth and riser height stay within your adopted code, and keep nosings consistent to prevent trips. If you need space-efficient stairs, favor a compact straight run or switchback over alternating treads unless permitted and clearly justified.

Maintain a clear walking width, limit steepness, and avoid encroaching doors at landings. Add slip-resistant nosings, bright step-edge contrast, and lighting controlled from both levels.

Verify guard heights and infill spacing at the loft opening.

Built-In Storage Solutions

Once your stair run and loft opening meet code and feel predictable underfoot, you can make the circulation zone earn its keep with built-in storage that doesn’t steal clearance. Keep required egress width and headroom intact by recessing cabinets between studs or under treads, and stop faces flush to avoid snag points.

Use drawer boxes on full-extension slides rated for the load, and anchor to framing with structural screws, not finish nails. Add Hidden compartments behind removable toe-kicks or false risers, but keep access panels tool-free and labeled for maintenance.

Specify Modular shelving with adjustable standards fastened into blocking so shelves stay plumb and don’t rack. Vent any enclosed volumes near HVAC returns, and maintain fireblocking where cavities connect to concealed spaces.

Daily-Flow Layout Planning

Because lofts compress circulation into a few critical feet, plan the daily-flow path around the stair run, the landing/loft opening, and the doors or drawers you’ll touch most, then lock those clearances in before you place storage or furniture.

Keep egress routes unobstructed: maintain a clear stair width per local code, provide uniform riser/tread geometry, and preserve headroom at the opening and along the run.

Size the landing so you can turn, open a door, or pull drawers without stepping into the stair.

For furniture arrangement, align the bed or desk so you don’t narrow the path; avoid low beams at primary walking lines.

Add guardrails at edges and consider privacy considerations with partial-height screens that don’t block required ventilation or light.

Conclusion

You’ve turned your loft from dead air into working square footage by proving headroom, joist capacity, and safe load paths. You’ve matched the space to its use, then cleared permissions, Building Regs, and inspections so nothing’s left to chance. With continuous insulation, sealed vapor control, and sized HVAC, comfort won’t leak away. You’ve poured in daylight, compliant wiring, and balanced ventilation. Finally, code-safe stairs, smart storage, and a tight layout make it liveable daily.…

professional painting techniques guide
Painting & Decorating

The Ultimate Guide to Painting Ceilings, Walls and Trim Like a Pro

You’ll paint like a pro by choosing the right sheen—flat for ceilings, eggshell or satin for walls, semi-gloss for trim—and the correct primer for stains, bonding, or drywall. You’ll wash surfaces, scrape loose paint, caulk gaps, patch and sand smooth, then vacuum and spot-prime. Start with the ceiling: cut in edges, then roll in overlapping passes while keeping a wet edge. Roll walls in 3×3 “W” sections, then brush trim with long, tipped-off strokes. Keep going to refine every step.

Key Takeaways

  • Choose the right finish and primer, test color samples in room lighting, and calculate paint gallons by square footage.
  • Clean, scrape, caulk, patch, sand, vacuum, and spot-prime repairs and stains to ensure smooth, durable adhesion.
  • Paint ceilings first: cut in edges, then roll overlapping passes while keeping a wet edge to prevent streaks.
  • Paint walls in 3×3-foot “W” sections, overlapping into wet paint and maintaining consistent pressure to avoid lap marks.
  • Finish with trim: prime bare areas, sand smooth, then brush long, controlled strokes and “tip off” to level without runs.

Choose Paint, Primer, and Tools (Checklist)

paint selection and preparation

Before you open a can, decide on the exact paint finish for each surface (flat for ceilings, eggshell or satin for walls, and semi-gloss for trim). Then choose a matching primer based on what you’re covering (stain-blocking for water marks, bonding for glossy surfaces, and drywall primer for new mud).

Confirm color coordination by sampling chips in the room’s lighting and checking undertones against flooring and trim. Buy one quality acrylic latex line for consistent touch-ups, and match paint sheens across adjacent rooms to avoid visual breaks.

Use a 2-inch angled sash brush for trim, a 9-inch roller with 3/8-inch nap for walls, and a 1/2-inch nap for textured ceilings. Add extension pole, painter’s tape, drop cloths, liner, and stir sticks.

Measure square footage to calculate gallons accurately.

Clean, Patch, Sand, and Prime Surfaces

Once you’ve picked your paint and tools, prep the surfaces so the finish levels out and sticks. Start with surface preparation: wash ceilings, walls, and trim to remove dust, grease, and soap film, then rinse and let everything dry fully.

Scrape loose paint, caulk gaps, and cut away failing edges. Patch dents and nail holes with spackle or filler, and repair cracks with setting compound; let patches cure. Sand repairs flush and feather surrounding paint to eliminate ridges that telegraph through finish textures.

Vacuum dust, then wipe with a damp microfiber cloth. Spot-prime stains, bare drywall, and repaired areas, and prime glossy trim after scuff-sanding. Let primer dry, then lightly sand and clean again for crisp adhesion.

Paint the Ceiling: Cut In, Then Roll

After the primer dries and you’ve masked or protected the walls and floors, start with the ceiling so you don’t drip onto finished work. Choose a flat or matte paint sheen to hide imperfections and match the ceiling texture. Stir thoroughly, then pour into a cut bucket and load a 2–2½-inch angled sash brush.

Cut in a 2–3-inch band along edges, around vents, and at light boxes, keeping a wet edge.

Next, roll immediately while the cut-in is still wet. Use a ⅜-inch nap for smooth ceilings or ½–¾-inch for heavier ceiling texture. Roll in straight, overlapping passes, then lightly back-roll to even coverage.

Work in manageable sections, and keep your roller evenly loaded.

Paint Walls Fast Without Lap Marks

Because lap marks form when paint starts to dry before you blend the next pass into it, you need to work in a controlled, continuous pattern. Load your roller evenly, then roll a 3-by-3-foot section in a “W” and fill it without lifting off.

Keep a wet edge by overlapping the previous section 2–3 inches while it’s still glossy. Refill before the roller sounds dry, and don’t overwork areas that are starting to tack.

Maintain consistent pressure and speed, and back-roll lightly in one direction to level the film.

Use Color coordination to spot holidays under your lighting and correct them immediately.

Apply Texture techniques by matching roller nap to wall texture and avoiding mixed nap sizes across walls.

Paint Trim Smooth With Crisp Lines

Although trim paint seems forgiving, it shows every ridge, brush mark, and wavy cut line under side light, so you’ll get the cleanest result by controlling the surface and the edge.

Start with Trim detailing: fill nail holes, sand flush to 180–220 grit, then vacuum and tack. Prime bare wood or patched spots, and lightly scuff again once dry.

Load a quality angled sash brush, then wipe one side to control paint.

For Edge brushing, cut the wall-to-trim line first using the brush’s tip, moving in 12–18 inch runs. Don’t push hard; let the bristles flex.

Then paint the face with long strokes following the grain, and “tip off” once to level. Maintain a wet edge, and stop before it drags.

Conclusion

Now you’ve got a repeatable system: pick the right paint and tools, prep until surfaces feel uniform, then work top-down. Cut in tight, roll in controlled sections, and keep a wet edge so your walls dry like glass. Finish with smooth trim and clean lines by removing tape at the right time. Follow these steps every room, and your results won’t rely on luck—they’ll be consistent, professional, and durable.…

victorian fireplace restoration guide
Home Upgrades & Renovations

A Step By Step Guide To Restoring Ornate Victorian Fireplaces

Start by inspecting the breast, throat, liner, hearth, tiles, and cast iron for cracks, bulges, soot leaks, loose bedding, and maker’s marks. Protect the room with dust sheets, sealed polythene, floor paths, and a fan exhausting outward plus HEPA filtration. Test every paint layer for lead before you strip. Clean soot first, then apply a low-odor gel stripper and scrape gently. Re-bed tiles and pack gaps with lime mortar, then refinish with heat-tolerant, breathable coatings, and you’ll uncover further practical specifics ahead.

Key Takeaways

  • Inspect the fireplace for cracks, flue leaks, loose hearths, and cast-iron damage; record maker’s marks and original fixings before disturbing anything.
  • Protect the room with dust sheets, floor barriers, sealed polythene, and HEPA extraction; ventilate outward using a box fan in a window.
  • Test all painted surfaces for lead using certified swabs or lab samples; stop and hire specialists if lead is confirmed.
  • Clean soot first with HEPA vacuum and soot sponge, then strip paint with low-odor gel; scrape gently and dry thoroughly between passes.
  • Repair and refit using lime-based mortar, tighten surrounds, seal gaps for expansion, then finish with breathable, heat-tolerant primers and topcoats.

Inspect Your Victorian Fireplace (and DIY Red Flags)

inspect victorian fireplace thoroughly

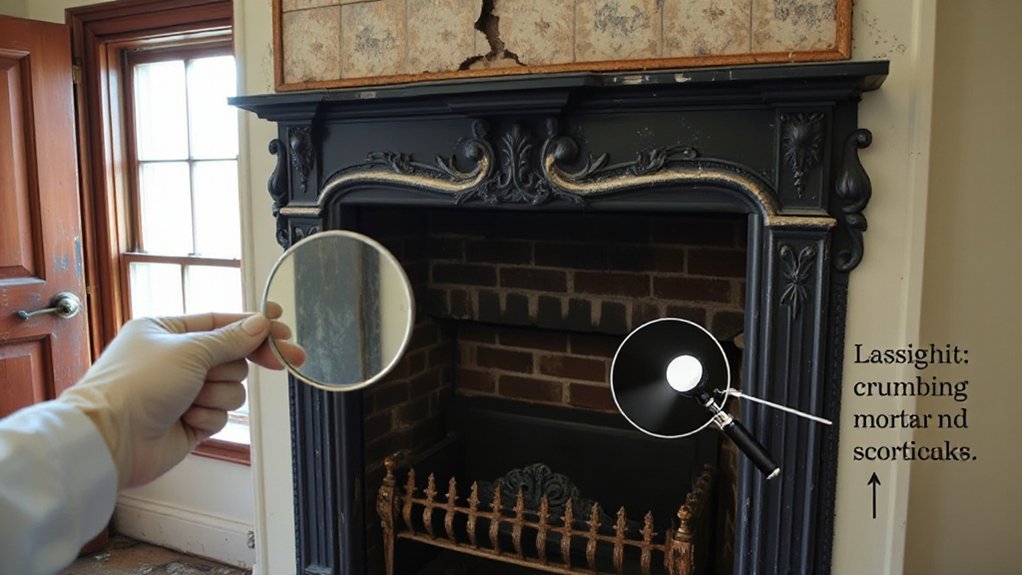
Before you pick up a scraper or order replacement tiles, inspect the fireplace the way a Victorian builder would’ve—starting with what carries heat and load. Check the breast for hairline cracks, bulging plaster, and soot ghosts that mark flue leaks.

Shine a torch up the throat; you’re looking for a sound clay liner, intact parging, and no tarry glaze.

Test the hearth for movement and examine bedding mortar for crumbling lime.

Tap cast iron with a knuckle: a clear ring beats a dull thud.

Note stamped maker’s marks, tile dimensions, and original fixings for Historical accuracy and Material preservation.

DIY red flags: spalled brick, loose lintels, salt bloom, or any smoke smell when cold. Call a sweep or mason.

Protect the Room: Dust Control and Ventilation

Although the fireplace is the star of the job, the room takes the first hit if you don’t control soot and lime dust. Clear the hearth area, roll up rugs, and cover cornices, mantels, and nearby furniture with cotton dust sheets, then tape the seams.

Lay rosin paper and hardboard paths to protect original boards and tiles. Seal the opening with polythene and painter’s tape, leaving a small flap for tools.

Set a box fan in a cracked window to exhaust outward, and open a second window for make-up air.

Add Air filtration with a HEPA unit positioned behind you, not blowing at the work.

For odor control, place bicarbonate trays and change them daily.

Test for Lead Paint Before You Strip

With the room sealed and air moving out through the window fan, turn to the paint on the surround, mantel, and any cast-iron insert—Victorian layers often include lead. You’ll confirm before you disturb a single flake.

Choose an EPA-recognized swab kit or collect chips for a lab; the latter suits thick, multiple-coat finishes common to late-19th-century work.

For Lead paint testing, score through all layers with a sharp knife at an inconspicuous edge, then test the cut, not the surface glaze. Use fresh gloves, label each location, and note colors and strata in a notebook, as restorers did with shop records.

If any result reads positive or uncertain, stop and plan Hazardous materials removal with a qualified professional, and protect children and pets in adjacent rooms.

Clean Soot and Strip Paint Safely

Once you’ve cleared the lead question, tackle soot and paint in separate, controlled passes so you don’t grind carbon into the grain or drive softened finish into joints. Start dry: vacuum with a soft brush, then use a soot sponge on cast iron, marble, or timber, working top to bottom. Follow with a barely damp cloth and pH-neutral soap; keep water away from seams and porous stone.

For fireplace restoration, shift to paint removal techniques only after surfaces are clean. Score paint edges with a knife, then apply a low-odour, non-caustic gel stripper in thin coats. Let it dwell, lift with a plastic scraper, and detail crevices with brass bristles or wooden picks. Rinse per product instructions and dry thoroughly.

Repair Tiles, Hearth Gaps, and Loose Surrounds

After you’ve removed soot and stripped back paint, inspect the tiled slips, hearth, and surround for movement, hairline cracks, and open joints that will only worsen under heat cycling. Tap tiles lightly; a hollow note signals failed bedding. Lift loose pieces carefully, keep every original, and re-bed with a lime-based mortar for historical accuracy, not hard cement that can spall edges.

Rake out crumbling joints to sound material, then repoint neatly, matching joint width around ornate detailing. At the hearth, chase out gaps, vacuum dust, and pack with lime mortar or fire-rated rope where expansion demands it.

Tighten a loose surround by checking cramps and screws, then reset with discreet shims so lines stay true. Allow repairs to cure fully before refitting.

Finish Your Victorian Fireplace: Paint, Polish, Seal

restore protect finish preserve

Although the structural repairs now look sound, you’ll only keep them that way if you finish the fireplace with breathable, heat-tolerant materials that suit Victorian fabric.

Begin with careful cleaning: de-dust mouldings, degrease, then lightly abrade gloss to key.

For cast iron, wire-brush to bright metal, spot-prime with a heat-resistant metal primer, then apply stove black or graphite paste, buffing to an even sheen.

For timber surrounds, choose an oil-based or shellac primer if resinous, then a satin or eggshell topcoat; avoid modern vinyls that trap moisture.

Prioritise Color matching from surviving paint layers, and keep historical accuracy by testing small panels in daylight.

Finally, seal porous stone or tile grout with a vapour-permeable, heat-rated impregnator. Let each coat cure fully.

Conclusion

You’ve inspected every casting, sealed the room against soot, and tested for lead before you ever scraped. You’ve lifted paint methodically, reset loose tiles, packed hearth gaps, and tightened the surround. Now you finish with the right period coating—iron blacking, shellac, or breathable paint—then polish, seal, and cure. Remember, about 90% of Victorian fireplaces were coal-fired, so residual grime hides deep. Work slowly, ventilate well, and you’ll restore its proper, crisp relief.…

installing a ceiling fan
Plumbing & Electric Fixes

Putting Up A Celing Fan In Simple Steps

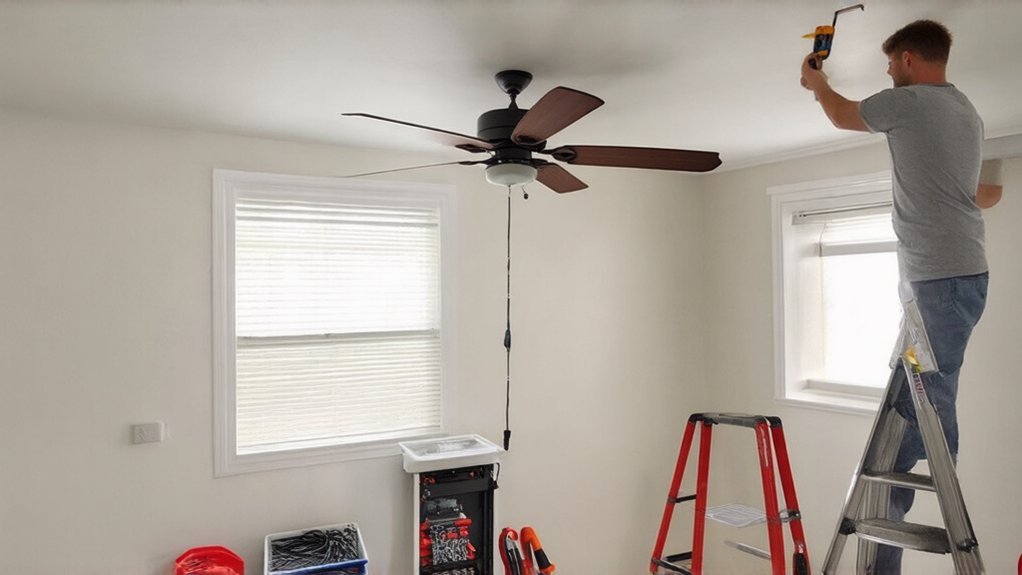
Confirm the fan fits your room and clearances, keeping blade tips at least 7 feet above the floor and about 18 inches below the ceiling. Gather tools and verify you’ve got a UL-listed, fan-rated ceiling box secured to framing. Shut off the breaker, tag it, and test for zero voltage before removing the old fixture. Mount the bracket, hang the motor, wire hot/neutral/ground, then install blades and balance wobble. Next, you’ll see setup tips for low, high, or sloped ceilings.

Key Takeaways

  • Choose a fan sized for the room, meeting blade clearance rules and maintaining at least 7 feet from floor to blade tip.
  • Verify the ceiling box is UL-listed and fan-rated, firmly secured to framing or an approved brace before mounting anything.
  • Shut off power at the breaker, lock it out if possible, and confirm zero voltage with a tester before removing the old fixture.
  • Install the fan bracket with correct screws, hang the motor on the bracket, and ensure the hanger ball is fully seated.
  • Connect ground, neutral, and hot wires correctly, attach blades evenly, then restore power and balance the fan if it wobbles.

Confirm the Fan Fits Your Room and Ceiling

verify fan size and clearance

Before you buy or mount anything, confirm the fan’s size, weight, and mounting style match both your room and your ceiling so you don’t create a wobble, noise, or safety hazard.

Match Fan size to the room: undersized units won’t move air, oversized blades can strike doors or walls and violate required clearances. Check the manufacturer’s listed blade sweep and minimum side clearance, and keep at least 7 feet from finished floor to blade tip to meet common code and safety guidance.

Verify Ceiling height: use a standard mount for 8–9 feet, a flush mount for low ceilings, and a downrod for high or sloped ceilings to keep blades in the efficient zone. Keep blades 18 inches below the ceiling for airflow.

Gather Tools and Check for a Fan-Rated Box

Why risk a wobble—or a fall—when the right tools and a fan-rated electrical box keep the installation safe and code-compliant? Start with a Tools checklist: voltage tester, insulated screwdrivers, nut drivers, wire strippers, linesman pliers, torque-rated drill/driver, step ladder, tape measure, level, and approved wire connectors.

Keep Safety precautions front and center: wear safety glasses, use cut-resistant gloves, and set the ladder on a stable surface.

Next, inspect the ceiling box. You need a UL-listed fan-rated box and bracket, secured to framing or an approved fan brace, not just drywall. Confirm the box is labeled for “fan support” and matches the fan’s weight rating.

Check for solid mounting screw threads and undamaged cable clamps and conductors.

Shut Off Power and Remove the Old Fixture

Once you’ve confirmed the box can support a fan, kill power at the breaker (not just the wall switch) and verify it’s truly off with a non-contact voltage tester and, if possible, a meter at the fixture wires. Tag the breaker so no one restores it.

Remove globes and bulbs, then support the old fixture with one hand while you loosen mounting screws. Lower it carefully and note conductor colors and any grounding method for electrical safety.

Undo wire connectors, separate conductors, and cap exposed wires individually. Inspect the box for heat damage, loose clamps, or missing grounding; fix issues before proceeding.

Confirm fixture compatibility by identifying how many conductors you have (hot, neutral, ground, and any switched leg). Don’t nick insulation.

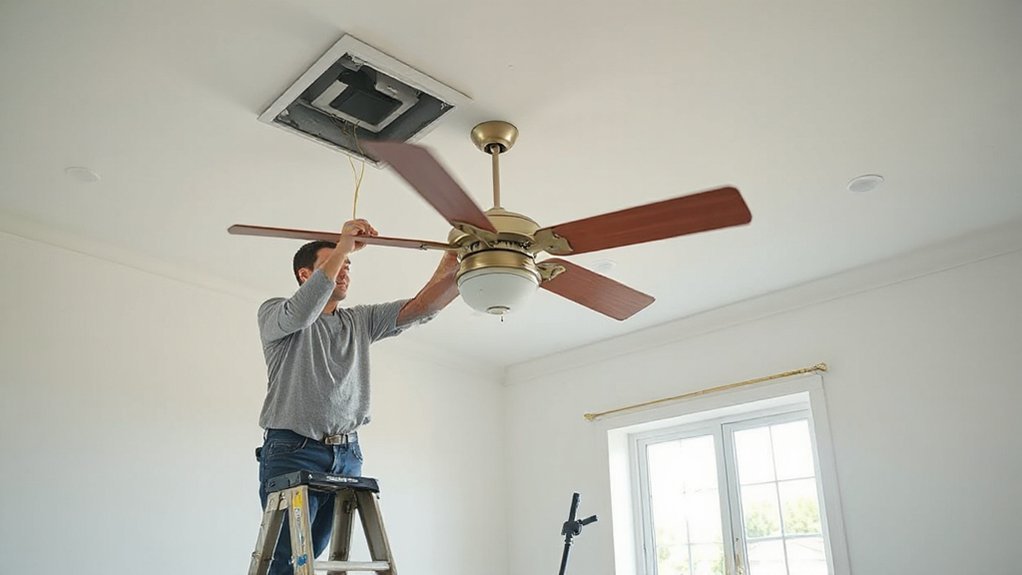
Install the Bracket and Hang the Fan Motor

Next, fasten the fan-rated mounting bracket to the ceiling box using the manufacturer-supplied screws (or the box’s listed 10-32 machine screws), tightening them fully so the bracket sits flat and can’t shift.

Confirm the box is fan-rated and firmly secured to framing; don’t hang a fan from a light-only box.

Verify fan placement aligns with room layout and that ceiling clearance meets the fan manual and local code, including distance from walls, cabinets, and sloped ceilings.

Install any rubber isolators or hanger ball receiver parts exactly as shown.

Then lift the motor assembly and seat the hanger ball or hook into the bracket’s cradle, making sure the safety tab engages.

Support the weight until it’s locked in place securely.

Wire the Ceiling Fan, Attach Blades, and Fix Wobble

Before you make any wire connections, shut off the circuit at the breaker, verify power is truly off with a non-contact tester and a meter at the ceiling box, and keep the conductors separated so nothing can accidentally energize.

Match colors: connect fan hot to switched hot, neutral to neutral, and tie grounds together for proper electrical grounding to the box and bracket.

Use listed wire connectors, tug-test each splice, and fold conductors neatly into the box without pinching.

If you’ve got separate light and fan leads, cap any unused conductor per instructions.

Attach blades with the specified screws and lock washers, tightening evenly so you don’t warp brackets.

Restore power, run the fan, and check wobble.

Do blade balancing with the included weight kit, moving weights until vibration stops.

Conclusion

You’ve confirmed the fan fits, used a fan-rated box, and kept the breaker off while you worked. Now double-check every screw, bracket, and blade is tight, and verify your wire connections match the manufacturer’s diagram and local code. Restore power only after the canopy is secured and the blades spin freely. If there’s wobble, balance the blades before regular use. When it runs smoothly, you’ll feel relief like cool shade on a hot day.…

stylish and comfortable bathroom upgrades
Home Upgrades & Renovations

Bathroom Renovation Ideas That Add Style and Improve Everyday Comfort

You’ll get more comfort fast by optimizing layout without moving plumbing: map door swings, keep clear pathways, and choose a wall-hung or shallow vanity to open knee space. Upgrade the shower with a thermostatic valve, a 2.0 gpm rain head, and a handheld on a slide bar, then use large-format porcelain tile for easier cleaning. Add vertical and recessed storage, layer high-CRI task plus dimmable ambient lighting, and install a quiet 80–110 CFM fan with a timer for what’s next.

Key Takeaways

  • Optimize layout without rerouting plumbing by mapping clearances and choosing wall-hung or shallow vanities to free floor space.
  • Upgrade the shower with thermostatic controls, a rain head, and a handheld on a slide bar for spa-like comfort.
  • Add vertical and hidden storage using recessed niches, mirrored medicine cabinets, and drawer organizers to reduce clutter in small bathrooms.
  • Layer lighting with high-CRI vanity fixtures, dimmable ambient LEDs, and motion-sensor night lights for comfort and safe navigation.
  • Improve finishes and moisture control with easy-clean large-format tiles, warm sealed wood accents, and a quiet 80–110 CFM exhaust fan.

Bathroom Renovation Layout Fixes Without Moving Plumbing

optimize bathroom layout efficiently

If you want a smarter bathroom layout without the cost and risk of rerouting pipes, you can still make major gains by rebalancing what’s already connected. Start by mapping door swings, clearances, and daily paths from entry to vanity to toilet, then shift fixtures within their current supply and drain reach.

Swap to a wall-hung vanity or a shallower cabinet to open knee and hip room. Replace a hinged door with a pocket or outswing to reclaim floor area. Use mirrored medicine storage and recessed niches between studs for vertical capacity without crowding.

Keep the wet wall intact to avoid a plumbing reroute, but allow small structural adjustments like moving non-load-bearing partitions, resizing openings, and aligning lighting with task zones.

Bathroom Renovation Shower Upgrades for a Spa Feel

Once your layout works hard without moving plumbing, put your upgrade budget into the shower—the one zone where small spec changes deliver the biggest “spa” payoff.

Start with a thermostatic valve and pressure-balancing cartridge so temperature stays locked even when fixtures run.

Add a Rain shower head on a correctly sized arm (8–12 inches) for full-body coverage; specify 2.0 gpm for comfort without waste.

Upgrade to a handheld on a slide bar for targeted rinse and easy cleaning.

Use large-format porcelain on walls to cut grout and improve hygiene.

If your electrical and ventilation can support it, a Steam shower generator with an insulated ceiling, vapor membrane, and dedicated exhaust timer turns daily rinses into recovery sessions.

Finish with a linear drain and slight slope for fast runoff.

Bathroom Renovation Storage Ideas for Small Spaces

In a small bathroom, you’ll reclaim floor space by specifying vertical storage—tall linen towers, wall-mounted cabinets, and recessed niches that use the full wall height.

You can also integrate hidden storage with mirrored medicine cabinets, vanity drawer organizers, and toe-kick pull-outs that keep essentials accessible but out of sight.

These upgrades reduce countertop clutter and improve daily comfort without expanding the room’s footprint.

Vertical Storage Solutions

How do you add serious storage without sacrificing elbow room? Go vertical and keep your floor clear. Install Floating shelves above the toilet or next to the mirror at eye level for daily-use items, then step them upward for backups. Specify moisture-rated materials, sealed edges, and stainless fasteners to prevent swelling and rust.

Add Overhead cabinets high on the wall to store bulk supplies while preserving sightlines; choose shallow depths (5–8 inches) so doors don’t clash with your head or lighting. Use adjustable shelf pins to fit tall bottles, and include soft-close hinges for quieter mornings.

Finish with wall-mounted towel bars or hooks stacked in a column to speed drying and reduce clutter, improving airflow too.

Hidden Storage Features

Where can you tuck away toiletries and backups without adding bulk to a tight bath? Build storage into what you already touch: the mirror, the vanity, and the wall cavity.

Specify a recessed medicine cabinet with Concealed shelving sized for bottles (3–4 in. depth) and add adjustable pins so you don’t waste vertical clearance.

Choose a vanity with toe-kick drawers for cleaning supplies and Hidden compartments behind a tilt-out false front for small items.

If you’re moving plumbing, frame a shallow niche beside the stack to create a service-friendly, code-clear chase with a hinged access panel.

Use soft-close hardware to cut noise, and line compartments with washable mats to control spills and keep daily routines smooth.

Bathroom Lighting Ideas for Task, Mood, and Night

optimal bathroom lighting setup

You’ll get the best daily performance by prioritizing vanity task lighting: place vertical fixtures at eye level on both sides of the mirror (or use a high-CRI, glare-controlled mirror light) to minimize shadows.

Then you’ll round out comfort with balanced ambient lighting that fills the room evenly without hot spots or harsh reflections.

For nights, add low-lumen, warm lighting on a motion sensor—at toe-kick or under-vanity height—so you can navigate safely without fully waking up.

Vanity Task Lighting Essentials

Although ambient fixtures set the overall tone, vanity task lighting does the precision work—shaving clean lines, accurate makeup, and comfortable contact lens handling. Place light at face height to eliminate under-eye shadows: mount vertical sconces 28–36 inches apart, centered on your cheeks, or use an LED bar above the vanity mirror paired with side lights.

Target 500–1,000 lux at the sink with a neutral 3,000–3,500K color temperature and 90+ CRI for true skin tones. Choose diffused lenses to reduce glare, especially with glossy tile.

Put task lighting on a dedicated dimmer so you can fine-tune brightness without losing color accuracy. Keep fixtures rated for damp locations and easy-clean finishes.

Ambient And Night Lighting

After you’ve dialed in vanity task lighting, set the room’s baseline comfort with layered ambient light plus a low-output night option. Use a sealed ceiling fixture or recessed LEDs to deliver even, shadow-free fill, sized for the room and rated for damp locations. Put it on dimmer switches so you can drop levels for baths, glare control, or early mornings without killing visibility.

For night guidance, add LED strips under the vanity toe-kick, along a recessed shelf, or inside a niche. Choose warm-white (2200–2700K) at 1–5 watts, aimed at the floor to protect dark adaptation and reduce stumble risk. Add a motion sensor or timer, keep drivers accessible, and separate night from ambient circuits for maximum comfort.

Warm Bathroom Finishes: Wood Tones, Brass, Earthy Tile

When cool white tile and chrome start to feel clinical, warm finishes bring balance and comfort without sacrificing performance. Choose Wood accents in sealed oak or teak for vanities, open shelves, or a mirror frame; they soften acoustics and feel warmer to the touch. Keep profiles slim to preserve clearance around doors and swings.

Specify brass fixtures in a brushed or PVD-coated finish for faucets, drains, and hardware; they add visual warmth while resisting fingerprints and tarnish. Pair them with earthy tile—clay, sand, or terracotta tones—in matte or lightly textured surfaces for better slip control.

Use larger-format tiles to reduce grout lines and simplify cleaning, or add a warm mosaic band to define zones without shrinking the room.

Bathroom Renovation Ventilation Upgrades to Stop Moisture

Warm wood tones and brass feel best in a bathroom that stays dry, so upgrade ventilation to control humidity at the source. Size airflow to your room: target 1 CFM per sq ft, or use 80–110 CFM for most baths, then vent outdoors with smooth, insulated duct to prevent backdraft and condensation.

Prioritize quiet operation (≤1.5 sones) so you’ll actually run it. Place the grille near the shower, add a timer or humidity sensor, and keep the door undercut for make-up air.

During exhaust fan installation, seal penetrations and slope horizontal duct runs slightly to the exterior. Finish with moisture resistant paint on ceilings and walls to slow vapor absorption and reduce peeling.

Conclusion

You don’t need a full re-plumb to get a smarter bathroom. Keep the layout, then upgrade the shower for spa-grade comfort, add tight-footprint storage, and layer lighting for task, mood, and safe night use. Choose warm wood tones, brass, and earthy tile to soften hard surfaces without sacrificing cleanability. Finally, improve ventilation with a right-sized fan and timer so humidity leaves fast, like a well-tuned exhaust system, protecting finishes and daily comfort.…

Scroll to Top