Author name: Graeme Allen

gutter maintenance prevents leaks
General Property Repairs

How to Maintain Your Gutters: Essential Homeowner Guide for Preventing Leaks

Maintain your gutters by inspecting seams, end caps, and fasteners for gaps, stains, and corrosion, and confirm consistent slope to downspouts (about 1/16–1/8 inch per foot) so water can’t pond. Clean debris with gloves and eye protection from a stable ladder, bag it, then hose-flush runs and snake downspouts to verify free discharge at least 5 feet from the foundation. Reseal minor leaks, resecure hangers, and consider guards; more details follow.

Key Takeaways

  • Inspect gutters each season for seam gaps, loose fasteners, corrosion, and proper slope toward downspouts to prevent standing water and leaks.
  • Clean gutters regularly by scooping debris, bagging it, and flushing with a hose to confirm unobstructed flow and no joint overflow.
  • Clear downspouts using a snake or jet nozzle, and ensure discharge routes carry water at least 5 feet away from the foundation.
  • Repair issues early by rehanging sagging sections, replacing failed hangers, and sealing dry, clean seams with compatible gutter sealant.
  • Prioritize safety: use a stable ladder, wear gloves and eye protection, avoid overreaching, and hire a professional for high or complex work.

Inspect Your Gutters: Seams, Slope, Hangers
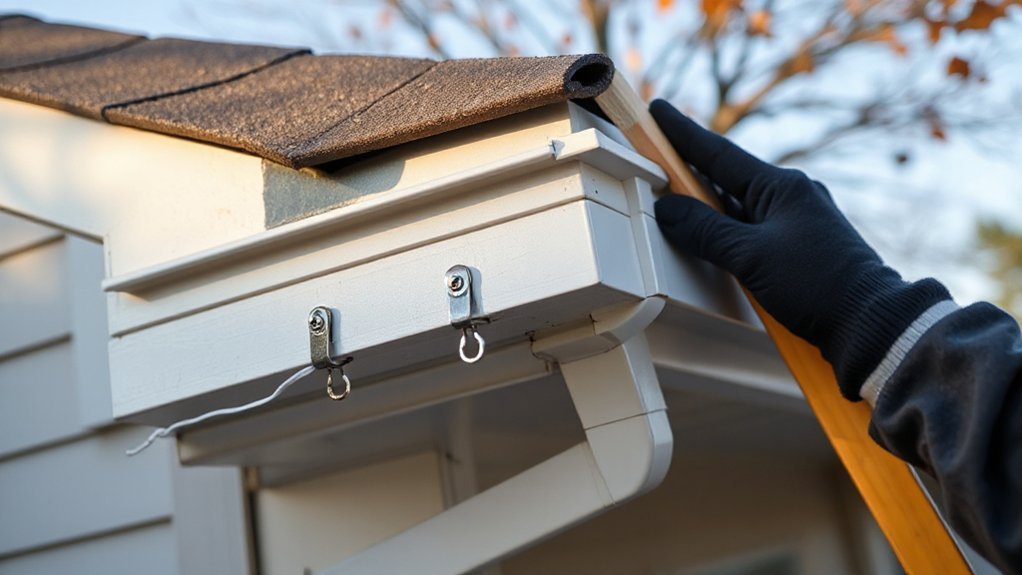
inspect repair secure verify

Before you clean or repair anything, inspect your gutters for seam separation, improper slope, and loose hangers so you can correct failures before they cause leaks or overflow.

Work from a stable ladder set per manufacturer instructions, maintain three points of contact, and don’t overreach.

Check Seam integrity at joints, end caps, and miters; look for gaps, fastener back-out, and staining that indicates leakage.

Verify slope with a level: you should see consistent fall toward downspouts, without reverse pitch or standing water.

Examine hangers and fascia attachment; replace corroded or undersized fasteners and ensure spacing meets local practice for your snow and wind loads.

Confirm compatibility of Gutter materials to prevent galvanic corrosion and premature joint failure.

Clean Gutters Safely (Tools + Step-by-Step)

Before you start, you’ll stage code-compliant access and wear essential PPE: cut-resistant gloves, safety glasses, non-slip footwear, and a stable extension ladder with a standoff (and a spotter when required).

You’ll then clear roofline debris, scoop and bag gutter buildup, flush with a hose to confirm unobstructed flow, and verify downspouts discharge away from the foundation.

You’ll finish by checking for leaks and loose fasteners, then dispose of debris per local rules and clean up the work area to prevent slips.

Essential Safety Gear

Why risk a fall or electrical contact when the right PPE and access equipment can keep gutter cleaning code-compliant and controlled? Start with ANSI-rated protective helmets and eye protection to manage impact and debris hazards.

Wear cut-resistant gloves, long sleeves, and non-slip footwear to reduce laceration and slip risk on wet roofs and ladders.

If you’ll work above lower-level edges, use safety harnesses with a compatible anchor point and lanyard rated for fall arrest; don’t rely on the gutter as an anchor.

Choose a Type IA or I ladder with levelers, stabilizer standoff, and a load rating that covers you and tools.

Keep ladders 10 ft from energized conductors, and use fiberglass rails near utilities.

Carry a basic first-aid kit.

Step-By-Step Cleaning Process

Once you’ve staged the right PPE and access equipment, you can clean gutters in a controlled sequence that limits fall exposure, protects the roof edge, and prevents downspout blockages.

Set your ladder per ANSI A14, maintain three-point contact, and standoff from the fascia.

Start at a downspout outlet, scoop debris into a bucket with a gutter spoon, and bag it—don’t drop it to grade.

Verify hangers and seams, then flush with a hose toward the downspout while watching for overflow at joints.

Clear the downspout with a plumber’s snake or jet nozzle, confirming free discharge.

Finish by rinsing the exterior to restore Gutter aesthetics.

If DIY challenges arise, stop and call a qualified contractor.

Set Your Gutter-Cleaning Schedule by Season

Because debris loads change throughout the year, you’ll get the most reliable drainage by setting a seasonal gutter-cleaning schedule that aligns with local tree drop, storm frequency, and roof runoff volume.

In spring, clear seed pods and granules after thaw to protect fascia and maintain Gutter aesthetics.

In summer, inspect after heavy rains and trim overhangs to improve landscaping integration and reduce organic load.

In fall, clean twice if you’ve got deciduous trees; schedule the final pass after leaf drop but before freezing nights.

In winter, verify downspouts remain unobstructed and remove accessible accumulations only from the ground using extension tools.

Follow ladder-angle and tie-off practices, wear cut-resistant gloves and eye protection, and comply with local runoff and debris-disposal rules.

Spot Gutter Overflow Signs Before Water Damage
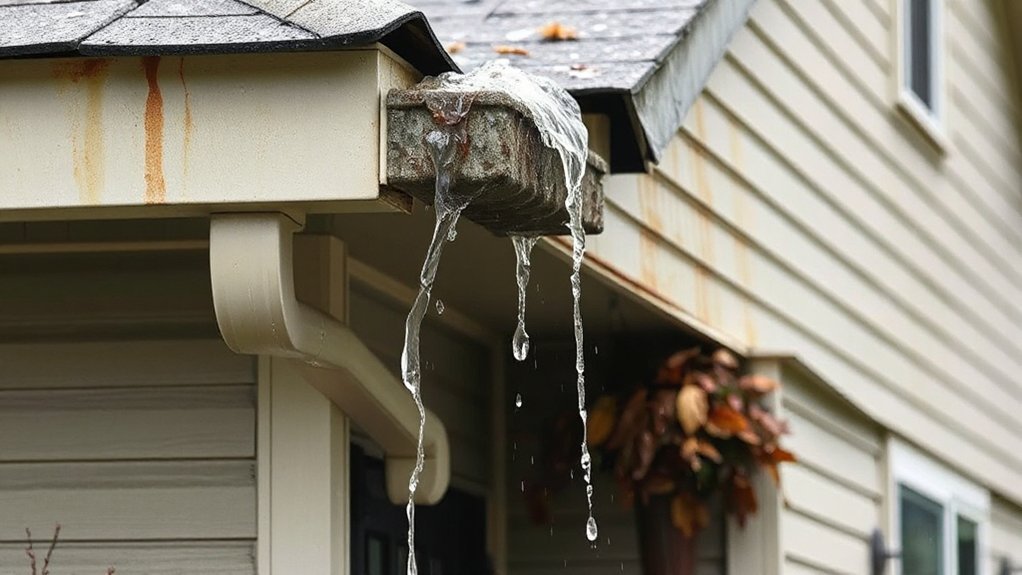
spot gutter overflow signs

A seasonal cleaning plan keeps debris predictable, but you still need to spot overflow early to prevent fascia rot, foundation saturation, and interior leaks.

During rain, watch the drip line: if water sheets over the gutter edge or splashes behind it, you’ve got capacity or flow restriction issues.

Check for water pooling at downspout discharge, at slab edges, or along the basement wall; pooling signals improper drainage and can violate site-drainage requirements.

Inspect soffit and siding for dark streaks, peeling paint, or algae bands that mark repeated overtopping.

Inside, track musty odors, damp rim joists, and window-head staining near exterior walls.

Confirm discharge routes to a storm drain or approved dispersal area, never toward walkways.

Use a ladder stabilizer and keep three points of contact.

Fix Sagging Gutters, Leaks, and Loose Downspouts

You’ll correct sagging gutters by checking hanger spacing, fascia rot, and slope so runoff meets code and doesn’t overload the system.

You’ll seal leaks by cleaning and drying seams, then applying a compatible gutter sealant or replacing failed joints per manufacturer instructions.

You’ll secure loose downspouts with approved straps and fasteners, verify the discharge path stays clear, and use ladder and fall protection to meet safety requirements.

Identify Sagging Causes

When gutters start to sag, it usually signals a load or fastening failure that can quickly lead to leaks, fascia rot, and loose downspouts. You should first confirm slope and support spacing; most manufacturers and local codes require hangers at roughly 24 inches o.c. (closer in snow zones).

Next, isolate sagging causes by inspecting the gutter material and its connections. Heavy debris, ice, or standing water indicates poor pitch or blocked outlets. Soft fascia, missing drip edge, or fasteners pulled through suggests substrate decay or incorrect screw length.

Look for bent brackets, separated joints, and downspout straps that don’t restrain movement. Work from a stabilized ladder, wear gloves and eye protection, and don’t overload the gutter during checks.

Seal Gutter Leaks

Sagging often opens seams and fastener holes, so the next step is stopping leaks before water reaches the fascia and soffit. Set a stable ladder on firm ground, use fall protection where required, and wear gloves and eye protection. Clean and dry the leaking section; sealants won’t bond to sludge or wet metal.

For Gutter sealing, tighten or replace loose screws with corrosion-resistant fasteners, then tool a continuous bead of exterior-rated gutter sealant along seams, end caps, and around fastener heads. If you’ve got separated joints, realign them and add a rivet per manufacturer instructions before sealing.

Verify slope after repairs so water drains to the outlet without pooling. After cure time, run a controlled hose test to confirm leak prevention and check for hidden drips.

Secure Loose Downspouts

One loose downspout can dump hundreds of gallons against the foundation and overload the gutter outlet during a storm. Inspect straps, elbows, and the outlet every season, and after high winds.

Reattach the downspout to framing with corrosion-resistant screws; don’t rely on nails or brittle plastic anchors. Keep hangers within manufacturer spacing and verify proper gutter fastening at the outlet to prevent shear and leaks.

Replace missing straps and add a second strap near joints to limit movement. Seal seams with approved gutter sealant only after the downspout is aligned and supported.

Confirm discharge meets local code: direct flow at least 5 feet from the foundation using downspout extensions.

Work from a stabilized ladder, wear gloves, and avoid overhead power lines.

Prevent Clogs With Gutter Guards and Downspout Upgrades

gutter guards and upgrades

Although routine cleaning helps, you’ll prevent most clogs by adding properly sized gutter guards and upgrading downspouts to move water and debris through the system without restriction. Choose Gutter protection rated for your roof type and local leaf load, and verify it doesn’t reduce effective cross-sectional area below the gutter’s design flow.

Fasten guards per manufacturer specs, maintain required slope (about 1/16–1/8 in. per ft), and keep hangers accessible for inspection.

For Downspout enhancements, upsize where allowed, add smooth-wall extensions, and minimize tight elbows that trap debris. Secure joints with corrosion-resistant screws, seal only at approved seams, and terminate discharge per local code away from foundations.

Use stable ladders, fall protection where required, and cut-resistant gloves.

When to Repair vs Replace (and When to Call a Pro)

Even with well-sized gutter guards and upgraded downspouts, components wear out, fasteners loosen, and joints open under thermal cycling and heavy runoff.

Repair if you’ve got isolated pinholes, a single loose hanger, or a minor seam leak—clean, dry, then seal with manufacturer-rated gutter sealant and replace corroded screws with exterior-grade fasteners.

Replace when the gutter material shows widespread corrosion, cracking, oil-canning, or repeated joint failures, or when slope can’t be corrected without re-hanging long runs.

Compare replacement costs against recurring labor and water-damage risk.

Call a pro if you see fascia rot, concealed leaks behind siding, ice-dam deformation, or if work requires ladders above one story.

Follow fall protection and local code-required discharge clearances.

Conclusion

Keep your gutter system in good working order, and you’ll gently steer water away from your foundation instead of inviting “unexpected indoor moisture.” Inspect seams, slope, and hangers, then clean with ladder safety, gloves, and eye protection. Set seasonal checks, watch for overflow stains, and tighten downspouts before they “take a walk.” Seal small leaks, correct sagging, and add guards where debris is persistent. If corrosion, separation, or fascia damage appears, you’ll want a licensed pro.…
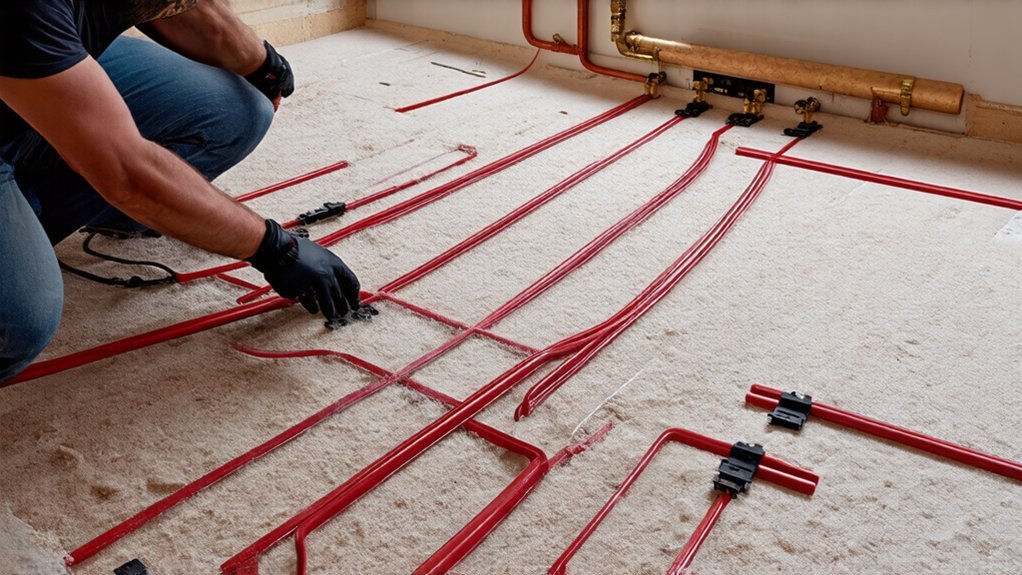
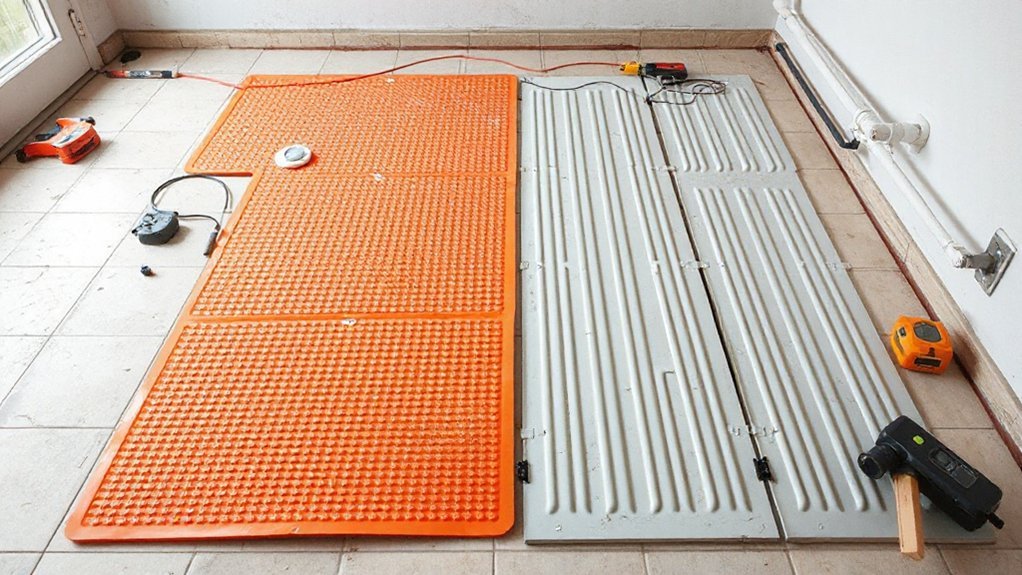
installing underfloor heating system
Plumbing & Electric Fixes

How to Install Underfloor Heating for a Warm, Even‑Heat Home Upgrade

You’ll start your project to install underfloor heating by choosing electric mats/cable or hydronic tubing based on your heat load, floor covering limits, and required permits. For electric, you’ll provide a dedicated GFCI‑protected circuit, confirm breaker sizing, and meter‑check resistance, insulation, and floor sensor values before, during, and after embedding. For hydronic, you’ll plan loop spacing, install an accessible manifold, add mixing/limit and backflow protection, and pressure‑test for leaks. Next you’ll level, insulate, waterproof, embed, and finish. Keep going to see layout and commissioning steps.

Key Takeaways

  • Choose electric or hydronic underfloor heating based on room heat load, floor type, and available electrical or boiler capacity.
  • Verify permits, dedicated GFCI protection, correct breaker sizing, and manufacturer temperature limits before purchasing components.
  • Prep a flat, dry, rigid subfloor; add approved insulation and moisture barriers to reduce heat loss and prevent failures.
  • Lay mats/cables or tubing with proper spacing and clearances, protect sensors/leads, and pressure-test hydronic loops before covering.
  • Test resistance/insulation and GFCI before, during, and after embedding; don’t energize until cured, then commission controls and document readings.

Electric vs Hydronic Underfloor Heating: Pick Your System

choose electric or hydronic to install underfloor heating

Before you buy materials, choose between electric underfloor heating  (cable or mat) and hydronic (warm-water tubing) underfloor heating, because the system you pick drives the electrical, plumbing, and permit requirements.

Electric systems typically need a dedicated, GFCI-protected circuit, correct breaker sizing, and listed components installed per manufacturer instructions. You’ll schedule an electrical permit and rough/final inspections, and you must protect heating leads and splice points.

Hydronic systems add a heat source (boiler or water heater rated for space heating), pressure-rated tubing, mixing/limit protections, and backflow prevention where required. You’ll pull plumbing/mechanical permits and plan pressure testing before covering.

For energy efficiency, hydronic often pairs well with high-efficiency boilers, while electric suits small areas. Compare installation costs, timelines, and inspection scope.

Check Floor Type, Heat Load, and Controls (Thermostat/Sensor)

Even if you’ve already picked electric or hydronic, you still need to confirm your floor covering, calculate the room’s heat load, and specify the right thermostat and floor sensor, because these choices control allowable floor temperatures, required wattage/BTU output, and where you can legally and safely place heating elements or tubing.

Verify the manufacturer’s max surface temperature for tile, wood, vinyl, or carpet, and follow local code for wet areas and clearances.

Use a heat-loss/heat-load calc (room size, insulation levels, windows, infiltration) so you don’t undersize circuits or boiler output.

Choose a listed thermostat matched to voltage or zone valve/actuator type, and require Temperature sensors for floor-limiting and overheat protection.

Confirm Floor insulation R-values assumed in your load calc, and plan sensor routing away from power leads.

Prep the Subfloor: Level, Insulate, and Waterproof

Once you’ve confirmed the floor type, load, and controls, prep the subfloor so it’s flat, dry, stiff, and protected, because underfloor heating can’t compensate for dips, weak spots, or moisture problems.

Start subfloor preparation by removing adhesives, paint, and debris, then vacuum and check for rot, delamination, or loose fasteners; re-screw per manufacturer spacing.

Verify flatness with a straightedge and correct low/high spots using a patching/leveling compound rated for the substrate. Keep deflection within tile or flooring requirements.

Add insulation boards or an insulating underlayment approved for the system to reduce downward heat loss and meet fire ratings.

Install moisture barriers appropriate to location (poly sheet, liquid membrane, or uncoupling layer), lap seams, tape, and seal penetrations. Let everything cure fully.

Install Electric Floor Heating Mats or Loose Cable

With the subfloor flat, insulated, and properly waterproofed, you can start laying the electric heating mat or routing loose cable according to the manufacturer’s plan and local electrical code.

Dry‑fit first, keep elements out of shower drains and under permanent cabinets, and maintain required edge clearances.

Never cut heating wire; only trim mesh backing.

Use approved adhesive or tape, and avoid crossing cables or creating tight bends that can overheat.

Route the cold leads to the electrical box, install conduit if specified, and place Smart sensors in a dedicated conduit between runs for serviceability.

Verify resistance and insulation values with a meter before, during, and after embedding.

Don’t energize until cured.

Connect to GFCI protection and compatible Wireless thermostats per listing.

Install Hydronic Radiant Floor Tubing and Manifold

Plan your tubing layout and spacing per the manufacturer’s drawings and local code. Then secure the loops without kinks and maintain required clearances from walls and penetrations.

Mount the manifold in an accessible location at the specified height. Fasten it to solid framing, and label each circuit before you connect the supply/return lines.

Before you cover anything, pressure-test the system to the required PSI and duration. Then purge all air from each loop and verify there are no leaks.

Tubing Layout And Spacing

Before you uncoil a single loop, map your tubing layout and spacing to match the room’s heat load, floor assembly, and the manifold location so each circuit stays balanced and serviceable.

Choose a layout pattern—serpentine for simple zones, counterflow spiral for the most even surface temps—and keep supply runs at exterior walls and high-loss areas.

Maintain consistent tubing spacing (commonly 6–12 inches on center) and tighten it near glass or overhangs when calculations call for it.

Limit each circuit length per manufacturer tables to control head loss, and document every loop on an as-built sketch.

Use approved bend radii, don’t kink PEX, and protect tubing at penetrations with sleeves.

Keep tubing clear of fasteners, drains, and floor sensors.

Manifold Placement And Mounting

Because manifold location dictates loop lengths, balancing, and service access, mount it where you can reach the isolation valves, flow meters, air vent, and drain without moving equipment or opening finished walls.

For smart Manifold placement, choose an interior wall near the boiler or water heater, above flood level, and centered to keep supply and return runs short and similar.

Use a listed recessed cabinet or a solid backer fastened to studs or masonry anchors; don’t rely on drywall alone.

Apply proper Mounting techniques: keep the manifold level for accurate meters, maintain required clearances for covers, and isolate vibration with approved pads.

Install shutoffs on supply and return, label each loop, and protect penetrations with sleeves and firestop where required.

Support piping to prevent strain.

Pressure Test And Purge

Where do you catch a kinked tube, a loose compression fitting, or a mislabeled loop before it’s buried under insulation and concrete? During pressure testing. Cap the manifold outlets, connect a calibrated gauge, and pressurize with air or water per your tubing and local code.

Isolate each loop, verify labels, and hold test pressure for the specified duration; don’t allow any drop. Walk the runs, listen for leaks, and soap-check fittings. Keep the system pressurized while you pour or cover to prevent crushed tubing.

Next, complete system purging. Open one loop at a time, use a purge valve and fill cart or hose, and flush until flow is bubble-free. Close each loop, balance valves, then recheck pressure.

Test, Embed (Thinset/Screed), and Lay the Finished Floor

Before you cover anything, you’ll test the system for continuity/pressure and verify readings match the manufacturer’s specs and local code requirements.

Keep the heat source off while you embed the tubing or cables in approved thinset or screed at the specified thickness, and protect leads, sensors, and manifold connections from damage.

Once the embed layer cures, you’ll install the finished floor per the flooring manufacturer’s limits for radiant heat and document the test results before commissioning.

Test Heating Continuity

Once you’ve secured the heating cable or mat and routed the leads to the box, test continuity and insulation resistance to confirm the circuit matches the manufacturer’s ohm range and hasn’t been nicked during installation.

Lock out the circuit, then use a calibrated multimeter to record resistance across the heating leads and compare to the label; document results for inspection.

Next, use a megohmmeter at the specified voltage to verify insulation resistance to ground meets the maker’s minimum. If readings are out of tolerance, stop and troubleshoot before you energize anything.

Confirm the floor sensor reads within spec, and verify the equipment grounding conductor is continuous back to the panel.

When you’re ready for Smart thermostats, follow the wiring diagram to preserve Energy efficiency and GFCI protection requirements.

Embed System And Finish

With your continuity and insulation readings documented and in spec, you can embed the heating system and build the finished floor without risking hidden damage. Recheck readings before covering, then lock out power and protect the cold leads and sensor with listed conduit where required.

For tile, trowel polymer‑modified thinset and fully encapsulate the cable or mat without voids; keep trowel edges off conductors.

For floating floors or large areas, pour a level, manufacturer‑approved screed to the specified minimum cover, and don’t exceed maximum thickness that slows heat transfer.

Maintain required clearances from walls, drains, and penetrations for code‑safe system integration.

After cure, verify resistance again, then install your floor per rating for radiant heat.

Finish with trim, thermostat, and GFCI test for finishing touches.

Conclusion

You’re ready to close up the floor only after you’ve matched the system to your heat load, verified thermostat and sensor placement, and documented resistance/pressure test results. Prep and insulation matter: in-floor systems can cut space-heating energy use by up to 15% when properly installed and controlled—proof that details drive performance. Don’t bury cables or tubing until tests pass, cures meet manufacturer specs, and GFCI/overcurrent protection is confirmed. If anything’s unclear, you’ll call a licensed pro.…

hallway radiator installation guide
Plumbing & Electric Fixes

Installing a Radiator in a Hallway: Positioning, Pipework and Heat Efficiency

Before you add a hallway radiator, you should confirm the space is truly cold, not just draughty, and check your boiler/pump can handle an extra run. Size the radiator from calculated heat loss (fabric + ventilation), then add a 10–20% margin for door cycling and infiltration. Mount it on an internal wall, away from doors, stairs, and escape routes. Plan short, accessible pipe routes, pressure-test, bleed, and balance lockshields to avoid overheating—next you’ll see how to do each step properly.

Key Takeaways

  • Fix draughts and insulation first, and confirm the boiler and pump can support an extra radiator without flow or pressure issues.
  • Site the radiator on an internal wall, clear of doors, stair “chimney” zones, and escape routes to avoid heat loss and obstructions.
  • Size the radiator using heat-loss calculations (fabric plus ventilation), adding a 10–20% margin for door cycling and infiltration.
  • Plan the shortest pipe route, avoiding electrical and structural hazards, maintaining fire-stopping, and ensuring valves and bleed points remain accessible.
  • Pressure-test, bleed, add inhibitor if drained, then balance the system to achieve roughly a 10–12°C temperature drop across each radiator.

Decide If a Hallway Radiator Makes Sense

check capacity routing safety

Before you cut into pipework or mount a bracket, verify a hallway radiator will actually solve a heat problem rather than create one. Check whether the hall is genuinely cold or just feels draughty due to an unsealed door, poor loft insulation, or air leakage around floorboards; fix those first to avoid wasted output.

Confirm your boiler and pump have spare capacity and that the existing circuit can be extended without unacceptable pressure drop or air traps.

Verify you can route flow and return pipes without compromising fire-stopping, electrics, or stair structure, and ensure valves won’t obstruct egress.

If wall space is limited, a Decorative radiator using Modern radiator designs can add usable heat without sacrificing clearance, but only if it won’t overheat adjacent rooms.

Size a Hallway Radiator (BTU/W) for Your Space

To size a hallway radiator safely, you’ll start by calculating heat loss from the hallway’s dimensions, insulation level, and target temperature.

You then choose a radiator with a BTU/W output that meets or slightly exceeds that load so the system heats reliably without stressing the boiler or valves.

Because hallways often see door cycling and drafts, you’ll factor in infiltration and adjacent room losses before finalizing the rating.

Calculate Hallway Heat Loss

How do you know what size hallway radiator you actually need? You calculate heat loss, then match it to your target room temperature and system flow temperature.

Measure the hallway’s length, width, and height to get volume, then note construction: external walls, glazing area, door gaps, and stairwell openings.

Rate your hallway insulation (loft above, wall type, floor over void) and record window/door U-values if available; otherwise use conservative defaults.

Estimate ventilation losses by checking draughts and assuming an air-change rate, higher for leaky front doors.

Add fabric losses (U × area × ΔT) to ventilation losses (0.33 × ACH × volume × ΔT).

Keep assumptions documented; it’s safer than guessing radiator design alone.

Choose Radiator BTU Output

Your heat-loss figure gives you the target heat output the hallway must receive at design conditions, so now you can choose a radiator BTU/W rating that actually meets it.

Match the radiator’s output to your system temperatures (flow/return and room), not the headline figure, because catalog ratings assume a specific ΔT. If your boiler runs cooler, you’ll need a larger emitter to hit the same watts.

Add a small margin for controllability, then size valves and pipework to deliver the required flow without excessive velocity or noise.

Prioritise safe surface temperatures where people pass close by, using lower-temperature operation or guards if needed.

Balance radiator aesthetics with performance: slim vertical panels can work, but check their tested output.

Correct sizing improves user comfort and avoids overheating.

Account For Drafts And Doors

Because hallways sit on the front line between indoors and outdoors, drafts from external doors, letter plates, and stairwells can blow past the radiator and strip heat faster than a basic room heat-loss number suggests. To account for Draft influence, add a safety margin to your calculated output—typically 10–20%—and confirm the radiator can still reach target temperature with the system’s flow rate and ΔT.

Check Door placement: if the radiator sits behind an opening door or in the direct air path, convection gets disrupted and cold air short-circuits the heat. Reposition to a side wall, or use a higher-output unit with a thermostatic valve and lockshield balancing.

Seal gaps, fit a brush letterbox, and guarantee pipework doesn’t cross egress routes or create trip hazards.

Choose the Best Hallway Radiator Location (Doors, Stairs, Drafts)

optimal hallway radiator placement

While a hallway radiator can look like a simple fit-and-forget upgrade, its location directly affects heat distribution, fire safety clearances, and how much cold air you’ll fight from doors and stairwells. Place it on an internal wall where possible; you’ll reduce heat loss and improve radiant comfort.

Keep clear of outward-opening doors and high-traffic pinch points so you don’t create impact hazards or block escape routes. Near a porch door, mount it offset from the draft line to temper incoming cold without short-cycling the room air.

For stairs, avoid the immediate stairwell “chimney” zone; heat can race upward and leave the lower hall cool. Balance interior decor and aesthetic considerations with practical clearance around furniture and handrails.

Plan Hallway Radiator Pipework (Routes, Floors, Costs)

You’ll plan the pipe route before you cut or lift anything, choosing the shortest run with safe access for drilling, clipping, and future isolation.

If the pipes need to run under the floor, you’ll identify which boards can be lifted, check for electrical cables and structural members, and protect joists and services as you work.

You’ll also price the route realistically, since longer runs, concrete floors, or extensive lifting and reinstatement can drive labour and materials costs up fast.

Pipe Routes And Access

Before you fix a hallway radiator in place, map the pipe routes and confirm access points so you don’t end up lifting extra floorboards, drilling into services, or starving nearby radiators of flow. Start by locating the nearest flow/return pair and tracing a direct, balanced run that won’t pinch pipe diameter or create tight bends.

Keep Pipe routing clear of electrical zones, gas lines, and door thresholds, and allow enough space for valve bodies and future service.

Identify Access points at junctions, tees, and isolation valves so you can bleed, drain, and isolate the branch without shutting down the whole system. If you’re extending from an existing rad, check circuit order and lockshield settings to maintain even heat output and stable system pressure.

Floor Lifting And Costs

Because hallway pipe runs often disappear under the most visible flooring, you should plan any floor lifting as a controlled, costed task rather than an on-the-day surprise.

Survey the floor build-up (boards, laminate, screed) and locate services with a detector before you cut or lift anything. Isolate the heating circuit, drain down where needed, and cap pipes so you don’t flood voids.

Protect occupants by controlling dust, securing lifted boards, and keeping walkways clear.

To manage installation costs, price labour for lifting and reinstatement separately from pipework, plus materials like new boards, clips, insulation, and underlay.

Minimise disruption by using existing voids, lifting only targeted sections, and choosing surface trunking where floors can’t be disturbed safely.

Pick TRVs, Lockshields, and Controls for Efficiency

Where efficiency and control matter most in a hallway radiator, choosing the right TRV, lockshield, and system controls lets you balance heat output without overheating a transit space or destabilizing the rest of the loop.

Prioritise a quality TRV with a liquid sensor head and a frost-protection setting; it’ll respond faster and reduce boiler cycling.

Get TRV placement right: keep the head clear of curtains, covers, or tight alcoves, and use a remote sensor if airflow is restricted.

Fit a lockshield with clear graduations so you can do precise Lockshield adjustment during balancing, limiting bypass flow and pushing heat to rooms that need it.

Pair the radiator with weather compensation or smart zoning, and set minimum boiler flow temps to cut losses and improve condensing operation.

Test, Bleed, and Check for Leaks After Installation

pressure test for leaks

Once the radiator’s mounted and the valves are tight, you need to pressure-test the circuit, purge trapped air, and confirm every joint stays dry under both cold fill and hot running conditions.

Isolate the supply, open both valves, then refill slowly while watching the gauge; don’t exceed the system’s rated pressure. Add inhibitor if you’ve drained significant water.

Wipe every compression nut, tail, and bleed point, then wrap each with dry tissue to spot weeps. Bleed at the top vent until water runs clear, topping up pressure as you go.

Fire the boiler and recheck once hot, because expansion can reveal marginal seals. Any leak risks staining paintwork and ruining radiator aesthetics.

If persistent, depressurise, remake the joint, or consider alternative heating options temporarily.

Balance the System After Fitting a Hallway Radiator

After you’ve confirmed the system is airtight and up to pressure, balance the radiators so the new hallway unit doesn’t steal flow from the rest of the circuit. Set all TRVs fully open, run the boiler, and let temperatures stabilise.

Use an infrared thermometer or contact probe: aim for roughly a 10–12°C drop across each radiator. Start with the radiator closest to the boiler; close its lockshield, then open it a quarter turn. Move outward, opening lockshields progressively more for farther radiators.

Keep the hallway radiator slightly restricted if nearby, preventing hallway overheating and supporting aesthetic integration with comfortable, even warmth.

Recheck pump noise and boiler cycling; if you hear rushing, throttle back.

Finish with Radiator maintenance: mark lockshield positions and log readings for future tweaks.

Conclusion

You’ve now sized, sited, piped, and controlled your hallway radiator for real heat, not wasted watts. If you’re worried it’ll “steal” warmth from other rooms, you won’t—when you balance the system, set TRVs correctly, and keep lockshields matched. Prioritise safe pipe routes, isolate and drain before cutting, and pressure-test joints before refilling. Bleed, check for leaks, then recheck temperatures. You’ll gain comfort, cut drafts, and keep efficiency stable.…

selecting durable paving materials
Garden & Outdoor

Hardscaping Essentials: Choosing the Right Materials for Paths and Patios

You’ll choose path and patio materials by matching texture, thickness, permeability, and base design to your site’s soil, slope, shade, and traffic load. Specify 60–80 mm concrete pavers or dense stone for high-wear routes, and use tight joints plus rigid edge restraint to stop lippage and creep. In freeze-thaw zones, pick low-absorption units over soft limestone and build a well-drained, compacted base. Set patios 1.5–2% away from doors, and you’ll see what fits next.

Key Takeaways

  • Match material to traffic load and site conditions to ensure durability and the intended appearance.
  • Prioritize slip-resistant textures and avoid polished finishes in shaded, damp areas prone to biofilm.
  • In freeze-thaw climates, use low-absorption stone, fired clay, or air-entrained concrete on a well-drained, compacted base.
  • Manage drainage by sloping patios 1.5–2% from doors and directing runoff to permeable joints, trenches, or slot drains.
  • Balance budget and maintenance: stone is premium, concrete pavers are replaceable and consistent, and gravel is affordable but needs edging upkeep.

How to Choose Path and Patio Materials?

material selection for durable pathways

If you want a path or patio that looks intentional and performs year-round, start by matching the material to your site conditions and traffic load. In freeze-thaw zones, choose units with low absorption and specify a compacted, well-drained base to limit heave.

On slopes, prioritize textured surfaces and tight jointing to improve traction and reduce runoff scour. In shaded, damp areas, avoid slick finishes and detail edge restraint to prevent creep.

For Landscape integration, echo existing site geometry, align joints with thresholds, and shift grades cleanly at doorways. Let aesthetic considerations guide color temperature, aggregate scale, and pattern rhythm so the hardscape reads as part of the planting palette.

Finally, confirm thickness, slip resistance, and permeability targets before you commit.

Quick Picks: Best Materials by Use Case

When you’re specifying hardscape by use case, match material performance to the site’s wear patterns and drainage conditions.

For high-traffic paths, you’ll prioritize tight-jointed pavers, dense natural stone, or broom-finished concrete that resists polishing, heave, and edge raveling under repetitive footfall.

For patio entertaining surfaces, you’ll pick finishes that stay level under furniture, manage spills and heat gain, and deliver consistent slip resistance across seating, grill, and circulation zones.

High-Traffic Path Materials

Because foot traffic concentrates load at edges, joints, and turns, you’ll get the best performance by matching each path material to how the route behaves on your site—slope, drainage, freeze–thaw exposure, and maintenance tolerance.

For straight, busy runs, specify 60–80mm concrete pavers on a compacted, well-graded base; they resist rocking at joints and allow easy spot repairs.

On tight curves and frequent direction changes, choose clay brick or small-format stone set on bedding sand to lock patterns and reduce edge spalling.

In wet shade, avoid untreated wood; use dense granite, fired clay, or composite boards for fungal resistance and safer traction.

Where roots heave or soils move, use permeable interlocking pavers to drain fast and keep lines crisp.

Choose finishes for aesthetic versatility and glare control.

Patio Entertaining Surface Picks

Although a patio reads like a single “room,” entertaining pushes loads, spills, heat, and chair drag into specific zones, so you’ll get better long-term performance by choosing the surface to match your use case—dining, fire feature, pool adjacency, or high-turnover party seating—plus your site’s drainage, sun exposure, and freeze–thaw risk.

For dining, specify porcelain pavers on a drained base; they resist wine, grease, and metal chair wear.

Around fire, use dense concrete or clay brick with tight joints; avoid resin-bound near embers.

Pool-side, choose light-toned, tumbled travertine or textured concrete for cooler, slip-resistant footing and salt tolerance.

For party flow, set large-format pavers for fewer trip edges, and align joints to circulation for landscape integration.

Favor local stone or permeable systems to cut environmental impact.

Compare Stone, Brick, Pavers, and Gravel

If you’re planning a patio, path, or driveway, you’ll get the best results by matching the material to your site conditions and performance targets—load, drainage, freeze–thaw exposure, and edge restraint.

In garden design, start with subgrade soils: expansive clay wants thicker base and tighter joints; sandy sites tolerate thinner sections. Your environmental impact shifts with sourcing and permeability, so map runoff routes and infiltration capacity before you pick finishes.

Use stone where you need high compressive capacity and minimal joint movement, and specify sawn versus cleft faces based on slip and visual rhythm.

Choose brick when you want modular coursing that aligns with building datum lines.

Select concrete pavers for precise geometry, consistent thickness, and engineered bedding layers.

Use gravel for permeable shoulders, secondary paths, and transitions that require flexible grading.

Pros and Cons of Each Hardscaping Material

material selection considerations

To choose the right hardscaping material for your site, you’ll weigh durability and expected lifespan against traffic loads, base prep, and drainage conditions.

You’ll also compare cost and installation complexity—cutting, bedding, edge restraint, and labor time—to keep the design on budget without compromising performance.

Finally, you’ll plan for maintenance and weathering, factoring in freeze–thaw cycling, staining, joint migration, and surface settling over time.

Durability And Lifespan

How long will your patio, path, or retaining wall hold its line once freeze–thaw cycles, UV exposure, de-icing salts, and settlement start working on it?

Poured concrete resists compression but can crack along control joints; sealers slow scaling.

Clay brick weathers gracefully yet spalls if salts concentrate at edges.

Natural stone excels in UV stability and abrasion, but soft limestones pit in acidic runoff.

Concrete pavers flex with slight subgrade movement; polymeric sand reduces washout, though joints need monitoring.

Gravel drains well and avoids heave, yet migrates on slopes and under plow blades.

Composite decking boards fade less now, but heat and fastener creep can telegraph.

Among innovative materials, permeable pavers and eco friendly options like recycled-aggregate slabs extend life by managing water.

Cost And Installation

Longevity only pays off when the install matches your site and your budget, so cost and labor deserve the same scrutiny as freeze–thaw performance. Concrete’s lowest unit price can vanish if you need thicker sections, rebar, or extensive formwork on unstable subgrade.

Clay brick costs more up front, but you can phase it in and reuse units if you revise your landscape design. Natural stone carries high material and freight costs, yet it fits premium details where cuts are minimal and laying patterns stay simple.

Permeable pavers add excavation depth, geotextile, and graded aggregate, but they can reduce drainage infrastructure and environmental impact fees.

Gravel installs fastest on level, well-drained sites, though edging and base prep still determine long-term geometry and safety.

Maintenance And Weathering

Because your site’s sun exposure, drainage rate, and winter de-icing habits dictate what actually survives year after year, you should weigh maintenance and weathering as performance specs, not afterthoughts.

Concrete pavers handle freeze-thaw well if you keep joints topped and edging locked; polymeric sand reduces washout but can haze in high heat.

Poured concrete resists weeds yet telegraphs cracks where subgrade settles; seal it to limit salt scaling and UV chalking.

Natural stone wins on color stability, but soft limestone spalls under de-icers and clay soils; choose dense granite for wet zones.

Brick looks timeless, though it effloresces with poor drainage and needs re-sanding.

Gravel drains best, but it migrates, needs periodic raking, and raises long-term material costs under heavy foot traffic and seasonal weather effects.

Cost and Lifespan by Hardscaping Material

While your layout and base preparation set the performance ceiling, material choice determines the real budget and the service life you can expect on a given site.

Poured concrete often wins on upfront cost, but you’ll trade for joint control and eventual surface repair; expect decades with periodic sealing.

Clay brick suits Historical landscaping and lets you swap individual units; higher install cost, long lifespan.

Natural stone carries the highest material and labor cost, yet delivers the longest service life and premium edge detailing.

Concrete pavers balance price and replaceability; choose thicker units for vehicular zones.

Gravel is cheapest and permeable, but you’ll budget for edging, top-ups, and regrading.

For Sustainable materials, specify locally sourced stone or recycled-content pavers.

Climate Fit: Freeze-Thaw, Heat, and Heavy Rain

climate responsive paving design

Material cost and expected service life only hold if the surface matches your climate loads and drainage reality.

In freeze-thaw zones, you’ll want low-absorption, air-entrained concrete, dense natural stone, or fired clay pavers; avoid soft limestone and poorly fired brick that spalls at edges. Specify tight joint tolerances and a stable base so heave doesn’t telegraph into lippage.

In hot climates, choose lighter colors to reduce surface temps, and use heat-stable binders; dark asphalt can rut and amplify glare, altering material aesthetics.

Under heavy rain, prioritize capillary breaks, raised thresholds at doors, and edge restraints that resist washout.

Detail expansion joints, sealers, and compatible mortars to prevent thermal stress cracking and boost climate resilience.

Traction and Drainage for Safer Surfaces

Where do slips start—at the finish, the slope, or the drain detail you skipped? You control traction by matching surface texture to use: broom-finished concrete for entries, flamed granite for pool decks, tumbled pavers where bare feet need grip without abrasion. Avoid polished stone in shaded zones where biofilm forms.

Then you manage water. Set patios at 1.5–2% fall away from doors, and break long runs with subtle cross-slope so runoff doesn’t sheet into walk lanes. Keep joints permeable where soils infiltrate; otherwise, route flow to a slot drain or gravel trench at the low edge.

Detail edge stability with rigid restraints and compacted base so units don’t tip, creating trip lips and ponding.

Maintenance and Installation: DIY vs Pro

Traction and drainage only perform as designed if you install them to spec and keep them clear, so the real question becomes whether you can execute the tolerances and maintenance schedule yourself.

DIY works when your site’s slope is mild, soil is stable, and you can compact base in lifts, hit 1–2% pitch, and keep joints uniform. You’ll also need to plan edge restraint, geotextile separation, and cleanouts so fines don’t clog permeable systems—especially with eco-friendly materials like porous pavers.

Hire a pro when you’re cutting grades near foundations, tying into existing drains, or building steps and retaining edges that must meet code.

Pros also source consistent batches and align patterns with landscaping trends while minimizing waste and rework.

Conclusion

When you choose path and patio materials, you balance structure, aesthetics, and site conditions. Match stone, brick, pavers, or gravel to your soil type, slope, and drainage plan, then confirm slip resistance and joint strategy for safe traction. In freeze-thaw zones, you’ll want stable bases and permeable detailing; in heat, lighter colors reduce surface temps. Don’t cut corners on edging and compaction—those details lock performance in. Done right, you’ll build it once and walk it for years.…

first time home buying process
Home Upgrades & Renovations

Buying a Property: Key Steps Every First‑Time Buyer Should Understand

Start by setting a real budget that covers your down payment, 2%–5% closing costs, earnest money, and a repair/moving buffer. Get pre-approved with pay stubs, W-2s, and bank statements, then compare rates, APR, fees, and lock terms across lenders. Tour homes with a must-have list, vet neighborhoods at different times, and note red flags like stains or foundation cracks. Make offers using comps and smart contingencies. Next, you’ll see how inspections, appraisals, and closing details protect you.

Key Takeaways

  • Set a realistic budget covering down payment, 2%–5% closing costs, and a buffer for inspections, repairs, and moving.
  • Get pre-approved to confirm your buying range and compare rates, fees, and timelines across multiple lenders.
  • Tour homes with a must-have list, evaluate neighborhoods, and watch for physical red flags and restrictive HOA rules.
  • Make an offer based on comparable sales, keep financing and title contingencies, and negotiate repairs, credits, or price within a firm walk-away limit.
  • Complete inspection, appraisal, and final walkthrough, then review the closing disclosure and verify wire and title details before signing.

First-Time Homebuyer Budget: Down Payment + Closing Costs

homebuyer budget planning essentials

Before you tour homes or submit an offer, secure a realistic first-time homebuyer budget that accounts for both your down payment and your closing costs. Set a target purchase price range, then map cash needs: down payment, earnest money, appraisal, title, escrow, lender fees, prepaid taxes, and homeowners insurance.

In many markets, closing costs run 2%–5% of the price, so you can’t treat them as an afterthought.

Align your plan with Mortgage types you’ll consider, since minimum down payments vary and can shift required reserves. Keep your credit scores in view because stronger scores often open lower PMI costs and better pricing, helping your cash stretch further.

Build a small buffer for inspections, repairs, and moving so negotiations don’t derail.

Get Pre-Approved: Payments, Rates, and Lender Choice

Once you’ve set your cash plan, a pre-approval turns it into a lender-backed buying range by tying your income, debts, and credit to a real payment and rate.

You’ll submit pay stubs, W-2s, bank statements, and permission for a hard credit pull, so your Credit score and debt-to-income ratio can be priced into your offer power.

Ask for a written loan estimate and compare interest rate, APR, points, lender fees, and required reserves across at least two lenders.

Confirm how long the rate lock lasts, what triggers re-underwriting, and how quickly they can close.

Review Mortgage types—conventional, FHA, VA, USDA, fixed vs adjustable—and match them to your down payment, occupancy, and risk tolerance.

Document everything and keep balances stable.

Tour Homes Smart: Must-Haves, Neighborhoods, Red Flags

With your pre-approval in hand, you can tour homes with a clear price ceiling and a payment target, which keeps emotion from overruling math.

Start with a must-have list (bed/bath count, commute time, yard, parking) and rank deal-breakers versus upgrades.

Use Virtual tours to screen layouts, light, and flow before you spend weekends driving, then confirm in person with measurements and photos.

Evaluate Neighborhood amenities like schools, transit, grocery options, parks, and noise patterns at different times of day.

Watch for red flags: uneven floors, fresh paint over stains, musty odors, window fogging, roof age, foundation cracks, poor drainage, and DIY electrical work.

Ask about HOA rules, utility costs, and recent permits.

Make a First Home Offer: Price, Contingencies, Negotiation

After you’ve narrowed in on a home that checks your must-haves, craft an offer that balances a competitive price with protections that keep your risk and cash exposure in check. Anchor your price to recent comparable sales, current days-on-market, and competing demand.

Then choose an Offer strategy that matches the seller’s priorities. Strengthen terms with a solid earnest deposit, flexible closing date, and clear financing timeline, but keep key contingencies where they protect you most, such as financing and title.

Use escalation clauses or appraisal-gap language only if your budget supports it. In counteroffers, stay disciplined on your walk-away number and trade concessions strategically—timing, inclusions, or credits—rather than overpaying.

Apply negotiation tactics that signal certainty, responsiveness, and professionalism throughout the process.

Inspections to Closing: Appraisal, Repairs, Final Walkthrough

Although your offer may be accepted, you still control your risk between inspections and closing by managing three pressure points: the appraisal value, repair negotiations, and the final walkthrough.

Schedule a Property inspection quickly, then prioritize defects that affect safety, financing, or resale: roof leaks, HVAC failure, electrical issues, moisture, and structural movement. Use the report to request credits, repairs by licensed pros, or price adjustments, and set deadlines with receipts and re‑inspection rights.

Track the appraisal like a market test; if value comes in low, you can renegotiate, challenge comps, increase cash, or exit under your contingency.

Before signing, complete a detailed walkthrough to confirm agreed repairs, appliances, and occupancy terms.

Then follow Closing procedures: verify the final CD, wire instructions, and title/insurance docs.

Conclusion

You’ve mapped your budget, secured pre-approval, toured with clear must-haves, and written an offer that protects you. Now, from inspection to appraisal to final walkthrough, you’re crossing the finish line—like Odysseus returning home—alert, prepared, and determined. You’ll verify repairs, confirm numbers, and sign only when every detail aligns. Do this well, and you won’t just buy a property—you’ll lock in value, confidence, and a place that truly feels like yours.…

smart storage durable materials
Home Upgrades & Renovations

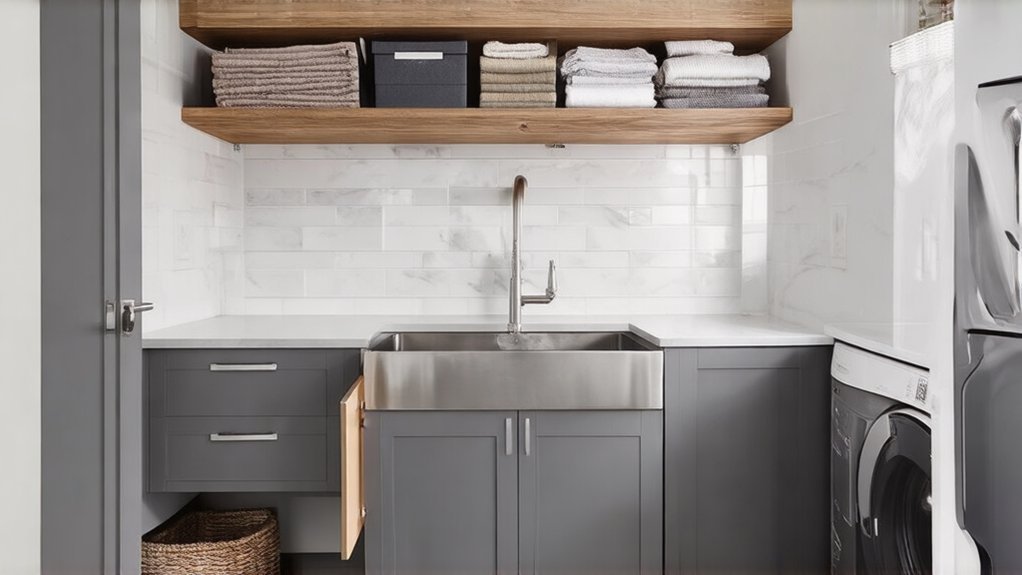
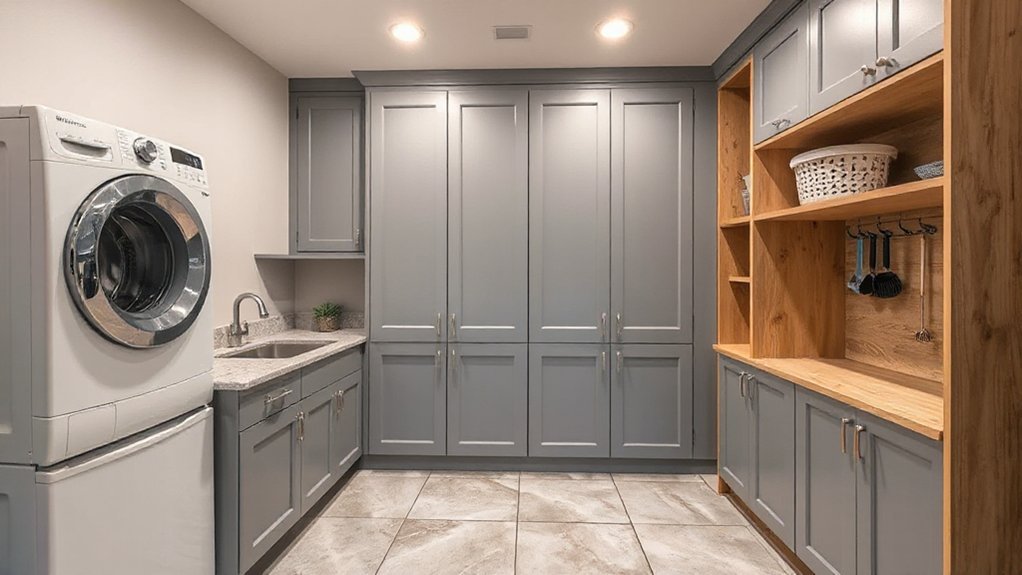
Utility Room Upgrades: Clever Storage and Durable Materials That Work Hard

Upgrade your utility room by zoning it for washing, folding, messy tasks, and a drop zone, and keep a 36-inch path for baskets. Choose easy-wipe cabinets with full-extension drawers, plus a tall pantry for vacuums and refill jugs. Add wall rails, rubberized hooks, and labeled peg strips within reach. Use dead space with slim pull-outs, toe-kick drawers, and over-appliance cabinets. Finish with quartz or stainless counters and sealed, spill-proof flooring—next up, even smarter built-ins.

Key Takeaways

  • Plan distinct zones for washing, folding, messy tasks, and drop-off, maintaining 36-inch walkways and clear door swings.
  • Choose storage by item type: full-extension drawers for daily supplies and tall pantries with adjustable shelves for vacuums and jugs.
  • Add wall-mounted rails, hooks, and short track systems for brooms, mops, and pet gear, anchored into studs and labeled.
  • Convert dead space with slim pull-outs, toe-kick drawers, over-appliance cabinets, and fold-down shelves to maximize every inch.
  • Specify hard-working surfaces: quartz or stainless counters, caulked seams, porcelain tile or sealed LVP flooring, plus epoxy grout and washer drain pan.

Plan Your Utility Room Layout and Zones

design efficient utility zones

Before you buy shelves or move appliances, map out how you’ll actually use the room and divide it into clear zones. Set a wash zone with straight access to hookups and enough door-swing clearance. Place a fold-and-sort zone beside it, leaving a 36-inch path so baskets and hampers don’t choke traffic.

Create a utility zone near the sink or drain pan area for messy tasks and quick wipe-downs. Add an entry drop zone by the door with a bench-width landing strip for bags and shoes.

Plan outlets and switches per zone, then layer bright task light with decorative lighting for visibility. Finish by confirming airflow: choose ventilation solutions that exhaust humidity and keep the room comfortable.

Choose Utility Room Cabinets by What You Store

Once you list what needs to live in your utility room—detergents, cleaning tools, pet supplies, bulk paper goods, or a vacuum—you can match cabinet type and size to the job instead of guessing.

Put daily items in base cabinets with full-extension drawers so you can see everything at a glance.

Reserve a tall pantry cabinet for brooms, a vacuum, and refill jugs; add adjustable shelves for changing bottle heights.

For messy supplies, choose easy-wipe Cabinet materials like thermofoil, laminate, or sealed plywood, and skip raw MDF near damp floors.

Use closed cabinets for visual calm, and add clear bins inside to tighten Storage organization.

Measure your largest items, then size door openings and shelf spacing so nothing gets wedged.

Add Wall Storage: Hooks, Rails, and Hangers

Because cabinets can’t hold everything you reach for mid-task, add wall storage with hooks, rails, and hangers to keep tools visible, dry, and off the floor.

Start with Wall organization: map zones for cleaning, laundry, and pet gear, then assign each item a dedicated hanger or hook.

Mount a sturdy rail for brooms and mops so handles don’t topple, and add S-hooks for spray bottles and dustpans.

Use rubberized hooks for wet coats, leashes, or garden gloves to prevent slipping.

Install a pegboard strip or short track system for frequently used tools, and label positions so everything returns fast.

Keep hanging solutions within arm’s reach, leave clearance for doors, and anchor into studs for safe weight limits.

Use Dead Space for Utility Room Built-Ins

Even if your utility room feels maxed out, you can squeeze in major function by turning dead space—awkward corners, the gap beside a washer, the wall behind a door, or the area above appliances—into simple built-ins. Measure clearances first, then add a slim pull-out tower for detergents, a toe-kick drawer for rags, or an over-appliance cabinet for bulk paper goods.

Use adjustable shelves so tall bottles and baskets fit without wasted height. Add Hidden compartments like a false-front panel that stores lint tools, stain sticks, and spare filters.

Choose multi purpose fixtures: a fold-down sorting shelf, a tilt-out hamper, or a narrow bench with bins below. Finish with labeled fronts so you grab items fast and keep clutter contained.

Pick Utility Room Surfaces That Handle Spills and Heat

If you choose utility-room surfaces the same way you’d spec a workbench, you’ll prevent most stains, warping, and scorch marks before they happen. Start with Spill resistant countertops such as quartz, stainless steel, or solid-surface; they shrug off detergent, bleach splashes, and wet baskets. Use a tight backsplash seam and caulked edges so spills can’t wick into substrate.

For Heat tolerant surfaces, add a stainless landing zone beside irons, garment steamers, or hot tools. If you prefer laminate, specify postformed edges and a heat pad policy; it’s durable but can blister.

For flooring, pick porcelain tile or sealed LVP with welded seams at thresholds. Finish with epoxy grout and a drain pan under the washer for insurance.

Conclusion

When you upgrade your utility room, you’re not just adding storage—you’re adding order. Plan zones so washing, folding, and cleaning don’t collide. Choose cabinets that fit what you stash, not what looks nice. Add hooks, rails, and hangers so tools stay visible and reachable. Build into dead space so nothing’s wasted. Pick durable surfaces that resist spills, heat, and scrapes. Work smarter, store cleaner, maintain easier, and keep everything ready.…

installing a ceiling fan
Plumbing & Electric Fixes

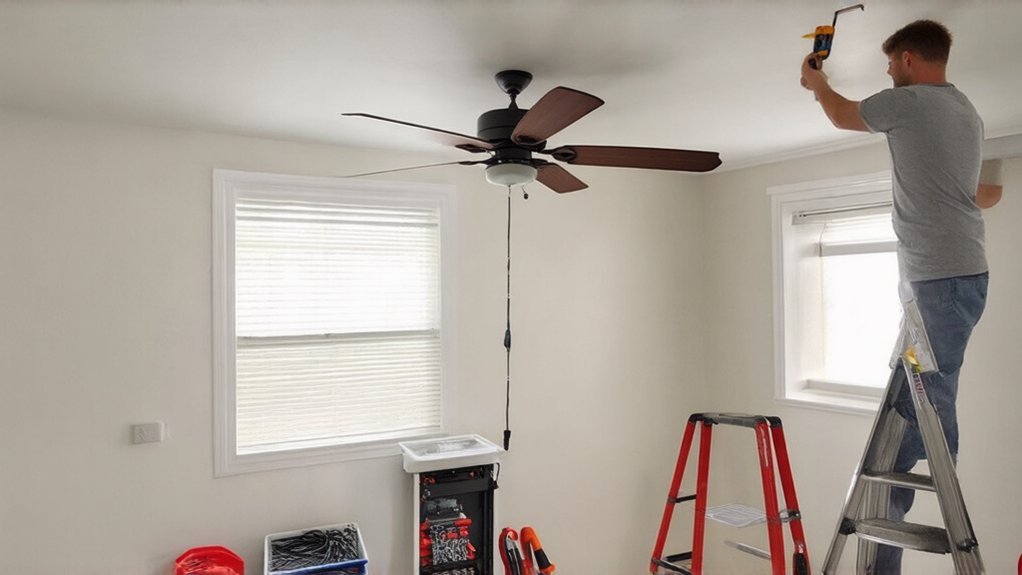
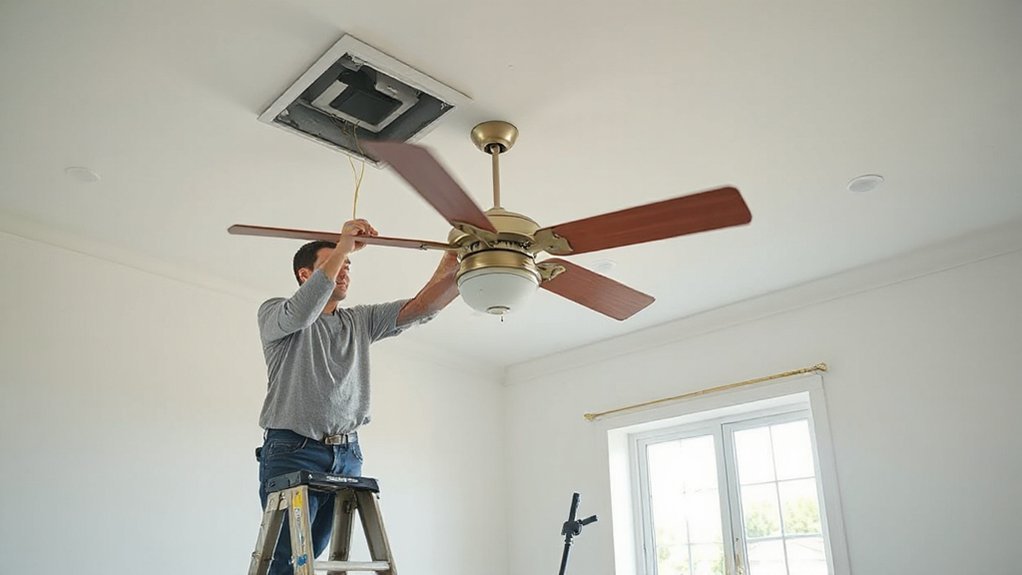
Putting Up A Celing Fan In Simple Steps

Confirm the fan fits your room and clearances, keeping blade tips at least 7 feet above the floor and about 18 inches below the ceiling. Gather tools and verify you’ve got a UL-listed, fan-rated ceiling box secured to framing. Shut off the breaker, tag it, and test for zero voltage before removing the old fixture. Mount the bracket, hang the motor, wire hot/neutral/ground, then install blades and balance wobble. Next, you’ll see setup tips for low, high, or sloped ceilings.

Key Takeaways

  • Choose a fan sized for the room, meeting blade clearance rules and maintaining at least 7 feet from floor to blade tip.
  • Verify the ceiling box is UL-listed and fan-rated, firmly secured to framing or an approved brace before mounting anything.
  • Shut off power at the breaker, lock it out if possible, and confirm zero voltage with a tester before removing the old fixture.
  • Install the fan bracket with correct screws, hang the motor on the bracket, and ensure the hanger ball is fully seated.
  • Connect ground, neutral, and hot wires correctly, attach blades evenly, then restore power and balance the fan if it wobbles.

Confirm the Fan Fits Your Room and Ceiling

verify fan size and clearance

Before you buy or mount anything, confirm the fan’s size, weight, and mounting style match both your room and your ceiling so you don’t create a wobble, noise, or safety hazard.

Match Fan size to the room: undersized units won’t move air, oversized blades can strike doors or walls and violate required clearances. Check the manufacturer’s listed blade sweep and minimum side clearance, and keep at least 7 feet from finished floor to blade tip to meet common code and safety guidance.

Verify Ceiling height: use a standard mount for 8–9 feet, a flush mount for low ceilings, and a downrod for high or sloped ceilings to keep blades in the efficient zone. Keep blades 18 inches below the ceiling for airflow.

Gather Tools and Check for a Fan-Rated Box

Why risk a wobble—or a fall—when the right tools and a fan-rated electrical box keep the installation safe and code-compliant? Start with a Tools checklist: voltage tester, insulated screwdrivers, nut drivers, wire strippers, linesman pliers, torque-rated drill/driver, step ladder, tape measure, level, and approved wire connectors.

Keep Safety precautions front and center: wear safety glasses, use cut-resistant gloves, and set the ladder on a stable surface.

Next, inspect the ceiling box. You need a UL-listed fan-rated box and bracket, secured to framing or an approved fan brace, not just drywall. Confirm the box is labeled for “fan support” and matches the fan’s weight rating.

Check for solid mounting screw threads and undamaged cable clamps and conductors.

Shut Off Power and Remove the Old Fixture

Once you’ve confirmed the box can support a fan, kill power at the breaker (not just the wall switch) and verify it’s truly off with a non-contact voltage tester and, if possible, a meter at the fixture wires. Tag the breaker so no one restores it.

Remove globes and bulbs, then support the old fixture with one hand while you loosen mounting screws. Lower it carefully and note conductor colors and any grounding method for electrical safety.

Undo wire connectors, separate conductors, and cap exposed wires individually. Inspect the box for heat damage, loose clamps, or missing grounding; fix issues before proceeding.

Confirm fixture compatibility by identifying how many conductors you have (hot, neutral, ground, and any switched leg). Don’t nick insulation.

Install the Bracket and Hang the Fan Motor

Next, fasten the fan-rated mounting bracket to the ceiling box using the manufacturer-supplied screws (or the box’s listed 10-32 machine screws), tightening them fully so the bracket sits flat and can’t shift.

Confirm the box is fan-rated and firmly secured to framing; don’t hang a fan from a light-only box.

Verify fan placement aligns with room layout and that ceiling clearance meets the fan manual and local code, including distance from walls, cabinets, and sloped ceilings.

Install any rubber isolators or hanger ball receiver parts exactly as shown.

Then lift the motor assembly and seat the hanger ball or hook into the bracket’s cradle, making sure the safety tab engages.

Support the weight until it’s locked in place securely.

Wire the Ceiling Fan, Attach Blades, and Fix Wobble

Before you make any wire connections, shut off the circuit at the breaker, verify power is truly off with a non-contact tester and a meter at the ceiling box, and keep the conductors separated so nothing can accidentally energize.

Match colors: connect fan hot to switched hot, neutral to neutral, and tie grounds together for proper electrical grounding to the box and bracket.

Use listed wire connectors, tug-test each splice, and fold conductors neatly into the box without pinching.

If you’ve got separate light and fan leads, cap any unused conductor per instructions.

Attach blades with the specified screws and lock washers, tightening evenly so you don’t warp brackets.

Restore power, run the fan, and check wobble.

Do blade balancing with the included weight kit, moving weights until vibration stops.

Conclusion

You’ve confirmed the fan fits, used a fan-rated box, and kept the breaker off while you worked. Now double-check every screw, bracket, and blade is tight, and verify your wire connections match the manufacturer’s diagram and local code. Restore power only after the canopy is secured and the blades spin freely. If there’s wobble, balance the blades before regular use. When it runs smoothly, you’ll feel relief like cool shade on a hot day.…

stylish wildlife friendly garden
Garden & Outdoor

Designing a Wildlife‑Friendly Garden That Still Looks Stylish

Start by mapping sun, wind, drainage, and canopy so you can place layered zones—groundcovers, shrubs, and small trees—into connected forage corridors. Keep it stylish with tight steel or stone edging, repeated plant drifts, and open sightlines while tucking dense cover behind focal planes. Choose locally native, single-flower species that stagger blooms from early spring to late fall, matching drought or swale conditions. Add a shallow, recirculating bowl with a stone ramp and discreet nesting sites; next, you’ll refine details and maintenance.

Key Takeaways

  • Map sun, wind, drainage, and canopy first, then place layered planting zones and corridors while preserving clean sightlines and access.
  • Choose locally native, pollinator-friendly plants with open single blooms, plus larval hosts, and stagger flowering for season-long nectar.
  • Layer structure intentionally—trees, shrubs, perennials, groundcovers—stepping heights toward paths and repeating drifts for a modern, cohesive rhythm.
  • Add discreet water and nesting micro-sites: shallow recirculating bowls with stone ramps, and hidden bee blocks or boxes with clear flight paths.
  • Keep it polished with crisp steel or stone edging, selective leaf litter under shrubs, spring cutbacks for overwintering insects, and minimal-chemical pest thresholds.

Plan a Modern Wildlife-Friendly Garden Layout

layered planting and corridors

Although a wildlife‑friendly garden looks effortless, you’ll get better habitat performance when you plan the layout like a modern site scheme: map sun and wind exposure, drainage paths, and existing canopy first. Then place layered planting zones (groundcover–shrub–small tree) to create continuous shelter and forage corridors.

Next, establish edge conditions: tighten hardscape lines, keep sightlines open, and tuck dense cover behind focal planes so the garden reads clean from the house. Connect habitat patches with Wildlife corridors sized to your site—hedgerows, stepping‑stone beds, and fence‑line thickets—while preserving a maintenance route for access.

For Urban integration, align corridors with neighboring trees, alley plantings, and green roofs. Buffer light and noise using berms, screens, and water‑infiltration swales. Route irrigation to support drought‑resilient zoning.

Choose Native Plants for Season-Long Blooms

Once your layout maps sun, wind, and drainage and links habitat patches with corridors, you can tune the planting matrix so nectar, pollen, seeds, and cover persist from early spring through frost.

Start with locally native species keyed to your ecoregion, then select cultivars only when they don’t dilute floral access or phenology.

Build Pollinator friendly plant choices by prioritizing open, single flowers, high nectar volume, and larval host function.

Use Seasonal bloom strategies: schedule overlapping flowering windows, stagger genotypes for extended peak, and include early and late resources to prevent forage gaps.

Specify drought‑tolerant natives in hot, reflective zones, and moisture‑adapted taxa in swales so bloom timing stays stable.

Finish with repeated drifts to keep a clean, modern rhythm.

Layer Plants for Height, Habitat, and Texture

After you’ve set your seasonal bloom sequence, build structure by stacking plants into vertical layers that mimic local habitat and read as intentional design.

Use Vertical planting: canopy or small trees for shade and perches, a shrub midstory for shelter, then herbaceous drifts for nectar and larval hosts. Finish with a ground layer of sedges, low natives, and leaf‑litter pockets to stabilize soil, cool roots, and support invertebrates that feed birds.

You’ll get cleaner sightlines if you repeat forms—clumps, mounds, and airy spires—rather than mixing everything randomly. Keep taller masses to the back or center, and step heights down to paths for a curated edge.

Stitch beds together with Pollinator corridors: continuous, layered strips that connect sunny nodes across your garden.

Add Modern Water and Discreet Nesting Sites

Layered planting gives wildlife cover and foraging routes, but you’ll anchor daily use of the space by adding reliable water and nesting micro‑sites that stay visually quiet.

Choose a shallow, recirculating rill or bowl with a dark liner so reflections read crisp—water feature aesthetics improve when edges align with paving modules and planting masks the pump access. Keep a 2–5 cm beach zone or textured stone ramp so bees, birds, and hedgehogs can drink safely.

For nesting, build in nesting site concealment: tuck swift or sparrow boxes behind a slatted screen, set bat tubes under a clean fascia, and stack drilled hardwood blocks inside a ventilated cabinet. Face openings east or southeast, add shade, and keep flight paths clear.

Keep It Neat With Low-Maintenance Routines

Even if you’re aiming for a loose, habitat-rich look, you’ll keep the garden reading intentional by setting a few low-maintenance routines that double as ecological management. Edge beds with steel or stone, then shear “soft” plantings back to that line twice a year so structure stays crisp while stems and seedheads persist through winter.

For garden cleanup, swap broad raking for selective edits: lift only smothering leaf mats from paths, leave 5–7 cm of leaf litter under shrubs, and compost diseased material hot.

Cut perennials to 15–20 cm in early spring to protect overwintering insects. For pest control, use thresholds: scout weekly, hand-remove hotspots, blast aphids with water, and favor habitat tweaks—mulch consistency, airflow, and diverse flowering strips—over chemicals.

Conclusion

You don’t have to choose between crisp design and biodiversity. When you plan clean sightlines, specify native, season‑long bloomers, and build layered structure, you’re creating habitat that reads intentional. Add a slim rill or bowl for water and tuck nesting tubes behind a slatted screen. For example, a small urban courtyard swapped sterile gravel for drifts of native salvia and grasses; within weeks, bees arrived, birds bathed, and the space still felt minimalist.…

selling house without agent
Home Upgrades & Renovations

Do I Need an Estate Agent to Sell My House or Can I Go It Alone?

You don’t need an estate agent to sell your house, but you’ll need to price it using solid comparable evidence, market it compliantly, qualify buyers, and manage viewings, paperwork, and the chain yourself. An agent can reduce fall-through risk by screening buyers, issuing a memorandum of sale, and chasing conveyancers and documents. DIY can work with a straightforward home and a cash or no-chain buyer, but complex chains or unusual properties often benefit from professional control. Next, you’ll see how to choose.

Key Takeaways

  • Estate agents handle pricing, marketing, buyer screening, and chain management; DIY gives control but adds time, admin, and responsibility.
  • Selling alone means managing viewings, enquiries, and follow-ups quickly, while keeping records and consistent buyer prioritisation to reduce fall-throughs.
  • Agents coordinate conveyancers, issue the memorandum of sale, and chase documents; DIY sellers must complete disclosures and legal paperwork accurately.
  • Pricing should be evidence-led using comparable sold prices and demand; agents provide appraisals, but DIY sellers must justify pricing to buyers and lenders.
  • Compare total costs: agent commission plus extras versus DIY listings, photos, EPC, and time; DIY suits simple, liquid markets with clear comparables.

Estate Agent or DIY Sale: How to Decide

choosing sale method wisely

Although you can sell your home without an estate agent, the right choice depends on your time, risk tolerance, and need for price assurance and compliance support. If you can dedicate hours to enquiries, viewings, and negotiation, a DIY sale may suit you—provided you’re comfortable documenting decisions and meeting disclosure duties.

If you want stronger pricing discipline, consider how emotional attachment can distort your view of offers and feedback. You should also assess whether you can execute Property staging consistently, photograph accurately, and present the home without misrepresentation.

Where deadlines, chain complexity, or dispute risk is high, you’ll likely benefit from structured process controls and third-party accountability. Choose the route that best protects your net proceeds and limits avoidable regulatory exposure.

What an Estate Agent Does (and What You Still Do)

If you use an estate agent, you’re paying for structured support on pricing and market appraisal, compliant marketing, and day-to-day buyer management.

Even then, you’ll still carry key responsibilities, including preparing for viewings and making decisions on offers.

Whether you appoint an agent or sell privately, you must also complete the legal steps correctly, so it’s essential you understand exactly who does what.

Pricing And Market Appraisal

Because your asking price sets the tone for every viewing and offer, pricing and market appraisal is where an estate agent can add the most immediate value—by grounding your figure in comparable sold prices, current local demand, and realistic time-to-sell expectations.

Yet you still carry responsibility for sense-checking the evidence, deciding your target outcome (speed versus price), and approving a price that you can justify to buyers and lenders.

An agent’s Market analysis should reference Land Registry data, recent fall-throughs, and competing listings, not optimistic “marketing prices”.

Ask for three evidence-backed options and the assumptions behind each.

Then apply Pricing strategies that reflect your chain position, risk tolerance, and any lender-sensitive issues (e.g., short lease, cladding).

If figures don’t align, challenge them and document your rationale.

Marketing And Buyer Management

Once you move beyond the asking price, marketing and buyer management determine whether you generate qualified viewings, protect your negotiating position, and keep momentum through to offer.

An estate agent typically builds a compliant marketing pack, writes listing copy, deploys professional photos, and publishes across portals, Social media, and mailing lists. They’ll add Virtual tours to widen reach and pre-qualify interest, then manage enquiries, screen buyers, and track follow-ups so warm leads don’t go cold.

You still control presentation standards, approve wording, and decide how much information you disclose. If you go solo, you must respond fast, keep records, and apply consistent criteria when prioritising buyers.

Either way, disciplined lead handling reduces fall-through risk and supports firmer offers.

While marketing gets eyes on your listing, the legal and viewing workload is what protects you from complaints, delays, and aborted sales. An estate agent can coordinate conveyancers, issue sales memoranda, and chase documents, but you still must provide accurate property information, disclose material facts, and respond promptly to enquiries.

If you’re selling alone, you’ll manage legal procedures end to end: confirm title details, complete TA forms, supply warranties and certificates, and keep a clear audit trail of communications and offers.

You’ll also control viewing arrangements. Agents can qualify viewers, conduct accompanied viewings, and log feedback, yet you must keep the property safe, follow data-protection rules when handling details, and ensure access is consistent.

Done well, you reduce fall-throughs and strengthen buyer confidence.

Estate Agent Fees vs DIY Selling Costs (Full Breakdown)

compare selling cost breakdown

Before you choose an estate agent or sell privately, you need a clear, itemised comparison of the agent’s commission and the extras that often sit outside the headline rate. You should confirm exactly what you’re paying for—marketing, photography, EPC coordination, accompanied viewings, sales progression, and contract terms—so you can assess value and avoid unexpected charges.

If you go DIY, you’ll need a cost checklist covering listings/portal access, photos and floorplans, EPC, conveyancing, signage, viewings, and negotiation time so you can price your route with compliance and outcomes in mind.

Agent Commission And Extras

Although an estate agent’s commission can look like a single, fixed percentage, the real cost usually combines core fees with add-ons—so you should compare the all-in price against what you’ll spend selling privately. Ask for a written schedule of charges and check whether VAT applies, when fees trigger (on exchange or completion), and if you’ll pay even if you withdraw or switch agents.

Common extras include premium listings, professional photography, floorplans, EPC coordination, accompanied viewings, and negotiation-only services. If you’re offered “free” Property staging, confirm who pays and whether you’ll be billed for damage, hire periods, or refresh visits.

Also check any referral fees tied to recommended conveyancers or mortgage options; these can influence advice. You’ll stay compliant by insisting on transparent, itemised terms upfront.

DIY Selling Expense Checklist

Once you’ve pinned down an agent’s true all-in fee (including VAT and any add-ons), you can benchmark it against the real cost of selling privately by running a like-for-like expense checklist.

Start with compliance: EPC, title documents, and ID checks, plus any lender redemption fees.

Add marketing: pro photos, floorplan, brochure, premium portal listings, and a “For Sale” board.

Factor presentation: Property staging, minor repairs, cleaning, and garden tidy.

Include access management: hosted viewings, keyholding, and an Open house (signage, safety, and neighbour notification).

Budget for negotiation/admin: offer qualification, memorandum of sale, and chasing solicitors.

Finally, price in risk: longer time on market, price reductions, and your time cost.

If DIY totals approach the agent fee, you’re paying yourself to take regulated responsibilities.

How to Sell Your House Without an Estate Agent

How do you sell your house without an estate agent and still stay in control of the process? Start by setting a defensible asking price using recent sold comparables. Then prepare compliance documents early (title, fixtures list, disclosures, EPC where required).

Invest in property staging to present space, light, and condition honestly. Commission professional photos plus virtual tours to widen qualified enquiries.

Market your home on major portals via a listing service. Then handle enquiries through a single email and phone line, logging viewing requests and notes for auditability.

Pre-qualify viewers by confirming proceedability and funding before appointments. Use a clear viewing script, provide an information pack, and keep communications written.

Instruct a conveyancer from day one, and respond to enquiries promptly to keep momentum.

Negotiating Offers, Chains, and Fall-Through Risk

Because your profit and timeline hinge on the quality of the buyer—not just the headline price—you should negotiate offers with clear, evidence-led terms and a firm grip on chain risk. Ask for proof of funds or a mortgage decision in principle, confirm deposit readiness, and set a deadline for instructing solicitors and booking surveys.

Use Negotiation strategies that trade price against certainty: prefer a slightly lower offer with no chain, cash, or flexible completion.

For Chain management, map the chain early, identify weak links, and insist on regular progress updates from each party’s conveyancer. Reduce fall-through risk by issuing a written memorandum of sale, agreeing inclusions/exclusions, and requiring prompt responses to enquiries.

If delays mount, re-market quietly and keep viewings ready to protect momentum.

When DIY Selling Works: and When to Hire an Agent

when to diy or hire

While you can sell without an estate agent, DIY only works when you’ve got the time, confidence, and local pricing evidence to run the process like a professional—and when your property will attract straightforward demand. You’ll need crisp marketing, prompt viewings, and disciplined follow-up to stay compliant with consumer protection rules and avoid misstatements.

DIY suits standard homes in liquid markets where comparable sales support a defensible Property valuation and buyers aren’t chain-heavy. You should hire an agent when pricing is uncertain, demand is thin, the home is unusual, or you can’t manage negotiations and qualification at pace.

Agents add screening, chain management, and documentation control, reducing fall-through risk. Whatever route you choose, you must coordinate solicitors, respond to enquiries fast, and keep Legal paperwork accurate and complete to protect your position and timeline.

Conclusion

Selling alone can feel like steering a ship through fog: you keep every penny, but you must read every tide—pricing, marketing, viewings, and compliance—without a co-pilot. An estate agent won’t remove your legal duties, yet they can sharpen your reach, filter timewasters, and steady negotiations when chains wobble. Choose DIY if you’ve got time, confidence, and local demand; hire an agent if speed, certainty, and risk control matter most to you.…

modern dining room ideas
Home Upgrades & Renovations

How to Modernise a Dining Room With Colour, Furniture and Feature Walls

Modernise your dining room by starting with a warm white, greige, or soft clay base, then add one saturated accent like inky navy, forest green, or oxblood. Paint a feature wall behind the table in matte or low-sheen colour, or try limewash for soft texture. Swap bulky pieces for a slim-leg table and airy, low-back chairs. Mix oak or walnut with black metal, glass, and boucle or linen. Add a sculptural pendant on a dimmer, with more ideas ahead.

Key Takeaways

  • Start with a warm neutral base (warm white, greige, soft clay), then add one saturated accent colour like navy, forest green, or charcoal.
  • Create a feature wall behind the dining table using matte paint, limewash, or subtle mural gradients, and echo that tone in accessories.
  • Swap bulky furniture for clean-lined pieces: slim-leg tables, low-back chairs, and streamlined silhouettes to improve sightlines and feel current.
  • Mix modern materials—wood with black metal, glass details, and textured upholstery—to balance warmth and sharpness without visual heaviness.
  • Upgrade lighting with a sculptural pendant and dimmers, using 2700K–3000K bulbs and wall lights to add modern ambience and depth.

Choose a Modern Dining Room Colour Palette

color sets modern dining mood

Although your dining room’s furniture and lighting matter, your colour palette sets the modern tone first. Start with a restrained base: warm white, greige, or soft clay to keep the room crisp yet inviting.

Then add one saturated accent—inky navy, forest green, oxblood, or charcoal—so the space feels current, not busy. Use Color psychology to steer mood: blue calms long dinners, green feels balanced, and deep red sparks conversation when used sparingly.

Track Cultural influences by borrowing proven pairings, like Japanese-inspired taupe with black, or Mediterranean chalk white with terracotta.

Finally, repeat your key tone in textiles and ceramics to create a clean, intentional rhythm across the room.

Add a Feature Wall That Looks Intentional

If your dining room needs a modern lift without a full overhaul, add a feature wall that reads deliberate, not decorative. Anchor it behind the table so it frames gatherings and photographs well. Choose one colour move: a matte clay, inky navy, or smoky olive, then echo that tone in small accents for cohesion.

For artistic wall treatments, consider limewash, colour-blocked panels, or a micro-mural with soft gradients; keep edges crisp with careful taping and aligned switch plates.

Prefer statement wall art? Go oversized and centered, or hang a tight grid with consistent frames and generous spacing. Skip random minis.

Finish with a low-sheen paint or textured plaster so light shifts subtly across the wall.

Swap Bulky Pieces for Clean-Lined Dining Furniture

When your dining set feels heavy in both scale and style, clean-lined furniture instantly sharpens the room’s silhouette and lets your feature wall breathe. Choose a table with slim legs and a refined profile so your wall colour reads crisp, not crowded. Keep chair backs low and airy to open sightlines and highlight contrast between paint, art, and trim.

If you love Traditional styles, edit them rather than erase them: swap carved, oversized chairs for streamlined silhouettes in a classic shape, and keep one familiar detail like a gentle curve. Add Vintage accents through a single statement piece—a petite sideboard with updated hardware or a framed mirror—so the palette stays modern.

Aim for cohesive tones: warm neutrals, inky blacks, or muted greens that look current under evening light.

Mix Modern Materials (Wood, Metal, Glass, Fabric)

Clean-lined dining furniture sets a sharp foundation, and mixing modern materials gives it depth without adding visual weight. Pair a warm oak or walnut tabletop with slim black metal legs to sharpen the silhouette and make colour pop—think clay, olive, or inky navy nearby. Add a glass-front sideboard or a clear centerpiece to keep sightlines open and reflect your wall tones.

Bring in fabric through upholstered chairs in boucle, performance velvet, or textured linen; choose a saturated shade for drama or a pale neutral to soften contrast. Balance sleek surfaces with rustic textures like woven rush seats, raw-edge timber, or a stoneware vase.

Finish with Vintage accents—brass cutlery, smoked-glass carafes, or a patinated tray—for curated, modern character.

Finish With Modern Dining Room Lighting (Layers + Bulbs)

Because lighting lands like jewellery in a dining room, layer it with intention: hang a sculptural pendant low over the table for a focused pool of glow. Add slim wall sconces or a picture light to wash the walls, then tuck a discreet lamp or LED strip in a sideboard for soft after-hours ambience.

Choose bulbs like you choose paint: warm 2700K flatters food and timber; crisp 3000K sharpens black metal and stone. Use dimmers so artificial lighting shifts from dinner-party sparkle to late-night calm.

Let color psychology guide finishes: brass warms greens and terracotta, chrome cools blues and greys, matte black grounds blush and cream. Pick opal glass for soft diffusion, or clear glass to spotlight a statement filament.

Conclusion

Bring your dining room into the now by choosing a confident, modern palette—think warm neutrals punched up with inky blue, sage, or terracotta. Make your feature wall look deliberate with crisp lines, textured paint, or graphic wallpaper. Trade bulky pieces for clean silhouettes, then layer wood, metal, glass, and soft upholstery for contrast. Finish strong with statement lighting plus subtle ambient glow. With these updates, you’ll hit the nail on the head.…

Scroll to Top