prepare price market strategically
Home Upgrades & Renovations

Selling a Property: How to Prepare, Price and Market Your Home Effectively

Start by setting a clear selling goal (top price, fast close, or minimal disruption) and a timeline that fits disclosures, title, and escrow. Price from recent 3–6 month neighborhood comps, adjusting for condition and upgrades. Fix safety and functional issues, document repairs, deep-clean, and boost curb appeal. Stage to highlight light and space, then market with pro photos, video, MLS distribution, and fair-housing compliant ads. Next, you’ll see how to manage showings, compare offers, and negotiate terms.

Key Takeaways

  • Set clear sale goals and a realistic timeline, including inspections, disclosures, moving logistics, and net-proceeds estimates for confident decisions.
  • Fix safety and functionality issues, complete deferred maintenance, deep-clean, declutter, and boost curb appeal to reduce inspection renegotiations.
  • Price using recent local closed comps, adjusting for size, condition, and upgrades, and validate against current active and pending listings.
  • Stage for light and space, then use professional photos, accurate listing copy, and MLS-first distribution with video or 3D tours to attract qualified buyers.
  • Manage showings and offers with documented procedures, evaluating terms beyond price—financing strength, contingencies, appraisal gap, and closing timeline.

Choose Your Home-Selling Goal and Timeline

set goals and timelines

Before you list, define your primary goal—maximum sale price, fastest close, or the least disruption—and set a realistic timeline to match. Your choice drives every next step: how much prep you’ll do, which contingencies you’ll accept, and how flexible you’ll be on showings and possession.

Map backward from your desired closing date and account for lender, title, and escrow timelines, plus any required disclosures in your state. Build a checklist that covers inspections you’ll order, repairs you’ll authorize, and document collection for compliance and smoother underwriting.

Align Moving logistics early—temporary housing, storage, and utility transfers—so you don’t force last‑minute concessions. Pair that with financial planning: estimate net proceeds, payoffs, taxes, and reserves so you can negotiate confidently.

Price Your Home With Local Comps First

Start by identifying recent, truly comparable sales in your neighborhood to anchor your pricing to current market behavior.

Then adjust for differences in size, condition, upgrades, and lot features so you’re not over- or under-valuing your home.

Use those comp-based adjustments to set a data-driven price range that aligns with applicable disclosure and fair-housing requirements and supports your selling timeline.

Identify Comparable Recent Sales

How do you set an asking price that buyers and appraisers will take seriously? Start by identifying comparable recent sales (“comps”) in your immediate area. Focus on closed transactions, not active listings, because closed sales show what the market actually paid.

Pull sales from the last 3–6 months, prioritizing the same neighborhood, school zone, or micro-market when possible. Review list-to-sale ratios, days on market, and concessions to spot pricing trends that can affect buyer expectations.

Use a basic market analysis: compare median sale prices, price-per-square-foot ranges, and the direction of recent closing prices. Confirm your data sources are reliable and current, and document them for lender and appraisal questions.

If inventory is volatile, narrow the timeframe further.

Adjust For Home Differences

Once you’ve pulled solid local comps, adjust them for the specific ways your home differs so your asking price reflects what buyers will actually pay—and what an appraiser can support. Start with objective features: living area, bedroom/bath count, lot size, parking, view, and condition.

Apply paired-sales logic where possible and document your sources so the adjustments are defensible. Account for renovation impacts by separating cosmetic updates from value-driving improvements like roof, HVAC, windows, and kitchens, and by noting permit status and completion quality.

Weigh customization considerations carefully: highly personal finishes can narrow demand, while broadly appealing upgrades typically translate better in resale. Also adjust for time, concessions, and atypical financing.

Keep adjustments consistent across comps to avoid overfitting and minimize pricing risk.

Set Data-Driven Price Range

After you’ve adjusted your best local comps for the ways your home differs, convert those numbers into a defensible price range grounded in recent, nearby closed sales. Prioritize closings from the last 60–90 days within your neighborhood, then bracket low-to-high based on condition, updates, and lot or view premiums.

Validate the range against current actives and pendings so Market trends don’t undermine your assumptions.

Use pricing psychology to position your list price inside the range, not above it: tighter bands reduce buyer uncertainty and improve showing volume. If your market rewards “search-step” pricing, choose a number that captures common filter thresholds without overstating value.

Document your comp set and adjustments for transparency, and avoid guarantees—price reflects available data, not future outcomes.

Prep Your Home: Repairs, Clean-Up, Curb Appeal
home prep for sale

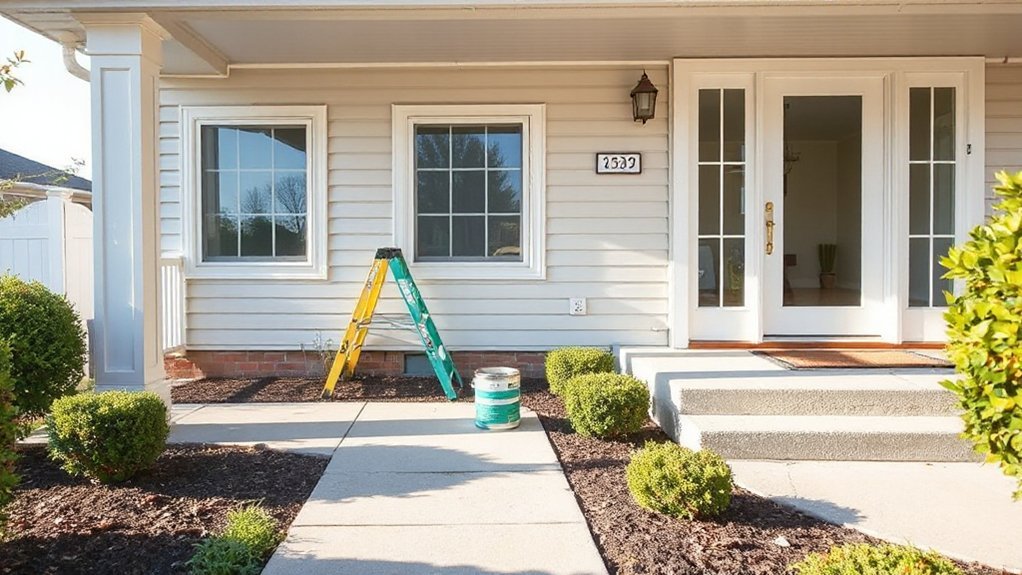
Before you list, prep your home to reduce buyer objections and support stronger offers by addressing visible repairs, completing a thorough clean-up, and boosting curb appeal.

Start with safety and function: fix leaks, sticking doors, cracked tiles, and nonworking lights, and keep permits and invoices where required. Tackle deferred maintenance that signals risk, including roof, HVAC, and plumbing issues, and disclose known defects per local law.

Next, deep-clean floors, grout, windows, and appliances; remove odors; and declutter storage so buyers can verify capacity.

Outside, prioritize Landscaping upgrades like fresh mulch, edging, trimmed shrubs, and a healthy lawn. Consider exterior painting to refresh trim, doors, and faded siding, and repair loose railings or cracked walkways.

These steps help inspections go smoother and reduce price renegotiations.

Stage Your Home for Faster, Higher Offers

To stage your home for faster, higher offers, you’ll start by decluttering and depersonalizing so buyers can picture themselves living there.

Then you’ll highlight space and light by optimizing furniture placement, opening window treatments, and using clean, neutral accents.

Keep changes honest and documented, and avoid staging that could misrepresent the property’s condition or features.

Declutter And Depersonalize

Although you may love your home’s personality, buyers need to picture their own life in it, and that happens faster when the space feels clean, open, and neutral. Start by removing extras from countertops, shelves, and floors, keeping only a few purposeful items that suggest function, not lifestyle.

Pack away personal memorabilia, including photos, awards, and highly specific collections, to reduce distractions and privacy risks during showings. Edit closets and cabinets to a streamlined baseline, then use discreet storage solutions—bins, drawer organizers, and off-site storage if needed—to keep essentials accessible but out of sight.

Aim for a consistent look across rooms so buyers can compare features easily. If you rent storage, confirm contract terms and insurance before move-in.

Highlight Space And Light

When you make space and light the headline features, buyers read your home as larger, cleaner, and better maintained—often within seconds of walking in. Start by opening blinds, cleaning windows, and trimming exterior greenery so Natural illumination reaches deeper rooms.

Then audit your Interior lighting: replace mismatched bulbs with consistent color temperature, add higher-lumen LEDs where corners look dim, and confirm all fixtures work. Use lamps to balance overhead glare and create even, photo-ready brightness.

Pull furniture a few inches off walls, remove oversized pieces, and keep walkways clear so rooms feel breathable. Hang mirrors opposite windows to multiply light, but avoid personal items or safety hazards on ledges.

If you use candles or scents for showings, follow building rules and disclose any known sensitivities.

Market Your Home: Photos, Video, and Distribution

How do you make buyers stop scrolling and book a showing? You invest in professional photos that balance accurate color, straight lines, and strong aesthetic appeal. Use wide angles sparingly so rooms look true-to-scale, and capture key sightlines in consistent daylight. Add short, stabilized video or a 3D tour to support visual storytelling and help buyers pre-qualify interest before they arrive.

Then distribute smartly: publish on the local MLS first for broad agent syndication, and confirm how third-party sites may display or crop images. Run targeted social ads only with proper disclosures and fair housing–compliant audience settings.

Track clicks, saves, and showing requests, then refresh the lead photo set if engagement dips. Always represent condition honestly and avoid digitally altering defects.

Write a Listing That Highlights Buyer-Ready Features
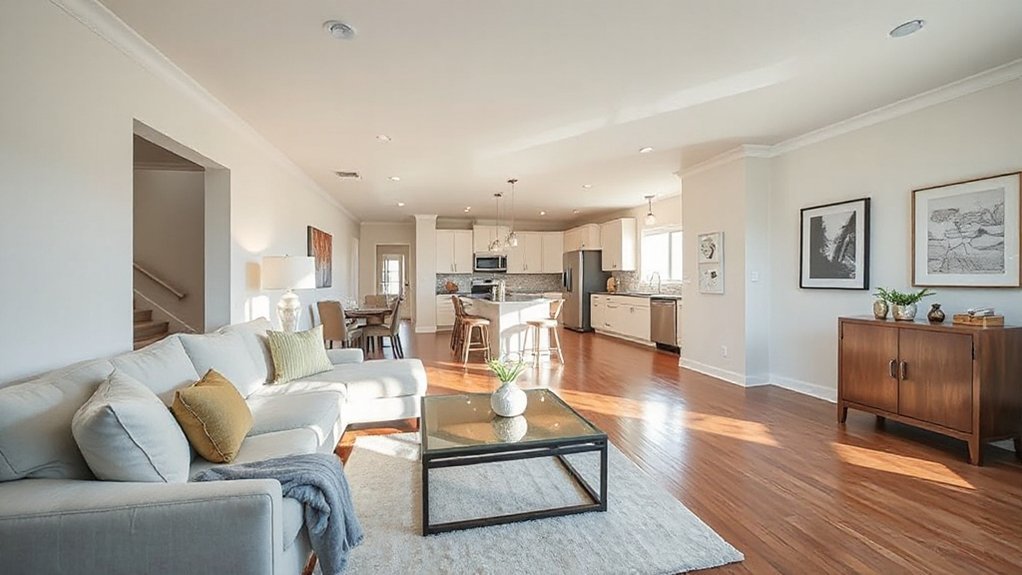
highlighting buyer ready property features

Strong photos and video earn the click, but your listing copy closes the gap between online interest and a scheduled showing.

Lead with buyer-ready upgrades that reduce uncertainty: recent roof, HVAC, windows, permits closed, and receipts available.

Quantify what you can—square footage per public records, lot size, and utility-saving improvements—without exaggeration or unsupported claims.

Use crisp, scannable phrases that match search behavior: “updated kitchen,” “move-in ready,” “low-maintenance garden landscaping,” and “smart home features” like app-controlled thermostat, security, and lighting.

Highlight neighborhood access factually (commute routes, nearby parks) and avoid prohibited or subjective language.

Include practical details that help buyers compare options: parking, storage, HOA terms if applicable, and what conveys.

End with a clear value proposition tied to condition, efficiency, and livability.

Host Showings, Review Offers, Negotiate Confidently

Once your listing starts generating tours, you’ll need a showing plan and an offer-review workflow that protect your timeline, pricing, and legal compliance. Set clear showing windows, require confirmed appointments, and document access instructions to reduce risk. Use Virtual tours to pre-qualify buyers and limit disruption, then schedule open houses strategically to create urgency and comparable traffic.

When offers arrive, compare more than price: financing type, appraisal gap coverage, inspection scope, closing date, contingencies, and proof of funds. Log every offer and counter in writing, follow fair-housing rules, and disclose material facts consistently.

Negotiate with data—recent comps, days on market, and buyer demand—and use counteroffers or addenda to tighten terms. If you accept, sign promptly and circulate executed documents to all parties immediately.

Conclusion

Sell smart, and you won’t just list your home—you’ll launch it like a headline-grabbing product. When you set a clear goal, price to real comps, and tackle repairs, cleaning, and curb appeal, you reduce surprises and protect value. Stage it so buyers can’t unsee themselves living there. Market with pro photos, video, and wide distribution, and write a feature-driven listing. Then run showings, compare offers, and negotiate confidently—because leaving money on the table is practically unforgivable.…


budget interior refresh tips
Painting & Decorating

How to Refresh a Tired Interior With Budget‑Friendly Decorating Tricks

Refresh a tired interior on a budget by clearing visual noise first: edit surfaces to three purposeful items and corral remotes and cords in a lidded box. Rearrange furniture around one focal point to improve flow, then layer lighting with a floor lamp and warm bulbs for an instant lift. Add texture with a new throw and a couple of cohesive pillows, hang curtains higher, and restyle shelves in thirds. Next, thrift one quality accent to finish the look.

Key Takeaways

  • Declutter surfaces to three purposeful items, then add one natural element for warmth without visual noise.
  • Rearrange furniture around a single focal point, keeping clear walkways to improve flow and make the room feel intentional.
  • Refresh impact cheaply with paint and lighting: try a warm neutral, swap bulbs, and add a floor lamp or dimmer.
  • Update textiles for instant change: add a textured throw, simplify pillows, and hang curtains higher for a tailored look.
  • Thrift for character: choose one quality vintage piece, reframe or rewire if needed, and keep the palette consistent.

Declutter Fast to Refresh a Tired Interior

declutter simplify organize refresh

If your space feels flat no matter how much you style it, start by decluttering—fast. Clear surfaces first: coffee table, console, nightstand. Edit to three purposeful items per zone so your eye can rest and your best pieces can read as intentional. Use a minimalist approach: keep what you use weekly, store what you love seasonally, and donate the rest.

Corral loose remotes, cables, and papers into one lidded box, then reset daily in two minutes.

Next, streamline visual noise. Match hangers, reduce pillow variety, and group books by height or color for a cleaner rhythm.

Add natural elements only after you subtract: one leafy stem, a wood tray, or a stone bowl brings warmth without clutter.

Rearrange Furniture to Refresh a Tired Room

Once you’ve cleared the clutter, you can refresh the room fast by rearranging what you already own.

Start by defining a new focal point, then shift key pieces to improve flow and everyday function.

Finally, rebalance scale and spacing so seating, surfaces, and pathways feel intentional and current.

Define A New Focal Point

Although your décor may still be stylish, a room can feel tired when the eye has nowhere fresh to land, so define a new focal point by rearranging your furniture around a single intentional anchor. Choose one statement element and let everything else support it: the fireplace, a large artwork, a sculptural floor lamp, or a bold area rug.

Pull seating to face that anchor and give it breathing room with a clear perimeter. Then tighten the vignette with one edited surface—coffee table, console, or mantel—so the focal zone reads intentional, not cluttered.

For trend-aware focal point ideas, try pairing warm wood with matte black accents, or layering tonal neutrals with one saturated accent. You’ll get a crisp visual centerpiece without buying anything new.

Improve Flow And Function

When your room feels tired, the issue often isn’t the décor—it’s the way you move through it, so refresh the space by rearranging for better flow and function. Start by mapping your main paths: door to seating, seating to storage, and storage to workspace.

Pull the largest piece to anchor the zone, then rotate secondary seating to support conversation and sightlines.

Next, align daily-use items with intuitive reach. Swap a side table for a slim console, or slide a cabinet closer to where you actually drop keys and chargers.

Add discreet storage solutions—lidded baskets, a tray, or an ottoman with hidden space—to reduce visual noise.

Finish with color coordination: group accessories by tone to guide the eye and make the new layout feel intentional.

Rebalance Scale And Spacing

If your furniture feels “off” even after a tidy-up, scale and spacing usually need the reset. Start by anchoring the room with the largest piece, then position secondary seating to create clear sightlines and walking paths.

You’re aiming for scale balance: pair bulky sofas with lighter chairs, and keep low pieces near windows to preserve openness. Pull furniture off the walls when you can; a few inches often makes the layout feel intentional and current.

Next, check spacing uniformity. Keep consistent gaps—about 16–18 inches between seating and a coffee table, and 30–36 inches for main pathways.

Finish by centering key groupings on rugs or lighting, so zones read calm, not crowded.

Use Simple Paint Updates for Big Impact

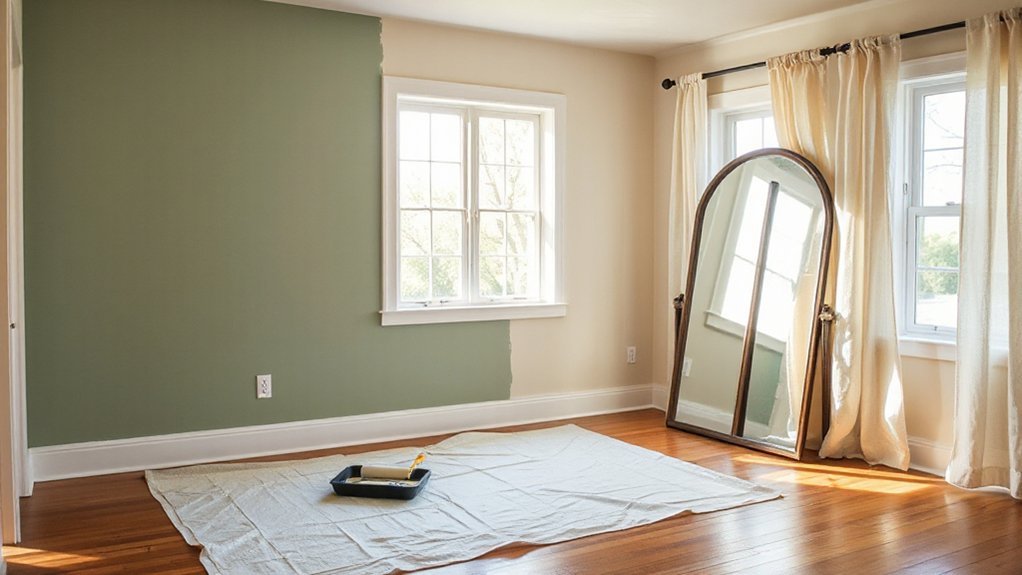
paint color and accent techniques

How do you refresh a tired room without a full renovation? Start with a smarter wall color choice that supports the room’s proportions and mood. If the space feels cramped, you can shift to soft, warm neutrals or a pale tint that visually recedes. If it feels flat, you can add depth with a saturated accent wall or a color-drenched nook that frames a focal point.

Use paint techniques for architectural polish on a budget. Try painting trim a few shades darker than the walls for crisp definition, or go tonal for a seamless, modern envelope.

You can also paint the ceiling slightly lighter to lift the room, or add a half-wall band to anchor furniture and guide sightlines.

Upgrade Lighting for an Instant Lift

Even though paint sets the tone, lighting controls how the room actually reads—its scale, warmth, and focal points. Swap a dated ceiling fixture for a clean-lined pendant or semi-flush mount to modernize instantly.

Then layer your sources: add a slim floor lamp for vertical lift and a task lamp where you read or work so corners don’t fall flat.

For flexibility, install dimmers or try Smart lighting bulbs you can tune from crisp daylight to soft amber. Use Mood lighting to highlight art, shelving, or a favorite chair with a plug-in picture light or adhesive LED strips.

Keep bulb temperatures consistent (2700–3000K) for a cohesive glow, and upgrade to higher CRI LEDs so colors look accurate, not washed out.

Swap Textiles for Color, Comfort, and Texture

Swap textiles to refresh the room’s palette and make it feel more comfortable without changing the layout. You can layer rugs and throws to add warmth and definition.

Then update curtains to introduce a clean hit of color at window level. Finish by mixing pillows in varied weaves and finishes for on-trend texture that reads intentional, not busy.

Layer Rugs And Throws

Two well-chosen layers—one rug underfoot and one throw within reach—can refresh a tired interior faster than most furniture swaps.

Start by scaling up: place a neutral, flatweave base rug to anchor the room, then layer rugs with a smaller patterned piece to define the seating zone and introduce color. Keep the top rug slightly offset for a relaxed, designer look, and let at least 8–12 inches of the base show for contrast.

Next, add throws where you lounge: over the sofa arm, at the end of the bed, or in a basket beside a chair. Mix textures—bouclé, chunky knit, washed linen—to soften hard lines and boost comfort.

Repeat one hue from the rug in your throw for cohesion, not matchy-matchy.

Update Curtains For Color

Where can you add the biggest hit of color without touching a paintbrush? Update your curtains. A new panel instantly reframes the room, pulls together existing tones, and makes windows feel intentional.

Choose Curtain patterns that echo your art or rug—subtle stripes for modern calm, botanicals for a fresh, relaxed vibe, or a solid velvet for depth and warmth.

Dial in the proportions by adjusting curtain length. Hang rods a few inches below the ceiling and extend them past the frame so fabric stacks on the wall, not the glass.

Let panels kiss the floor for a tailored look, or puddle slightly for a softer, boutique feel. Stick to affordable liners to improve drape and light control.

Mix Pillows For Texture

If your room feels flat but you don’t want a major overhaul, mix pillows to add instant texture and a hit of color. Start with a tight palette pulled from your rug or art, then vary materials: linen, bouclé, velvet, and a nubby knit. This Textile pairing builds depth even on a neutral sofa and makes the seating zone feel more intentional.

Use Pattern mixing with a simple rule: one large-scale print, one small geometric, and one solid or subtle stripe. Keep undertones consistent so the set reads curated, not chaotic. Swap in a lumbar pillow to sharpen proportions, and rotate covers seasonally for a low-cost refresh.

Finish with inserts one size larger than the covers for a plush, tailored look.

Restyle Shelves and Surfaces With What You Own

Even when your room’s bones feel dated, you can make it look intentional by restyling shelves and surfaces with pieces you already own. Start by clearing everything, then edit back in thirds: books, objects, and breathing space.

Stack a few books horizontally to create height, then top them with a candle or small bowl for a Personalized display.

Use Surface organization to keep the look crisp: corral remotes on a tray, group like items, and hide loose cords behind books or a box.

Vary finishes so it feels current—mix matte ceramics with glossy glass, or warm wood with black accents.

Anchor each shelf with one larger piece, then sprinkle smaller items forward.

Rotate art, frames, and plants between rooms to refresh the whole view fast.

Add Character With Budget-Friendly Thrift Finds

Once you’ve refreshed your shelves with what you already own, thrift stores become the quickest way to layer in character without spending much. Go in with a tight edit: one sculptural vase, a framed print with a strong mat, or a small brass lamp can shift the room’s mood fast.

During thrift shopping, look for quality materials—solid wood, ceramic, linen—so pieces feel intentional, not random.

Use Vintage accents to add contrast to modern basics: pair an aged mirror with a clean console, or stack worn hardcovers under a sleek candle. Keep your palette consistent and vary texture for depth.

Before you buy, measure key surfaces and check scale against your seating so everything lands balanced and curated. Clean, rewire, or reframe as needed.

Conclusion

You’ve cleared the clutter, shifted the layout, and refreshed the walls—now your space is already breathing easier. But don’t stop yet. The real transformation shows up in the details: a warmer bulb, a layered throw, a rebalanced shelf, a single thrifted accent with attitude. Stand at the doorway and look again. What still feels “off”? Fix that one thing next, and your tired interior won’t just look updated—it’ll feel intentionally designed.…

moss free british paving
General Property Repairs

Patio Cleaning Made Easy: Keeping British Paving Slabs Moss‑Free All Year

Check the forecast and don’t start if rain, frost, or high winds are due; wear gloves, eye protection, and non-slip boots, then sweep grit and clear furniture. Dry-scrape thick moss, lightly wet slabs, and scrub joints downhill with a stiff brush, keeping runoff controlled. Rinse with low-pressure water and re-scrub dark patches. Match cleaners to your paving type to avoid etching. Pressure wash gently, then top up jointing sand. Next, you’ll tighten the routine.

Key Takeaways

  • Check weather, clear clutter, sweep grit, and protect plants and vents before cleaning to prevent slips, damage, and runoff.
  • Dry-scrape thick moss, then lightly wet slabs and brush joints downhill; keep the surface damp to limit mess and regrowth.
  • Use paving-safe cleaners: alkaline for concrete, pH-neutral for sandstone/limestone, and non-acidic low-residue products for granite, porcelain, or brick.
  • If pressure washing, use a fan nozzle at low pressure from 30–45 cm, working diagonally across joints to avoid etching and joint loss.
  • Refill joints with kiln-dried sand, then apply a patio biocide in spring and autumn; improve drainage and sweep weekly to deter moss.

Quick Patio Cleaning Prep and Safety Checks

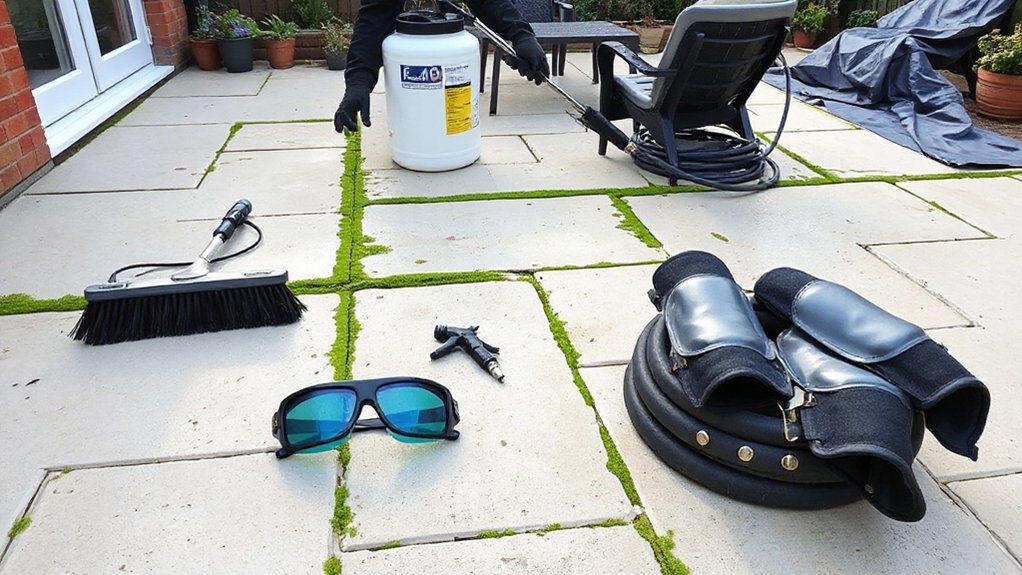
prepare safety and protection

Before you start spraying or scrubbing, take two minutes to prep the area and confirm it’s safe to work. Check the forecast and stop if frost, heavy rain, or high winds are expected. Put on gloves, eye protection, and non-slip footwear, and keep children and pets indoors. Sweep off loose grit to reduce slip risk and prevent abrasive damage.

Move Garden furniture, pots, and mats off the slabs, then cover nearby plants and air bricks. Inspect paving for rocking slabs, cracked joints, and trip edges; mark hazards and avoid loading them.

Identify drainage routes so runoff won’t enter ponds or borders, supporting Wildlife protection. If you’ll use electricity, route cables away from water and use an RCD.

Remove Moss and Algae Fast (Step-by-Step)

With the area cleared, hazards marked, and runoff routes checked, you can tackle moss and algae while keeping slips and plant damage under control. Put on gloves, goggles, and grippy footwear.

Lift remaining Garden furniture onto dry ground, not the lawn, to avoid scuffing during lawn maintenance.

Dry-scrape thick moss with a plastic scraper, then sweep debris into a bag.

Wet the slabs lightly to reduce dust, then scrub joints with a stiff brush, working downhill so you don’t step onto slimy sections. Keep the surface damp, not flooded, to limit runoff.

Rinse with a low-pressure hose, directing water to your planned drain point.

Re-scrub any dark patches immediately.

Finish by brushing clean, checking for slick spots before reopening the area.

Choose a Patio Cleaner by Paving Type

How do you pick a cleaner that won’t etch, stain, or weaken your paving? Start by identifying the slab: concrete, sandstone/limestone, granite, porcelain, or brick.

For concrete, use an alkaline patio detergent or sodium percarbonate; avoid strong acids that dissolve cement paste.

For sandstone and limestone, choose a pH‑neutral stone cleaner; acids and bleach can bleach pigments and attack calcite.

For granite and porcelain, use a non‑acidic, low‑residue cleaner; solvents can leave films on textured finishes.

For brick, use a mild alkaline cleaner; avoid hydrochloric acid unless the manufacturer approves.

Protect garden furniture with covers and rinse overspray.

Plan plant placement: shield borders, wet leaves first, and avoid runoff into soil.

Avoid Damage: Pressure Washing and Joint Care

Although a pressure washer can strip grime fast, it can just as quickly erode soft stone, etch concrete paste, and blast out jointing sand if you run too much pressure or hold the lance too close.

Set the machine to a fan nozzle, start at the lowest effective bar, and keep a 30–45 cm standoff. Work diagonally across joints, not along them, and test a hidden slab first.

Wear eye protection, gloves, and boots; keep cables and pets clear.

After washing, inspect joints for voids. Replace lost sand with kiln‑dried sand or compatible jointing compound, brushing it in dry and tamping lightly.

For Eco friendly solutions, avoid acids; use water, stiff brushing, and controlled rinse during DIY maintenance.

Stop Moss Returning: Aftercare and Yearly Routine

Once you’ve washed the patio and re-packed any lost jointing, lock in those results with aftercare that removes spores and keeps the surface dry between cleans. Apply a patio-safe biocide on a still, dry day; wear gloves, goggles, and long sleeves, and keep pets off until fully dry. Rinse overspray from planting and collect runoff where possible.

For Moss prevention, improve drainage: clear gullies, sweep grit weekly, and trim overhanging shrubs to increase sunlight and airflow. Inspect joints monthly; top up kiln-dried sand or resin jointing before gaps widen.

For Seasonal maintenance, treat in spring and early autumn, then do a quick winter check after storms for pooling, algae film, and lifted slabs. Record dates and products so you don’t over-apply chemicals unnecessarily.

Conclusion

In the UK, surveys suggest around 60% of householders see moss return within a year if they skip aftercare—so don’t. You’ve prepped safely, removed growth methodically, and matched cleaner to your slab type. Now lock in results: rinse residues, re-sand joints, and keep drainage clear. If you pressure wash, use a fan nozzle and low PSI to protect pointing. Schedule a light biocide treatment and quarterly sweeps, and you’ll stay moss-free.…

bedroom makeover with textures
Home Upgrades & Renovations

Refreshing a Master Bedroom With New Textures, Lighting and Layout Tweaks

Start by capping your spend and sketching a quick floor plan, then center the bed on the strongest wall and keep 24–30 inches clear on each side for easy flow. Swap bulky pieces for low, calm furniture and align drawers away from pathways. Refresh the bed with crisp percale, a quilt, and a chunky knit throw, then add nubby or velvet accents. Layer warm, dimmable 2700–3000K lighting and hang drapes high and wide with sheers behind blackout panels. Keep going for more simple upgrades.

Key Takeaways

  • Assess the room day and night, measure clearances, and sketch a floor plan to fix glare, shadows, and dead corners.
  • Recenter the bed on the strongest wall, keeping 24–30 inches of clearance per side for smoother traffic flow.
  • Refresh the palette with one neutral and one accent color, repeating the accent in pillows, art, and throws for cohesion.
  • Upgrade textures by layering percale sheets with linen, knits, and a quilt or coverlet to add depth without clutter.
  • Improve lighting with layered, dimmable ambient and bedside task lights using warm 2700K–3000K bulbs for a calmer mood.

Plan Your Master Bedroom Refresh: Budget + Checklist

bedroom refresh planning checklist

Before you shop for a single new textile or swap a bulb, map out your master bedroom refresh with a tight budget and a quick checklist so every change earns its footprint. Set a spending cap, then list what you’ll keep, move, replace, or repair.

Walk the room at day and night; note glare, shadows, and dead corners. Use Color psychology to pick one calming hue family, then decide where it lands: wall, art, or a single accent piece.

Apply feng shui principles by clearing pathways, anchoring the bed to a solid wall, and balancing nightstands for visual weight.

Measure clearances around drawers and doors, sketch a simple floor plan, and confirm your lighting layers: ambient, task, and soft dimmable glow.

Refresh Bedding With Layers and Texture

Start with a crisp base and mix fabrics and weaves—cotton percale, linen, and a chunky knit—so your bed catches light with subtle highs and lows.

Add cozy layering pieces like a quilt, coverlet, and a throw you can fold at the foot to keep the layout tidy and inviting.

Finish with texture-rich accents—matelassé shams, velvet pillows, or a nubby lumbar—that read warm under bedside lamps without adding visual clutter.

Mix Fabrics And Weaves

When the light shifts across your bed throughout the day, mixed fabrics make the difference between flat and layered. Start with crisp cotton sheets that catch morning brightness, then add a matte linen duvet cover to soften glare.

Introduce Textile combinations through a subtle herringbone sham or a ribbed knit euro—small-scale weaves read rich without busy pattern. Use Fabric contrasts intentionally: smooth percale beside nubby bouclé, or satin piping against washed canvas, so lamplight grazes edges and defines contours.

Keep the palette tight and let texture do the work. If your headboard sits low, choose thinner, tailored shams so the bed looks taller; if it’s tall, wider weaves balance the vertical plane. Rotate one fabric per season.

Add Cozy Layering Pieces

Although your sheets and duvet set the base, cozy layering pieces give the bed its lived-in depth and control how light plays across it. Add a quilt or coverlet you can fold at the foot so morning sun catches subtle ridges, while lamplight softens shadows at night.

Drape a lightweight throw diagonally to break up flat planes and guide the eye toward the pillows, making the whole surface feel intentional, not overstyled.

For tactile comfort, stack layers by weight: breathable blanket closest, warmer topper above, then your duvet. You’ll sleep cooler, adjust faster, and keep the bed looking fuller without bulk.

Keep edges aligned with the mattress corners for a cleaner footprint, and let one layer peek out by an inch or two for contrast.

Choose Texture-Rich Accents

Because light exaggerates every surface in a bedroom, choose accents that bring texture you can actually see—think nubby lumbar pillows, a boucle bench cushion, a woven basket for throws, or a ribbed ceramic lamp base. Keep your palette quiet so shadow and sheen do the work, especially beside a bright window or under warm bedside sconces.

Refresh bedding by stacking contrast: crisp percale sheets, a gauzy coverlet, then a chunky knit throw at the foot to anchor the bed visually. Add tactile decorative accents in pairs to balance the layout—two mismatched pillows, two low trays—so the room feels composed, not cluttered.

If your walls look flat at night, introduce textured wall treatments behind the headboard to catch raking light and deepen the whole scene.

Choose a Simple Color Palette (Fast Wins)

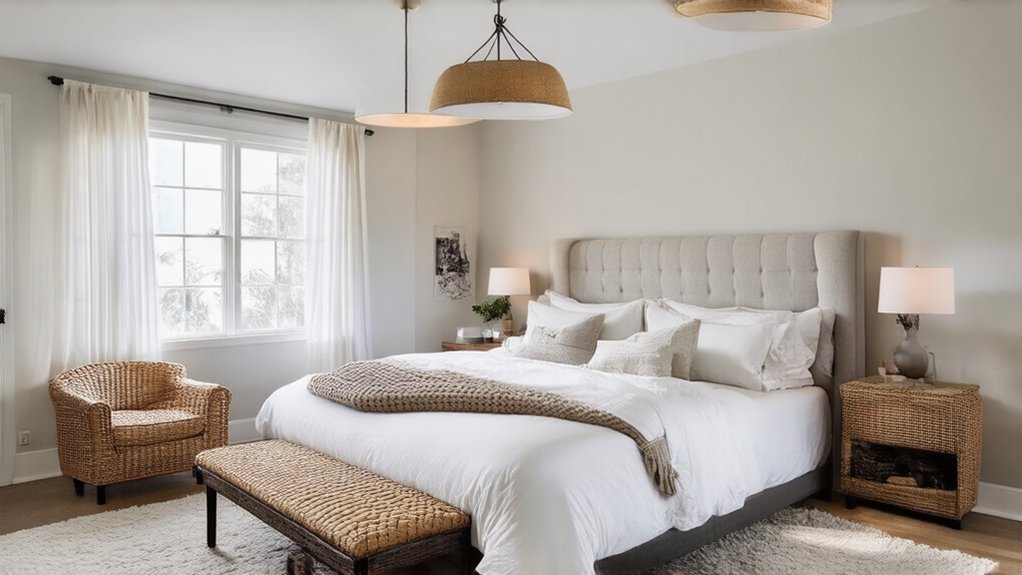
simple cohesive bedroom palette

To get fast wins in a master bedroom refresh, lock in a simple color palette and let texture and light do the heavy lifting. Pick one warm neutral or one cool neutral, then add a single accent hue for depth. Keep color coordination tight: repeat that accent in pillows, art, and a throw, while staying within two to three tones overall.

Nail paint selection by matching undertones to your daylight: north light likes warmer whites; south light can handle crisper ones. Use a matte or eggshell on walls to soften glare, then bring in sheen with a lacquered tray, satin lampshades, or metallic hardware.

Layer whites, creams, and wood grains to feel intentional, not flat.

Improve Layout for Better Flow Around the Bed

Once your palette feels tight, the room’s comfort comes down to how you move around the bed—especially in morning light when every shadow and hard edge feels sharper.

Start by centering the bed on the strongest wall, then measure clearances: aim for 24–30 inches on each side so you don’t brush the duvet or bang a knee on a nightstand.

Keep furniture placement low and calm near pathways; swap bulky chests for a slim bench with a woven top that catches light without blocking steps.

Protect traffic flow by aligning drawers to open away from the main route to the door and bath.

If a rug feels bunched, shift it so your first step lands on soft pile, not cold floor.

Upgrade Lighting for Mood and Reading

Even if your layout finally feels effortless, the wrong lighting can flatten every texture and turn bedtime reading into a squint. Start by layering: a dimmable ceiling fixture or soft cove glow sets ambient ambiance, while bedside sconces keep surfaces clear and shadows controlled.

Aim beams across the headboard fabric and rug pile so their weave reads rich, not muddy.

For reading, choose adjustable arms or swivel shades that deliver task illumination directly onto the page, not into your partner’s eyes. Place switches where your hand naturally lands, and add warm bulbs (2700K–3000K) for skin-friendly calm.

Use two circuits or smart scenes: “Wind Down” for low glow, “Read” for crisp contrast, and “Rise” for gentle morning lift.

Add Hidden Storage to Make the Room Feel Bigger

Because a calm layout depends as much on what you *don’t* see as what you style, hidden storage can make your bedroom feel instantly larger without changing its footprint. Start with the bed: choose a platform with drawers or lift-up slats so bulky linens disappear and the floor reads as open, breathable negative space.

Add a nightstand with Hidden compartments to stash chargers, books, and eye masks, keeping the top surface clean for light to bounce.

Slide a slim dresser into a shadowy wall zone and use drawer dividers as quiet storage solutions that stop piles from spreading.

If your headboard sits proud, build a shallow ledge behind it for rarely used items.

Tuck hampers into closets so corners stay crisp and uncluttered.

Finish the Refresh With Rugs, Drapes, and Accents

You’ll lock in the refresh by layering rugs that warm up bare floors and define the bed zone underfoot. Hang drapes high and wide so they soften hard edges, filter daylight, and make the ceiling feel taller.

Then curate a tight edit of accent accessories—mixed textures, a few reflective touches—to catch lamplight without cluttering the layout.

Layer Rugs For Warmth

When the floor still feels a little bare after the big moves, layered rugs add instant warmth without stealing light or crowding your layout. Start with a low-pile, neutral base that tucks under the front two-thirds of the bed to anchor the frame and keep pathways crisp.

Then add a smaller, higher-texture topper—wool loop, vintage flatweave, or plush shearling—offset to one side where your feet land first.

Use Layer rugs to guide circulation: leave 18–24 inches of visible border so edges read intentional, not cramped.

If you’ve got Fireplace ambiance, choose a rug with subtle sheen or mottled pattern that catches flicker and lamplight, boosting depth while hiding everyday lint and footprints.

Hang Drapes To Soften

After you’ve anchored the floor with rugs, hang drapes to soften the hard lines of windows and walls while giving the light a prettier filter. Choose window treatments with enough fabric softness to look relaxed, not limp—think linen blends or brushed cotton that catch shadows and move slightly when air shifts.

Mount the rod wider and higher than the frame so panels stack off the glass and make the ceiling feel taller. Let hems kiss the floor for a tailored line, or hover a half inch for cleaner circulation near vents.

If you wake with strong morning sun, layer a sheer behind a blackout panel to tune brightness without flattening the room. Keep folds generous so light grazes the texture instead of bouncing hard.

Curate Accent Accessories

With drapes filtering the light and softening the window edges, let accent accessories carry that same layered feel across the rest of the room. Anchor the nightstands with decorative trays that corral a candle, hand cream, and a catchall, keeping surfaces calm while reflecting lamplight in small, controlled glints.

Add a ceramic vase or ribbed glass to echo the drape’s vertical fall, then balance it with a nubby box or woven bowl for tactile contrast.

Use artificial plants where daylight fades—on a dresser corner or high shelf—so greenery reads fresh without chasing the sun. Keep heights staggered, leave breathing room around the bed path, and repeat one metal finish to tie lighting, hardware, and accents into a cohesive glow.

Conclusion

You’ve turned your master bedroom into a quiet retreat that feels like a deep exhale. With layered bedding and touchable textures, the space reads warm and intentional. A simple palette keeps the eye calm while smart layout tweaks open clear paths around the bed, like smoothing wrinkles from a sheet. Dialed-in lighting—soft glow for mood, focused beams for reading—sets the tone. Hidden storage tucks clutter away, and rugs, drapes, and accents finish it.…

shower replacement guide overview
Plumbing & Electric Fixes

Replacing a Shower: Choosing the Right Unit and Completing the Swap Smoothly

You’ll swap a shower smoothly by measuring the rough opening stud-to-stud and recording the smallest dimensions, then confirming wall plumb, finish thickness, and valve depth for flush trim. Verify drain centerline, trap, venting, and required slope to meet code. Choose a stall, tub-to-shower, or walk-in that matches your drainage and waterproofing plan. Pick a rated pan, waterproofed walls, and tempered glass hardware. Keep going to see pro-level prep steps.

Key Takeaways

  • Measure the existing unit and rough opening accurately, noting out-of-plumb walls, smallest dimensions, and valve and shower arm heights.
  • Choose the shower type (stall, tub-to-shower, walk-in) based on drainage layout, waterproofing needs, entry clearance, and splash control.
  • Confirm valve and drain compatibility by checking pipe sizes, rough-in depth, drain centerline, trap and venting, and code requirements.
  • Select durable materials for pan, walls, and doors, prioritizing proper slope, waterproofing systems, slip resistance, and tempered safety glass hardware.
  • Do pre-demo inspections for hidden leaks, rot, stud blocking, shutoffs, and nearby electrical, and verify permits before altering plumbing or structure.

Measure for a Shower Replacement (Size and Rough Opening)

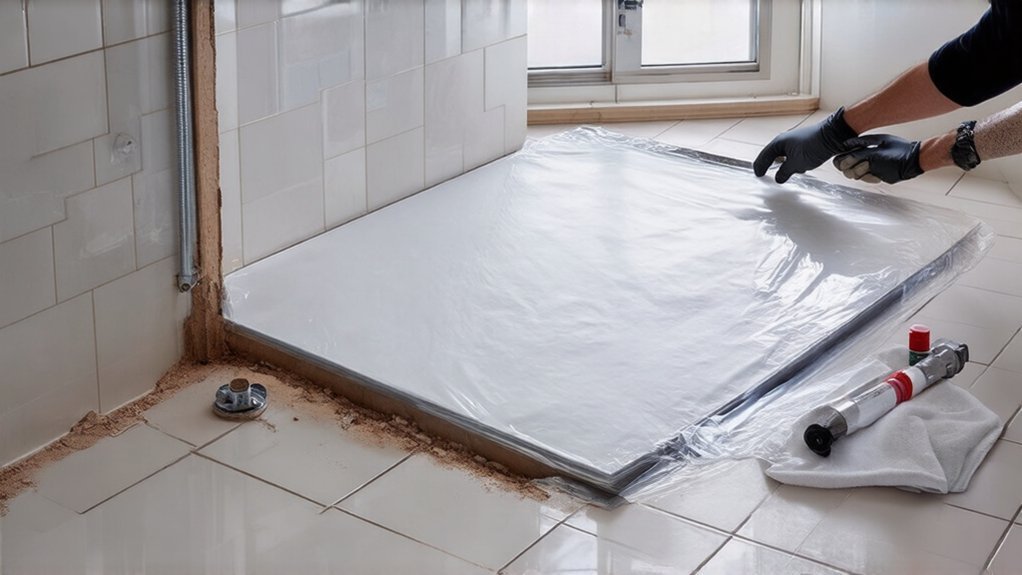
precise shower measurement guidelines

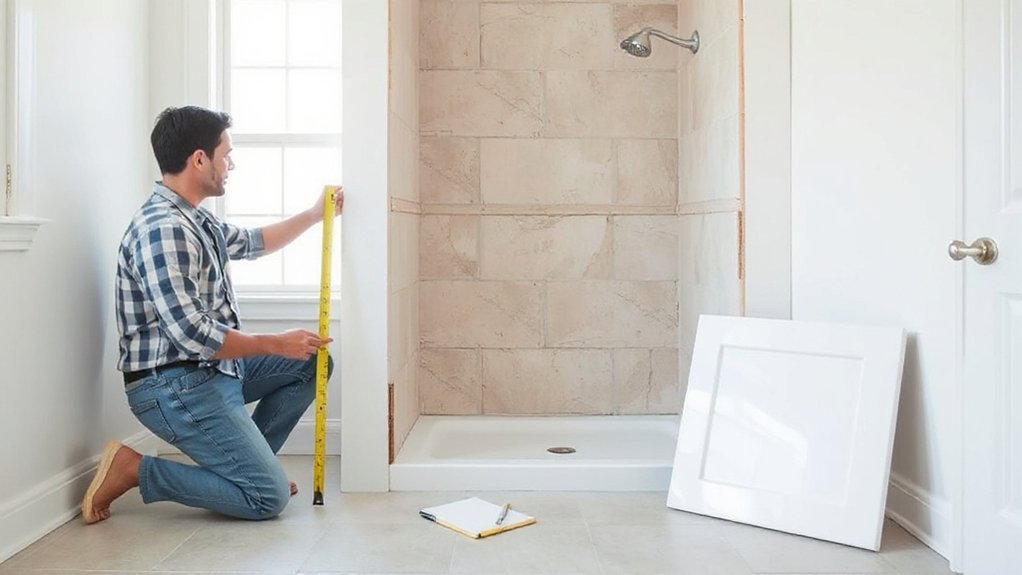
Before you order a replacement shower, measure the existing unit and the rough opening so the new base and wall kit fit without forcing framing changes that can compromise waterproofing.

Remove trim, then measure width and depth stud-to-stud at the curb line and back wall, plus height to the valve and shower arm.

Check for out-of-plumb walls and record the smallest dimension; you can’t assume a square opening.

Verify drain centerline from each wall and confirm trap location stays within code-required slope.

Note wall finish thickness so your tile patterns align at corners and niches without slivers.

Measure valve depth to ensure the trim plate seats flush.

Confirm supply line size and spacing so water pressure won’t drop after reconnecting.

Choose Your Shower Type (Stall, Tub-to-Shower, Walk-In)

Although your rough opening may accept several configurations, you should choose the shower type—standard stall, tub-to-shower conversion, or walk-in—based on drainage layout, waterproofing method, and the clearance requirements you must meet for safe entry, door swing, and service access.

A standard stall fits tight bathrooms and simplifies wall-to-pan waterproof progressions; select slip-resistant flooring and tempered-glass doors with required clearances.

A tub-to-shower conversion boosts accessibility, but you’ll need a continuous water containment strategy, solid backing at grab-bar locations, and a threshold that won’t trip users.

A walk-in suits aging-in-place plans; keep entry width generous and control splash with panels, slopes, and properly located floor waterproofing.

Match Shower aesthetic to maintenance needs and choose Water saving features.

Confirm Shower Valve and Drain Compatibility

Once you’ve settled on a shower format, verify that the new valve and drain will match your existing plumbing sizes, locations, and code requirements so you don’t end up opening more wall or slab than planned.

Confirm your supply line diameter and valve inlet type (threaded, solder, or PEX) and choose a pressure-balancing or thermostatic valve as required.

Check water pressure and validate the valve’s flow rate meets fixture and local limits.

Measure rough-in depth and stud bay clearance so the trim sits flush and the stop valves remain accessible.

For the drain, match outlet size, trap type, and centerline location, and confirm the trap arm ties into a properly sized vent.

Review ventilation requirements before closing walls, and pressure-test for leaks.

Select Shower Pan, Wall, and Door Materials

When you choose shower pan, wall, and door materials, balance durability, water management, and the installation method your framing and subfloor can safely support. Pick an acrylic or fiberglass pan for lighter loads, or a mortar-set solid-surface pan for rigidity. Verify it’s listed for wet locations and slopes 1/4 inch per foot to the drain.

For walls, use tile over a bonded waterproof membrane or solid panels with sealed joints. Keep fasteners out of horizontal surfaces and follow manufacturer-approved sealants. Favor eco-friendly materials like low-VOC sealants and recycled-content panels where available.

For doors, choose tempered safety glass with corrosion-resistant hardware. Confirm clearances, and plan shower fixture selection so spray patterns stay inside the enclosure.

Prevent Shower Replacement Surprises Before Demo Day

After you’ve locked in the pan, wall system, and door style, head off demo-day problems by verifying what’s behind and under the old shower. Pull the trim plate and inspect the valve type, pipe material, and shutoffs; plan upgrades if they won’t meet Plumbing codes.

Check stud spacing, blocking for grab bars/doors, and whether the drain is centered for your new pan. Probe the subfloor from an access panel for rot, deflection, or prior leaks, and confirm you’ve got adequate joist notching clearance.

Identify electrical nearby (fans, lights, outlets) and protect circuits before you swing tools. Confirm permits requirements with your local building department, especially for valve or drain relocation, so inspections don’t halt progress.

Conclusion

You’ve measured the rough opening, chosen the right shower type, verified valve and drain alignment, and selected durable pan, wall, and door materials—now you’re ready to swap units without drama. Treat demo day like opening a wall with a seatbelt on: shut off water, verify circuits, wear PPE, and protect framing from moisture. Follow manufacturer specs, slope the pan to the drain, seal per code, and test for leaks before closing.…

improve bathroom kitchen water pressure
Plumbing & Electric Fixes

How to Fix Low Water Pressure in Bathrooms and Kitchens

Check whether low pressure hits one fixture or the whole house by testing hot and cold at several taps, then confirm with a hose-bibb gauge (aim 40–60 psi). If it’s isolated, remove and clean the faucet aerator or showerhead screen with vinegar and flush debris. For tub/showers, strong tub flow but weak shower points to a worn diverter. If it’s everywhere, verify valves are fully open, inspect supply lines, and check the PRV. More steps follow.

Key Takeaways

  • Test hot and cold at several fixtures to see if low pressure is localized or affects the whole house.
  • Measure static and running pressure with a hose-bibb gauge; aim for 40–60 psi and note drops under flow.
  • Fully open main shutoff, meter valve, and under-sink angle stops; replace kinked or collapsed supply lines.
  • Clean or replace faucet aerators and showerhead screens by removing debris and soaking parts in white vinegar.
  • If pressure is low everywhere, check/adjust the PRV and look for leaks using the water meter; call a plumber for hidden leaks.

Diagnose Low Water Pressure: One Fixture or Whole House

check entire plumbing system

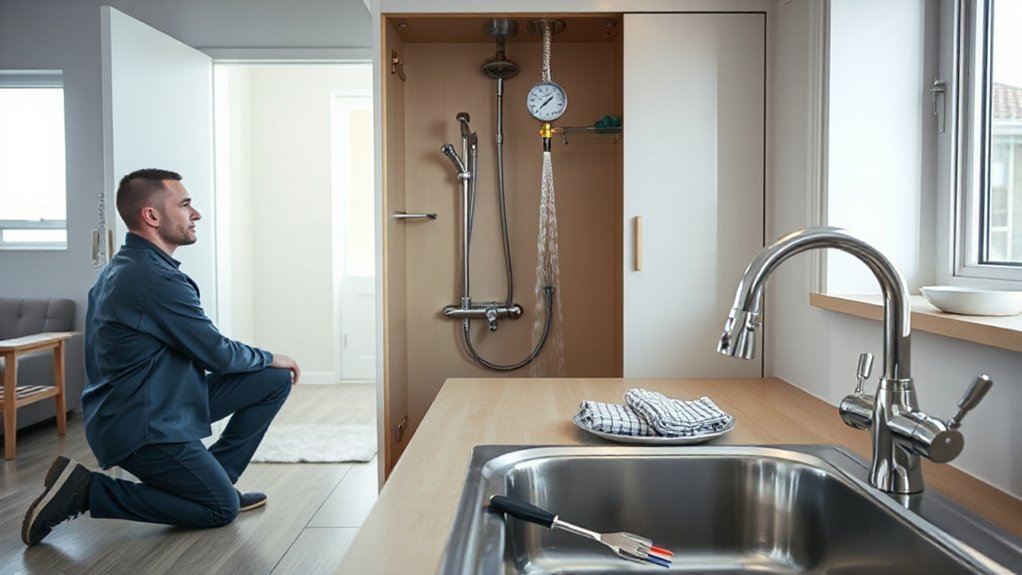
Before you start adjusting valves or swapping parts, confirm whether the pressure drop affects one fixture or the whole house. Check both hot and cold at several taps, then compare showers, kitchen, and outdoor hose bibbs to isolate zones.

For Water pressure testing, thread a gauge onto a hose bibb or laundry tap and record static pressure, then open a fixture to note dynamic pressure. Most homes target 40–60 psi per common code guidance.

If readings are low everywhere, verify the main shutoff and meter valve are fully open and look for recent utility work.

If pressure is normal at the gauge but weak at distant branches, prioritize Pipe corrosion detection: inspect exposed galvanized runs, discoloration, pinhole leaks, or debris at shutoffs.

Fix Low Water Pressure at Faucets (Aerators & Buildup)

Once you’ve confirmed the pressure drop shows up at a specific faucet rather than the whole house, start with the simplest restriction point: the aerator or faucet outlet.

Shut off the faucet, close the drain, and use padded pliers to remove the aerator without damaging the finish. Inspect the screen for debris and mineral buildup; note whether flow improves with the aerator removed (briefly run water to test, controlling splash).

Perform aerator cleaning by soaking parts in white vinegar, then brushing and rinsing. Replace cracked screens or missing O-rings to prevent leaks.

If the faucet has a concealed outlet, follow the manufacturer’s instructions and don’t exceed torque.

Restore service, verify steady flow on hot and cold, and recheck for drips.

Fix Low Water Pressure in the Shower (Head, Restrictor, Diverter)

If the low pressure shows up mainly in the shower, isolate whether the restriction sits at the showerhead, the flow restrictor, or the tub/shower diverter.

Start by turning off the shower, then cover the drain so small parts can’t fall in. Unscrew the shower head and check the inlet screen for grit or scale; flush it and soak parts in vinegar if allowed by the manufacturer.

If spray is still weak, look for flow restrictors inside the head or connector; remove only if your local code permits, since many jurisdictions require them for water efficiency.

For tub/shower combos, run the tub spout: strong tub flow but weak shower points to a worn diverter. Replace the diverter assembly or spout per listed parts.

Check Shutoff Valves, Supply Lines, and the Pressure Regulator

Low pressure that isn’t confined to a single fixture usually traces back to a partially closed shutoff, a kinked or clogged supply line, or a misadjusted pressure-reducing valve (PRV).

Start with Valve maintenance: confirm the main valve and all branch shutoffs are fully open, then check under-sink angle stops for seized stems or debris. Inspect braided connectors for sharp bends, crushing, or internal liner collapse, and replace any damaged line with the correct rated length and washers.

Next, do Pressure testing with a threaded gauge at a hose bibb or laundry tap; most systems should read roughly 40–80 psi. If pressure is low everywhere, inspect the PRV direction arrow and screen, then adjust per manufacturer instructions, in small increments, without exceeding code limits.

Find Hidden Leaks and Know When to Call a Plumber

Because a concealed leak can mimic system-wide pressure loss, you should rule it out before you keep adjusting valves or the PRV.

Start with Leak detection: shut off all fixtures, then watch the water meter; if the dial moves, you’ve got flow somewhere. Check under sinks, behind toilets, at the water heater, and along exposed piping for corrosion, staining, or damp insulation. Listen for hissing in walls and note warm spots on slabs.

Don’t ignore a running toilet; it can drop pressure at other taps.

For Plumbing maintenance, replace failed supply lines and repair dripping stop valves promptly.

Call a licensed plumber if you suspect a slab leak, hidden piping failure, gas water heater issues, or any code-required repairs.

Conclusion

Low water pressure won’t fix itself, but you can. You diagnose whether it’s one fixture or the whole house, you clean aerators and flush buildup, you service the showerhead, restrictor, and diverter, and you confirm shutoffs, supply lines, and the pressure regulator are fully open and set within code. You listen for leaks, you watch the meter, you document changes. If pressure stays unsafe or pipes show damage, you call a licensed plumber.…

design shaded garden seating
Garden & Outdoor

How to Create a Shaded Seating Area Using Pergolas or Garden Structures

Map your pergola footprint to the sun path, shadows, and clearances, then size the roof plane to extend 18–24 inches beyond chair backs and confirm permits, setbacks, and wind/snow loads. Choose attached construction for clean progressions and predictable framing, or go freestanding when grade, drainage, or trees limit tie-ins. Tune shade with slats set perpendicular to harsh afternoon sun, adjustable louvers, solid panels, retractable fabric, or vines, then add screens and low-glare lighting for comfort. Keep going for system-specific detailing.

Key Takeaways

  • Map the pergola footprint to sun paths and verify shade at noon and 3 p.m. to place seating in peak shade.
  • Size the roof plane to extend 18–24 inches beyond chair backs, and confirm setbacks, permits, and wind/snow anchorage requirements.
  • Choose a roof system—solid panels, adjustable louvers, or retractable fabric—based on desired shade control, ventilation, and rain runoff.
  • Optimize shade by orienting slats perpendicular to harsh afternoon sun and tightening spacing (about 8–12 inches o.c.) as needed.
  • Add living shade or screens using trained vines, privacy panels, or outdoor curtains, positioned to block glare and key sightlines.

Plan Your Pergola Layout (Sun, Space, Permits)

plan position and permit carefully

Before you buy lumber or set footings, map your pergola’s footprint against the sun path, your available clearances, and local code constraints.

Track Sun exposure at morning, solar noon, and late afternoon; note shadow lines from your house, trees, and fences.

Position seating where peak shade lands during your actual use hours, then size the roof plane to extend at least 18–24 inches beyond chair backs.

Verify setbacks from property lines, overhead service drops, and easements, and keep post locations clear of irrigation, septic, and roots.

Check permit requirements for accessory structures, including height limits, anchorage details, and snow/wind loads.

Call 811, mark utilities, and document the layout for inspections.

Choose a Pergola: Attached vs Freestanding

Although both styles can deliver usable shade, choosing between an attached pergola and a freestanding pergola comes down to how you want the structure to transfer loads, manage water, and define circulation on your specific site.

Attach to the house when you’ve got sound framing to lag into, predictable eave heights, and you want a clean threshold from interior to patio. You’ll simplify footings, but you must detail flashing, ledger isolation, and roof runoff so you don’t trap moisture against siding—key for Pergola maintenance.

Go freestanding when setbacks, trees, or grade changes make anchoring cleaner, or when you want the pergola to act as a room in Garden design. You’ll add more piers and bracing, yet you’ll gain flexible orientation and clearer drainage paths.

Compare Pergola Shade Options (Louvers, Panels, Fabric)

Once you’ve set the pergola’s footprint and orientation, you’ll choose a shade system that matches your sun path, wind exposure, and drainage plan.

Adjustable louvered roofs let you tune light and ventilation while shedding water when pitched and guttered correctly.

Solid panel coverings lock in full-time shade and require precise slope and flashing at connections.

Retractable fabric canopies give you flexible coverage with minimal dead load, but you’ll need clean anchor lines, tensioning hardware, and a wind stow strategy.

Adjustable Louvered Roofs

When you need a pergola roof that can track shifting sun angles and sudden weather changes, adjustable louvers give you the most controllable shade envelope. You can tune blade pitch to block high summer sun yet admit low winter light, which lets you target comfort at the seating zone instead of over-darkening the whole deck.

Align the louvers perpendicular to the primary afternoon exposure (often west/southwest) to reduce glare and radiant load. Specify gutters and downspouts integrated into the beams so runoff doesn’t sheet onto cushions.

For wind-prone sites, choose a system with lock-in-place blades and anemometer-driven automated shading that parks the roof open or closed based on thresholds. Add concealed LED strips and fan mounting points without compromising drainage paths.

Solid Panel Coverings

Where do solid panel coverings outperform louvers and fabric? You’ll see the advantage on wind-exposed decks, coastal sites, and courtyard pergolas where you want fixed, all-day shade and dependable rain shedding.

Specify insulated aluminum panels or polycarbonate sheets when you need thermal buffering, UV control, and a clean ceiling plane for recessed downlights, fans, and conduit runs. You can pitch panels 1/4 inch per foot to a gutter beam, then route downspouts to a drain or rain garden to keep paving dry.

Use opaque panels over dining zones to reduce glare, while leaving perimeter bays open for cross-ventilation.

Solid panel coverings also deliver aesthetic enhancement by aligning seams with rafter spacing and matching trim to fascia colors.

Retractable Fabric Canopies

Although you can engineer permanent shade with louvers or solid panels, a retractable fabric canopy gives you tunable coverage that adapts to sun angle, breezes, and how you actually use the patio hour to hour.

Mount tracks tight to the pergola beams so the fabric rides above head height, and align the opening direction with prevailing wind to reduce sail forces.

Prioritize canopy materials rated for UV, mildew, and colorfastness; solution-dyed acrylic or PVC-coated polyester handles high exposure better than cotton blends.

Specify fabric tensioning at both the lead bar and rear anchor so you don’t get ponding after rain or noisy flutter in gusts.

Add a slight pitch, integrate drain points, and place tie-backs where you’ll park the shade at sunset.

Control Sun With Pergola Slats and Spacing

Because the slat layout dictates how much direct beam sunlight reaches your seating zone, you should treat pergola spacing and orientation as a controllable shading system rather than a decorative detail.

For Sun control, set slats perpendicular to the harshest afternoon azimuth; on west-facing patios, run members north–south so they cast longer shadows during peak heat.

Adjust Pergola spacing to your latitude and desired shade factor: 2×6 slats at 12 in. o.c. give intermittent shade, while 8 in. o.c. tightens cut-off and reduces glare.

Increase slat depth to improve angle blocking without closing airflow.

If your seating faces low morning sun, cant slats 10–15° or add a secondary cross-batten to break beam paths.

Verify with a noon/3 p.m. site check.

Add a Retractable Pergola Canopy or Shade Sail

If your pergola slats can’t cover every sun angle, you can add a retractable canopy system—track-guided fabric, cable-driven panels, or a motorized roller—sized to your bay spacing and post layout.

If you’re using a shade sail instead, you’ll set attachment points to match your seating footprint, pitch it for runoff, and align it to block peak afternoon exposure without clipping circulation paths.

Specify UV-stabilized HDPE or solution-dyed acrylic with rated UPF, corrosion-resistant hardware, and reinforced corners so the assembly holds tension and maintains shade performance season after season.

Retractable Canopy Options

Where does the sun hit hardest during your peak-use hours—midday over the dining set, or late afternoon across the lounge zone? Specify a retractable canopy that tracks that exposure: a rail-guided pergola canopy for linear coverage, or a cable-suspended tension fabric panel for flexible span. You’ll control heat gain while keeping views open when shade isn’t needed.

Choose weatherproof materials matched to your microclimate: solution-dyed acrylic for UV stability, PVC-coated polyester for higher tensile strength, or PTFE-coated fabric for maximum longevity.

Detail the hardware like you’d exterior trim: marine-grade stainless fasteners, anodized aluminum tracks, and low-friction carriages. Add a slight crown or integrated gutter line so runoff doesn’t pond, and include wind-locks or breakaway clips to protect the structure.

Shade Sail Placement Tips

Even though a shade sail reads like a simple fabric plane, you’ll get the best performance by placing it from a sun-path and anchor-load plan rather than by eye. Map summer noon and late-afternoon angles, then skew the sail so its longest edge blocks the worst glare on your outdoor furniture.

Keep one corner higher to drive runoff away from seating and pathways, and maintain consistent tension lines to prevent flutter.

If you’re tying into a pergola, align fixings to posts or beam nodes, not mid-span members, and keep hardware accessible for seasonal retensioning.

Avoid placing edges where ladders or pruning tools swing during garden maintenance.

Set clear zones for grills, doors, and circulation so the sail doesn’t turn your shade into an obstacle.

Materials And UV Protection

Because UV exposure and heat load vary by orientation and nearby reflective surfaces, choose canopy or shade-sail fabrics by rated UV block, permeability, and hardware grade rather than by color alone.

Aim for 90–98% UV protection in open patios; use tighter weaves on south- and west-facing edges, and more permeable mesh where wind funnels between buildings.

Specify solution-dyed acrylic or high-density polyethylene for material durability, and confirm mildew resistance if the canopy will retract into a cassette.

Match thread and webbing to the cloth (PTFE or UV-stabilized polyester).

For hardware, use 316 stainless or hot-dip galvanized fittings, and isolate dissimilar metals to prevent corrosion.

Add a retractable track system or tensioned sail with turnbuckles so you can tune pitch and shed rain.

Shade a Pergola With Climbing Plants and Vines

If you want your pergola to cast real, usable shade without adding a solid roof, train climbing plants and vines up the posts and across the rafters to form a living canopy. Match species to exposure: use deciduous options on south and west faces for summer shade and winter sun, and evergreen only where year-round cover won’t darken interiors.

Install stainless eye screws and tensioned wire or mesh beneath rafters so shoots grip quickly and loads transfer cleanly to beams. Space planting 18–24 inches off footings with drip irrigation and root barriers near paving.

Use Vining strategies like two-leader training per post, lateral weaving every 12 inches, and midsummer tip-pruning to thicken cover. Choose climbing plants with non-invasive habits and manageable weight.

Add Pergola Privacy Screens, Curtains, or Panels

Where do you need the most screening—street side, a neighboring second-story window, or wind-driven afternoon sun? Map sightlines from seated height and identify the azimuth of glare. Then position Privacy screens on the pergola’s outer bays, prioritizing west and northwest exposures.

Use slatted cedar, perforated metal, or composite panels set 1–2 inches off posts for drainage and airflow. Keep panel height just above eye level to preserve openness while blocking views.

If wind is a factor, brace with hidden Z-clips and choose 40–60% open area to reduce sail effect.

Add decorative curtains only on leeward sides; hang them on stainless cables with weighted hems and tie-backs so they track smoothly and don’t whip. Seal fasteners for corrosion resistance.

Finish the Pergola Seating Area With Lighting and Decor

Once the screens and panels lock in your sightlines, you can tune the pergola into a usable room after sunset by layering lighting and weather-rated decor to match your layout and exposure.

Start with Outdoor lighting on two circuits: an overhead ambient run (dimmable string or linear LED under rafters) and low-glare task points at seating edges. Aim fixtures away from neighbors and down toward the floor plane to cut spill and insects.

If wind funnels through the structure, choose shatterproof globes and stainless hardware. Add step or post-cap lights to mark circulation from patio to lawn.

Then finish with decorative accents that resist UV and moisture: solution-dyed cushions, powder-coated planters, and a washable outdoor rug sized to keep front chair legs on it. Anchor decor for gusts.

Conclusion

You’ve dialed in your pergola layout to match sun angles, setbacks, and any permit requirements, then chosen attached or freestanding structure for the cleanest site fit. Now you control shade with louvers, panel spacing, retractable canopies, or a shade sail tuned to your seating zone. You can soften it with vines, then tighten comfort with privacy screens or curtains. Finish with task lighting and weather-rated décor—your patio will feel like a million suns switched off.…

questions for estate agents
Home Upgrades & Renovations

Essential Questions to Ask an Estate Agent Before You Commit

Before you sign, get the full agency agreement and confirm scope, authority, term, notice, and whether it’s sole or multi-agency. Demand a complete fee schedule (commission, VAT, add-ons) and exactly when it’s payable, including any “ready, willing and able” or post-termination “tail” clauses. Ask for written nearby sold comparables and verify them. Require a documented pricing plan, marketing timetable, viewing controls, buyer proof-of-funds checks, and sale-progression updates—there’s more that can protect you.

Key Takeaways

  • What agency agreement are you asking me to sign, what’s the term, and can I terminate early without penalties?
  • What is your full fee schedule, including VAT, minimum fees, and all extras like marketing, photography, EPC, and viewings?
  • When exactly is commission payable, and do you have “ready, willing, and able” or post-termination buyer-introduction clauses?
  • What recent comparable sales support your valuation, and can you provide written evidence with dates, tenure, and key differences?
  • Who will manage viewings and negotiations, how are buyers qualified, and what update frequency and escalation route will I get?

What to Ask Before You Sign Anything?

important contract and fee details

Before you sign anything, ask for the full agency agreement and all attached terms, then confirm—in writing—exactly who you’re appointing, what authority you’re granting, and when the contract starts and ends.

You should ask whether the instruction is sole, joint, or multi-agency, and how that choice affects fees, liability, and termination rights.

Require a clear fee schedule: commission rate, VAT, minimum fees, and any extra charges for marketing, photography, EPCs, or accompanied viewings.

Clarify when commission becomes payable, including “ready, willing, and able” clauses and sales that complete after termination.

Ask for their Pricing strategies in writing, with assumptions and review triggers.

Finally, check legal considerations: complaints process, data handling, conflicts of interest, and whether they’re tied to conveyancers or lenders.

What Have They Actually Sold Nearby?

Once you’re clear on the contract terms, test whether the agent can justify their advice with evidence from completed sales, not just listings. Ask for a written list of their recent sales within your street or a tight radius, including sale dates, property type, tenure, and any material differences (extensions, parking, condition).

Verify each sale independently via Land Registry, auction results, or the agency’s own completion notices. Check whether they acted for the seller or buyer. You should also ask how many instructions they took nearby that didn’t complete and why, because fall-throughs reveal process risk and chain management weaknesses.

Press them to explain how those outcomes reflect the local market, and require supporting documentation you can keep on file for audit and complaints purposes.

How Will They Price Your Home: and Why?

Although an agent may talk confidently about “the right number,” you should require a pricing rationale you can evidence and defend, because an inflated or poorly supported figure increases time-on-market, weakens your negotiating position, and can trigger valuation issues with lenders.

Ask them to explain their Market analysis: which comparable sales they rely on, what adjustments they’ve made for condition, tenure, square footage, and recent local supply changes, and what data period they’ve used.

Require a written Pricing strategy showing the initial list price, the review date, and objective triggers for reduction.

Confirm whether they’ve considered likely mortgage valuation outcomes and any title or planning factors that may limit value.

Finally, check for conflicts: are they incentivised by winning instructions rather than achieving completion?

How Will They Market It (Portals, Photos, Strategy)?

Even if your agent promises “maximum exposure,” you should pin them down on the exact marketing plan they’ll execute and the controls they’ll use to protect your position. Ask which portals they’ll use, whether listings appear on all major sites, and who owns the advert copy and images if you switch agents.

Confirm timelines: when photos go live, when copy is approved by you, and when the first viewing window starts.

Insist on professional photography standards, floorplans, EPC display, and accurate measurements to reduce misrepresentation risk.

Test their digital presence: social campaigns, retargeting, email lists, and tracking reports you’ll actually receive.

Require a coherent branding strategy for your property, not generic templates.

Finally, ask how they’ll handle data privacy, cancellations, and corrective updates without weakening your negotiating stance.

What Will It Cost, and What Are the Contract Tie-Ins?

Before you sign anything, get the full fee schedule in writing and treat the contract terms as a liability you’re actively managing, not boilerplate. Demand Fee transparency: confirm the commission rate, whether it’s fixed or tiered, and what triggers it (exchange, completion, or introduction). Ask for every add-on cost—photography, floorplans, EPC, premium portal listings, accompanied viewings—and whether VAT applies. Verify who pays if you withdraw, renegotiate, or accept a private offer.

Then scrutinise the tie-ins. Pin down Contract duration, notice periods, and any automatic renewal. Clarify sole agency versus multiple agency, and the “ready, willing and able purchaser” clause. Require written rules on post-termination fees for buyers introduced during the term, with a defined tail period.

Who’s Your Day-to-Day Contact, and How Often Will They Update You?

clear communication and reporting procedures

When you instruct an agent, you’re also choosing who controls the flow of information and, by extension, your risk exposure on price, timing, and compliance. Ask who your named, day-to-day contact is, and get it confirmed in writing, not implied by a generic “team” model. Clarify whether they’re a negotiator, branch manager, or administrator, and who covers sickness, holidays, or high workload so nothing stalls.

Define the cadence and format of updates: weekly minimum, same-day reporting after material events, and written summaries you can retain. Specify what counts as “material” (offers, price feedback, marketing changes, delays, complaints).

Test agent availability: hours, response times, and escalation routes. Strong client communication reduces misunderstandings and supports your audit trail if disputes arise later.

Who Runs Viewings, and How Do They Qualify Buyers?

Clear updates only help if the right facts get gathered at the viewing stage, so you should pin down who actually conducts viewings and how they screen applicants. Ask whether a named negotiator attends, or if third-party staff run appointments, and require confirmation in writing.

Demand clear Viewing procedures: ID checks, attendee logs, supervision rules, feedback capture, and how they handle keys, alarm codes, and data protection.

Then drill into Buyer qualifications before any offer reaches you. You should insist they verify proof of funds, mortgage agreement in principle, deposit source, chain position, and timescale, and that they record this evidence.

Ask how they flag cash buyers versus financed buyers, and how they filter speculative viewers, investors, and undisclosed intermediaries. Make sure they won’t share your personal details without consent.

How Will They Negotiate: and Manage the Sale to Completion?

Although the agent can’t control your buyer’s solicitor or lender, they do control how firmly they negotiate your position and how tightly they project-manage the deal to completion.

Ask which Negotiation tactics they’ll use on price, fixtures, timelines, and conditional offers, and how they’ll document every concession to avoid later disputes.

You should require clear escalation routes: who approves counteroffers, how quickly they’ll respond, and when they’ll recommend walking away.

Confirm they’ll issue written sales memos promptly, chase mortgage offers, surveys, searches, and enquiries, and keep a dated audit trail.

Ask how they’ll handle gazumping risk, down-valuations, and renegotiation after surveys.

Finally, confirm their Sale closure process: weekly updates, completion-day coordination, and handover evidence.

Conclusion

Before you commit, treat your choice of estate agent like signing a contract in the dark: you’ll want a torch. You’ve reduced risk by testing local results, pricing logic, marketing detail, fees, and tie-ins. You’ve also clarified who reports to you, how viewings are controlled, how buyers are vetted, and how negotiation and progression are managed. If anything’s vague, insist on it in writing—or walk away.…

professional painting techniques guide
Painting & Decorating

The Ultimate Guide to Painting Ceilings, Walls and Trim Like a Pro

You’ll paint like a pro by choosing the right sheen—flat for ceilings, eggshell or satin for walls, semi-gloss for trim—and the correct primer for stains, bonding, or drywall. You’ll wash surfaces, scrape loose paint, caulk gaps, patch and sand smooth, then vacuum and spot-prime. Start with the ceiling: cut in edges, then roll in overlapping passes while keeping a wet edge. Roll walls in 3×3 “W” sections, then brush trim with long, tipped-off strokes. Keep going to refine every step.

Key Takeaways

  • Choose the right finish and primer, test color samples in room lighting, and calculate paint gallons by square footage.
  • Clean, scrape, caulk, patch, sand, vacuum, and spot-prime repairs and stains to ensure smooth, durable adhesion.
  • Paint ceilings first: cut in edges, then roll overlapping passes while keeping a wet edge to prevent streaks.
  • Paint walls in 3×3-foot “W” sections, overlapping into wet paint and maintaining consistent pressure to avoid lap marks.
  • Finish with trim: prime bare areas, sand smooth, then brush long, controlled strokes and “tip off” to level without runs.

Choose Paint, Primer, and Tools (Checklist)

paint selection and preparation

Before you open a can, decide on the exact paint finish for each surface (flat for ceilings, eggshell or satin for walls, and semi-gloss for trim). Then choose a matching primer based on what you’re covering (stain-blocking for water marks, bonding for glossy surfaces, and drywall primer for new mud).

Confirm color coordination by sampling chips in the room’s lighting and checking undertones against flooring and trim. Buy one quality acrylic latex line for consistent touch-ups, and match paint sheens across adjacent rooms to avoid visual breaks.

Use a 2-inch angled sash brush for trim, a 9-inch roller with 3/8-inch nap for walls, and a 1/2-inch nap for textured ceilings. Add extension pole, painter’s tape, drop cloths, liner, and stir sticks.

Measure square footage to calculate gallons accurately.

Clean, Patch, Sand, and Prime Surfaces

Once you’ve picked your paint and tools, prep the surfaces so the finish levels out and sticks. Start with surface preparation: wash ceilings, walls, and trim to remove dust, grease, and soap film, then rinse and let everything dry fully.

Scrape loose paint, caulk gaps, and cut away failing edges. Patch dents and nail holes with spackle or filler, and repair cracks with setting compound; let patches cure. Sand repairs flush and feather surrounding paint to eliminate ridges that telegraph through finish textures.

Vacuum dust, then wipe with a damp microfiber cloth. Spot-prime stains, bare drywall, and repaired areas, and prime glossy trim after scuff-sanding. Let primer dry, then lightly sand and clean again for crisp adhesion.

Paint the Ceiling: Cut In, Then Roll

After the primer dries and you’ve masked or protected the walls and floors, start with the ceiling so you don’t drip onto finished work. Choose a flat or matte paint sheen to hide imperfections and match the ceiling texture. Stir thoroughly, then pour into a cut bucket and load a 2–2½-inch angled sash brush.

Cut in a 2–3-inch band along edges, around vents, and at light boxes, keeping a wet edge.

Next, roll immediately while the cut-in is still wet. Use a ⅜-inch nap for smooth ceilings or ½–¾-inch for heavier ceiling texture. Roll in straight, overlapping passes, then lightly back-roll to even coverage.

Work in manageable sections, and keep your roller evenly loaded.

Paint Walls Fast Without Lap Marks

Because lap marks form when paint starts to dry before you blend the next pass into it, you need to work in a controlled, continuous pattern. Load your roller evenly, then roll a 3-by-3-foot section in a “W” and fill it without lifting off.

Keep a wet edge by overlapping the previous section 2–3 inches while it’s still glossy. Refill before the roller sounds dry, and don’t overwork areas that are starting to tack.

Maintain consistent pressure and speed, and back-roll lightly in one direction to level the film.

Use Color coordination to spot holidays under your lighting and correct them immediately.

Apply Texture techniques by matching roller nap to wall texture and avoiding mixed nap sizes across walls.

Paint Trim Smooth With Crisp Lines

Although trim paint seems forgiving, it shows every ridge, brush mark, and wavy cut line under side light, so you’ll get the cleanest result by controlling the surface and the edge.

Start with Trim detailing: fill nail holes, sand flush to 180–220 grit, then vacuum and tack. Prime bare wood or patched spots, and lightly scuff again once dry.

Load a quality angled sash brush, then wipe one side to control paint.

For Edge brushing, cut the wall-to-trim line first using the brush’s tip, moving in 12–18 inch runs. Don’t push hard; let the bristles flex.

Then paint the face with long strokes following the grain, and “tip off” once to level. Maintain a wet edge, and stop before it drags.

Conclusion

Now you’ve got a repeatable system: pick the right paint and tools, prep until surfaces feel uniform, then work top-down. Cut in tight, roll in controlled sections, and keep a wet edge so your walls dry like glass. Finish with smooth trim and clean lines by removing tape at the right time. Follow these steps every room, and your results won’t rely on luck—they’ll be consistent, professional, and durable.…

victorian fireplace restoration guide
Home Upgrades & Renovations

A Step By Step Guide To Restoring Ornate Victorian Fireplaces

Start by inspecting the breast, throat, liner, hearth, tiles, and cast iron for cracks, bulges, soot leaks, loose bedding, and maker’s marks. Protect the room with dust sheets, sealed polythene, floor paths, and a fan exhausting outward plus HEPA filtration. Test every paint layer for lead before you strip. Clean soot first, then apply a low-odor gel stripper and scrape gently. Re-bed tiles and pack gaps with lime mortar, then refinish with heat-tolerant, breathable coatings, and you’ll uncover further practical specifics ahead.

Key Takeaways

  • Inspect the fireplace for cracks, flue leaks, loose hearths, and cast-iron damage; record maker’s marks and original fixings before disturbing anything.
  • Protect the room with dust sheets, floor barriers, sealed polythene, and HEPA extraction; ventilate outward using a box fan in a window.
  • Test all painted surfaces for lead using certified swabs or lab samples; stop and hire specialists if lead is confirmed.
  • Clean soot first with HEPA vacuum and soot sponge, then strip paint with low-odor gel; scrape gently and dry thoroughly between passes.
  • Repair and refit using lime-based mortar, tighten surrounds, seal gaps for expansion, then finish with breathable, heat-tolerant primers and topcoats.

Inspect Your Victorian Fireplace (and DIY Red Flags)

inspect victorian fireplace thoroughly

Before you pick up a scraper or order replacement tiles, inspect the fireplace the way a Victorian builder would’ve—starting with what carries heat and load. Check the breast for hairline cracks, bulging plaster, and soot ghosts that mark flue leaks.

Shine a torch up the throat; you’re looking for a sound clay liner, intact parging, and no tarry glaze.

Test the hearth for movement and examine bedding mortar for crumbling lime.

Tap cast iron with a knuckle: a clear ring beats a dull thud.

Note stamped maker’s marks, tile dimensions, and original fixings for Historical accuracy and Material preservation.

DIY red flags: spalled brick, loose lintels, salt bloom, or any smoke smell when cold. Call a sweep or mason.

Protect the Room: Dust Control and Ventilation

Although the fireplace is the star of the job, the room takes the first hit if you don’t control soot and lime dust. Clear the hearth area, roll up rugs, and cover cornices, mantels, and nearby furniture with cotton dust sheets, then tape the seams.

Lay rosin paper and hardboard paths to protect original boards and tiles. Seal the opening with polythene and painter’s tape, leaving a small flap for tools.

Set a box fan in a cracked window to exhaust outward, and open a second window for make-up air.

Add Air filtration with a HEPA unit positioned behind you, not blowing at the work.

For odor control, place bicarbonate trays and change them daily.

Test for Lead Paint Before You Strip

With the room sealed and air moving out through the window fan, turn to the paint on the surround, mantel, and any cast-iron insert—Victorian layers often include lead. You’ll confirm before you disturb a single flake.

Choose an EPA-recognized swab kit or collect chips for a lab; the latter suits thick, multiple-coat finishes common to late-19th-century work.

For Lead paint testing, score through all layers with a sharp knife at an inconspicuous edge, then test the cut, not the surface glaze. Use fresh gloves, label each location, and note colors and strata in a notebook, as restorers did with shop records.

If any result reads positive or uncertain, stop and plan Hazardous materials removal with a qualified professional, and protect children and pets in adjacent rooms.

Clean Soot and Strip Paint Safely

Once you’ve cleared the lead question, tackle soot and paint in separate, controlled passes so you don’t grind carbon into the grain or drive softened finish into joints. Start dry: vacuum with a soft brush, then use a soot sponge on cast iron, marble, or timber, working top to bottom. Follow with a barely damp cloth and pH-neutral soap; keep water away from seams and porous stone.

For fireplace restoration, shift to paint removal techniques only after surfaces are clean. Score paint edges with a knife, then apply a low-odour, non-caustic gel stripper in thin coats. Let it dwell, lift with a plastic scraper, and detail crevices with brass bristles or wooden picks. Rinse per product instructions and dry thoroughly.

Repair Tiles, Hearth Gaps, and Loose Surrounds

After you’ve removed soot and stripped back paint, inspect the tiled slips, hearth, and surround for movement, hairline cracks, and open joints that will only worsen under heat cycling. Tap tiles lightly; a hollow note signals failed bedding. Lift loose pieces carefully, keep every original, and re-bed with a lime-based mortar for historical accuracy, not hard cement that can spall edges.

Rake out crumbling joints to sound material, then repoint neatly, matching joint width around ornate detailing. At the hearth, chase out gaps, vacuum dust, and pack with lime mortar or fire-rated rope where expansion demands it.

Tighten a loose surround by checking cramps and screws, then reset with discreet shims so lines stay true. Allow repairs to cure fully before refitting.

Finish Your Victorian Fireplace: Paint, Polish, Seal

restore protect finish preserve

Although the structural repairs now look sound, you’ll only keep them that way if you finish the fireplace with breathable, heat-tolerant materials that suit Victorian fabric.

Begin with careful cleaning: de-dust mouldings, degrease, then lightly abrade gloss to key.

For cast iron, wire-brush to bright metal, spot-prime with a heat-resistant metal primer, then apply stove black or graphite paste, buffing to an even sheen.

For timber surrounds, choose an oil-based or shellac primer if resinous, then a satin or eggshell topcoat; avoid modern vinyls that trap moisture.

Prioritise Color matching from surviving paint layers, and keep historical accuracy by testing small panels in daylight.

Finally, seal porous stone or tile grout with a vapour-permeable, heat-rated impregnator. Let each coat cure fully.

Conclusion

You’ve inspected every casting, sealed the room against soot, and tested for lead before you ever scraped. You’ve lifted paint methodically, reset loose tiles, packed hearth gaps, and tightened the surround. Now you finish with the right period coating—iron blacking, shellac, or breathable paint—then polish, seal, and cure. Remember, about 90% of Victorian fireplaces were coal-fired, so residual grime hides deep. Work slowly, ventilate well, and you’ll restore its proper, crisp relief.…

Scroll to Top