Author name: Graeme Allen

improve attic water pressure
Plumbing & Electric Fixes

How to Improve Water Pressure in an Upstairs Attic Ensuite Without Major Plumbing Work

First, confirm whether you’ve got low pressure or just low flow by timing how fast a 1‑gallon container fills upstairs versus downstairs. Turn off power to any pump, then clean the showerhead, hose filter, and tap aerators, and flush out limescale. Make sure the stopcock is fully open, check the PRV setting, and confirm boiler/combi inlet filters and service valves aren’t blocked. If flow restrictors are removable and allowed, swap to a suitable high‑pressure head. If the attic still lags, a compliant shower pump may help—next you’ll see how to decide.

Key Takeaways

  • Verify whether it’s low pressure or restricted flow by timing a 1‑gallon fill upstairs and downstairs simultaneously.
  • Ensure the main stopcock and any local isolator valves are fully open, and check any PRV settings and inlet filters.
  • Clean tap aerators and showerheads by descaling and flushing debris, and confirm washers and O-rings are seated to prevent leaks.
  • Remove or replace shower flow restrictors where permitted, and fit a high-pressure showerhead matched to your system type.
  • If upstairs remains weak but downstairs is fine, consider a correctly specified shower pump with strainers and anti-vibration mounts.

Confirm Low Pressure vs Low Flow Upstairs

diagnose pressure versus flow

Before you change valves or add a booster, confirm whether you’ve got low pressure (insufficient PSI at the fixture) or low flow (restricted gallons per minute) in the attic ensuite, because the fixes aren’t the same.

Check Water pressure differences by comparing the attic cold tap to a downstairs tap at the same time. If both drop, you’re seeing a whole-house supply or regulator issue, not a branch problem.

For flow rate clarification, time how long it takes to fill a 1-gallon container at the attic basin; repeat downstairs.

If attic gallons per minute are much lower but pressure feels similar, suspect a restriction in the branch line or shutoff, not a PSI deficit.

Shut off power to any pump before testing, and avoid removing fittings under pressure.

Clean the Attic Showerhead and Tap Aerators

Even if the attic ensuite’s branch pressure checks out, a scaled-up showerhead or clogged tap aerator can choke flow at the point of use and make the shower feel weak.

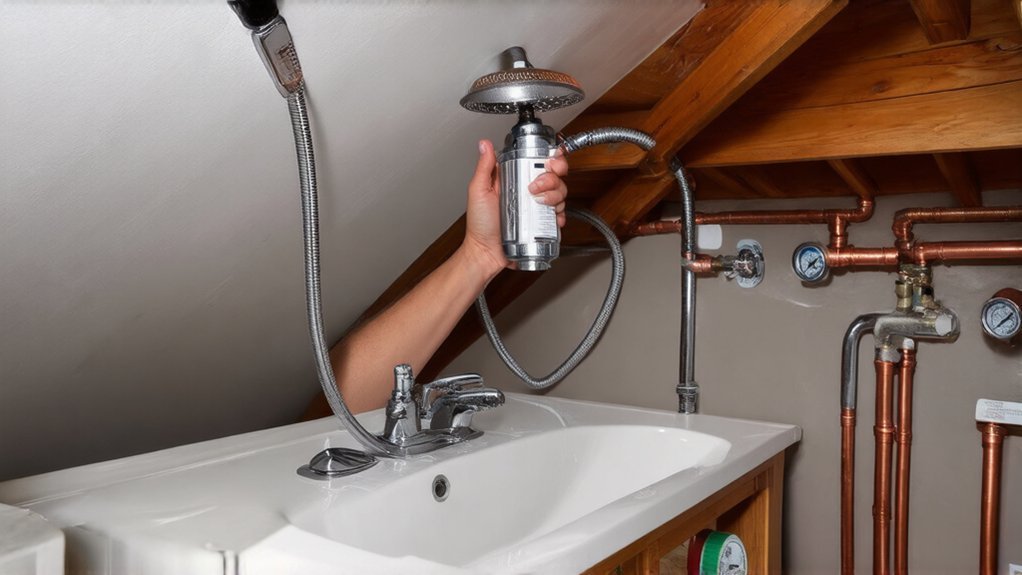
Start by isolating the fixture with its service valve, then cover the drain to prevent small parts dropping in. Unscrew the showerhead, remove the rubber nozzle insert if present, and soak components in white vinegar for 30–60 minutes; brush mineral scale, rinse, and reassemble with the correct washer.

For taps, remove the aerator with a strap wrench, clean the mesh and flow restrictor, and flush debris briefly before refitting. Don’t over-tighten—protect chrome for aesthetic enhancement.

Restored spray improves water conservation without new pipework.

Check Stopcock, PRV, and Boiler/Combi Pressure

If the upstairs attic ensuite still feels underpowered, trace the restriction back to the controls that set whole-house pressure: the main stopcock, any pressure‑reducing valve (PRV), and your boiler/combi settings.

Confirm the stopcock is fully open; turn it anti‑clockwise until it stops, without forcing it.

Next, locate any PRV near the incoming main; check its setpoint and gauge if fitted. For safe pressure regulation, adjust only within manufacturer limits and local code (typically around 3 bar/45 psi).

If you’re unsure, stop and call a licensed plumber.

For combi boilers, verify cold mains pressure and check the boiler’s inlet filter and service valves are open.

Don’t confuse sealed‑system heating pressure with domestic hot-water pressure.

Document each valve adjustment and recheck flow.

Remove Flow Restrictors and Upgrade the Showerhead

Next, check for flow restrictors in the showerhead, hose, or mixer inlet. Then isolate the water supply and remove them only if your local water regulations allow it.

Clean any debris from the filters and O-rings, then refit everything to the manufacturer’s torque and sealing guidance to prevent leaks.

If pressure still feels weak, install a rated high-pressure showerhead that matches your system type (combi/high-pressure vs gravity-fed) to improve spray without overstressing pipework.

Locate And Remove Restrictors

Because many upstairs ensuite showers lose pressure at the last few inches of the system, start by checking for flow restrictors you can safely access at the showerhead and hose connections.

Shut off the shower, then wrap a cloth around fittings and use an adjustable wrench to avoid damaging chrome. Unscrew the head or hose and look for small plastic discs, mesh screens, or O-ring inserts that limit flow.

Remove only removable Flow restrictors; don’t drill or modify parts that could violate local water-efficiency rules.

Rinse screens under running water, then reassemble with the washer seated flat to prevent leaks.

If your valve includes Pressure regulators, don’t alter them—adjustments belong at the main regulator and may require a licensed plumber.

Test for leaks and stable temperature afterward.

Install High-Pressure Showerhead

Once you’ve confirmed the showerhead and hose connections are clear of debris and removable restrictors, you can boost usable pressure by installing a high-performance showerhead designed to maintain spray force at lower flow rates.

Choose a model certified to local standards (for example, WRAS/WaterSense where applicable) so you stay code-compliant and support Water conservation.

If your old head has a removable flow insert, only remove it if permitted in your area; otherwise, replace the head rather than modifying it.

Shut off the shower valve, protect finishes, then unthread the head with a strap wrench.

Wrap the shower arm threads with PTFE tape, thread on the new head, and hand-tighten.

Check for leaks and confirm a strong, even spray worthy of a Luxury bathroom.

Check Attic Pipework, Isolator Valves, and Limescale

Next, you’ll inspect the attic pipe runs for kinks, crushed sections, poor joints, or undersized pipe that can choke flow. You’ll also confirm any insulation and supports are intact to prevent damage and freezing.

You’ll then test each isolator valve serving the ensuite to make sure it’s fully open, operates smoothly, and isn’t partially closed or seized.

Finally, you’ll remove limescale from showerheads, tap aerators, and accessible fittings using a suitable descaler and proper ventilation, restoring flow without risking leaks or damage.

Inspect Attic Pipe Runs

Where’s the pressure getting lost—at the fixture, or somewhere along the attic run? Start by tracing the hot and cold feeds across the loft. Look for kinks, flattened plastic, tight bends, or undersized branches that can throttle flow.

Check for damp staining, green/white crusting, or pinhole leaks at joints—any seep can drop pressure and risks timber damage. Confirm pipes are clipped, supported, and protected where they pass through joists to prevent abrasion, per UK guidance.

In cold lofts, add or refit pipe insulation and keep attic ventilation clear so insulation doesn’t trap moisture against pipes.

Finally, inspect taps, shower heads, and aerators for limescale; soak removable parts in descaler and flush the line to clear debris safely.

Test Isolator Valve Position

Although the pipe run may look fine at a glance, a partially closed isolator valve can choke flow enough to mimic “low pressure” at the shower or basin.

First, locate the Isolator valve(s) serving the ensuite—often under the basin, near the cylinder, or on the branch in the attic. Before touching anything, confirm you’re adjusting the correct valve and that pipework is supported; don’t force seized fittings.

Test by turning the valve fully open (typically anti-clockwise for screw-slot types, in-line for quarter-turn levers), then run the cold and hot taps and flush the WC to compare flow.

If you find improvement, make a careful Position adjustment back and forth to verify it’s not slipping.

Finally, recheck for drips and restore any access covers safely.

Remove Limescale Buildup

If your valve positions check out but the ensuite still feels weak, how often do you look for limescale restricting the flow? In hard-water areas, scale narrows pipework and clogs shower heads, mixer cartridges, and inline strainers, cutting pressure upstairs.

Isolate the supply at the local service valve, confirm the circuit is dead by opening the tap, then remove and descale the shower head and tap aerators. Soak parts in a manufacturer-approved descaler or diluted white vinegar, rinse thoroughly, and refit with new seals if they’re perished.

If you’ve got accessible attic pipework, check for partially blocked flexi tails or kinked runs and replace as needed.

For Limescale prevention, consider Water softening or a scale inhibitor on the incoming main, installed to local regulations.

Add an Attic Shower Pump (When It’s Worth It)
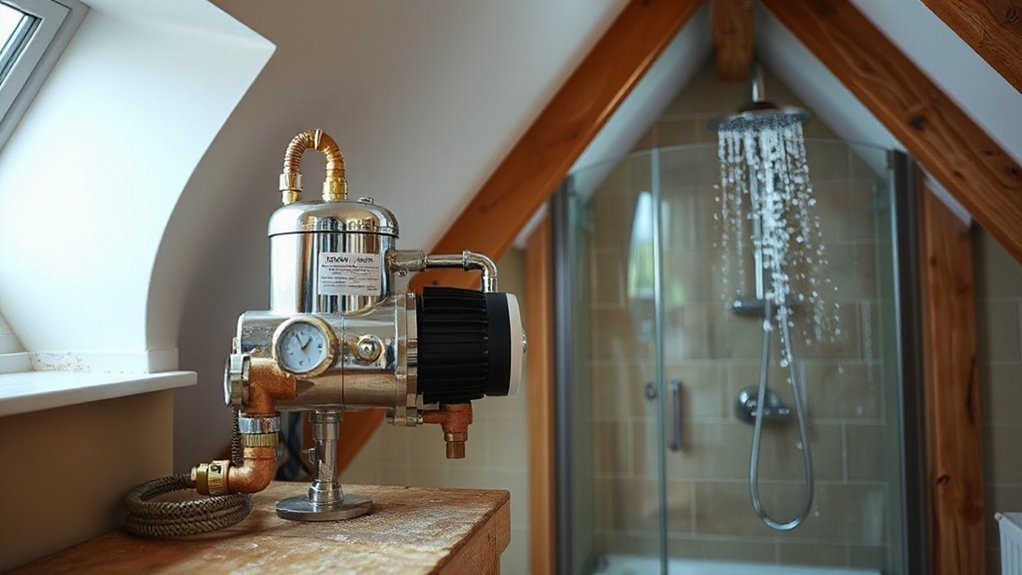
attic shower pump installation

When your attic ensuite sits at the top of the run and the pressure still feels weak after you’ve ruled out simple fixes, adding a dedicated shower pump can deliver a stable, code-compliant boost at the outlet. It’s worth it when your supply is adequate downstairs but drops only at the attic shower, or when a combi/low-flow system can’t maintain flow under demand.

Choose a pump rated for your system (gravity or mains), with built-in negative head protection if needed. Install it on a solid base, with isolation valves, strainers, and correct electrical bonding, then keep access for servicing.

Because attics face temperature swings, protect pipework with Attic insulation and prevent condensation with Ventilation improvements. Follow local noise limits, fit anti-vibration couplers, and test for leaks.

Conclusion

Start by confirming you’ve got true low pressure, not just low flow, then tackle the easy wins: descale the showerhead, clean aerators, and make sure the stopcock, PRV, and combi settings are fully open and correctly set. If you remove restrictors, stay within local water regs. Check attic pipework and isolators for half-closed valves or limescale. Add a shower pump only when needed—like fitting a seatbelt, it’s safest when correctly sized and installed.…
fixing a clogged sink
Plumbing & Electric Fixes

How to Repair a Slow‑Draining Sink Without Calling a Plumber

Start by timing drainage: run water 30 seconds, stop, and watch drawdown; instant backup points to the stopper, strainer, or trap, while gradual slowing suggests a branch drain or vent issue. Flush with hot water 2–3 minutes, then dump a full basin. Plunge with the overflow sealed, or use a wet/dry vac to pulse suction. Remove and scrub the stopper, then clean the P-trap and reassemble leak-free. If it’s still slow, hand-snake the wall stub-out to clear deeper clogs—and there’s more help ahead.

Key Takeaways

  • Diagnose the slowdown by timing drawdown after a 30‑second run; early backup indicates trap/strainer issues, later slowdown suggests branch or vent problems.
  • Flush with hot water 2–3 minutes, then dump a full basin to scour grease and loosen soft buildup.
  • Plunge effectively by sealing the overflow, adding enough water to cover the bell, and pumping 10–15 strong strokes.
  • Remove and clean the stopper and drain opening using a plastic drain tool, then scrub with detergent and rinse hot.
  • Disassemble and clean the P‑trap, or snake through the wall stub‑out for deeper clogs; avoid caustic chemicals and leak‑test afterward.

Find Where the Slow‑Draining Sink Clog Is

identify sink clog location

Before you start disassembling anything, pinpoint where the restriction is by checking how the sink drains under controlled conditions. Run water at a fixed flow rate for 30 seconds, then stop and time the drawdown.

If the bowl backs up immediately, suspect the tailpiece, strainer, or trap arm. If it slows after initial flow, suspect the branch drain or venting.

Shut off power to any nearby receptacles and use PPE. Perform Pipe inspection by verifying the trap weir isn’t siphoning and the trap arm has proper slope.

Use Drain visualization with a flashlight and mirror through the stopper opening, and note gurgling, oscillating water level, or sewer odor, which indicates a partial blockage or vent restriction upstream.

Try Fast Fixes for a Slow‑Draining Sink

Now that you’ve narrowed down where the restriction likely sits, start with fast, low‑risk fixes that don’t require opening the drain. Run hot water for 2–3 minutes to soften grease, then flush with a full basin dump to increase hydraulic scouring.

Next, use a cup plunger: seal the overflow with a damp rag, add enough water to cover the bell, and pump 10–15 strokes to create pressure oscillation.

If you have a wet/dry vacuum among your DIY tools, switch to wet mode, seal the hose at the drain with a towel, and pulse suction.

Avoid caustic chemicals that can damage piping and violate local code guidance. Add these steps to your maintenance schedule to prevent recurrence.

Clean the Stopper and Drain Opening (Hair/Soap)

If the sink still drains slowly, the stopper and drain throat often hold a compacted plug of hair, soap scum, and toothpaste that restricts flow. Put on nitrile gloves and eye protection, then close the faucet and remove standing water with a cup.

Release the stopper: for a lift‑rod type, loosen the clevis strap pivot linkage and lift the stopper out; for a pop‑up, twist and pull per the manufacturer’s design. Use a plastic drain tool or hemostat to extract debris from the drain opening without scratching the finish.

Scrub the stopper with a nylon brush and mild detergent; don’t use caustic chemicals. Rinse hot, reinstall, and test.

This Drain cleaning step improves Stopper maintenance and restores flow.

Clear the P‑Trap Under the Sink (and Reassemble)

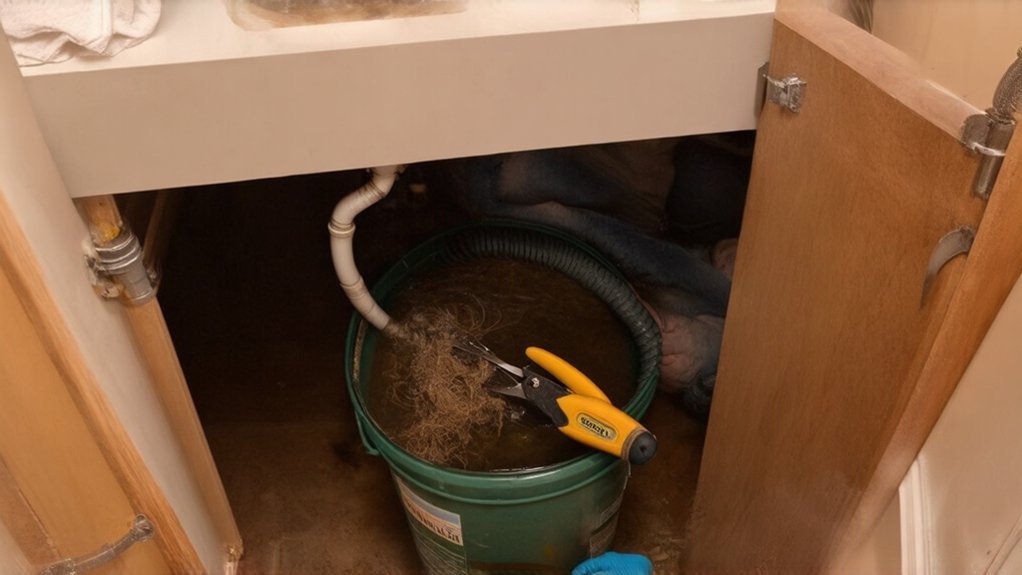
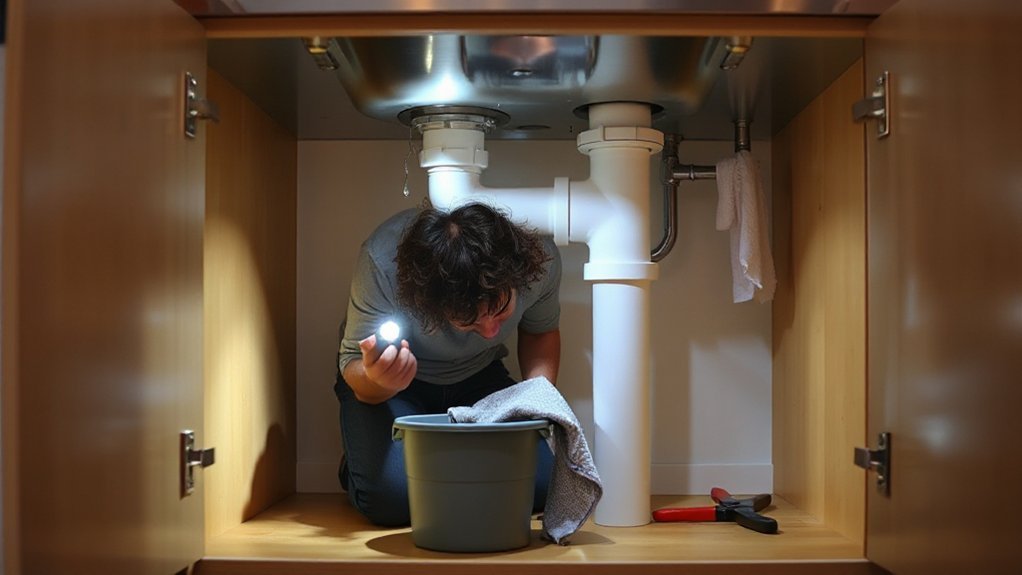
When debris slips past the drain opening, it often settles in the P‑trap—the U‑shaped fitting under the sink that holds a water seal and can clog with soap scum and grit. Place a bucket under it, put on gloves, and ventilate the cabinet area. Close the stop valves if you’ll disturb the supply lines.

Loosen the slip nuts by hand or with tongue‑and‑groove pliers, supporting the trap arm to prevent strain on the trap adapter. Lower the trap, drain it, and remove buildup with a bottle brush; flush the parts with hot water.

For pipe maintenance, verify the beveled washers face the correct direction and the trap weir aligns without cross‑threading. Reassemble finger‑tight, then snug 1/4 turn. Run water and perform leak inspection at every joint.

Snake the Drain for Deep Clogs (Then Prevent Repeats)

A clean, properly reassembled P‑trap that still drains slowly points to a clog farther down the branch drain, and a hand auger (drain snake) clears it mechanically without relying on caustic chemicals. Place a bucket, wear gloves and eye protection, and remove the trap arm to access the wall stub-out.

Feed the cable into the branch, rotate clockwise, and advance until you feel resistance. Work the head through the obstruction with short push-pull strokes, then retract while rotating to capture debris. Restore the slip-joint washers, tighten hand-tight plus a quarter turn, and leak-test.

For drain maintenance and clog prevention, flush hot water weekly, use a strainer, keep grease and coffee grounds out, and enzyme-treat monthly.

Conclusion

You’ve traced the restriction, tried quick clears, cleaned the stopper, serviced the P-trap, and snaked the branch drain, so your sink should discharge freely. Verify flow with hot water and check every slip-joint for leaks; tighten hand-snug plus a quarter turn, not over-torqued. If you used chemicals, flush per label and ventilate. Treat the drain like a highway after an accident—keep debris out. Use a screen, avoid grease, and rinse routinely.…

install durable straight fencing
Garden & Outdoor

How to Install a Strong, Long‑Lasting Fence That Stays Straight for Years

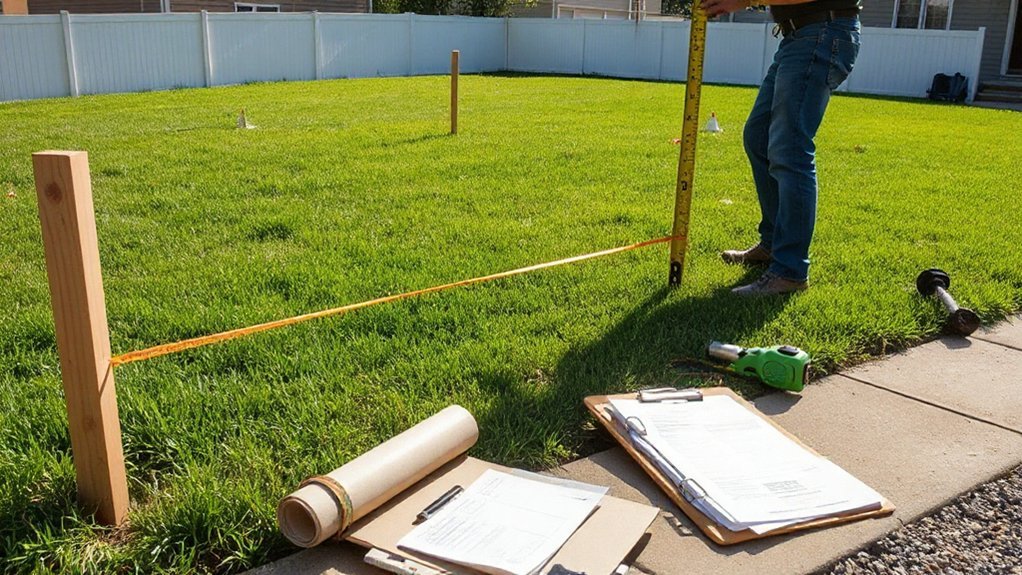
Start by confirming property pins or a survey, then check setbacks/permits and mark utilities before you stretch a taut mason’s line for a straight layout. Choose durable wood or composite with hot-dip galvanized or stainless hardware. Match post spacing to true panel widths and gate clearances. Dig holes below frost line, add tamped gravel, set posts plumb, brace, and pour concrete. After curing, fasten rails/panels with structural screws, add mid-rails, and cap posts—next you’ll see the step-by-step details.

Key Takeaways

  • Confirm property lines, permits, setbacks, and easements, then mark a straight control line with offset stakes and taut mason’s line.
  • Call before you dig, locate utilities, and avoid restricted corridors to prevent unsafe placement and future rework.
  • Set posts below frost line on tamped gravel, plumb and braced, with consistent spacing that matches true panel widths and gate hardware clearances.
  • After concrete cures, attach rails level using structural screws or through-bolts, add mid-rails for long spans, and use anti-sag bracing on gates.
  • Use corrosion-resistant hardware, pre-drill to prevent splitting, seal cut ends, add post caps, and recheck plumb and fastener tightness after settling.

Lay Out the Fence Line (Property, Permits, Utilities)

verify boundaries and permits

Before you dig or set a single stake, confirm the fence line is legal and safe: locate your property pins or verify boundaries with a current survey, check local setback/height rules and secure any required permits or HOA approvals.

Then have all underground utilities marked through your local “call before you dig” service and note easements that restrict placement. If pins are missing or disputed, order a Land survey and document corner monuments.

Translate the approved line into a control layout: set offset stakes outside the dig zone, run taut mason’s line, and confirm straightness with a transit or laser. Measure diagonals to verify corners are square.

Recheck zoning regulations for street-front visibility triangles and utility corridors. Mark gate openings and post centers in paint, then pause if any mark conflicts.

Pick Fence Materials That Match Your Weather

After you’ve verified the layout and cleared utilities, you need to choose fence materials that fit your site’s moisture, temperature swings, and sun exposure so you don’t create premature rot, corrosion, or warping hazards.

You’ll compare weather-resistant wood species and treatments, select metal options rated for high humidity and salt air, and confirm fasteners and coatings to prevent galvanic corrosion.

You’ll also weigh composite and vinyl for long-term durability, checking UV stability, thermal expansion limits, and impact resistance for your climate.

Weather-Resistant Wood Choices

Although any fence board can look good on day one, your local climate determines whether it stays straight, rot‑free, and fastener‑tight over the long haul. Choose naturally durable species where moisture and insects are common: cedar, redwood, or black locust.

In dry, high‑UV regions, select dense, stable lumber and budget for stricter coating maintenance.

Inspect each board before installation. Favor tight, straight wood grain and minimal pith; these reduce cupping and checking.

Specify kiln‑dried, exterior‑rated lumber, and store it off the ground under cover to prevent uneven wetting.

Pre‑seal cut ends, then apply a compatible weatherproof finish on all faces before you hang boards.

Wear gloves and eye protection when cutting, sanding, or brushing finishes, and follow the product’s ventilation and cure-time requirements.

Metal Options For Humidity

Wood holds up well when you pick the right species and seal it correctly, but in humid or salt‑air climates you may get longer service life by switching to corrosion‑resistant metal components or full metal panels.

Prioritize Corrosion resistance: choose hot‑dip galvanized steel or marine‑grade aluminum, and avoid bare mild steel fasteners. Specify stainless hardware (304 inland, 316 near coasts) and isolate dissimilar metals with nylon washers to prevent galvanic attack.

Because high humidity drives moisture absorption in surrounding soils and debris, set posts on compacted gravel with drainage, keep panel bottoms off grade, and don’t trap leaf litter against rails.

Touch up cut edges with zinc‑rich coating, then inspect annually for pitting. Wear gloves when handling sharp sheet and cut ends.

Composite And Vinyl Durability

If your climate swings from freeze–thaw winters to high‑UV summers, composite and vinyl fencing can outperform stained lumber by resisting rot, insects, and moisture uptake.

To verify composite durability, check the manufacturer’s capstock thickness, UV stabilizers, and ASTM test data for flexural strength and impact resistance.

Specify stainless or hot‑dipped fasteners to prevent galvanic corrosion, and predrill where required to avoid cracking.

For vinyl longevity, choose panels with titanium dioxide for UV blocking, thickened rails, and internal aluminum or steel reinforcement in wind zones.

Maintain straight lines by setting posts below frost depth, using gravel drainage, and bracing during concrete cure.

Wear eye protection when cutting, and control dust with a vacuum or wet cut.

Plan Fence Post Spacing for Panels and Gates

fence post spacing and layout

Before you dig a single hole, lay out your fence run and calculate post spacing around the exact panel widths and gate openings you’ll install. Measure each panel’s true end-to-end dimension, not the nominal size, and include bracket or rail clearances.

Mark centers with stakes and mason’s line so fence post spacing stays consistent and panel alignment doesn’t drift. If the run won’t divide evenly, adjust at a noncritical section or use a cut panel; don’t “stretch” bays.

For gates, set posts to the manufacturer’s required opening, then add hardware offsets and hinge-side clearance for swing. Plan latch height and avoid conflicts with grade changes.

Verify plumb references, check diagonal measurements, and confirm property lines and utility locates before committing layout marks.

Dig Fence Post Holes Below Frost Line (Add Gravel)

With your post centers marked and lines pulled tight, start drilling each post hole to a depth that reaches below your local frost line so seasonal freeze–thaw cycles can’t heave the footing and rack the fence. Use an auger sized for your post plus clearance; keep the hole walls clean and vertical. Call utility locating services before you dig, and wear eye, hearing, and hand protection.

Bore to consistent depth, then bell the bottom slightly if soil allows for better bearing. Remove loose spoil, roots, and standing water with a clamshell digger. Add 4–6 inches of Gravel bedding to the base, then tamp it firmly to create a stable, draining pad.

Verify depth with a tape at multiple points and keep spoils back from the edge to prevent cave-ins.

Set Fence Posts Plumb and Brace While Concrete Cures

Once the gravel pad is tamped, drop the post into the hole, orient any faces or brackets to your layout line, and set the base centered.

Check plumb on two adjacent sides with a level, then rotate as needed until it’s true. Install temporary bracing: stake two 2x4s or metal braces to the ground and screw them to the post at mid‑height so you can fine‑tune alignment.

Recheck height against your stringline and lock the braces.

Wear gloves and eye protection before handling dry mix. Add concrete in lifts, rodding each lift to eliminate voids and keep the post from drifting.

Maintain post stabilization by verifying plumb every few minutes during initial set. Protect the hole from vibration and water during concrete curing.

Attach Fence Rails and Panels to Prevent Sagging

After the concrete’s cured and braces are off, you’ll fasten each rail to the posts with corrosion-resistant hardware and proper pilot holes so connections won’t loosen under load.

You’ll keep rail spacing consistent with a story pole or spacer block, and you’ll verify level and straight alignment before you fully tighten fasteners.

To prevent sagging, you’ll reinforce panels with additional blocking or a mid-rail where needed.

You’ll recheck plumb and hardware tightness as you go.

Secure Rail-to-Post Fasteners

Because rail connections carry most of the fence’s load, you need rail‑to‑post fasteners that lock the rails tight and resist movement under wind, gate vibration, and seasonal wood shift. Use galvanized or stainless structural screws or rated rail brackets; don’t rely on smooth nails.

Pre‑drill near rail ends to prevent splitting, then drive fasteners square to the post with an impact driver set to moderate torque. Verify each bracket’s fastener schedule and embedment, and keep heads seated without crushing fibers.

Where panels act as privacy screen options, add approved connectors at each rail end to control racking.

Wear eye protection and gloves, and keep hands clear of pinch points. After fastening, recheck plumb, then install decorative post caps to limit moisture intrusion.

Maintain Consistent Rail Spacing

Although your posts can be perfectly plumb, inconsistent rail spacing will telegraph into wavy panel lines and invite sagging as the fence loads up in wind and weather. Establish rail heights from a fixed benchmark, then mark every post with a story pole or spacer block so top and bottom rails land identically.

Clamp rails in place before fastening, and recheck level and parallel spacing at each bay. When attaching panels or pickets, keep your fasteners aligned to the rails, not to varying board lengths, so loads transfer evenly.

Wear eye protection when cutting spacers and use stable sawhorses to prevent kickback. Uniform spacing keeps Decorative accents straight and ensures Privacy enhancements don’t create gaps or uneven reveals over time.

Reinforce Panels Against Sagging

If you want panels to stay straight through seasonal movement and gust loads, you must build a continuous load path from pickets to rails to posts.

For Fence reinforcement, fasten rails to posts with rated structural screws or through‑bolts, not nails, and predrill near ends to prevent splitting. Use two fasteners per rail end, set in a staggered pattern, and keep edge distance per manufacturer guidance.

For Panel stability, attach pickets with two exterior‑grade screws at every rail, maintaining consistent spacing so loads share evenly. Add a mid‑rail on spans over 6 ft or where wind exposure is high.

If you use prefab panels, add metal rail brackets and a diagonal anti‑sag brace from the bottom hinge side to the top latch side.

Wear eye protection.

Use Exterior-Rated Fence Fasteners, Hardware, and Caps

When your fence faces rain, UV exposure, and seasonal movement, standard interior fasteners can corrode, stain the wood, and loosen over time. Choose exterior-rated screws, bolts, and brackets: hot-dip galvanized for treated lumber, or 304/316 stainless near salt or pool chemicals.

Match fasteners to hardware coatings to prevent galvanic reaction, and drive screws straight to avoid splitting. Pre-drill near ends and on Decorative lattice to reduce cracking and racking.

Use structural screws for rails, not drywall or deck nails. Add post caps to shed water, reduce end-grain saturation, and limit Fence staining from rust bleed.

Wear eye protection, clamp workpieces, and keep hands clear of driver bits. Tighten, don’t overtork, and recheck torque after settling.

Conclusion

Like Odysseus plotting his course, you’ll keep your fence true by measuring the line, confirming permits, and calling to mark utilities. You’ve matched materials to climate, spaced posts for panels and gates, and dug below the frost line with a gravel base for drainage. You’ve set posts plumb, braced them while concrete cures, and fastened rails with exterior‑rated hardware and caps. Inspect annually, tighten hardware, and you’ll avoid sagging.…

selecting suitable local agent
Home Upgrades & Renovations

How to Choose the Right Estate Agent for Your Area and Budget

Choose the right estate agent by starting with your non‑negotiables: minimum net proceeds after fees and costs, your timeline, and how much risk you’ll take on price cuts or fall-throughs. Shortlist agents who can prove recent local results (ask vs sold, days on market, completion rate) and who’ll share a written marketing plan and reporting schedule. Compare fees, tie-ins, notice periods, and tricky clauses in writing. Next, use targeted questions to test negotiation skill and spot red flags.

Key Takeaways

  • Set your sale goals, timeline, and minimum net proceeds so you can choose an agent and pricing strategy that fits your budget.
  • Compare local agents using hard evidence: recent sold prices vs asking, days on market, and completion rates within half a mile.
  • Check hyper-local knowledge and reputation by asking about nearby street sales, fall-through causes, and recent reviews for communication quality.
  • Negotiate fees and contract terms: tie-in length, notice period, payable timing, included marketing, and exit rights if service underperforms.
  • Demand a written marketing plan and reporting schedule, and avoid agents who won’t share data or can’t explain how they’ll create buyer competition.

Set Your Budget and Sale Priorities

set budget and sale strategy

Before you speak to any estate agent, lock down your numbers and your non‑negotiables. Calculate your minimum acceptable net proceeds after fees, EPC, conveyancing, repairs, and moving costs.

Set a timeline: quick sale, top price, or a balanced target—you can’t maximise all three.

Decide your risk tolerance for price reductions and fall‑throughs, and define what you’ll fix versus sell as‑is.

Then map your priorities to Pricing strategies. If you need speed, you’ll favour a sharp launch price and tight viewing windows; if you need margin, you’ll push for premium positioning and controlled reductions.

Clarify your negotiation tactics too: reservation requests, proof‑of‑funds rules, counter‑offer limits, and when you’ll walk.

How to Shortlist Local Estate Agents

Now you’ll shortlist local estate agents by putting their numbers under the spotlight: recent sale prices, time to sell, and how often they hit or beat asking.

You’ll also test true area expertise—street-by-street knowledge, buyer demand, and which price points are moving—so you’re not paying for generic marketing.

Stack the evidence, then pick the agents most likely to negotiate hard and protect your final figure.

Compare Local Track Records

How do you separate the agents who talk a great game from the ones who’ll actually deliver a sale at the right price? You compare hard numbers against market trends, not anecdotes.

Ask each agent for their last 10 completed sales: original list price, final price, days on market, and whether they negotiated up from offers. Check their sale-to-ask ratio and how often deals fell through.

Request evidence, not “trust me” claims—completion statements, Rightmove/Zoopla histories, and anonymised offer logs.

Then pressure-test their pricing accuracy: how close their initial valuation landed to achieved price.

Finally, gauge agent reputation with recent, detailed reviews that mention communication, buyer qualification, and fee transparency. Strong track records show consistency, not one-off wins.

Assess Area Expertise

Hard stats show you who can perform; area expertise shows you who can price, position, and negotiate your home against the right buyers. Test it fast: ask three hyper-local questions—recent sale prices on your street, buyer demand by property type, and which micro-locations command premiums or discounts. If they can’t answer without “I’ll check,” they’re guessing.

Push for a clear Property valuation rationale: comparable selection, adjustment logic, and how they’ll defend the number in offers and surveys.

Probe neighborhood familiarity: school catchments, parking pressures, planning risks, leasehold quirks, and seasonal footfall. You want an agent who can name likely buyer pools, craft listing language that speaks to them, and use local competition to create leverage.

Choose the one who turns postcode nuance into price tension.

Compare Estate Agent Fees, Tie-Ins, and Clauses

Although the headline commission rate grabs attention, you’ll get the best outcome by comparing the full fee structure, tie-in period, and contract clauses side by side. Ask for a written breakdown of commission structures: fixed fee vs percentage, sole agency vs multi-agency, and whether VAT, photos, floorplans, portals, and viewings are included or add-ons.

Negotiate the tie-in: shorten it, cap notice periods, and agree clear exit rights if service slips. Scan contractual clauses for “ready, willing and able purchaser” wording, dual fee triggers, and liability for marketing costs if you withdraw.

Confirm when fees become payable—exchange or completion—and get all promises in writing. When terms are transparent, you can push harder on value without overpaying or getting locked in.

Check the Estate Agent’s Local Sale Results

verify local sales performance

Before you sign, pressure-test the agent’s track record on your exact patch: recent sold prices versus asking, average days on market, and how often listings actually complete rather than quietly get reduced or withdrawn.

Ask for a list of the last 10 sales within half a mile and compare them on Land Registry/Rightmove Sold Prices. You’re looking for consistent accuracy in property valuation, not optimistic numbers to win instructions.

Drill into negotiation outcomes: how much they typically secure above the first offer, and how they handle survey down-valuations.

Check whether they’ve sold similar homes on your street and if they can explain why certain deals fell through.

Strong local results protect your neighborhood reputation and your price, because buyers trust proven agents.

What Marketing Will the Estate Agent Do?

Because great marketing creates leverage long before the first viewing, you should make the agent spell out exactly how they’ll generate demand, qualify buyers, and drive competing offers—not just “put it on Rightmove.”

Ask for a written plan that covers pricing strategy, professional photography and floorplans, standout listing copy, portal placement (Rightmove/Zoopla), email blasts to registered proceedable buyers, social targeting, and whether they’ll run accompanied viewings and structured open days.

Then judge execution. You want tight turnaround times, weekly refreshes, and a strong Online presence that keeps your listing ranking and saves from going stale.

Social media should be purposeful: postcode targeting, lookalike audiences, and short video walk-throughs that pull in motivated buyers.

The goal is urgency, not vanity metrics—more booked viewings, cleaner buyer qualification, and stronger leverage at offer stage.

Questions to Ask an Estate Agent Before Signing

Before you sign, you’ll want proof the agent can win in your local market, not just promise a good price. Ask for recent sale results on comparable homes, a clear fee structure (and any extras), and exactly how they’ll handle offers and counteroffers to protect your bottom line.

Then pin down the marketing plan and timelines—what launches when, how they’ll measure traction, and what they’ll change if buyers don’t bite.

Local Market Track Record

How well does an agent actually perform in your neighbourhood, not just across the wider town? Ask for proof: Historical sales on your street and nearby, including asking price vs achieved price, days on market, and fall-through rates. You’re looking for repeatable results, not one-off wins.

Probe how they read Neighborhood trends: what’s shifting demand, which buyer groups are active, and what’s happening with comparable stock right now. Get them to justify a pricing range with live evidence, then explain the negotiation plan if viewings stall.

Ask for three recent examples where they defended value against low offers and how they handled survey issues, chain risk, or down-valuations. If they can’t name local buyers, hotspots, and deal-breakers, they’ll struggle to deliver your target outcome.

Fee Structure And Extras

Strong local results are only worth paying for if the fee deal matches the service you’ll actually get. Ask for a written breakdown of Commission rates and what triggers them: is it a flat percentage, tiered, or linked to a price threshold? Confirm whether the rate is negotiable, and what you give up if you push it down.

Next, lock in service inclusions: accompanied viewings, buyer qualification, negotiation handling, sales progression, and after-hours availability.

Then probe the extras: what costs sit outside the headline fee, when they’re billed, and whether you can cap them. Get clarity on VAT, withdrawal fees, and sole-agency tie-ins.

Finally, compare like-for-like quotes and use competing offers to tighten terms without shrinking accountability.

Marketing Plan And Timelines

Once you’ve nailed the fee, you need to pin the agent down on the marketing plan and the clock: what launches on day one, what gets added if interest is soft, and exactly when price or strategy gets reviewed.

Ask for a written schedule: photography, floorplan, copy, portal go-live, email blasts, and social media cadence. Get clarity on target buyers and the branding strategies that’ll position your home against competing listings, not just “generate views.”

Confirm who pays for premium listings, video, and staging, and what triggers upgrades.

Set reporting expectations: weekly feedback summaries, enquiry-to-viewing conversion, and buyer objections.

Agree decision points: after 10 days and after 3 weeks, you’ll review pricing, presentation, and negotiation tactics based on real data.

Estate Agent Red Flags to Watch For

Even if an agent seems polished in the pitch, a few early warning signs can cost you leverage, time, and ultimately price. Watch for red flags like vague pricing logic, “guaranteed” sale promises, or pressure to sign the longest contract. If they can’t explain how they’ll create competition, they’ll likely discount your home later.

Notice unprofessional behavior: missed calls, late arrivals, sloppy comparables, or a defensive tone when you question fees. If they dodge hard numbers on days-on-market, list-to-sale ratios, and marketing spend, you’re funding guesswork.

Be wary of agents who talk more than they listen; they’ll negotiate for their commission, not your outcome. If they won’t set clear reporting cadence and next-step triggers, walk.

Conclusion

Choosing the right estate agent is like picking your lead negotiator at an auction—you want nerve, local insight, and a sharp plan. One seller on my patch saved £6,500 by swapping a “cheap” agent for a proven closer who pushed three bidders into best-and-final. Set your budget, demand clear fees and exit clauses, and judge results—not promises. If their marketing feels thin or their valuation feels fluffy, walk. Your price depends on it.…

paint finishes comparison guide
Painting & Decorating

Choosing the Right Paint Finish for UK Homes: Matt, Satin or Gloss?

For most UK homes, you’ll get the best mix of looks and durability by using a washable durable matt on walls, true flat matt on ceilings, and satinwood or gloss on woodwork. Matt (0–5% sheen) hides uneven plaster and cuts glare but can burnish if scrubbed hard. Satin (10–25%) cleans easily yet shows minor defects, while gloss (60%) wipes fastest but exaggerates brush marks. Match sheen to light, traffic, and moisture to get it right.

Key Takeaways

  • Choose matt for walls with imperfections and low glare; it hides ripples but can burnish if scrubbed hard.
  • Choose satin for walls needing wipeability; it reflects more light, resists scuffs, but can highlight minor defects.
  • Choose gloss for woodwork and high-traffic trims; it’s most durable and washable, but exaggerates flaws and brush marks.
  • Match finish to room: kitchens/bathrooms suit eggshell or satin moisture-resistant paints; ceilings suit true matt to hide defects.
  • Prefer low-VOC, water-based systems; prepare properly with cleaning, priming and mist coats to avoid patchiness and improve durability.

Matt, Satin or Gloss: Which Paint Finish Is Best? (UK)

paint finish selection guide

Although paint colour gets most of the attention, the finish is what determines how a wall or woodwork will look and wear in a typical UK home. Choose matt for low-sheen walls and ceilings where you want to mute minor plaster ripples and reduce glare from big south-facing windows.

Pick satin for woodwork and cupboards when you need a smoother, more contemporary look without full shine.

Use gloss on skirting, doors, and handrails where you want strong contrast and a crisp “trim” line.

For paint application techniques, cut in with a 2″ angled brush, then roll with a medium-pile sleeve to avoid lap marks.

For paint color coordination, match trim finish to your palette’s warmth, not just the shade.

Paint Finish Checklist: Sheen, Durability, Washability

You’ll want to match sheen to both the look and the light in your room, from low-sheen matt through satin to high-sheen gloss, because each highlights (or hides) surface defects differently.

Then check durability by room: high-traffic halls and kitchens need tougher finishes than bedrooms, and bathrooms need moisture-resistant systems.

Finally, confirm washability and maintenance—scrubbable, stain-resistant paints cope better with UK condensation, fingerprints, and routine wipe-downs.

Sheen Level Comparison

Before you choose a paint finish, compare sheen levels side by side because gloss isn’t just about looks—it directly affects durability and how easily you can wash marks off.

In UK ranges you’ll see matt (0–5% sheen), satin (10–25%), and gloss (60%+).

Matt hides plaster ripples and roller marks, but it shows burnishing if you scrub hard.

Satin reflects more light, so it highlights defects slightly yet cleans better.

Gloss gives the sharpest reflectance and wipes down fastest, but it exaggerates every nib and needs tighter prep and denibbing between coats.

For Eco friendly options, look for water-based acrylic or hybrid “waterborne” finishes with low VOCs.

For a Cost comparison, matt often needs extra coats, while gloss costs more in labour.

Durability By Room

Sheen gives you a quick read on how a finish will look and clean, but you still need to match it to the room’s wear, moisture, and how often you’ll wipe it down.

In halls, stairs, and kids’ rooms, you’ll want satin or soft-sheen for better scuff resistance on plaster and MDF.

For living rooms and ceilings, matt suits low-contact zones, but pick a tougher “durable matt” where sofas and doorways rub.

In kitchens, utility rooms, and bathrooms, moisture and condensation push you towards satin or gloss on woodwork and tiles-adjacent walls, with mould-resistant specs.

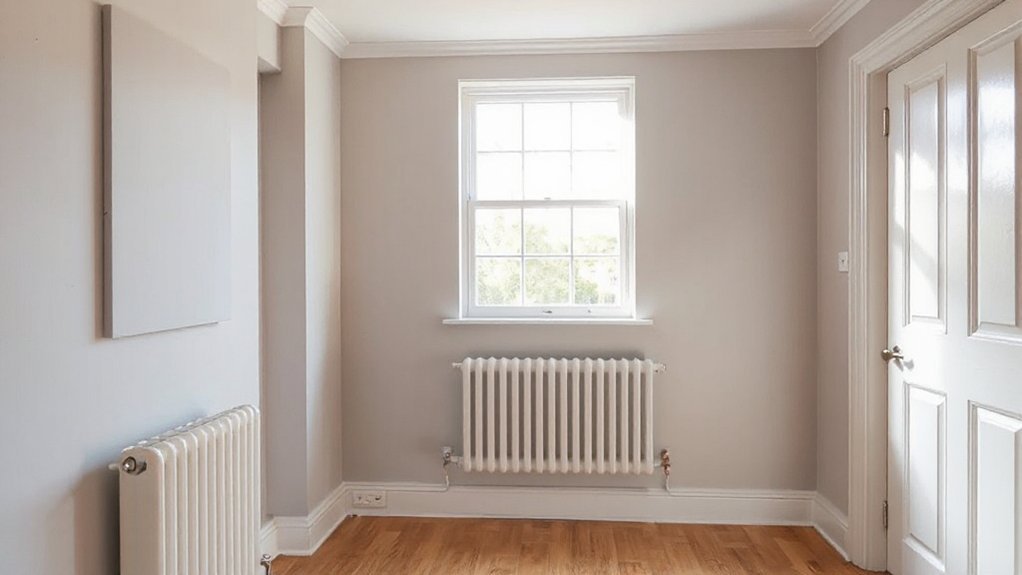
On skirting, doors, and radiators, gloss takes knocks best.

To cut Environmental impact, choose low-VOC water-based systems.

Nail application techniques: de-nib, prime, and keep wet edges.

Washability And Maintenance

How often will you actually wipe the walls down? If it’s weekly in hallways, kids’ rooms, or near light switches, pick satin or soft sheen; they resist burnishing and tolerate repeated cleaning.

Use a damp microfibre with diluted sugar soap, then rinse—aggressive scrubbing will polish matt and leave shiny patches.

In kitchens and bathrooms, choose a washable acrylic or moisture-resistant finish; gloss sheds grease best but highlights defects and needs thorough de-greasing before touch-ups.

For maintenance, keep leftover paint for feathered repairs; matt blends easier than gloss.

When weighing Eco friendly options, look for water-based, low-VOC, scrubbable formulas.

For cost comparison, higher-sheen coatings cost more upfront but reduce repaint cycles and labour over time.

Best Paint Finish for Walls (Living Rooms & Bedrooms)

matt vs satin finish

For living rooms and bedrooms, you’ll usually choose between matt and satin on the walls. The right pick depends on how hard the room is used.

You need to balance durability and washability—especially around switches, radiators and skirting—against the finish’s tendency to show scuffs.

Also consider light: matt hides plaster ripples and roller marks better, while satin reflects more and can highlight imperfections under strong daylight or downlights.

Matt Versus Satin Walls

Although matt and satin can use the same colour, they behave very differently on living room and bedroom walls: matt hides uneven plaster and minor scuffs, while satin reflects more light, looks crisper, and shows every ripple, patch repair, and roller mark.

In older UK homes with lumpy skim coats, matt usually looks calmer under side lighting from bay windows or wall lights. If you’re choosing satin, prep has to be sharper: fill, sand, dust off, and apply a consistent mist coat on fresh plaster before your top coats.

Satin can make smaller rooms feel brighter, but it can also emphasise joint lines on plasterboard. For Textured wall finishes, matt keeps the pattern readable without glare.

You’ll also find Eco friendly paint options in both sheens now.

Durability And Washability

Sheen affects more than how your walls look under a bay window; it also changes how well the paint stands up to fingerprints, scuffs, and the odd wipe-down.

In UK living rooms and bedrooms, you’ll usually get the best balance from a durable matt or satin rated “washable” to Class 1/2 scrub resistance (EN 13300). Standard matt marks easily and can burnish when you spot-clean; choose a tough matt if you’ve got kids, pets, or frequent visitors.

Satin resists stains better and lets you use a damp microfibre with mild detergent without lifting colour.

For colour coordination, keep the same paint system across rooms so touch-ups match.

To cut environmental impact, pick low-VOC water-based finishes and avoid overpainting by prepping properly.

Light And Imperfection Hiding

When daylight rakes across a wall—especially from a UK bay window or a strong ceiling downlight—it exaggerates every ripple, filled crack, and roller lap, so your finish choice matters as much as the colour.

For living rooms and bedrooms, you’ll hide defects best with a quality matt or “durable matt”: low sheen scatters light and masks uneven plaster, old lining-paper edges, and patch repairs common in Victorian terraces.

Satin will highlight flatting issues, so only use it on walls you’ve properly skimmed and sanded.

Full gloss is unforgiving and better kept to woodwork.

Nail Color coordination by checking sheen levels on sample cards under morning and evening light.

For paint application, keep a wet edge, de-nib between coats, and avoid over-rolling.

Best Ceiling Paint Finish to Hide Imperfections

Because ceilings catch raking light from windows and downlights, the finish you choose makes a big difference to how bumps, hairline cracks, and poor plastering show up.

For most UK rooms, pick a true matt or “flat matt” ceiling paint: it scatters light, masks unevenness, and avoids the shine that highlights roller marks. Avoid silk, satin, or gloss overhead unless the surface is near-perfect.

If you’ve got patched areas, use a high-opacity matt and apply a mist coat on fresh plaster, then two full coats with a long-pile roller for textured ceilings.

Consider Color psychology too: bright whites bounce light but can exaggerate defects; a soft off-white can calm glare.

Look for eco friendly paints with low-VOC certification to reduce odour indoors.

Best Paint Finish for Woodwork (Skirting, Doors, Trim)

durable matte satin gloss

Ceilings benefit from dead-flat paint, but woodwork needs a tougher finish that stands up to knocks, finger marks, and regular wiping.

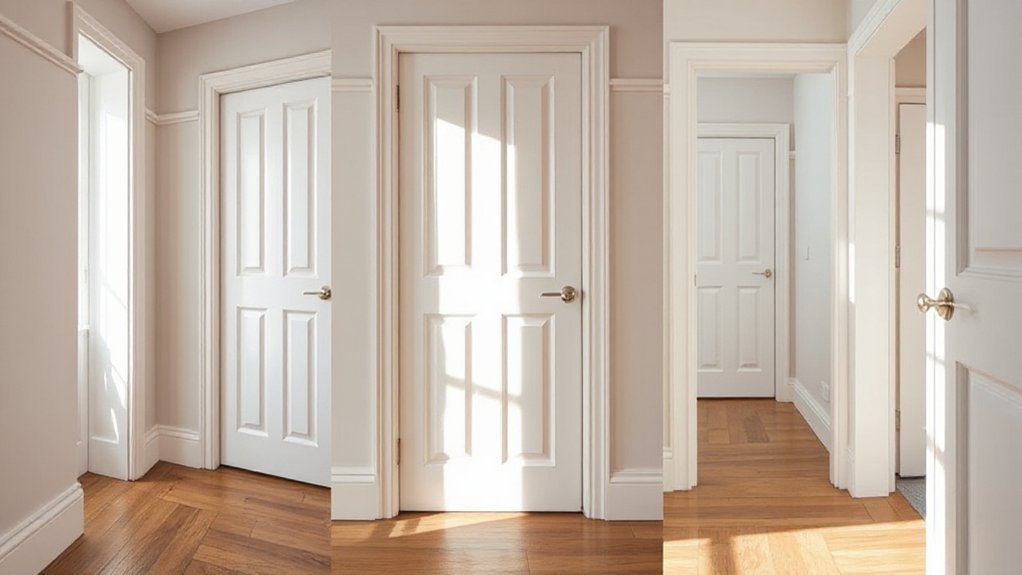
For skirting, doors, and trim, you’ll usually get the best balance with satinwood: it flows well, resists scuffs, and won’t highlight grain or filler as harshly as full gloss.

Use gloss if you want maximum durability and shine, but expect it to show brush marks unless you lay it off carefully.

Choose matt or “dead matt” wood paint for a modern look, but specify a washable, abrasion-rated product.

For Eco friendly options, pick water-based acrylic or hybrid enamels with low VOCs.

For Historical accuracy in period homes, traditional oil gloss or linseed-based paints suit older joinery.

Best Paint Finish for Kitchens (Grease, Scrubbing, Stains)

Although kitchens see more airborne grease and frequent wipe-downs than any other room, you’ll get the best results with a durable, washable mid-sheen finish (typically satin or soft sheen) that’s rated for scrubbing. Choose a UK-marketed “kitchen paint” with stain resistance and a tight film that won’t burnish patchily when you spot-clean.

Use it on walls, ceilings near cooking zones, and around splashbacks where food staining happens. Avoid dead matt: it marks quickly and can go shiny in hand-contact areas. Full gloss can highlight plaster defects and show roller stipple under downlights.

Prep matters: degrease with sugar soap, rinse well, then apply a stain-blocking primer on nicotine or cooking residue. Eco-friendly paints now offer robust acrylic binders without high odour.

If you’re matching Historical paint finishes, pick soft sheen.

Best Paint Finish for Bathrooms (Steam, Mould, Moisture)

In a bathroom, constant steam and quick temperature swings push moisture into paint films, so you’ll get the best results with a purpose-made bathroom paint in satin/soft sheen (or a durable eggshell) that’s rated for condensation and mould resistance. These finishes form a tighter, more washable film than matt, helping stop staining around showers, windows, and ceiling corners.

Choose a modern acrylic, water-based system with a built-in biocide and a scrub rating suitable for UK condensation cycles. Keep sheen low-to-mid to avoid highlighting plaster defects under downlights, but don’t go flat.

If you follow Paint color trends like warm off-whites or muted greens, pick tintable formulations designed for high humidity. For Eco friendly finishes, look for low-VOC, water-based paints carrying EU Ecolabel or similar UK-available certification.

Common Matt, Satin and Gloss Mistakes (and Fixes)

When you mix up matt, satin and gloss, you usually don’t see the problem until the light hits the wall and every patch, lap mark or scuff shows up.

The commonest mistake is putting matt on high-traffic areas; fix it by switching to durable vinyl matt or satin and touching in with a full-coat re-roll, not spot dabs.

You’ll also get flashing if you don’t seal new plaster. Mist coat with watered-down emulsion, then keep a wet edge and box your paint to avoid shade drift.

With satinwood, don’t skip deglossing; key old gloss with 180–240 grit, wipe, then use adhesion primer.

Brush marks? Lay off with a fine synthetic brush and work to the grain.

Choose eco friendly paint options with low-VOC where possible.

Conclusion

You don’t need a PhD in Sheen Studies to paint a UK house. Use matt on living rooms and bedrooms when you want to hide lumpy plaster and pretend you never touched the wall. Go flat on ceilings so every trowel mark doesn’t shout. Pick satin for woodwork if you like durability without full-on gloss “estate agent shine”. Save gloss for hard-wearing trim. In kitchens and bathrooms, use wipeable, moisture-resistant finishes—because Britain.…

diy shower leak repairs
General Property Repairs

Fixing a Dripping Shower: Simple Repairs Homeowners Can Do Themselves

Start by pinpointing the drip: check the showerhead/arm joints with a dry paper towel, inspect the tub spout diverter for backflow, and look for staining or scale at fittings. Shut off the shower’s stop valves or the main, verify zero flow, and cover the drain and finishes. Snug loose joints and reseal threads with 3–5 wraps of PTFE tape. If the valve still drips, replace the washer or cartridge and retest hot/cold. Next, you’ll see the step-by-step checks.

Key Takeaways

  • Identify the leak source by checking showerhead joints, arm threads, diverter backflow, trim caulk gaps, and mineral staining at fittings.
  • Shut off water at shower stop valves or the main, then open the valve to confirm flow stops and relieve pressure.
  • Cover the drain, protect surfaces, and organize trim screws; clean the valve bore and lubricate O-rings with silicone grease before reassembly.
  • Reseal showerhead or arm threads with 3–5 clockwise PTFE tape wraps, then hand-tighten and snug with a cloth-protected wrench.
  • Replace worn washers or cartridges, reassemble, restore water, and test hot/cold operation; call a plumber if leaks persist or walls may be wet.

Pinpoint Where Your Dripping Shower Starts

identify precise leak source

Before you replace any parts, isolate the exact source of the drip by watching when it occurs and where the water tracks. Run the shower, then shut it off; note whether dripping continues, which can indicate valve or cartridge leakage.

Check the showerhead and arm: wrap a dry paper towel at the escutcheon and along threaded joints to confirm seepage.

Inspect the tub spout diverter for backflow that mimics a “shower” drip.

Look for Caulking issues at the trim plate and tile junctions; water behind the wall violates moisture-control best practices and can damage framing.

If staining, green/white scale, or rust appears at fittings, suspect Pipe corrosion and confirm with an access panel inspection where permitted.

Document findings before disassembly.

Shut Off Water and Protect the Shower Area

Locate the shower’s integral shutoff valves if present, and close them fully. If you can’t isolate the fixture, shut off the main water supply to comply with safe service practices.

Verify the water is off by opening the shower valve and confirming flow stops. Then relieve residual pressure.

Cover the drain with a strainer or plug and protect the tub or shower pan surfaces with a drop cloth so small parts can’t fall into the trap or damage the finish.

Locate Shower Shutoff Valves

If you can’t isolate the shower’s water supply quickly, a minor drip can turn into a leak while you work, so identify the shutoff points and secure the area first.

Look for a dedicated shower shutoff near the bathroom: inside an access panel behind the valve wall, in an adjacent closet, or in the basement/crawlspace directly below.

Some installations use integral stop valves on the mixing valve body; you’ll find them behind the trim plate and they’re turned with a flathead or hex key.

Verify valve locations by tracing hot and cold lines to the shower drop.

Confirm the valve is rated for potable water and fully operational.

Lay down a non-slip drop cloth, cover the drain, and keep tools dry to reduce shock and slip hazards.

Turn Off Main Supply

Once you’ve confirmed the shower’s local shutoffs—or found none—shut down the home’s main water supply to control pressure and prevent an uncontrolled leak while you open the valve.

Locate the Main supply shutoff at the meter, curb stop, or where the service line enters the building; turn the valve fully off (clockwise for most gate/stop valves, lever perpendicular for ball valves).

Open the shower valve to relieve residual water pressure and verify flow stops.

If you’ve got a water heater, set gas control to “Pilot” or switch electric power off to prevent dry-firing while lines are depressurized.

Keep a flashlight handy, work with dry hands, and don’t force a stuck valve; call a licensed plumber if it won’t move safely.

Cover Drain And Surfaces

Before you open the valve body, cover the shower drain with a fine-mesh strainer or a rag and protect the tub or shower floor with a drop cloth so screws, clips, and small parts can’t disappear into the trap or chip finished surfaces. Tape the drop cloth edges so it won’t shift underfoot, and keep the work area dry to reduce slip hazards.

If you’re removing trim, place a towel under tools to prevent enamel or tile damage. Do quick drain cleaning around the grate and weep holes so debris won’t wash into the trap when you flush lines later.

After reassembly, perform surface sealing as required: replace cracked escutcheon gaskets, re-caulk per manufacturer specs, and keep sealant off moving valve components.

Tighten and Reseal a Dripping Showerhead

seal and tighten showerhead

Verify the drip’s source at the showerhead, arm threads, or swivel joint so you’re addressing the correct fitting.

Use a wrench with a protective cloth to snug the showerhead connection—don’t overtighten and risk damaging the threads.

If it still weeps, remove the head and wrap PTFE plumber’s tape clockwise on clean, dry threads, then reinstall and tighten to a secure, leak-free seal.

Identify Leak Source

Where’s that drip actually coming from—the showerhead face, the swivel joint, or the threaded connection at the shower arm? Start with Leak detection: dry the head, then run water for 30 seconds and watch for first moisture.

If droplets form on the spray face after shutoff, suspect trapped debris or a worn internal seal.

If water beads at the swivel joint while running, the ball-and-socket washer may be failing.

If the wall-side area dampens, the shower arm penetration or escutcheon may be letting water migrate; that’s a building-cavity risk.

Before testing, confirm water pressure isn’t excessive; many codes expect a pressure-reducing valve above 80 psi.

Shut off, then wipe and recheck after 10 minutes.

Tighten Showerhead Connection

Now that you’ve pinpointed the leak, tighten and reseal the showerhead connection to stop seepage at the threads and prevent water from migrating behind the escutcheon. Shut off the shower valve, then open it briefly to relieve trapped pressure.

Protect the finished nut with a cloth and use an adjustable wrench to snug the showerhead or swivel nut clockwise; don’t over-torque, or you can crack the fitting or distort gaskets.

Verify the arm is secure in the drop-ear elbow and that the escutcheon sits flat to keep wall cavities dry and code-compliant.

Restore flow and inspect for drips at full hot and cold. If spray is harsh, perform a Water pressure adjustment at the main regulator.

Regular Showerhead maintenance includes checking tightness after cleaning.

Reseal With Plumber’s Tape

If tightening alone doesn’t stop the drip, reseal the threaded joint with PTFE plumber’s tape to create a watertight, code-appropriate seal.

Shut off the shower valve, then protect the finish with a cloth and use an adjustable wrench to remove the showerhead.

Inspect threads for cracks, corrosion, or cross-threading; replace damaged parts to meet safe plumbing practice.

Clean old tape and debris, then dry the male threads.

Wrap Plumber’s tape clockwise (the direction you’ll tighten) for 3–5 full turns, keeping it flat and taut so it doesn’t bunch and restrict flow.

Reinstall hand-tight, then snug 1/4 turn with the wrench—don’t overtighten.

Run water and verify no leaks.

These sealing techniques prevent drips and reduce galvanic binding.

Replace the Shower Valve Washer to Stop Drips

Although a worn washer seems like a minor part, it’s often the primary seal that stops water from bypassing the shower valve seat and causing a steady drip.

Shut off the branch supply at the stop valves or main, then verify zero flow by opening the shower. Plug the drain, remove the handle and trim, and keep fasteners organized.

For code-compliant shower valve maintenance, don’t use heat or solvents near plastic parts.

Back out the stem assembly, then inspect the rubber washer on the stem end. Match the diameter and thickness exactly, and replace the brass screw if it’s stripped or corroded.

Use proven washer replacement techniques: seat the washer flat, tighten snugly, and don’t over-torque.

Reassemble, restore water, and check for leaks.

Replace a Shower Cartridge Causing a Steady Drip

replace worn shower cartridge

A steady shower drip that persists after a washer replacement usually points to a worn or scored cartridge that can’t seal the valve body correctly.

Shut off the water at the stop valves or main, then open the shower to relieve pressure and verify flow stops.

Remove the handle and trim, keeping the escutcheon gasket intact for preventing leaks.

Note the cartridge orientation, then pull the shower cartridge using the manufacturer’s tool to avoid damaging the valve body.

Inspect the bore for debris or mineral scale; clean it without scratching.

Lubricate O-rings with silicone grease rated for potable water, and install the new cartridge fully seated.

Reassemble, restore water, and test both hot and cold for smooth operation and no drips.

Know When to Call a Plumber for Shower Drips

When a shower drip keeps returning or the valve won’t shut off cleanly after you’ve replaced the washer or cartridge, call a licensed plumber before you risk damaging the valve body or creating a concealed leak.

You should also stop DIY work if the shutoff won’t fully isolate the fixture, if the stop valves are missing, or if you must open a wall to access soldered or crimped joints.

Code-compliant repairs require proper supports, rated materials, and tested connections; a pro can pressure-test and verify anti-scald operation on pressure-balance or thermostatic valves.

Treat any active seepage behind tile, swelling drywall, or mold odor as Emergency plumbing. That’s when to call a pro to prevent structural damage and contamination.

Conclusion

A dripping shower is a small leak with a big message: ignore it, and it becomes corrosion, mold, and higher bills. If you’ve pinpointed the source, shut off the supply, protected the work area, and corrected the showerhead, washer, or cartridge, you’ve restored the system’s seal. Recheck for leaks, confirm smooth handle operation, and verify temperature control. If valves won’t seat, piping shows damage, or codes apply, call a licensed plumber.…

restoring vintage wooden windows
Home Upgrades & Renovations

A Step By Step Guide To Restoring Vintage Wooden Sash Windows

Start by inspecting each sash for twist, open joints, and rot at the lower rail and sill line, then decide what’s sound enough to repair. Score paint lines, remove staff stops, lift out the lower sash, tie off cords, pull the parting bead, and withdraw the upper sash, labeling everything. Strip paint only on moving edges, clean channels, and wax for glide. Repair rot and loose mortise-and-tenon joints, re-cord, renew beads, then prime and paint, lapping onto glass—more details follow.

Key Takeaways

  • Inspect sashes, joints, muntins, and rot at rails and sill line to decide repair versus replacement, documenting all findings.
  • Gather sharp tools, low-heat paint removal gear, clamps, and PPE; choose compatible materials like hide glue, linseed putty, and sash cord.
  • Remove interior stops, lower sash, parting bead, then upper sash; label parts, tie off cords, and bag hardware for reassembly.
  • Strip paint only in moving channels, clean tracks, set nails below surface, and lubricate sash edges and beads with paraffin or beeswax.
  • Repair rot and loose joints, replace cords and beads, service pulleys, then prime and paint, slightly overlapping glass for a weather-tight seal.

Assess Wooden Sash Windows: Repair or Replace?

inspect assess repair document

Before you reach for replacement units, take a careful inventory of what you’ve got, because original sash often repays repair when its core timber remains sound. You’ll inspect rails, stiles, and meeting rails for spring, twist, and open joints; probe suspected decay at the lower rail and sill line, and note whether damage is localized or structural.

Check muntins for fractures, glazing bars for thinning, and mortise-and-tenon shoulders for tight bearing. If putty has failed yet the arrises remain crisp, you can justify repair for Historical accuracy.

If previous alterations have erased profiles, or rot has advanced through joints and pins, consider modern alternatives, but match sightlines, horn details, and glass thickness to the opening exactly. Document findings for measured decisions.

Tools, PPE, and Materials for Sash Restoration

Once you’ve decided the sash deserves saving, set yourself up with the same disciplined kit a joiner would recognize: sharp cutting tools, controlled heat for paint and putty, accurate measuring and clamping, and materials that respect old-growth timber and traditional glazing.

Keep chisels honed, add a narrow pry knife, and use a carbide scraper; pair them with an infrared heater or low-temp heat gun to soften coatings without scorching profiles.

Wear a P100 respirator, goggles, nitrile gloves, and disposable coveralls for dust and lead paint.

Stock hide glue or reversible epoxy sparingly, linseed-oil putty, shellac-based primer, and sash cord, waxed if specified.

Choose brass screws and period pulleys to maintain Historical accuracy while managing Restoration cost sensibly.

Remove the Sashes and Protect the Trim

Although the joinery looks simple at a glance, you’ll get the cleanest removal by treating the frame and its mouldings as finished furniture, not demolition. Score paint lines with a sharp knife, then ease off the interior stop with a thin putty knife and a small pry bar, levering against a wood shim. Label each stop and its location.

Lower the bottom sash a few inches, cut any paint bridging, and lift it free. Tie off the sash cords immediately so the weights don’t drop, then tag left/right. Remove the parting bead carefully, working from the meeting rail area, and withdraw the upper sash the same way.

Bag screws, lifts, and locks for hardware restoration, and cushion the glass for later Glass replacement. Mask the trim with low-tack tape and cardboard.

Strip Paint and Ease Tight Sash Channels

With the sashes out and the trim protected, you’ll strip the paint that’s bridged the parting beads and jamb liners, using a low-heat gun and sharp scraper or a solvent stripper where heat would scorch the old growth.

You’ll keep the work lead-safe with wet methods, containment, and a HEPA vacuum as you go.

Then you’ll clear the channels to bare, true wood, dress high spots lightly, and apply a dry film lubricant or a rubbed paraffin coat so the sashes run free without attracting grit.

Safe Paint Stripping Methods

Because old sash paint often bridges the meeting rails and packs into the parting and staff channels, you’ll get the best results by stripping only where the window must move, not by scouring the whole frame. Score the paint line with a sharp knife, then pull the sash and parting bead carefully so you don’t splinter brittle profiles. Protect glass with foil tape and a thin sheet of metal.

Choose non toxic solvents for flat areas where you can keep dwell time controlled; brush on, wait, then lift softened paint with a shave hook, working with the grain.

For stubborn ridges, use a heat gun on low, keep it moving, and stop as soon as the paint turns dull and pliable. Scrape immediately, then wipe residue clean.

Lubricate And Clear Channels

Where does a sash usually bind after you’ve broken the paint seal? Most often at the parting bead, staff bead, and the jamb channels where old paint has bridged. Pull the sash, then scrape only the high ridges with a sharp, narrow chisel held flat; don’t gouge the stile. Follow with a cabinet scraper and a few passes of fine paper on a hardwood block to true the bearing surfaces.

For channel cleaning, vacuum the pockets, then wipe the channels with mineral spirits to lift grit and waxy residue. Check for protruding brads and set them below the surface.

For window lubrication, rub dry paraffin or beeswax along the sash edges and beads; avoid oily lubricants that attract dust. Rehang and test for smooth travel.

Repair Rot and Tighten Loose Sash Joints

Before you touch paint or putty, inspect the sash for rot and joint failure, since both will undo an otherwise careful restoration. Probe suspect rails, stiles, and the bottom meeting edge with an awl; punky fibers and dark staining signal sash window rot. Excavate to sound wood, then flood the cavity with consolidant and pack it with a dutchman patch or epoxy filler shaped to the original profile.

For loose mortise-and-tenon corners, do wooden joint repair: strip the joint, scrape out failed glue, and test-fit square. Re-glue with hot hide glue for period correctness, clamp diagonally, and verify equal diagonals. If the tenon’s worn, peg it with a small hardwood dowel, then plane flush after cure. Prime end grain immediately.

Replace Sash Cords, Pulleys, and Balance Weights

Once the sash itself is sound, you can restore the counterbalance by renewing the cords, servicing the pulleys, and confirming the weights match the sash.

Start by opening the weight pocket and retrieving each weight; keep left and right sets paired.

Weigh the sash and compare: the combined weights should slightly underbalance it so it closes firmly.

For Sash cord replacement, cut new braided cotton sash cord to length, melt the ends, and tie a figure-eight to the weight ring.

Feed the cord over the pulley, then pin it temporarily at the stile while you rehang the sash and set the knot in the sash groove.

For Pulley repair, remove paint, oil the axle, and true the wheel so it spins freely, without wobble.

Draught-Proof Timber Sash Windows (Beads and Seals)

After you’ve restored the counterbalance, turn to draught-proofing by renewing the parting and staff beads and fitting discreet seals that stop rattle without tightening the sash.

Ease out the staff bead with a thin chisel, keeping the old profile as a pattern. For bead replacement, mill or buy matching ovolo sections in straight-grained softwood, then pre-drill and pin with lost-head nails so you don’t split it.

Replace the parting beads next, ensuring the sash runs freely in the groove. Rout or saw a neat kerf and press in brush pile or sprung bronze, keeping the carrier continuous at meeting rails.

Rehang and test: the sash should slide under its own weight. Finish with seal maintenance: vacuum the piles, wipe wax, and replace crushed strips early.

Prime and Paint Sash Windows So It Lasts

Although the joinery now runs sweetly and seals neatly, you’ll only keep rot and sticking at bay if you prime and paint the sash in the traditional order and with thin, well-worked coats.

Start by spot-priming bare timber and end-grain with an oil-based wood primer; don’t flood it, just work it into pores and joints. Prime the glazing bars and meeting rails next, then lightly denib.

Apply undercoat, brushing out with the grain and keeping the paint off the draught seals.

Lay on the topcoat last, and “strike” the paint line to the glass with a slight overlap to seal the putty edge.

For color matching, take a clean paint scrape to a specialist and match the aged tone. That supports historical accuracy.

Conclusion

Once you’ve re-hung the sashes, sealed the beads, and laid on your final coats, you’ll feel the window come back to life. A joiner I apprenticed under timed it: after cords and parting-bead seals, his draught strip cut the candle-flicker test from 10 seconds to none. That’s the point—like resetting a pocket watch, each pin, scrape, and brushstroke restores steady movement. Keep the channels waxed, and it’ll run true for decades.…

optimal garden lighting placement
Plumbing & Electric Fixes

Where to Position Security Lights in the Garden for Maximum Coverage

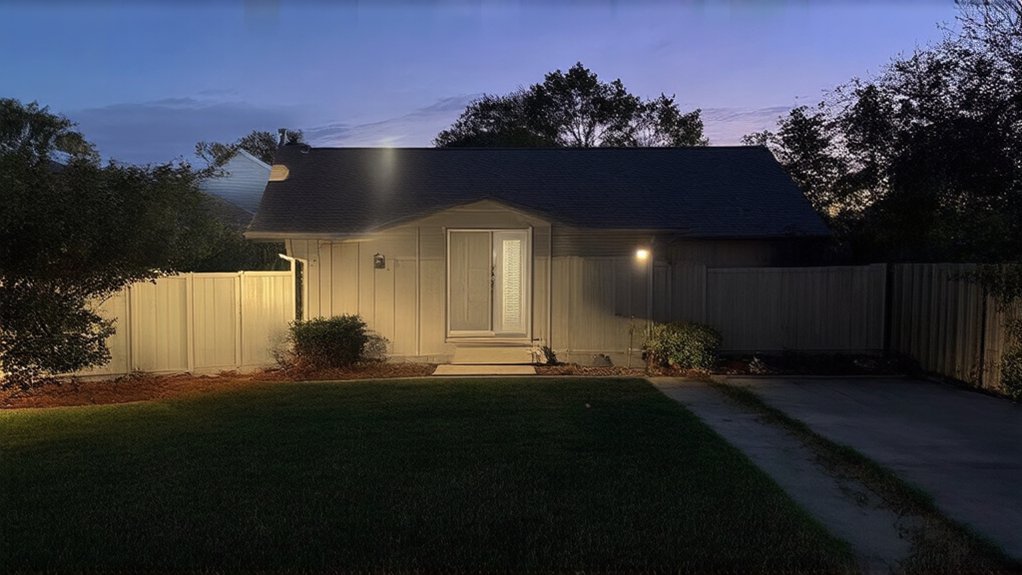
Walk your garden after dark and mark doors, ground-floor windows, paths, steps, and shadowed corners where sightlines fail. Mount fixtures high enough to stay out of reach, then aim beams 15–30° downward to cut glare and spill. Light access points for face-and-hand visibility, edge-light paths and treads, and place fixtures at both ends of side passages and on shed corners so beams overlap and erase shadow bands. Keep going to refine optics, timers, and sensor zones.

Key Takeaways

  • Walk the garden on a moonless night to map routes, entry points, and persistent shadow zones behind sheds, hedges, and pergolas.
  • Mount lights high and aim 15–30° downward to reduce glare and spill, using shields near windows and neighbor-facing boundaries.
  • Prioritize doors and ground-floor windows by washing faces and latch areas along approach lines, aligning beams with any camera viewpoints.
  • Light pathways and steps with low-glare edge fixtures aimed across treads, keeping consistent spacing and adding extra units at hazards and curves.
  • Cover side passages and sheds with lights at both ends and on adjacent faces, overlapping beams to eliminate dark bands and blind corners.

Map Your Garden at Night for Blind Spots

nighttime garden mapping awareness

Before you mount a single fixture, walk your garden after dark and map where light fails, because daytime sightlines don’t reveal true coverage gaps. Use a notepad or phone sketch to mark circulation routes, entry points, and any hardscape edges that disappear in shadow.

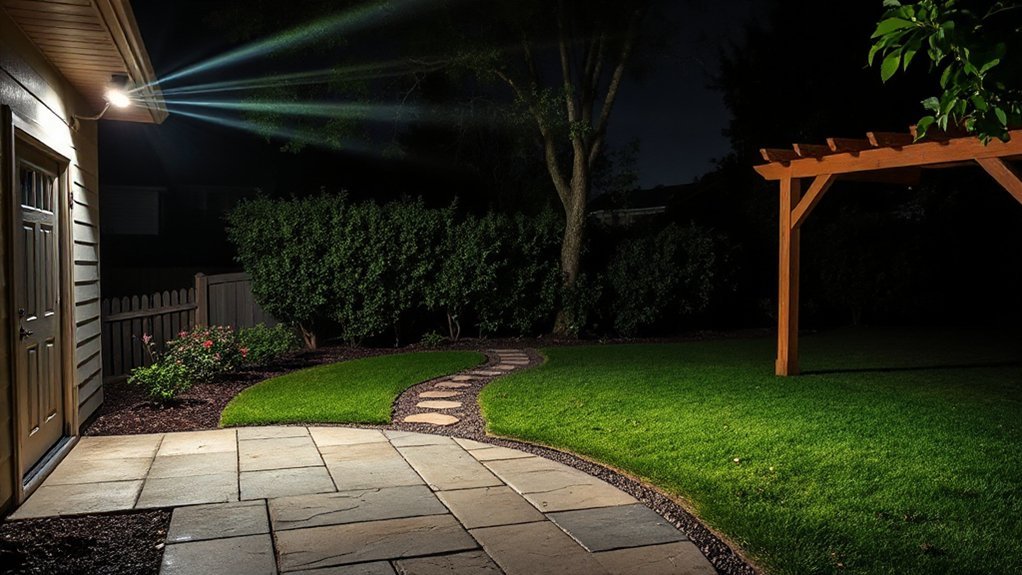
Stand at doors, gates, and paths and note what you can’t see: corners behind sheds, dense hedges, pergola posts, and elevation changes from garden landscaping. Identify reflective surfaces (windows, pale walls, gravel) that may cause glare and reduce contrast.

Track existing ambient sources like streetlights or neighbors’ luminaires and record their spill. For wildlife friendly lighting, flag habitat zones and corridors so you can prioritize low-impact placement and limit unnecessary illumination.

Verify results on a moonless night.

Set Security Light Height, Angle, and Beam Spread

Once you’ve marked your dark zones, set each security light’s mounting height, aiming angle, and beam spread as a single system: higher mounts widen coverage but flatten facial detail, while lower mounts improve identification at gates and paths but create longer shadows behind shrubs and posts.

Aim fixtures 15–30° downward to keep spill off neighboring lots and reduce glare into cameras.

Choose beam spread by task: 10–25° for long side passages, 40–90° for patios and lawn edges, and asymmetric wall-wash optics to graze fences without hotspots.

Overlap beams slightly so moving subjects stay illuminated during transitions.

Pair Motion sensors with a short ramp-up and a 30–120 second hold to avoid rapid cycling.

Use Light timers for dusk-to-midnight baseline, then sensor-only overnight.

Place Security Lights at Doors and Ground-Floor Windows

Because doors and ground-floor windows act as your primary access points, treat them as priority nodes in the lighting layout and aim for clean facial and hand-level illumination at typical approach lines. Mount fixtures near door heads or soffits and offset them so the beam crosses the visitor, not the lens, reducing glare and improving identification.

For windows, place lights to wash frames and latch areas while avoiding direct spill through glass that can silhouette occupants and compromise Indoor security. Use narrow-to-medium optics to avoid lighting empty wall, and add shields to cut upward and neighbor-facing spill.

If you run camera integration, align beam direction with the camera’s field of view and set output to prevent blown highlights on faces and reflective door hardware. Set consistent color temperature across these nodes.

Place Security Lights Along Paths, Steps, and Trip Hazards

Run low-glare fixtures along pathway edges so you define the walking line without washing out nearby planting beds.

Aim light across treads and landings to cast crisp shadows that reveal step noses, drops, and changes in grade.

Keep spacing consistent and place luminaires on the outside of turns and at every hazard point so you don’t create dark gaps where footing fails.

Illuminate Pathway Edges

If you want reliable, glare-free coverage where people actually walk, prioritize pathway edges and every change in elevation. Mount low bollards or shielded path lights 12–18 inches high, aimed downward at 30–45°, so you wash the walking surface without lighting sightlines.

Space fixtures 6–10 feet apart, tightening spacing on curves to prevent dark pockets. Select 2700–3000K LEDs with full cutoff optics to support garden aesthetics while preserving contrast for obstacle detection.

Keep beams off planting beds; use glare shields and orient lenses away from foliage for plant growth considerations and to reduce hotspotting on glossy leaves.

Run wiring outside root zones, and set timers or motion with low-level standby to maintain continuity.

Highlight Steps And Drops

When your path shifts from flat to vertical—even by a single riser—treat that edge as a primary security-lighting target. Aim fixtures across the tread, not down the stair run, so you reveal riser faces without glare.

Mount step lights 150–300 mm above each tread, or use low bollards set back 300–600 mm to keep beams off eye level.

For drops, wash the landing and the first step, then add a narrow-beam accent to mark the edge line.

Plan motion sensor placement so it triggers before a foot reaches the change: position sensors 2–3 m upstream, angled 15–30° across travel.

Tie zones into lighting automation: step circuits stay at dim standby, then ramp to full on detection.

Cover Side Passages, Sheds, and Dark Corners (Overlap Light)

Place a light at each end of your side passage so the beams overlap and eliminate mid-run shadow bands along fences and gates.

For sheds, mount one fixture to wash the door plane and a second on the adjacent corner so their coverage intersects at the rear edge where concealment occurs.

You’ll get continuous illumination through dark corners by aiming for cross-lighting rather than a single hotspot.

Illuminate Side Passages

Because side passages naturally trap shadows between fences, walls, and planting beds, you’ll get the best security coverage by treating them as a continuous corridor and designing for overlapping light. Mount fixtures along the run at consistent spacing so each beam intersects the next at roughly 20–30% of its footprint, preventing blind pockets near gates, bins, and service doors.

Aim asymmetric wall packs or shielded floods downward at 30–45° to keep glare off neighboring windows while maintaining vertical illumination on faces. Use motion sensors with a low-lux standby mode, so you get fast activation without wasting power, improving energy efficiency.

Prioritize 3000–4000K LEDs and high CRI for accurate color recognition. Keep wiring accessible and protect controls in weatherproof enclosures.

Overlap Shed Corner Lighting

Side passages rarely end at a clean edge—they usually terminate at a shed wall, gate post, or rear corner where one fixture can’t see around the return, so you need overlapping corner coverage.

Mount two luminaires on adjacent faces of the shed corner, each aimed 30–45° across the blind side, so their beams intersect mid-passage.

Keep mounting heights matched (2.2–2.8 m) to avoid shadow bands and to maintain consistent vertical illuminance on fences and doors.

Specify asymmetric optics or adjustable heads to push light along the ground plane without overspill into neighbors’ windows.

Set PIR sensors to slightly different zones and delays, so motion near the corner sustains overlap lighting rather than strobing.

Test at night and fine-tune cutoff.

Light Gates, Driveways, and Parking: Without Neighbour Spill

When you light gates, driveways, and parking bays, you need a layout that gives you continuous, readable illumination on approach paths while keeping the beam cut-off tight to your boundary.

Mount asymmetric, full cut-off luminaires at 2.5–3.5 m, aimed 5–10° down, and keep fixtures 0.5–1 m inside your fence line to prevent neighbour spill.

Use cross-lighting: place two units on opposing posts so shadows don’t hide faces or number plates.

Specify 3000K, 70+ CRI to support security without washing out garden aesthetics.

Add a hood or louvre where sightlines leave your plot.

Pair PIR with low-level dusk dimming for energy efficiency, and zone-control the driveway separately from the gate to avoid overlighting.

Conclusion

Walk your garden at night and let the shadows show you what daytime hides. Mark blind spots, then set each fixture high, aimed down, with a beam spread that overlaps—never leaves a seam. Lock in doors and ground-floor windows first, then trace paths and steps with glare-controlled pools of light. Don’t forget side passages, sheds, and corners. Finally, light gates and driveways with tight cutoffs. When the last dark patch disappears… that’s your coverage.…

electrical issues causing flickering
Plumbing & Electric Fixes

Troubleshooting Flickering Lights: Common Electrical Issues and Easy Fixes

If your lights flicker, treat it as a warning sign and check the scope first: one bulb, one room, or the whole house. Tighten or replace a loose bulb, confirm the wattage matches the fixture, and make sure your LED works with the dimmer. Reset a tripped breaker once, then stop if it trips again. Run large appliances separately to spot overloads. If you notice heat, burning odor, buzzing, sizzling, or discoloration, shut off power and call an electrician—next you’ll see the most common causes and fixes.

Key Takeaways

  • Treat repeated or worsening flicker, heat, burning odors, buzzing, or discoloration as hazards; shut off power and call an electrician.
  • Identify scope: one bulb, one room, or whole house; broader flicker often indicates circuit overloads or utility/service connection problems.
  • Check bulb and fixture compatibility, correct wattage, and LED/CFL dimmer suitability; incompatible dimmers commonly cause flicker or ghost glow.
  • Inspect and tighten loose bulbs, and replace worn or scorched sockets; flicker when touched or wobbling bulbs suggests poor contact or arcing.
  • Reset tripped breakers once and observe load-related flicker; repeated trips, hot panels, or failure to reset require professional diagnosis.

Are Flickering Lights Dangerous? Key Warning Signs

detect and address flickering hazards

Although a brief flicker can come from a loose bulb or a momentary utility dip, you should treat repeated or worsening flickering as a potential electrical hazard until you’ve ruled out a code-compliant cause.

If you notice heat, a burning odor, buzzing, sizzling, or discoloration at switches, fixtures, or panel covers, shut the circuit off and call a licensed electrician.

Don’t ignore frequent dimming that coincides with motor starts, or lights that surge unusually bright; both can signal loose terminations, overloaded conductors, or failing devices.

If a breaker trips, won’t reset, or feels hot, stop troubleshooting.

You’ll protect lighting aesthetics, improve energy efficiency, and reduce fire risk by prioritizing safe diagnostics and proper torque, splicing, and grounding.

Is It One Bulb, One Room, or the Whole House?

Once you’ve ruled out obvious danger signs, narrow the problem by mapping the flicker’s scope: one bulb, one room/circuit, or the whole house. If it’s isolated to a single lamp or Decorative fixtures, suspect the fixture, socket, or driver compatibility; Lighting aesthetics upgrades often introduce dimmers, LEDs, and controls that don’t always play nicely together.

If multiple lights in one room flicker, track what’s on that circuit and whether switching loads correlates, which can indicate a localized connection issue or an overloaded branch circuit requiring professional evaluation.

If the entire house flickers—including receptacle-connected lamps—think service-level problems: utility voltage fluctuation, meter base issues, or a failing main connection. Document when it happens, what’s running, and call a licensed electrician or your utility.

Quick Fixes: Bulb Fit, Breaker Reset, and Load Checks

Before you start chasing wiring faults, you can rule out a lot of harmless flicker with three safe checks.

First, confirm the lamp or fixture is rated for the bulb type and wattage you’re using, then verify any dimmer is LED/CFL-compatible and properly rated. If you use Smart lighting, update the app/firmware and disable aggressive “adaptive” features that can pulse output.

Second, check your panel for a tripped breaker. Stand on a dry surface, look for a handle between ON and OFF, and reset it fully OFF then ON. If it trips again, stop and call a licensed electrician.

Third, do a load check: run large appliances one at a time and note flicker. Managing simultaneous loads improves energy efficiency.

Loose Bulbs and Worn Sockets That Cause Flicker

If your light flickers when you touch the lamp or tap the fixture, you’re likely dealing with a loose bulb or a socket that’s worn and not maintaining solid contact.

You should confirm the symptom with power off, inspect for heat damage or corrosion, and stop using the fixture if you see arcing, discoloration, or a loose center tab.

When replacement is needed, you’ll shut off the correct breaker, verify de-energization, and swap the socket or fixture with a properly rated, code-compliant part.

Signs Of Loose Bulbs

A loose bulb or a worn socket is one of the most common, code-relevant causes of flickering because it creates an intermittent connection that can arc and overheat. You’ll often notice quick, irregular flashes when the lamp is bumped, a bulb that wobbles, or light that cuts out then returns.

Watch for dark scorch marks on the bulb base, a hot-to-the-touch socket shell, or a faint buzzing. These are warning signs, not “lighting aesthetics” issues, and they can shorten bulb lifespan.

Before touching anything, switch off the breaker and let the bulb cool. If the bulb wasn’t fully seated, tighten it gently—no forcing.

If flicker persists, stop using that fixture and schedule service.

Diagnosing Worn Sockets

Once you’ve ruled out a bulb that simply wasn’t seated, focus on the socket itself—worn contacts and heat-damaged insulation can’t hold a solid connection and will keep producing intermittent flicker and arcing.

Turn off the breaker, verify power is off with a non-contact tester, and let the lamp cool.

Inspect the shell and center contact: pitting, dark spots, melted phenolic, or a springy tab that doesn’t press firmly indicate a worn socket.

Look for contact corrosion (green/white buildup) that increases resistance and heat.

Gently wiggle the bulb base; any play suggests poor tension.

If flicker changes when you tap the fixture or move the cord, suspect internal loosening.

Stop using the circuit if you smell burning.

Safe Replacement Steps

Before you replace anything, lock in a safe, code-compliant work setup: switch off the correct breaker (not just the wall switch). Verify the fixture is de-energized with a non-contact tester and a meter when accessible, and let the lamp or socket cool fully.

Tighten a loose bulb to snug—don’t over-torque—or swap in a known-good lamp to confirm the flicker follows the bulb. If the socket feels sloppy, shows heat marks, or won’t grip the base, replace the lampholder.

Use Electrical safety basics: insulated gloves as needed, eye protection, and a stable ladder.

Gather Replacement tools: screwdriver, wire stripper, needle-nose pliers, and approved wire connectors.

Match wattage, base type, and fixture rating, then restore power and recheck for flicker.

Switches, Dimmers, and LED Compatibility Issues

Although your wiring may be fine, a mismatched switch or dimmer often triggers LED flicker, strobing, or a faint “ghost” glow—especially when the fixture is on a dimmer.

First, confirm Dimmer compatibility: check the dimmer’s LED/CFL rating, minimum load, and approved bulb list, then match it to your lamp wattage and driver type.

If you’ve installed smart switches, verify they don’t require a neutral in that box before energizing.

Next, inspect switch wiring with power off at the breaker: make sure line and load aren’t reversed, terminals are tight, and any multi-way setup uses the correct dimmer model.

If flicker persists, replace the dimmer with a listed LED-rated unit and retest at full brightness.

Circuit Overloads and Wiring Faults Behind Recurring Flicker

If your lights still flicker after you’ve ruled out bulb and dimmer issues, the circuit itself may be dipping voltage under load or suffering from a loose, damaged, or miswired connection.

Start by noting what else runs when the flicker appears: heaters, microwaves, and compressors can push circuit capacity past safe limits. If flicker tracks these starts, redistribute loads or add a dedicated circuit—don’t upsize a breaker without matching wire gauge per code.

Next, inspect for wiring integrity problems: loose neutrals, backstabbed receptacles, worn switches, or overheated splices can arc and cause intermittent drops. Shut off power, verify de-energized, and tighten terminations to torque specs.

Call a licensed electrician if you find scorching, aluminum wiring, or repeated breaker trips.

Conclusion

Flickering lights aren’t just pesky—they can signal serious, system-wide stress. Start simple: snug the bulb, swap a suspect socket, reset a tripped breaker, and spread heavy loads. Then scrutinize switches and dimmers for LED compatibility. If the flicker follows a circuit, treat it as a wiring warning: loose lugs, failing neutrals, or overloaded conductors. Stay safety-first and code-compliant—shut power off, verify with a tester, and call a licensed electrician when in doubt.…

garden nighttime illumination ideas
Garden & Outdoor

Outdoor Lighting Ideas That Transform Your Garden After Dark

You’ll transform your garden after dark by zoning it first: paths, seating, focal plants, and hazards. Choose warm 2700–3000K, shielded low-voltage LEDs for stable output and tight optics, then keep intentional darkness for contrast and sky view. Line walkways with low-glare path lights (100–200 lumens) spaced 6–8 feet and offset. Uplight specimen trees with 10–25° spots and wash walls evenly. Next, you’ll refine aiming, dimming, and smart controls.

Key Takeaways

  • Zone your garden by function—paths, seating, beds, focal points—and keep intentional dark areas for contrast and sky view.
  • Choose warm 2700–3000K low-voltage LEDs for reliable runtime, good beam control, high CRI color, and easy expansion.
  • Light paths with shielded, low-glare fixtures spaced 6–8 feet apart, using 100–200 lumens to guide footsteps without glare.
  • Uplight trees and specimens with narrow 10–30° beams for trunks and wider floods for canopies, placed off-trunk to avoid hot spots.
  • Use smart controls—timers, dimming, and motion at gates—to keep a soft baseline while boosting light only where needed.

Map Your Outdoor Lighting Zones First

plan zone map brightness

Before you buy a single fixture, map your outdoor lighting zones so every lumen has a job. Walk the site at night and sketch circulation, focal points, and hazards.

Use garden zoning to separate task, accent, and ambient needs: steps and thresholds demand crisp guidance; seating wants soft, low-glare pools; specimen trees deserve controlled highlights.

Define outdoor zones by function, not property lines, then note mounting heights, beam spreads, and shield requirements to keep light off windows and neighbors.

Mark existing power access and routing paths, but don’t pick hardware yet.

Finally, assign target brightness levels per zone and decide where darkness is intentional, preserving contrast, depth, and sky view.

This plan turns ideas into a coherent, controllable layout.

Solar or Low-Voltage: Which Should You Use?

Although solar fixtures promise quick installs with zero trenching, they don’t deliver the same output, runtime consistency, or beam control you’ll get from a properly sized low-voltage system. Solar excels when you need accent points and can tolerate seasonal dimming; panel angle, battery chemistry, and shade dictate lumen drop and color shift.

You’ll gain energy efficiency by skipping transformer losses, but you’ll trade away predictability.

Choose low-voltage when you’re shaping scenes: tight uplight spreads, glare-cut shielding, and dimming tied to timers or photocells. You’ll manage installation complexity—cable routing, burial depth, and voltage drop—yet you’ll get stable CCT, higher CRI options, and expandable circuits.

If you want repeatable drama night after night, low-voltage wins.

Path Lighting Ideas for Safer Walkways

How do you make a walkway feel inviting without turning it into a runway? Start with low-glare fixtures spaced 6–8 feet apart, offset on alternating sides to prevent harsh scallops and hide shadows that trip you up. Aim for 100–200 lumens per light and choose warm 2700–3000K to preserve night vision and plant color.

Use shielded path lights or louvered step markers so you direct photons onto the walking plane, not into eyes or windows. Add a single uplight to silhouette a garden sculpture at a bend; it becomes a waypoint without flooding the path.

For outdoor security, integrate motion-triggered bollards near gates, then maintain steady, dim baseline lighting elsewhere. Keep cables buried, connectors waterproof, and lenses cleaned seasonally.

Patio and Deck Lighting Ideas for Ambiance

When you treat your patio or deck like an outdoor room, layered lighting builds ambiance without blasting the space. Start with dimmable string lights on a warm 2200–2700K setting, tensioned on stainless cable for a clean line and reduced sag.

Add low-glare step lights or recessed deck riser LEDs to define edges and prevent missteps.

Next, place shielded lanterns or bollard-style mini posts near garden furniture to create task zones for dining and cards, while keeping sightlines comfortable.

For fire features, pair outdoor fireplaces with discreet flame-rated wall sconces or toe-kick strips that won’t compete with the glow.

Use photocells plus smart dimmers to ramp output from sunset to late night, and choose IP65-rated fixtures with marine-grade hardware for longevity.

Uplighting Ideas to Make Trees Stand Out

Place uplights a few feet off the trunk and aim them upward to wash the canopy, not the lower bark, so you get layered leaf texture and clean silhouettes.

Choose beam angles with intent—narrow spots (10–25°) to punch up tall trunks and wide floods (40–60°) to spread across broad crowns without hot spots.

Adjust tilt and spacing until the light grazes branches evenly and keeps glare out of your sightlines.

Position Lights For Canopies

Two well-aimed uplights can turn a flat canopy into a layered ceiling of texture and shadow. Set fixtures just outside the drip line so trunks stay readable while leaves catch the glow.

Aim each light across, not straight up, to spread canopy illumination through branching planes. Offset the pair by a few feet to avoid a hotspot and to reveal depth between limbs.

Mount or stake units low, then tilt until the brightest zone lands high in the crown, not on the first branches. Hide housings behind shrubs, stones, or root flares, keeping sightlines clean.

If you’re supplementing with overhead fixtures, place them farther back and dimmer, so uplight remains dominant and natural-looking.

Choose Beam Angles Wisely

Because beam angle controls how light “reads” bark, branching, and leaf mass, you’ll get better-looking uplights by matching the spread to the tree’s geometry instead of defaulting to a wide flood.

Start with 10–15° on tall, clean trunks to carve a crisp column and pull eyes upward. Move to 24–36° for multi-stem trees so you catch several trunks without washing the ground.

Save 60° floods for broad canopies only when you can set the fixture far enough back to avoid hot spots. Aim the lamp so the brightest core lands on texture, not leaves, then adjust until your lighting focus reveals depth rather than glare.

Mix angles—narrow for trunk, medium for canopy—to stage the silhouette.

Light Exterior Walls With Washing and Grazing

When you want your home’s façade to read as architecture—not just a dark outline—wall washing and wall grazing let you sculpt it with controlled light.

For wall washing, set fixtures 18–36 inches off the wall and aim them straight up to create an even veil that minimizes texture and expands perceived width. Choose wider optics and add louvers or glare shields so you don’t spill light into windows or sightlines.

For grazing techniques, push linear LEDs or in-grade uplights tight to stone, brick, or timber cladding; the steeper angle exaggerates relief and reveals mortar joints, grain, and shadow cadence. Keep spacing tight to avoid scallops, and dim to match ambient levels.

Warm 2700–3000K preserves material color, while careful aiming keeps the beam disciplined.

Subtle Lighting Ideas for Garden Beds

For garden beds, you’ll get the cleanest nighttime edge with low-glare border lights that sit tight to the soil line and aim light laterally, not into your eyes.

You can also hide compact downlights in shrubs or under eaves to drop narrow, controlled beams that pick out texture on foliage and blooms.

Keep outputs modest and optics shielded, and you’ll define the planting geometry without washing out color or creating hotspots.

Low-Glare Border Lights

How do you outline a garden bed at night without turning it into a runway? Choose low-glare border lights with shielded optics and a 2700K–3000K color temperature. You’ll get garden safety by defining edges and reducing trip hazards, while keeping your sightlines comfortable.

Set fixtures 12–18 inches apart, aiming beams inward across mulch, not outward toward paths or windows. Pick 2–5 lumen micro-spikes or louvered caps that cut uplight and hide the diode point.

For consistent output, run a 12V system with thicker cable to minimize voltage drop on long runs. Use corrosion-resistant housings and stake bases deep enough to resist frost heave.

Done right, the line reads as a soft contour—clean, quiet, and pure aesthetic enhancement.

Hidden Downlighting Accents

Although path lights draw the eye at ankle level, hidden downlighting accents shape a garden bed with quieter, more natural cues. Mount compact, shielded fixtures high in a tree limb, pergola beam, or soffit, then aim them steeply to mimic moonlight and prevent glare.

You’ll get leaf texture, shadow layering, and improved garden aesthetics without visible hardware. Choose warm 2700–3000K LEDs to keep flowers believable, and use narrow 20–30° optics to pick out specimen plants while leaving mulch subdued.

With modern lighting technology, you can add low-voltage drivers, dimming, and smart zoning so each bed runs at 10–30% output after dusk. Hide wiring in conduit under edging, and seal connections.

Avoid Glare, Hot Spots, and Overlighting

When you push brightness too far or aim fixtures carelessly, outdoor lighting turns from guidance into glare, creating harsh hot spots, deep shadows, and a washed-out yard that feels exposed rather than inviting.

Start by choosing lower-lumen fixtures and warmer CCTs (2200–3000K) so contrast stays gentle on eyes and plants.

For Reducing glare, shield the source: use full-cutoff housings, glare caps, and louvered baffles, and aim beams below the horizontal plane. Mount lights higher only when you can narrow the beam and control spill.

For Managing hot spots, overlap beams at the edges, not the centers, and dim in 10–20% steps until highlights read as texture, not glare.

Add timers, motion sensors, and zoning so you light only what’s needed.

Conclusion

When you map zones and choose solar or low-voltage wisely, your garden stops disappearing at dusk and starts performing. You’ll stitch safe paths with low-glare markers, then layer patio warmth like a dimmable soundtrack. Aim uplights to crown trees, wash walls for quiet depth, and graze textures to reveal every ripple. Keep bed lighting subtle—more whisper than shout. If you avoid hot spots and overlighting, you’ll build a nightscape that reads like constellations.…

Scroll to Top