Author name: Graeme Allen

outdoor shade and structure
Garden & Outdoor

Building a Pergola: A Stylish Way to Add Shade and Structure to Your Outdoor Space

You’ll get the best pergola by first tracking seasonal sun and wind, then choosing slats, tighter rafters, or a retractable canopy that won’t act like a sail. Stake out the footprint to confirm door swings, grill clearance, and sightlines, and call for utility locates before digging. Pick wood, vinyl, or metal that fits your home’s lines and local uplift/footing rules. Keep hardware corrosion-resistant, manage runoff, and you’ll see smart options ahead.

Key Takeaways

  • Choose a shade style (slats, tight rafters, or retractable canopy) based on seasonal sun angles and local wind exposure.
  • Size and place the pergola to protect door swings, grills, and sightlines while catching breezes and avoiding roof drip lines.
  • Confirm setbacks, easements, utility locates, and permit rules for height, attachment, footing depth, and wind uplift.
  • Select materials to match your home and climate: wood for customization, vinyl for low maintenance, metal for slim modern spans.
  • Build with correct footings, braced plumb posts, code-rated connectors, corrosion-resistant hardware, and planned conduit for lighting and fans.

Decide What Shade and Style You Want

shade style materials design

Before you buy lumber or dig footings, decide how much shade you actually need and what style fits your site. Track sun angles across seasons, then choose between dappled slats, a tighter rafter grid, or a covered canopy for near-solid relief.

If wind funnels through your yard, favor open designs and retractable Fabric options that won’t act like a sail. Match the pergola’s lines to your home: clean, square posts for modern facades; tapered members and decorative tails for traditional trim.

Keep material choices fire- and weather-appropriate for your region, and avoid adding roof-like panels that could trigger stricter structural requirements under local codes. Pick durable finishes and smart color choices that reduce glare and heat.

Choose Pergola Size, Placement, and Permits

Because a pergola’s footprint affects everything from how you move through the yard to what your inspector will sign off on, start by staking out a few size options on the ground and living with them for a day. Check door swings, grill clearance, and sightlines from key windows.

Keep posts out of root zones and underground utilities; call for locates before you dig. Place it to catch prevailing breezes, avoid constant drip lines, and respect property setbacks and easements.

For landscaping integration, align beams with existing paths, patios, and planting beds so runoff and traffic don’t trample soil. Then confirm permit triggers: height, attached vs. freestanding, footing depth below frost line, and wind uplift requirements.

Build in maintenance tips: leave access for ladders, and plan drainage around bases.

Compare Pergola Materials: Wood, Vinyl, Metal

Now that you’ve set size, placement, and permits, you need to pick a pergola material that fits your site conditions and passes code checks.

You’ll weigh wood’s easy customization and repairability against vinyl’s low-maintenance profiles and UV/heat movement that can affect fasteners and spans.

You’ll also compare metal options (aluminum or steel) for higher strength-to-size ratios and clean lines, while accounting for corrosion protection, connection hardware, and local wind/snow load requirements.

Wood Vs. Vinyl

Whether you’re matching an existing deck or starting from scratch, the material you choose for a pergola sets the tone for everything that follows—cost, maintenance, structural details, and even what your inspector will want to see.

Wood gives you warm grain and flexible sizing, so you can tune beam depth, rafter spacing, and notching to meet local snow and wind loads. You’ll also handle outdoor aesthetics easily with stain or paint, but you’ll sign up for maintenance considerations like sealing, checking fasteners, and managing rot at post bases.

Vinyl stays bright with simple wash-downs and resists insects, yet it often relies on an internal wood or steel core for span and uplift resistance. Confirm footing size, post anchorage, and attachment hardware are listed and code-compliant for your jurisdiction.

Metal Strength And Style

If you’re building where wind uplift, long spans, or tight clearances drive the design, metal pergola framing lets you carry more load with slimmer members and fewer intermediate posts. You’ll get clean lines and modern aesthetics while keeping sightlines open on small patios or over walkways.

Choose galvanized steel or powder-coated aluminum for metal durability in wet, coastal, or termite-prone zones. Check local code for corrosion class, allowable spans, and required anchorage; you may need engineered calcs, uplift-rated post bases, and specified embedment or epoxy-set anchors in existing slabs.

Isolate dissimilar metals to prevent galvanic corrosion, and detail drainage so water can’t sit in channels. With metal, you’ll spend less time on refinishing and more time using the shade year after year.

Create Pergola Shade: Slats, Canopies, Panels

shade options for pergolas

Because a pergola’s open rafters won’t block much midday sun on their own, you’ll want to add shade with fixed slats, a retractable canopy, or panel infill that matches your site’s sun path and wind exposure.

Angle slats toward the harshest sun, and keep spacing consistent so you don’t create striped glare on seating. In windy zones, choose low-profile slats or rated panels, and follow local uplift requirements and fastener schedules.

For canopies, pick fabric options that resist UV, mildew, and fading, and confirm your HOA or fire code allows them. Use stainless or coated hardware, add a drain path so water won’t pond, and include installation tips like tensioning evenly and allowing seasonal removal.

If you use panels, maintain required clearances from grills and property lines.

DIY Pergola Build Steps: Footings to Rafters

Where do you start a DIY pergola so it stays square, plumb, and code-compliant? You start by calling for utility locates, checking setbacks, and confirming footing depth below frost line. Lay out batter boards and string lines, then verify diagonals match.

Dig or auger holes, add gravel, set rebar, and pour concrete with post bases aligned to your strings.

After cure, stand posts, brace them, and plumb in two directions. Cut beams to length, crown them consistently, and bolt per span tables and hardware specs.

Snap a centerline, mark rafter layout, and seat rafters with hangers or notches allowed by code. Stub conduit for outdoor lighting before you close framing.

Leave clearance and sleeves for plant integration near posts.

Finish Your Pergola: Lighting, Vines, Privacy

Once the framing passes inspection and the lumber dries out, you can finish your pergola with the parts that make it usable—power, plants, and screening—without trapping moisture or creating hazards.

Run electrical only where your code allows: use a GFCI-protected circuit, exterior-rated boxes, and conduit strapped to posts; keep splices accessible and lights listed for wet locations.

For ambient lighting, hang low-voltage string lights or mount downlights under the beams, leaving drip loops and clearance from combustibles.

Train climbing vines with stainless wire trellises set off the wood so air can dry it; avoid aggressive species near footings.

Add privacy with slatted panels or outdoor fabric on removable tracks, preserving egress and wind-load gaps.

Conclusion

You’ve now got a pergola plan that won’t leave your yard “unexpectedly sun‑kissed.” You’ve matched shade style to your space, picked a size and location that respects setbacks, frost depth, and any permits, and chosen materials that suit your climate. Whether you use slats, panels, or a canopy, you’ll anchor posts on proper footings, square the frame, and set rafters true. Add low‑voltage lighting, vines, and privacy—then enjoy it.…


property sales versus rentals
Home Upgrades & Renovations

Estate Agents vs Letting Agents: What’s the Difference and Who Do You Need?

You’ll use an estate agent when you’re selling: they value your home, market it, run viewings, negotiate offers, and help progress the chain through to completion alongside solicitors. You’ll use a letting agent when you’re renting out: they find and reference tenants, prepare the tenancy agreement, protect the deposit, manage inventories, and oversee safety and other ongoing compliance, rent, and repairs. You can use both to align timelines and keep accountability clear—more detail follows.

Key Takeaways

  • Estate agents market and sell properties, handling valuations, viewings, negotiations, and coordinating with solicitors through to completion.
  • Letting agents find tenants and manage rentals, covering referencing, tenancy agreements, deposit protection, inventories, inspections, and repairs.
  • Choose an estate agent if you’re selling; choose a letting agent if you’re renting out or need ongoing property management.
  • Letting agents carry heavier ongoing compliance duties, including safety certificates, right-to-rent checks, licensing, and regulatory reporting.
  • Using both can align sale and letting timelines; dual agency simplifies communication but needs conflict disclosure and separate negotiation processes.

Estate Agent vs Letting Agent: The One-Line Difference

selling versus renting services

While both work in property, an estate agent markets and sells homes on your behalf, whereas a letting agent finds tenants and manages residential lettings, rent collection, and ongoing compliance for a landlord.

You engage an estate agent when your objective is a sale: they price to current Market trends, prepare listings, conduct viewings, negotiate offers, and progress the transaction to completion.

You engage a letting agent when you require a tenancy: they advertise, reference applicants, draft and execute agreements, protect deposits, and oversee statutory duties during occupation.

You must note legal differences: sales focus on conveyancing and disclosure obligations, while lettings involve licensing, safety certification, right-to-rent checks, and periodic regulatory reporting.

You should confirm each firm’s scope, fees, and complaint scheme membership.

Estate Agent vs Letting Agent: Which One Do You Need?

If you’re deciding between an estate agent and a letting agent, start by defining your objective and timeframe: sale, purchase support, or rental income with ongoing management.

If you’re buying or selling, you’ll typically need an estate agent to guide negotiations, coordinate viewings, and keep you aligned with market trends and pricing evidence.

If you’re renting out, you’ll typically need a letting agent to source tenants, structure the tenancy, and oversee compliance tasks that continue after move-in.

Choose based on your risk tolerance and capacity. If you can’t monitor changing regulations, a letting agent helps you meet legal responsibilities around safety, deposits, and right-to-rent checks.

If your priority is transactional support and local demand insight, an estate agent is usually the right fit.

Consider fees, service scope, and reporting cadence.

What Does an Estate Agent Do When Selling?

Once you’ve decided an estate agent is the right fit for a sale, their role becomes managing the transaction from valuation through to completion with clear oversight and accountability.

You’ll receive a compliant Property valuation supported by local comparables, condition, and demand, so your asking price is evidence-led.

They’ll recommend a marketing strategy, arrange professional photography, floorplans, and listings, and manage viewings with controlled access and feedback.

You’ll get vetting of buyers, confirmation of funding position, and negotiation handled to protect your interests.

They’ll issue and record offers in line with agency rules, keep an audit trail, and guide you on accepting terms.

After agreement, they’ll progress the chain, liaise with solicitors, monitor milestones, and reduce delay risks until completion.

What Does a Letting Agent Do When Renting?

Because letting involves ongoing legal duties as well as finding a tenant, a letting agent manages the rental from market appraisal to move-in and, where instructed, through the tenancy lifecycle.

You’ll receive evidence-based pricing advice, compliant marketing, viewings, and tenant vetting, including referencing and right-to-rent checks where applicable.

Your agent prepares or arranges robust Rental agreements, explains key clauses, and coordinates deposit registration, prescribed information, and mandatory documents.

They’ll also advise on licensing, safety certification, and data protection, helping you meet statutory deadlines.

Before occupation, they organise inventories and check-in, and schedule Property inspections to evidence condition and support dispute resolution.

If you instruct ongoing management, they collect rent, handle repairs via approved contractors, manage renewals, and issue compliant notices when required.

Can You Use Both Agents: and When Should You?

You can use both an estate agent and a letting agent when you need to sell a property while also securing compliant, uninterrupted rental management.

This dual approach helps you coordinate viewings, tenancy obligations, and timelines without breaching notice requirements or tenancy rights.

You should appoint both agents when you’re changing strategy mid-tenancy, planning a sale with tenants in situ, or managing a portfolio where sale and letting decisions run in parallel.

When Dual Representation Helps

Although estate agents and letting agents traditionally handle different sides of the property market, dual representation can streamline your move when a single firm (or closely coordinated firms) manages both the sale of your current home and the rental or letting of your next one. You’ll benefit from one point of contact, aligned timelines, and consistent compliance checks across marketing, viewings, and referencing.

Dual agency can also reduce duplicated paperwork and improve accountability, because you can require clear service standards under one set of terms.

However, you must assess and document any potential conflict of interest, particularly where advice on pricing, incentives, or tenant selection could favour one outcome over another.

Ask for written disclosure, separate negotiators where appropriate, and confirmation of complaint routes and redress scheme membership before you proceed.

Managing Sale And Letting

Dual representation can keep a move on track, but many clients still prefer—or need—to run a sale and a letting through separate agents. You can use both when timing, compliance, or risk management demand specialist oversight and clear accountability.

If you’re selling a home while letting another, appoint an estate agent for Property marketing and sale progression, and a letting agent for tenancy setup, rent collection, and statutory checks. This split helps you evidence best practice on AML, deposit protection, Right to Rent, and safety certification, while keeping negotiations distinct.

You should also separate roles if you require premium Tenant screening, complex referencing, or a corporate let. Use one firm only if it can demonstrate competent sales and lettings teams, transparent fees, and documented conflict-of-interest controls.

Estate Agent vs Letting Agent Fees: What Do You Pay For?

Before signing any instruction, it’s essential to understand what agent fees cover, because estate agents and letting agents charge for different outcomes and carry different compliance responsibilities.

You typically pay an estate agent a percentage of the sale price, covering valuation, marketing strategies, viewings, offer negotiation, and progression to exchange and completion. Charges are often due on completion.

You pay a letting agent for securing and/or managing a tenancy. Fees may be tenant-find only, rent collection, or full management, usually as a percentage of rent plus set charges.

These services include advertising, referencing, Right to Rent checks, tenancy documentation, deposit protection administration, inventory coordination, and ongoing compliance.

Because letting involves continuing legal responsibilities, management fees often reflect monitoring repairs, safety certification, and prescribed information delivery.

Always confirm what’s included and what triggers payment.

How to Choose an Agent: Proof, Terms, and Service

Once you’ve compared fees, you should choose an agent based on evidence of performance, the instruction terms you’ll sign, and the service level you actually need. Ask for recent, local results: achieved price versus asking, average days on market, void periods, arrears rates, and compliance record.

Verify agent credentials, including professional memberships, client money protection (if holding funds), and redress scheme registration.

Next, review the contract. Check exclusivity, notice periods, tie-in clauses, renewal commission, and what counts as an “introduced” buyer or tenant.

Confirm what’s included: marketing, accompanied viewings, tenant referencing, inventories, deposit protection, inspections, and repairs management.

You should also test service quality—response times, reporting frequency, and a named point of contact—before you sign.

Conclusion

Over 60% of UK landlords now use a letting agent to manage their property, reflecting how regulated and time‑sensitive renting has become. If you’re selling, you’ll rely on an estate agent to market, negotiate, and progress the sale. If you’re letting, you’ll need a letting agent to screen tenants, comply with safety and deposit rules, and manage ongoing issues. Choose based on your objective, and don’t sign until you’ve verified fees, service scope, and termination terms.…

inspect tighten prevent damage
General Property Repairs

How to Spot and Repair Loose Roof Tiles Before They Cause Damage

You’ll spot loose roof tiles by looking for lifted, rotated, or misaligned courses, cracked corners at ridges/hips/eaves, and fresh fragments or granules in gutters. Inside, watch for stains that grow after rain, damp insulation, musty odors, or bubbling drywall near valleys and penetrations. Inspect safely with a tied-off extension ladder, 3-point contact, and fall arrest if you access the roof. Re-seat or replace tiles without prying, keep underlayment intact, and verify headlap and ventilation—next you’ll see the exact tools and steps.

Key Takeaways

  • Scan for lifted, rotated, cracked, or misaligned tiles, especially at ridges, hips, eaves, valleys, and around roof penetrations.
  • Check gutters and ground for fresh tile fragments or granules, and note rusted fasteners or exposed underlayment at tile laps.
  • Look indoors for expanding stains after rain, damp insulation, musty odors, or peeling paint directly beneath suspect roof areas.
  • Inspect safely using a secured ladder and fall protection; hand-test tiles for lift or chatter without prying or walking on unsupported tile edges.
  • Re-seat or replace damaged tiles while preserving underlayment and headlap, then confirm alignment, uplift resistance, and clear ventilation paths.

Loose Roof Tile Warning Signs and Leak Clues

early roof tile damage detection

If you catch a loose roof tile early, you can often prevent a code-relevant moisture intrusion that compromises the roof assembly. Look for displaced, lifted, or rotated profiles, uneven courses, and cracked corners, especially at hips, ridges, and eaves where roof design concentrates wind uplift.

Note fresh debris in gutters, granules, or broken fragments matching the tile material. Inside, track stains that expand after rain, damp insulation, musty odor, peeling paint, or bubbling drywall below penetrations and valleys.

Check for daylight at roof-to-wall connection points from attic vantage, and watch for rusted fasteners, darkened underlayment, or mineral deposits indicating chronic wetting.

Correlate clues with prevailing wind direction and recent storms to pinpoint likely loosened tiles.

How to Check for Loose Roof Tiles Safely

Once you’ve identified likely loose-tile locations from exterior and interior clues, confirm them with a methodical inspection that keeps you off fragile profiles and within basic fall-protection practices. Set a rated extension ladder on firm grade, maintain 3-point contact, and tie it off.

If you must access the roof, use a personal fall-arrest system anchored to a structural member and avoid stepping on tile ribs, hips, or valleys. Walk only on supported areas near the lower third of each tile, distributing weight with foam pads or a roof ladder.

Lightly hand-test suspect tiles for lift, chatter, or sliding; don’t pry. Document locations, then clear debris during Tile cleaning to expose fasteners and underlayment edges as part of routine Roof maintenance.

When to Call a Roofer for Loose Tiles

If loose tiles follow a severe storm or a noticeable impact, you should call a licensed roofer to assess hidden damage and restore the roof’s required weatherproofing.

If you’re seeing persistent leaks, stained decking, or sagging areas, stop any DIY work and get a roofer on-site because these conditions can indicate structural or underlayment failure.

You’ll reduce fall risk and help keep repairs code-compliant by letting a professional handle walkability, fastening, and any needed substrate replacement.

Severe Storm Or Impact

Although a loose tile can look like a simple fix, severe storms or impact events (hail, falling branches, wind-borne debris) often compromise the roof system in ways you can’t verify safely from the ground.

After hail damage or wind impact, tiles may be fractured, fasteners may be loosened, and underlayment may be torn, creating hidden uplift paths. You shouldn’t climb up for a quick reset; wet surfaces, displaced tiles, and unstable battens increase fall risk and can worsen damage.

Call a licensed roofer to perform a code-compliant inspection, including tile soundness testing, attachment verification, and perimeter/hip/ridge detailing checks per manufacturer specs. You’ll also get documentation for insurance and confirmation that repairs maintain required wind-resistance ratings and flashing continuity.

Persistent Leaks Or Sagging

When loose tiles coincide with persistent interior leaks or visible roofline sagging, you’re no longer dealing with a cosmetic reset—you’re looking at a probable assembly failure that needs a licensed roofer. Water entry often means compromised underlayment, flashing, or fasteners.

Sagging can signal saturated decking, failed rafters, or overloaded spans. Don’t attempt a spot fix from a ladder—building codes require proper fall protection, evaluated structural capacity, and manufacturer-approved attachment patterns.

A roofer will perform a leak trace, moisture mapping, and deck probe, then replace damaged sheathing and restore the waterproofing layer before resetting tiles.

Protect Roof tile aesthetics by matching profile and color, especially on historical architecture where approvals and heritage rules may apply. You’ll prevent mold, rot, and progressive collapse risks.

Why Roof Tiles Come Loose Over Time

roof tiles loosen over time

Because roofs flex, breathe, and take constant weather loads, roof tiles don’t stay locked in place forever. Thermal cycling expands and contracts the deck and underlayment, slowly working fasteners loose and breaking sealant bonds. Wind uplift exploits small gaps at laps and eaves, and repeated vibration can shift profiles out of engagement.

Freeze-thaw action widens hairline cracks, while foot traffic concentrates point loads that can fracture brittle units. Poor attic ventilation raises heat and moisture, accelerating underlayment aging and corrosion at nails or clips.

Roof tile manufacturing tolerances vary, so slight dimensional differences can reduce interlock strength over time. Historical roofing styles may rely on minimal mechanical fastening, which today’s codes often supplement to meet uplift and fire-resistance requirements.

Tools for Fixing Loose Roof Tiles

Loose tiles usually start with minor movement, but you’ll fix them faster and safer if you bring the right gear to the roof and follow manufacturer instructions and local uplift requirements.

Start with fall protection: harness, certified anchor, lifeline, and non-slip footwear. Use an extension ladder with stabilizer, plus roof jacks or a scaffold where code requires.

For inspection and roof tile maintenance, pack a flat bar, plastic shims, pry tool, and a thin trowel to clear debris without cracking edges.

Match tools to roof tile materials: rubber mallet for clay or concrete, carbide scraper for underlayment flashings, and a torque-limited driver for tile screws/clips.

Keep a tape measure, chalk line, and camera for documentation, and wear cut-resistant gloves and eye protection.

Secure or Replace a Loose Roof Tile (Step by Step)

Start by removing the suspect tile carefully so you don’t crack adjacent courses. Then inspect the tile, fasteners, underlayment, and battens for damage or moisture intrusion.

If the components are serviceable, you’ll refasten the tile using code-approved corrosion-resistant hardware and compatible sealant where permitted, maintaining required headlap and uplift resistance.

If you find cracks, spalled edges, or compromised fastening points, you’ll replace the tile with a matching unit and secure it to the manufacturer’s specifications and local code.

Remove And Inspect Tile

Before you secure or replace a loose roof tile, you’ll need to remove it and inspect both the tile and its fastening points so the repair meets manufacturer instructions and local code requirements. Set ladder and fall protection.

Then lift the adjacent course with a slate ripper or flat bar to relieve interlock pressure. Slide the tile out without cracking corners; note the Tile material (clay, concrete, or composite) because nail type and fastening method vary.

Examine the tile for hairline fractures, spalling, and underside wear. Inspect nail holes, clips, battens, underlayment, and flashing for corrosion, elongation, or rot.

Confirm Roof ventilation paths aren’t blocked by debris, mortar, or displaced underlayment. Photograph findings and measure exposure to match the existing layout before proceeding.

Refasten Or Replace Tile

Once you’ve confirmed the tile’s condition and checked the fastening points, refasten it only with hardware and methods approved for that tile type and your local code (typically IRC with manufacturer specs).

Set roof jacks and a harness, then lift adjacent tiles gently to access the batten or deck.

If the nail hole’s sound, drive the specified corrosion-resistant fastener in the approved location; don’t overdrive and crack the tile.

If the hole’s enlarged, install an approved clip, foam, or screw-and-seal system as required.

Replace any cracked or spalled tile, matching Tile color to maintain heat performance and appearance.

Re-seat the tile, confirm headlap, and keep underlayment intact.

Don’t block Roof ventilation paths at eaves or ridge.

Recheck alignment and uplift resistance.

Conclusion

Don’t wait—*a stitch in time saves nine*. If you’ve spotted shifted, cracked, or missing tiles, you should act before wind-driven rain compromises the underlayment and decking. You’ll stay safer by using fall protection, stable ladders, and avoiding wet or steep slopes, per local code and OSHA basics. If tiles won’t re-seat, fasteners are corroded, or flashing is suspect, you should call a licensed roofer and document repairs.…

restoring hardwood floors step by step
Home Upgrades & Renovations

A Step By Step Guide To Restoring Original Hardwood Floors

First, you confirm the floor’s refinishability by measuring wear layer above the tongue at a register and checking for cupping, rot, pet stains, or engineered delamination. Next, you clear the room, seal vents and openings with plastic, set exhaust ventilation, and wear a P100 respirator, eye and hearing protection. Then you sand systematically from 36–60 grit through 120–150, edge-sand each pass, and screen to remove swirls. Repair loose boards, gaps, and stains, then stain (optional) and seal with a compatible sealer and low-VOC waterborne polyurethane. Keep going for detailed grit choices, repair fixes, and finish timing.

Key Takeaways

  • Confirm the floor can be refinished by measuring wear layer thickness, checking damage, and identifying prior coatings needing special handling.
  • Empty and seal the room, protect HVAC openings, and set ventilation to control dust while preventing appliance backdrafting.
  • Sand in grit stages from coarse to fine, vacuum between passes, and use raking light to verify the previous scratch pattern is removed.
  • Repair loose boards, gaps, stains, and nail pops before finishing, then spot-sand repairs flush and tack thoroughly.
  • Test stain colors, apply evenly, then seal and topcoat with low-VOC waterborne polyurethane within recoat windows for a durable finish.

Decide If Your Hardwood Floors Are Refinishable

check wood and condition

Before you rent a drum sander or buy finish, confirm your floor can actually take a refinish. Identify the wood and its Hardwood history: strip flooring, plank, or parquet may dictate thickness and repair strategy.

Remove a floor register and measure remaining wear layer above the tongue; you’ll generally need enough meat for one more sanding. Check for cupping, deep pet stains, rot, active insect damage, or widespread delamination in engineered boards—these can make refinishing unsafe or ineffective.

Verify the subfloor feels rigid; excessive bounce can crack future finish. Note prior coatings: wax, acrylic, or lead-era paint overspray require special testing and may push you toward Flooring alternatives like replacement or overlay.

If boards are thin or split throughout, don’t sand; plan another approach.

Prep the Room, Safety Gear, and Floor Tools

Once you’ve confirmed the floor can be refinished, clear the room to create a controlled, dust-managed work zone and stage the right PPE and tools. Complete Furniture removal, then take down curtains, rugs, grilles, and doors you can’t protect. Seal HVAC registers, hang 6-mil plastic at openings, and tape seams to limit migration.

For Ventilation setup, exhaust air with a box fan in a window and crack an opposite window for make-up air; avoid backdrafting combustion appliances.

Wear a P100 respirator, safety glasses, hearing protection, gloves, and knee pads. Keep a Class A/B/C extinguisher nearby and manage cords to prevent trips. Stage a HEPA vacuum, tack cloths, painter’s tape, utility knife, pry bar, nail set, putty knife, and wood filler for fast, safe corrections.

Sand Hardwood Floors Smooth (Grits + Swirl Tips)

After you’ve sealed the space and suited up, sand the floor in controlled passes that step through grits—coarse to cut old finish and flatten high spots, then progressively finer to erase scratch patterns without leaving swirls.

Start with 36–40 grit on heavy finish or cupping, or 60 grit on lighter wear; that’s your Grit selection baseline. Run the drum/belt sander with the grain, keep it moving, and lift before stopping to prevent divots.

Edge-sand after each main pass using the same grit sequence so the field and perimeter match. Vacuum between grits and inspect under raking light to confirm the previous scratch pattern is gone.

For Swirl technique, use a buffer with a 100–120 grit screen, overlapping passes and feathering edges. Finish with 120–150 grit for uniformity.

Fix Boards, Gaps, and Stains Before Finishing

Even if your sanding looks uniform, you’ll lock flaws in permanently if you don’t correct loose boards, open seams, and discoloration now. Walk the floor slowly and mark squeaks, movement, dark pet stains, water marks, and nail pops. Wear eye protection and a respirator when cutting or scraping.

Secure loose boards by driving finish nails into joists or adding trim screws where plugs will hide. For split, cupped, or rotten planks, plan to replace boards: cut back to the nearest joist, remove fasteners, and fit a matching board with proper expansion.

Start filling gaps only after humidity stabilizes. Pack narrow seams with latex wood filler, and use slivers for wider gaps. Spot-sand repairs flush, then vacuum and tack thoroughly.

Stain or Go Natural, Then Seal for Protection

Although a freshly sanded floor looks clean, you still need to choose a stain (or stay natural) and lock the surface down with a compatible sealer before foot traffic, UV light, and spills start degrading the wood.

Start with Color matching: test stains on offcuts or an inconspicuous corner, then let samples dry fully under your actual lighting. If you go natural, confirm the wood’s undertone won’t amber excessively under finish.

Wear gloves and a respirator; maintain cross-ventilation and eliminate ignition sources.

Apply stain with a pad, wipe evenly, and control lap marks by working in manageable rows.

After cure, vacuum and tack carefully, then seal with a dewaxed shellac or manufacturer-approved sealer.

Choose Eco friendly finishes like low-VOC waterborne polyurethane, and follow recoat windows precisely.

Conclusion

You’ve checked refinishability, cleared the room, and geared up, so finish strong. Sand with the right grits, vacuum between passes, and keep the sander moving to prevent swirls. Repair loose boards, fill gaps, and treat stains, so defects don’t telegraph through the finish. Choose stain or natural, then seal with even coats, proper dry times, and solid ventilation. Work clean, work level, work safe—and you’ll restore durable, original hardwood.…

electrical switch replacement guide
Plumbing & Electric Fixes

Replacing a Faulty Light Switch: Safe and Simple Electrical Steps

If your switch flickers, feels gritty, runs warm, crackles, or shows discoloration, replace it with a like‑for‑like unit (single‑pole has 2 brass screws; 3‑way has a common plus 2 travelers). Shut off the correct breaker, then prove the circuit is dead with a voltage tester on all conductors. Remove the plate, pull the switch out, label line/load/ground, reconnect tightly, reassemble, restore power, and test; keep going for extra tips.

Key Takeaways

  • Confirm the switch is faulty by checking flickering, heat, arcing sounds, loose mounting, or burning smell before replacing it.
  • Identify the switch type (single-pole or 3-way) by terminal count and labels; don’t rely on wire colors alone.
  • Turn off the correct breaker and verify all wires are de-energized using a voltage tester before touching conductors.
  • Label and disconnect wires carefully, inspect for damage, and match the replacement switch’s voltage/amperage and terminal style to the original.
  • Reconnect hot, load, and ground securely, mount the switch flush, reinstall the cover, restore power, and test for normal operation without arcing.

Spot the Signs You Need to Replace a Light Switch

signs of faulty light switch

Although many switch problems look minor at first, you should replace a light switch if it shows clear failure or heat damage: intermittent operation (lights flicker when the toggle is steady), arcing or crackling sounds, visible discoloration or melting on the device or cover plate, a loose yoke that won’t tighten securely in the box, or a warm faceplate under normal load.

You should also act if the switch feels gritty, binds, won’t latch positively, or if the lights stay on/off inconsistently, indicating worn contacts. If you smell burning insulation, see soot at the strap, or find brittle conductors when you remove the cover plate, stop and de-energize at the breaker.

A failing switch can undermine Lighting design by causing nuisance flicker and can reduce Energy efficiency through poor contact resistance and heat. Replace with a listed device of correct rating.

Identify Your Switch Type (Single-Pole vs. 3-Way)

Once you’ve decided the switch really is failing, identify whether you’re dealing with a single-pole or a 3-way before you buy parts or move any conductors.

A single-pole controls a light from one location and typically has two brass terminal screws plus a green ground.

A 3-way controls the same load from two locations and has three current-carrying terminals: one common (often a dark screw) and two travelers (brass), plus ground; it won’t have ON/OFF markings.

Confirm by removing the cover plate and looking for a 3-conductor cable (often red/black/white) on a 3-way.

Don’t rely on wire colors alone—verify with wiring diagrams and terminal labeling for switch compatibility and correct conductor placement.

If anything looks nonstandard, stop.

Grab the Tools and the Correct Replacement Switch

Before you shut off any power, gather what you’ll need and buy a switch that matches the exact function and ratings of the original: single-pole or 3-way, the same voltage (typically 120/277V), and an amperage rating at least equal to the circuit (most commonly 15A or 20A).

Check switch compatibility by matching terminal style (screw, backwire clamp), grounding provision, and whether you need a neutral for smart controls.

If you’re replacing a dimmer, confirm it’s rated for the lamp type (LED/CFL/incandescent) and total wattage.

For tool organization, lay out an insulated screwdriver set, wire stripper, needle-nose pliers, non-contact voltage tester, flashlight, and a small parts cup for screws.

Bring a UL/CSA-listed cover plate if the old one’s cracked.

Turn Off the Breaker for the Light Switch Circuit

At your service panel, identify the correct circuit breaker feeding the light switch by using the panel directory and confirming by turning the switch load on/off.

Move that breaker fully to OFF to de-energize the circuit, and don’t rely on the wall switch for isolation.

Verify the switch is dead at the box with a properly rated voltage tester on all conductors to ground and neutral before you touch any wiring.

Identify Correct Circuit Breaker

How do you make sure you’ve killed power to the switch you’re replacing? Start at your service panel and use the directory label as a guide, but don’t trust it blindly. For circuit safety, you’ll confirm the branch circuit by testing, not guessing.

Turn the light on, then have a helper toggle breakers one at a time while you note which breaker controls that load. If the light is fed by a multi-location setup, check every related switch position to confirm consistent control.

Re-label the panel directory immediately using clear room and load descriptions so it matches Electrical codes expectations for identification. If breakers aren’t labeled or multiple rooms go dead, stop and map the circuit before proceeding.

Never assume “off” equals de-energized.

Shut Off Breaker Power

Keep the panel cover closed, stand to the side, and use one hand when operating the handle to reduce shock exposure.

Don’t rely on wall switches, dimmers, or smart controls to de-energize conductors; only the breaker provides the required disconnect.

Set out your Switch installation tools now—insulated screwdriver, wire strippers, and a listed replacement device—so you won’t leave the work area.

Planning ahead also protects Lighting aesthetics by preventing rushed, misaligned hardware.

Verify Switch Is Dead

With the breaker switched off and your tools within reach, prove the circuit is actually de-energized before you touch any conductors. Flip the wall switch on, then try the light; it should stay dark. Don’t rely on the lamp alone—use a non-contact voltage tester at the switch yoke and at each insulated conductor in the box.

Next, pull the switch out slightly and use a two-pole tester or multimeter: test hot-to-neutral and hot-to-ground; you should read 0 volts. Confirm your tester works by checking a known live receptacle before and after.

Follow wire color coding (black/red hot, white neutral, green/bare ground), but still test—miswires happen. These checks align with electrical code standards and reduce shock risk.

Verify Power Is Off With a Voltage Tester

Before you touch any conductors, confirm the circuit is de-energized using a properly rated voltage tester. For electrical safety, use a CAT III (or better) tester and verify it works on a known live source first.

Then test the switch box: place one probe on the suspected hot and the other on neutral or the equipment grounding conductor. You should read 0 V.

Test hot-to-ground and hot-to-neutral, because an open neutral can mislead you.

If you’re using a non-contact tester, treat it as a screening tool only and confirm with a contact meter.

Re-check the live source afterward to prove the tester didn’t fail.

This voltage testing sequence meets safe work practice expectations and reduces shock risk.

Remove the Old Switch and Label the Wires

With power confirmed off, remove the wall plate, then loosen the mounting screws and pull the switch straight out to expose the terminals.

Before you loosen any terminal screws or wire connectors, label each conductor with tape (line/hot, load/switched hot, neutral if present, and ground) to preserve the correct connections.

Keep the wires separated and supported so they can’t touch the metal box or each other while you work.

Unscrew And Remove Switch

Once you’ve confirmed the circuit is de-energized, how do you remove the old switch without losing track of the wiring? Start by removing the cover plate screw, then back out the two mounting screws securing the switch to the box. Pull the device straight out a few inches, keeping conductors undisturbed to maintain wiring safety. Don’t force it; if it binds, check for paint, drywall pressure, or a misaligned yoke.

With the switch exposed, inspect the box fill and grounding path. Confirm the device type (single-pole, 3-way, 4-way) and verify switch compatibility with your replacement. If you see brittle insulation, overheated terminals, or a damaged strap, stop and correct the issue before proceeding.

Keep the switch supported so wires aren’t strained.

Label Wires Before Disconnecting

Even though the switch wiring may look straightforward, you’ll save time and prevent miswires by labeling every conductor before you loosen a single terminal. With power confirmed off, take a clear photo, then apply tape flags and write “LINE,” “LOAD,” “TRAVELER,” and “GROUND” as applicable.

Don’t rely only on wire color codes; repainting, age, or prior repairs can defeat expectations. Identify the common on 3-way/4-way switches and mark it distinctly.

Next, loosen terminal screws and pull each conductor free using insulated tools, keeping bends gentle to avoid nicking copper. Cap any loose hot candidates with a wire connector until you’re ready to reconnect.

Proper labels also verify switch compatibility, ensuring you reinstall the correct single-pole, 3-way, or smart-rated device.

Connect the New Light Switch, Then Test It Safely

After you’ve confirmed the circuit is de-energized at the box with a non-contact tester, connect the new switch to match the original wiring: land the hot feed and switched-hot on the switch’s brass terminals (or the two leads on a standard single-pole).

Bond the bare/green equipment ground to the green screw and the metal box if present, and keep all splices tight under listed wire connectors. Use color coding and verify wire insulation is intact; re-strip to clean copper if nicked.

Fold conductors neatly, keep grounding continuous, and mount the switch with the yoke flush to the box. Install the cover plate.

Restore the breaker, then test with the switch in both positions and confirm the fixture operates normally. If it trips or arcs, shut off power and recheck connections.

Conclusion

You’ve spotted the warning signs, identified whether you’ve got a single-pole or 3-way switch, gathered the right tools, and shut off the correct breaker. You’ve verified de-energized conductors with a voltage tester before touching anything. After labeling and transferring each wire to the matching terminal, you’ve tightened connections to manufacturer torque and reinstalled the device and cover. Restore power and test operation. Follow these steps, and you’ll feel a million times safer working in the box.…

simple garden water features
Garden & Outdoor

Creating a Garden Water Feature: Simple Designs That Add Instant Calm

You’ll get instant calm by choosing a self-contained water feature that fits your space and power: a bubbling urn or bowl for tight patios, or a stock-tank basin or low rill for larger yards. Set it on a level gravel-and-paver pad in bright shade or morning sun, keep it within hose reach and near a GFCI outlet or use a solar pump. Hide cords, allow a 18–24-inch splash zone, and tune flow with river rock—next you’ll see easy builds and upkeep.

Key Takeaways

  • Choose a self-contained bubbling urn, bowl, or stock-tank basin based on your space and desired sound level.
  • Pick a pump setup that matches power access: submersible near an outlet, or solar with battery when cords aren’t possible.
  • Place the feature on a level, compacted pad in morning sun or bright shade to reduce algae and evaporation.
  • Build simple DIY fountains by hiding a basin, running tubing through a pot, and topping with river rock to soften splash.
  • Keep it calming and clean with regular skimming, monthly filter rinses, water top-offs, and fall pump protection before freezes.

Choose a Simple Garden Water Feature (By Space + Power)

match space and power

Whether you’ve got a tight patio corner or a wide lawn to work with, you’ll choose a simpler (and better-looking) water feature if you match the design to two constraints up front: available space and available power.

In a small footprint, pick a self-contained urn or bowl where the basin hides inside a planter footprint and the sound stays close to seating.

With more room, a low rill or stock-tank basin reads intentional without complex plumbing.

Next, plan around power. If you’ve got an exterior outlet, you can run a quiet submersible pump with a steady column.

If you don’t, choose solar pump options with a battery for evening flow.

Lock in material choices early: glazed ceramic amplifies sparkle, corten or stone reads grounded, and molded resin keeps weight manageable.

Place Your Garden Water Feature: Level, Sun, and Splash

Once you’ve picked a feature that fits your space and power, the placement does most of the work for how it looks, sounds, and holds up. Set it on a truly level pad—compacted gravel under pavers or a flat stone—so water stays centered and doesn’t creep out of the basin. Check level front-to-back and side-to-side.

Aim for bright shade or morning sun; harsh afternoon sun boosts algae and evaporates water fast. Keep it within hose reach and near an outlet, but tuck cords along edges or under mulch. Allow a splash zone: 18–24 inches of clear perimeter from decking, siding, and tender plants. Use nearby garden lighting to skim the surface at night.

Add a shallow landing stone to encourage wildlife attraction without trampling beds.

DIY Bubbling Pot Garden Fountain (Weekend Build)

After you’ve dialed in a level, splash-safe spot near water and power, a bubbling pot fountain gives you a clean, modern water sound with minimal footprint and no exposed pond edge.

Set a perforated basin in a shallow dig, then backfill so the rim disappears under mulch or pavers. Drop in a sturdy water pump, route tubing up through the pot, and cap it with a nozzle or diffuser for a tight, low-splash dome.

Choose a tall, glazed jar for crisp reflections near a patio, or a matte, textured urn to blend beside a garden pond.

Top the basin with river rock to hide hardware, stabilize the pot, and tune the tone. Plug into a GFCI, then adjust flow until it burbles, not spits.

Build a Container Mini-Pond Water Feature

Because a container mini-pond holds a stable volume of water with no digging, you can tuck it into a sun-to-part-shade corner of the patio, beside a bench, or at the edge of a planting bed and still get that reflective, wildlife-friendly surface.

Choose a frost-proof ceramic bowl, half barrel, or stock tank at least 18 inches deep, and set it dead-level on compacted gravel so the waterline reads crisp.

Hide a small pump under a flat stone to keep the surface moving, or leave it still for mirror-like reflections.

Arrange aquatic plants by height: dwarf papyrus or sweet flag in the back, water lettuce mid-basin, and a mini water lily centered.

Add low-voltage pond lighting to graze the rim and shimmer after dusk.

Keep Your Garden Water Feature Clean Year-Round

Even if your water feature sits under open sky, you can keep it clear in every season by pairing a simple maintenance rhythm with smart placement and hardware. Site it where it gets morning sun but dodges harsh afternoon heat; less thermal swing means fewer blooms. Add a skimmer or intake screen and hide it behind a clipped sedge or stone baffle so the view stays clean.

Set a Maintenance schedule: skim leaves twice weekly, rinse the filter monthly, and top off with dechlorinated water as levels drop.

For Algae control, keep water moving with a correctly sized pump, shade 30–50% with lilies or a trellis, and add beneficial bacteria after rain.

In fall, stretch netting over the basin and lift the pump before hard freezes.

Conclusion

Once you’ve matched a simple feature to your space and power, you’ll feel the garden settle. Level the base, mind midday glare, and keep splash off decking so the sound stays crisp, not messy. One client in a narrow townhouse courtyard used a 20-inch glazed bubbling pot on a hidden patio slab—after adding river stone and a weekly rinse, the pump ran quietly all season. Stay on top of debris, and calm becomes automatic.…

rental agreement checklist
Home Upgrades & Renovations

Renting a Property: What Tenants Should Check Before Signing Anything

Before you sign or pay anything, you should verify the landlord’s authority through county records and confirm any manager’s written authorization, then pay only by traceable method. You should inspect the unit for leaks, pests, working locks, and tested smoke/CO alarms, and run faucets and toilets. You should document condition with date-stamped photos and a move-in checklist. You should total all fees, utilities, and parking, and confirm pet, guest, sublet, entry, repair, disclosure, and deposit terms in writing. Keep going to see a fuller checklist.

Key Takeaways

  • Verify the landlord’s authority via county records, ID, and written management authorization before paying any fees or deposits.
  • Inspect the unit for leaks, pests, working locks/windows, and functioning smoke and carbon monoxide alarms.
  • Document condition with date-stamped photos/videos and a signed move-in checklist noting preexisting damage and missing items.
  • Read lease rules on pets, guests, subletting, quiet hours, and fees; ensure every promise or exception is in writing.
  • Confirm entry notice, habitability and repair duties, required disclosures, and security-deposit return deadlines, deductions, and move-out procedures.

Confirm the Landlord Is Real (Before You Rent)

verify landlord identity legitimacy

Before you send any money or sign anything, how do you confirm the “landlord” actually has legal authority to rent you the property? Start by checking county property records to match the owner’s name to the person demanding payment.

If a manager claims authority, require a signed management agreement or notarized authorization, and verify it with the recorded owner using independently sourced contact details.

Demand government ID and confirm consistency with the deed, tax bill, and utility billing name.

Use a traceable payment method; refuse cash, wire transfers, or “application fees” paid before verification.

Conduct Landlord background checks for prior fraud judgments, evictions, or liens.

Request Rental history verification by asking for prior tenant references and cross-checking addresses and dates.

Keep screenshots, emails, and receipts.

Tour Like a Renter: Damage, Pests, Safety Checks

Even if the unit looks clean at first glance, you should tour it like you’re building an evidence file: inspect for water damage (stains, soft drywall, warped baseboards), active leaks (under sinks, around toilets, at the water heater), and signs of pests (droppings, shed wings, bait stations, musty odors, gaps around pipes).

Test every window and lock, confirm deadbolts engage, and check that exterior doors close square. Verify smoke and carbon monoxide alarms exist where required; ask when they were last tested.

Turn on faucets, flush toilets, and run the shower to check pressure and drainage. Look for exposed wiring, loose outlets, and tripped breakers.

Walk common areas for lighting and secure entry. Consider neighborhood amenities and confirm local zoning won’t undermine quiet enjoyment.

Document Condition With Photos and a Move-In Checklist

Before you take possession, you’ll create dated, high-resolution photos and video of every room, fixture, appliance, and any existing damage, and you’ll store copies in a backed-up location.

You’ll complete a move-in checklist item by item, noting stains, scratches, odors, pest signs, and any missing or nonworking features.

You’ll require the landlord’s written acknowledgment.

You won’t rely on memory or verbal assurances because this record helps limit disputes over responsibility and your security deposit.

Photo Evidence Essentials

Although a walkthrough feels routine, you should treat move-in documentation as evidence that can determine whether you recover your security deposit. Take date-stamped photos and short videos before you move belongings in, capturing wide shots and close-ups.

Photograph floors, walls, ceilings, windows, appliances, fixtures, smoke detectors, and any existing stains, chips, rust, or water marks. Include serial numbers and utility meter readings if accessible.

Store originals in a secure cloud folder and don’t edit files; preserve metadata for authenticity. Send copies to the landlord by email and request written acknowledgment.

While doing so, respect Tenant privacy by avoiding images of neighbors, mail, or personal data. Keep the record for the full tenancy and through Lease renewal negotiations, disputes, and move-out.

Move-In Checklist Details

Once you receive the keys, complete a written move-in checklist that matches the unit’s condition room by room, and tie each entry to supporting, date-stamped photos.

Note preexisting damage, cleanliness issues, and missing items: floors, walls, ceilings, windows, screens, locks, appliances, plumbing, HVAC, smoke/CO detectors, and fixtures.

Record meter readings and provided keys, fobs, and parking permits.

Use clear, objective wording (“2-inch chip, left of sink”), not opinions.

Send the checklist and photos to the landlord within the deadline stated in your lease agreements, and keep proof of delivery.

Ask for written acknowledgment or corrections.

Store originals securely, and back up copies.

Confirm how the checklist affects security-deposit deductions.

Even with Rental insurance, treat documentation as essential to dispute liability for prior conditions.

Calculate True Monthly Costs (Fees, Utilities, Parking)

breakdown of housing expenses

You should itemize every mandatory fee in writing (e.g., application, admin, amenity, trash, pest control) and confirm when it’s due and whether it’s refundable.

You should also estimate utility expenses by identifying which services you must place in your name, reviewing typical usage costs, and noting any billing method (submetering or flat-rate) that could vary month to month.

You should assess parking costs by verifying whether a space is included, the monthly rate for assigned or guest parking, and any penalties or towing terms that could create unexpected charges.

Itemize Mandatory Fees

Before signing a lease, itemize every mandatory charge so the advertised rent doesn’t obscure your true monthly cost. In your renting paperwork, demand a written fee schedule that matches the lease terms, not verbal promises.

Confirm all recurring charges: application or screening fees, amenity or “resident benefit” packages, pest control, trash/valet service, administrative fees, insurance surcharges, and monthly pet rent.

Identify one-time costs: deposits, move-in fees, key/fob charges, and lease preparation fees.

If parking is required, verify the exact monthly rate, space assignment, guest rules, and towing authority.

Check escalation clauses, proration methods, and billing dates.

Require receipts and dispute procedures, and don’t sign until every “mandatory” item appears in writing.

Estimate Utility Expenses

Although the advertised rent may look fixed, utilities can shift your actual monthly obligation substantially, so quantify them in writing and treat any estimate as a risk factor until verified.

Require the landlord to specify, in the lease or an addendum, which utilities you must pay (electric, gas, water, sewer, trash, internet), who bills them, and whether charges are submetered or allocated by formula.

Request the last 12 months’ average and peak bills for your unit or a comparable unit, and document any refusal.

Confirm whether HVAC, hot water, and laundry are electric or gas and whether rates vary seasonally.

Add these figures to mandatory fees to test rent affordability over the full lease duration, and budget a conservative buffer for spikes and rate changes.

Assess Parking Costs

Where will the vehicle actually go, and what’ll it cost per month after every add-on? Confirm whether parking is included in rent or billed separately. Request written disclosure of all parking fees: assigned space charges, garage rent, tandem premiums, guest passes, and remote fob deposits. Verify whether the fee is fixed, month-to-month, or subject to unilateral increases, and require notice terms in the lease.

Review parking regulations for the building and municipality. Check permit requirements, towing authority, enforcement hours, and restrictions on vehicle size, commercial plates, EV charging, motorcycles, and overnight guests.

If you rely on street parking, confirm signage rules and ticket frequency. Document the space number, access method, and liability allocation for theft or damage. Don’t assume “free” means “available.”

Before You Sign: Pets, Guests, Subletting, Quiet Hours

Even if the rent looks right, you should treat the lease’s rules on pets, guests, subletting, and quiet hours as enforceable conditions that can trigger fees, default notices, or termination if you violate them.

Review Pet policies for species, size, number limits, pet rent, deposits, insurance requirements, and mandatory screening; confirm any “no pets” clause covers visiting animals and service/assistance-animal procedures.

Check Guest regulations for maximum overnight stays, registration requirements, parking limits, and when a guest becomes an unauthorized occupant.

For subletting or assignments, require written consent standards, application fees, and liability language; you may remain responsible for rent and damages.

Read quiet-hour clauses for time ranges, noise definitions, and complaint process; verify penalties are stated and proportionate.

Get all approvals in writing.

Know Your Rights: Entry Notice, Habitability, Disclosures

tenant rights and disclosures

Before you move in, confirm the lease and local law protect three core rights: advance notice before the landlord enters, a habitable unit throughout the tenancy, and accurate written disclosures about the property.

Require an entry clause that limits access to defined purposes, sets minimum notice hours, and preserves Tenant privacy; insist on written notice and documentation for every non-emergency entry.

For habitability, verify the lease doesn’t waive statutory warranties and states the premises will meet health and safety codes at commencement and during occupancy, including utilities and security features.

Demand all mandatory disclosures in writing (lead paint, mold, flood risk, smoking rules, bed bugs, prior damage), and keep copies.

Confirm whether disclosure updates are required at Lease renewal and whether you must acknowledge receipt.

Repairs and Emergencies: Who Handles What, How Fast

After you’ve locked in entry limits, habitability standards, and required disclosures, put equal precision into the lease’s repair and emergency provisions so you’re not arguing about responsibility when something breaks.

Require a written allocation: landlord handles structural, plumbing, electrical, HVAC, and appliance failures; you handle minor upkeep only if narrowly defined.

Set response times: emergencies (no heat in winter, gas leak, flooding, electrical hazard) within hours; urgent repairs within 24–48 hours; non-urgent within a stated window.

Specify the reporting method, after-hours contact, and permission for you to call qualified vendors if the landlord can’t be reached, with capped reimbursement and documentation requirements.

Confirm liability limits for consequential damages.

During Lease renewal, guarantee repair duties don’t shift or trigger rent escalation.

Security Deposit and Move-Out: Deductions, Cleaning, Timing

Because deposit disputes usually turn on documentation and deadlines, you should spell out security-deposit handling and move-out procedures in the lease with the same specificity as rent and repairs.

Confirm the Security deposit amount, where it’s held, whether interest accrues, and the exact statutory return deadline.

Require an itemized statement for any deduction, limited to unpaid rent, documented damage beyond ordinary wear, and contractually defined cleaning.

Define “ordinary wear” and ““clean” (e.g., carpet shampooing only if professionally installed at move-in).

Schedule a pre–move out inspection with written findings and a cure period to remedy issues.

Take dated photos and keep receipts.

Specify key return, forwarding-address notice, and prorated rent rules.

State that deductions must be supported by invoices, not estimates.

Conclusion

Before you sign, stay skeptical and specific. Confirm the landlord’s identity, scrutinize the space, and record every crack, chip, and concern with photos and a move‑in checklist. Count the complete cost—fees, utilities, and parking—so surprises don’t surface later. Read rules on pets, people, and partial sublets. Know notice and habitability rights. Require repair routes and response times in writing. Secure clear deposit terms to limit deductions and delays.…

old plaster wall preparation
Painting & Decorating

Preparing Old Plaster Walls for Painting: Essential Tips for British Properties

Before you paint old plaster, you’ll check for damp with brown paper or a meter, trace leaks or bridged DPCs, and spot salts by powdery blooms and tide marks. You’ll tap for hollows and watch cracks for movement, then you’ll scrape back loose paint to sound edges and brush away dust. You’ll repair with lime-compatible fillers and reattach blown areas. You won’t use PVA; you’ll tame suction with a breathable stabiliser or 70/30 mist coat, and there’s more to follow.

Key Takeaways

  • Check for damp, condensation, and salt blooms first; fix gutters, ventilation, and bridged DPCs before any decorating work.
  • Scrape only loose paint and friable distemper back to sound edges; avoid aggressive sanding that damages lime plaster and historic texture.
  • Test for powdering and over-suction; use a breathable stabiliser on friable areas, not vinyl sealers that trap moisture.
  • Repair cracks and hollow plaster with compatible lime-based fillers and reattachment methods; mist lightly to control suction before filling.
  • Apply a properly diluted mist coat (70/30 or 60/40 water-to-emulsion), let fully dry, then add breathable top coats evenly.

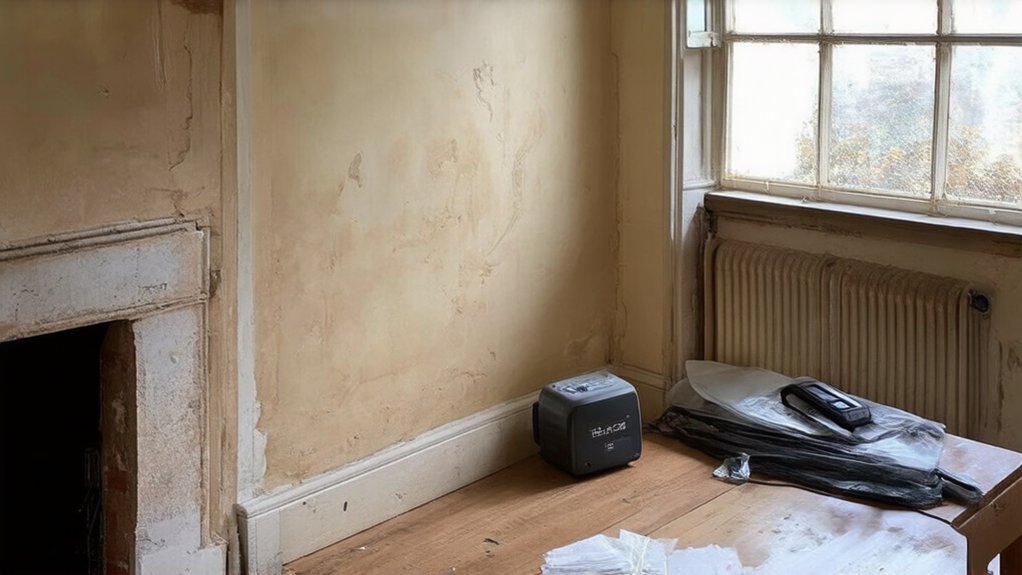
Check Plaster for Damp, Salts, and Movement

inspect plaster before painting

Before you lift a brush, examine the plaster as a conservator would: test for damp, salts, and movement, because each fault will defeat fresh paint and can worsen the fabric if you seal it in.

Begin with moisture detection: press clean brown paper to suspect patches, note darkening, and take readings with a capacitance meter, then confirm by ventilating and rechecking.

Trace sources—leaking gutters, bridged DPCs, trapped condensation—before you consider any finish.

Next, look for salt contamination: powdery bloom, friable faces, or tide marks. You’ll often find chlorides and nitrates near hearths, chimneys, and ground floors; record extent, don’t wash them deeper.

Finally, test movement by tapping for hollows and watching cracks through a week’s humidity change.

Scrape Loose Paint and Remove Flaking Areas

Once you’ve proved the plaster is sound and dry, turn to the old finish and take off only what’s already failed: scrape away loose paint, blistered distemper, and any friable edges until you reach a firm, well-adhered margin.

Use a sharp filling knife or shave-hook, keeping the blade shallow so you don’t bruise the lime surface or alter the wall texture that gives period rooms their character. Work methodically, tapping and watching for lifting at edges; stop when the coating resists.

Collect dust and chips as you go, and brush down with a soft hand brush rather than scouring. If you find many generations of paint color, record them before removal, then feather sound edges lightly for a tidy transition.

Fix Cracks and Reattach Blown or Hollow Plaster

With the loose finish pared back to firm edges, you can now deal with the wall itself—cracks that telegraph through paint and areas of plaster that sound hollow when you tap them.

Open hairline cracks slightly with a fine scraper, rake out dust, then mist lightly to temper suction. Press in a compatible lime-based filler, keeping the plaster texture in mind so the repair sits flush without a modern skim.

For blown plaster, locate sound margins by tapping, then drill small holes through the face into the void. Inject lime slurry or adhesive formulated for historical restoration, working from the lowest hole upward until it returns.

Gently draw the plaster back with washers and screws, protecting the surface with card. Remove fixings once set, fill, and feather edges carefully.

Sand Plaster Walls: Grit Guide and Dust Control

Although plaster rewards a light hand, you’ll need to sand selectively to level filled cracks, soften trowel marks, and knock back only the high spots that would catch the light under paint. Start with 120–150 grit on a cork block for repairs, then finish with 180–220 to blend without flattening historic Plaster texture.

Keep edges crisp around cornices and picture rails by feathering by hand, never grinding with a coarse disc. Rake a lamp across the wall to reveal ridges, and stop as soon as the surface reads even.

For Dust mitigation, mist the air lightly, sheet floors, and use a vacuum-sanding head or hold a nozzle beside your hand. Wear a P3 mask, and brush down with a soft broom before vacuuming.

Control Suction: Stabiliser vs Mist Coat (No PVA)

On old lime or gypsum plaster, you must first judge the suction: if the surface is friable, chalking, or powdery, you’ll use a proper stabiliser.

If it’s sound but thirsty, you’ll lay on a mist coat—no PVA—at roughly 70/30 or 60/40 water-to-matt emulsion.

You’ll know you’ve left over-suction when the paint drags, flashes patchy, or dries before you can keep a wet edge.

Get this step right and you’ll seal the surface without trapping moisture or smothering the wall’s breathability.

When To Use Stabiliser

When should you reach for a stabiliser instead of a mist coat? Choose it when old plaster turns dusty under your fingers, sheds fine powder, or shows friable limewash remnants that will otherwise bind your paint poorly.

You’re not “sealing” for modern gloss; you’re consolidating a weakened surface so later coats sit evenly and don’t peel.

For using stabiliser effectively, brush off loose material, vacuum the pores, then apply sparingly, working it in rather than flooding.

Let it cure fully, and test adhesion on a small patch before committing to the room.

When to avoid stabiliser: if the plaster is sound but merely absorbent, if salts or damp persist, or where breathability matters most on lime work—over-stabilising can form a skin and trap moisture.

Mist Coat Mix Ratios

Because old plaster can drink paint at different rates from one bay to the next, you’ll get the best finish by controlling suction with the right first coat: use a stabiliser only to consolidate genuinely friable, dusty surfaces, but reach for a true mist coat to key sound, porous plaster without adding an impermeable skin.

For a mist coat, thin a breathable matt emulsion with clean water: start at 70/30 (paint/water) on sound but open plaster, and go to 60/40 on very porous areas.

Don’t add PVA; it can seal and compromise later decorative finishes.

Stir thoroughly, then brush in, working across the Plaster texture to fill pinholes without flooding mouldings.

Keep your mix consistent room to room, and note ratios for later coats.

Signs Of Over-Suction

Although sound old plaster can look perfectly serviceable, over-suction shows itself the moment you start painting: the coat goes flat and patchy within minutes, dries too fast to level, and leaves drag marks, lap lines, or a dusty “chalking” rub-off under your finger.

You’ll also notice the wall texture telegraphing oddly, with porous areas dulling the paint sheen while denser lime patches hold a slight gloss. Edges around fills flash, and cut-ins won’t marry.

Confirm it by wiping with a damp sponge: if the surface drinks instantly and powders, you’ve got excessive suction.

For conservation work, don’t reach for PVA. Use a breathable stabiliser only where friable, then mist-coat the rest to equalise porosity before your full coats.

Prime Old Plaster for Strong Paint Adhesion

You’ll get lasting adhesion on old plaster by choosing a primer that suits the wall’s age, finish, and breathability, rather than a modern one-size-fits-all coating.

If the surface is friable or chalking, you’ll first seal that powdery plaster so the primer can bind to sound material instead of loose dust.

Then you’ll lay on a proper mist coat—well-thinned, evenly brushed or rolled, and worked into the pores—so the new paint keys without forming a brittle skin.

Choose The Right Primer

Before you open a paint tin, choose a primer that matches the condition and character of your old plaster, since the wrong sealer can lock in moisture or fail to bind a friable surface.

In British period rooms, you’ll often face lime plaster, which needs breathable systems. For sound lime, favour a vapour-permeable mineral or lime-compatible primer rather than heavy acrylics that can trap damp.

For later gypsum repairs, use a quality acrylic primer designed for interior plaster, keeping the film thin.

Make primer selection with the finish coat in mind: check paint compatibility between primer, undercoat, and topcoat, especially when using claypaint, distemper-style mattes, or modern vinyl emulsions.

Where staining persists, specify a stain-blocking primer only where needed.

Seal Powdery Plaster Surfaces

Where old plaster has turned chalky and leaves dust on your fingers, you must seal it or the best paint will fail to key. Begin by dry-brushing and vacuuming the wall, then wipe lightly with a barely damp sponge so you don’t soften friable areas.

If the surface still powders, apply a breathable, conservation-minded stabiliser or diluted binding coat suited to lime or gypsum, choosing a product that won’t trap moisture in British masonry. Work it well into the pores with a brush, not a roller, and keep runs off cornices and skirtings.

Let it cure fully, then check by rubbing: you want a firm, even Plaster finish. Take care around decorative textures; flood them and you’ll lose crisp relief and shadows.

Apply Mist Coat Correctly

Once the plaster feels firm and no longer sheds dust, lay on a proper mist coat to give your finish paint something to bite into without sealing the wall shut.

For traditional lime or early gypsum, keep it breathable: thin a matt emulsion with clean water (about 20–30%) until it soaks in rather than sits on top.

Work in good light, cut in neatly, and roll out evenly, watching for dark patches that show thirsty areas.

Don’t overwork; let the coat draw in and dry fully.

This stage isn’t applying primer as a heavy film, but careful surface preparation that keys the wall.

If it powders after drying, add another mist coat, not vinyl or gloss.

Then you’re ready for your top coats.

Conclusion

Before you lift a brush, you’ll have checked the plaster for damp, salts, and movement, then scraped back every loose edge. You’ll have stitched cracks, re-secured any hollow patches, and sanded with care, keeping dust well controlled. You’ll have tamed suction with stabiliser or a proper mist coat—never PVA—then primed for reliable adhesion. Do it this way and your finish can last practically forever, while the old fabric stays respected.…

preventing damp in heritage homes
General Property Repairs

The Ultimate Guide to Preventing Damp in Older British Properties

You’ll prevent damp in an older British property by first confirming the type: take repeat moisture readings (calibrated capacitance meter and, if needed, carbide testing) and match symptoms—tide marks and salts suggest rising damp, isolated patches suggest penetrating damp, mould and RH above 60% suggest condensation, and localised wetting can indicate leaks. Then fix the pathway: clear gutters, repair roofs/flashings, repoint with lime, lower external ground, improve drainage and sub-floor ventilation, and keep finishes breathable for compliance. Continue for step-by-step checks and remedies.

Key Takeaways

  • Diagnose damp type with symptoms plus moisture profiling, using calibrated meters and confirmatory tests like carbide and salt analysis.
  • Inspect exteriors: roofs, flashings, gutters, downpipes, pointing, render cracks, and window seals; ensure rainwater discharges correctly.
  • Prevent rising damp by removing bridging, lowering external ground levels, improving drainage, and enhancing sub-floor ventilation before considering DPC works.
  • Stop penetrating damp by repairing roofs and leadwork, repointing with breathable lime mortar, and clearing or realigning leaking gutters and downpipes.
  • Reduce condensation by maintaining 40–60% indoor RH, using effective extraction and trickle vents, and keeping steady heating to avoid cold surfaces.

How to Tell What Type of Damp You Have

identify damp type accurately

Before you choose a remedy, you need to confirm whether you’re dealing with rising damp, penetrating damp, condensation, or a plumbing leak, because each has distinct causes and compliance implications.

Start by mapping symptoms and measuring wall moisture with a calibrated capacitance meter, then verify with carbide (CM) testing where access allows.

Rising damp typically shows a low-level “tide mark,” hygroscopic salts, and paint deterioration up to about 1m.

Condensation presents as surface droplets, mould in corners, and peaks when indoor RH exceeds 60% without equivalent fabric wetting.

Plumbing leaks create localised, persistent damp, often with pressure-drop evidence or thermal anomalies.

Penetrating damp tends to correlate with wind-driven rain and isolated patches, but confirm with repeat readings over time to meet evidential standards.

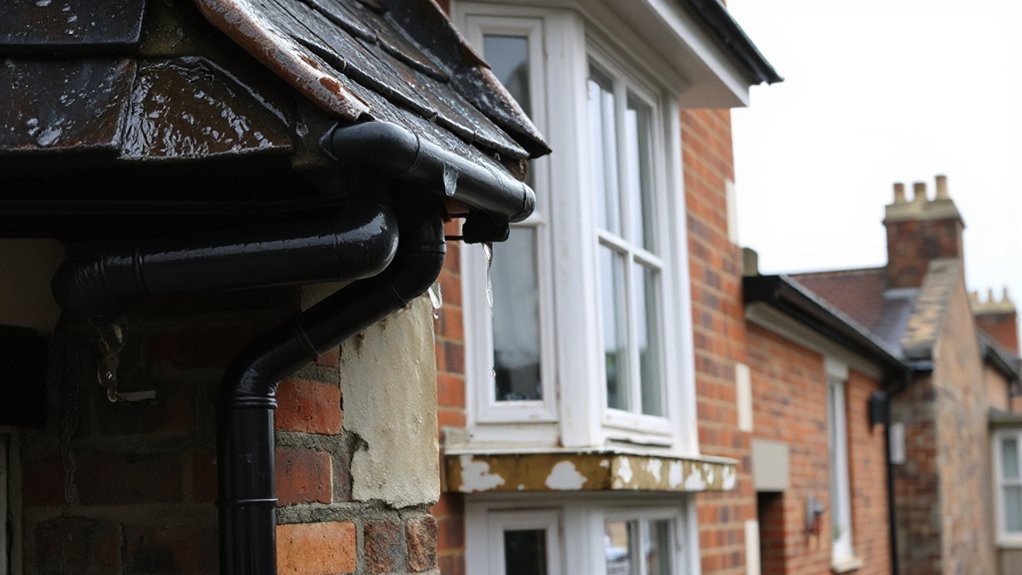
Outside Checks for Damp in Period Homes

Although indoor symptoms often look convincing, you’ll get more defensible evidence by starting outside on a period home, where fabric defects and ground conditions usually explain moisture pathways.

Walk the elevations and note cracked render, open pointing, spalled brick, and failed seals around windows and service penetrations.

Check gutters, hoppers, and downpipes for leaks, misalignment, and overflowing at joints; confirm discharge reaches a gully, not the wall base.

Inspect roof coverings, flashings, and parapets for slipped units and defective leadwork.

Assess External paint: blistering and peeling can indicate trapped moisture or poor vapour permeability.

Review ground levels, hardstanding, and garden drainage; you should see falls away from walls, clear channels, and no ponding.

Record findings with photos for survey compliance.

Rising Damp in Old Houses: Causes and Fixes

You’ll typically see rising damp in old houses when the damp-proof course is missing, bridged, or failed, or when high external ground levels and defective drainage drive moisture up porous masonry by capillary action.

You should confirm the diagnosis with moisture profiling and salt analysis to distinguish it from condensation or penetrating damp. Then, align remedial work with relevant British Standards and good practice.

You can then fix it by lowering external ground levels, removing bridging, improving sub-floor ventilation and drainage, and installing a compliant DPC system where justified, followed by salt-resistant replastering.

Common Causes Of Rising Damp

When moisture from the ground can’t be blocked or diverted, it rises through masonry by capillary action and shows up as “tide marks,” crumbling skirtings, and salt contamination at low level.

You’ll usually trigger it where the damp-proof course is missing, bridged, or compromised: pre-1875 walls without a DPC; later repairs that cover it with render, insulation, decking, or raised paths; or internal plaster that continues below floor level.

You also increase risk when external ground sits too high against the wall, or when cavity walls contain debris that transfers water across.

In Historical building preservation, you must verify materials and detailing before altering breathability.

Poor Interior moisture control can mask diagnosis by elevating hygroscopic salts’ readings on meters.

Effective Fixes For Rising Damp

Rising damp fixes start by proving the moisture source and removing the defect that lets ground water wick up the wall, not by masking symptoms with tanking or “waterproof” paints. Confirm diagnosis with hygrometer profiles, salt analysis, and inspection of DPC continuity per BS 6576, ruling out condensation and leaks.

Lower external ground levels to at least 150 mm below the DPC, clear bridged cavities, and replace hard cement renders with breathable lime where appropriate for Historical preservation. Repair or install a compliant damp-proof course (chemical injection or physical DPC) only after you’ve removed bridging; otherwise it’ll fail.

Improve sub-floor ventilation and reinstate air bricks to control moisture load. Use compatible internal finishes and capillary-break moisture barriers at floors, not impermeable wall coatings. Document works for Building Control and conservation officers.

Penetrating Damp: Roofs, Walls, Gutters, Windows

roof and wall waterproofing

Penetrating damp occurs where rainwater breaches the external envelope—typically via defective roof coverings, porous masonry, failed pointing, blocked or leaking gutters/downpipes, and poorly sealed windows. It then migrates through the fabric by gravity and capillary action. You’ll confirm it by correlating staining patterns with rainfall, checking moisture profiles, and inspecting junctions, flashings, valleys, and parapets to BS 5534 principles.

Repair roofs with compatible slates/tiles and sound leadwork to BS EN 12588, then reinstate underlay laps and ventilation paths without altering the Historical interior.

On walls, you should repoint with lime where the original Building material requires permeability; avoid hard cement that drives moisture inward.

Clear, realign, and test gutters/downpipes; guarantee correct falls and sealed joints. Reseal window frames, repair sills, and maintain drip details.

Condensation Damp: Ventilation and Heating Fixes

Condensation damp can look like rain ingress, but it’s driven by internal moisture meeting cold surfaces, so you’ll treat the building’s ventilation and heat balance rather than its external envelope.

You’ll confirm with hygrometer readings (aim 40–60% RH) and surface temperatures; persistent mould indicates poor Indoor air quality.

Improve extract ventilation to meet Building Regulations Part F: fit humidistat-controlled fans in kitchens and bathrooms, ducted to outside, and keep trickle vents open.

If background airflow is low, specify whole-house mechanical ventilation where feasible.

For Humidity control, cover pans, vent tumble dryers, and dry clothes with extraction running.

Heat consistently to reduce cold spots: maintain steady setpoints, use timed thermostats/TRVs, and avoid intermittent “blast heating” that spikes RH.

Breathable Damp-Proofing Upgrades for Older Properties

Because many pre‑1919 homes were built to “breathe” through lime mortars, porous brick, and suspended floors, you’ll often make damp worse if you retrofit impermeable barriers that trap moisture and drive salts to the surface. Specify vapour‑permeable repairs: repoint in NHL lime, replace cement renders with lime render, and redecorate with mineral or limewash paints.

Improve subfloor airflow by clearing airbricks and maintaining cross‑ventilation; don’t block vents with insulation. Where you need a DPC, choose breathable systems (e.g., silane/siloxane cream) only after moisture profiling and salts analysis, and follow BS 6576 and BS 5250.

For Heritage preservation, you’ll document significance, use reversible methods, and match finishes for aesthetic considerations. Use competent contractors and keep test results.

Conclusion

If you ignore damp in an older British property, it won’t “settle down”—it’ll spread like it owns the place, undermining timbers, salts, plaster, and indoor air quality. You’ll stop guessing once you’ve identified rising, penetrating, or condensation damp with systematic checks and moisture measurements. Then you’ll fix causes: drainage, fabric defects, ventilation, and heat balance—using breathable, heritage-compatible materials. Follow manufacturer specs, Building Regulations, and conservation guidance, and you’ll keep the building dry for decades.…

loft renovation for living
Home Upgrades & Renovations

How to Renovate a Loft Space Into a Comfortable, Usable Living Area

Start by measuring headroom along stairs, circulation paths, and occupancy zones, then verify joist species, span, spacing, and bearing for required loads and deflection limits; add sistering, LVLs, or beams if needed. Confirm planning permission for dormers, windows, or roofline changes, and submit drawings to Building Control for staged inspections and final sign-off. Design continuous insulation, airtightness, and ventilation to prevent condensation, then upgrade wiring, lighting, and HVAC zoning. Next, you’ll see how to optimize stairs, storage, and daily flow.

Key Takeaways

  • Confirm structural capacity and code-compliant headroom, stairs, guardings, and egress before planning finishes or furniture.
  • Plan circulation first, then place stairs, doors, and built-ins to keep clear pathways and safe, consistent riser/tread geometry.
  • Build a continuous insulation and airtightness system, with correct ventilation and fireblocking to prevent condensation and meet regulations.
  • Upgrade electrical, lighting, and mechanical ventilation; keep junction boxes, duct runs, and penetrations accessible and code-compliant.
  • Use low-profile, securely anchored storage at eaves and under stairs, preserving required egress width, airflow paths, and daily usability.

Can Your Loft Renovation Meet Height and Structure Rules?

loft height and structure compliance

Before you finalize a loft renovation plan, verify that the space can meet code-required ceiling heights and that the existing structure can carry the new dead and live loads without overstress. Measure headroom at proposed circulation paths, stairs, and any areas intended for regular occupancy, then compare results to applicable Building codes. If height is marginal, you’ll need engineered solutions such as dormers or lowered ceilings below—don’t assume exceptions apply.

Next, confirm Structural integrity by inspecting joist species, span, spacing, bearing conditions, and any notches or bore holes. Calculate tributary loads for finishes, partitions, and furnishings, and check deflection limits to control bounce and cracking. If capacity falls short, specify sistering, LVLs, or new beams with proper connections.

Pick the Right Use for Your Loft Renovation

Once you’ve confirmed the loft can meet height and structural requirements, define its primary use early because occupancy type drives nearly every downstream code decision.

If you’re creating a bedroom, you’ll need space for a compliant egress route and clearances that won’t be blocked by furniture placement.

If it’s an office or studio, prioritize workstation zones, glare control, and dedicated circuits for equipment loads.

For a lounge, plan seating sightlines, media wall backing, and guard locations to keep fall protection intact.

Map circulation first, then assign built-ins so you don’t compromise headroom at slopes.

Keep storage low at kneewalls, and reserve tall elements for the ridge line.

Finish with decorative accents that don’t reduce required clear widths or access panels.

Planning Permission, Building Regs, and Inspections

Although a loft conversion can feel like an internal remodel, you still need to confirm whether it triggers planning permission and must satisfy Building Regulations, then schedule inspections so each hidden element gets signed off before you cover it up.

Check local planning rules for dormers, roofline changes, new windows, and added floor area; in conservation zones, you’ll often need consent. Submit drawings, structural notes, and a spec to Building Control, then follow applicable Building codes for structure, stairs, headroom, fire separation, smoke/heat alarms, escape windows, and guardings.

Use approved contractors where required and keep certificates for electrics and any new drainage connections. Book staged inspections for structural supports, fire protection details, and stair installation.

You’ll need final sign-off and occupancy permits before you move in.

Insulation and Heating/Cooling for a Comfortable Loft

Because a loft sits directly under the roof deck and outside air, you’ll only get year-round comfort if you design insulation and HVAC as a single, code-compliant system: set a target U‑value/R‑value that meets your local energy code, maintain continuous insulation at rafters, gables, and eaves to eliminate thermal bridging, and protect performance with an airtight layer plus correctly sized ventilation paths (or an approved warm-roof assembly) to prevent condensation.

Then size heating/cooling to the new heat-loss and solar-gain calculations, not the house’s original plant. You’ll improve thermal comfort and energy efficiency by using room-by-room load calculations, zoning, and low-temperature emitters (radiant panels or hydronic loops) or a properly commissioned mini-split.

Seal ducts to code, insulate pipework, and verify airflow and refrigerant charge. Add smart controls and balance the system so the loft doesn’t overheat or lag.

Add Light, Electrics, and Ventilation Up Top

You’ll plan loft lighting around headroom and task zones, specifying IC-rated recessed fixtures or low-profile surface luminaires. You’ll also verify any skylight work meets local egress and tempered-glazing requirements.

You’ll upgrade wiring to current code by sizing circuits for the added load, installing AFCI/GFCI protection where required, and routing cables with proper protection and staple spacing.

You’ll also provide code-compliant ventilation by verifying exhaust CFM, insulating and sealing ducts to prevent condensation, and maintaining required roof/soffit vent pathways for balanced airflow.

Plan Lighting For Lofts

Before you close in the ceiling or finish the knee walls, map the loft’s lighting, electrical runs, and high-level ventilation so every junction box, cable route, and duct penetration stays accessible and code-compliant.

Lay out ambient lighting first: place recessed or low-profile fixtures to avoid headroom conflicts and maintain required clearances from insulation and framing. Add task lighting at desks, reading nooks, and stair landings, and specify IC-rated, airtight housings where assemblies demand it.

Use smart controls so you can zone slopes, dormers, and the center bay independently; include 3-way switching at both stair and loft entries.

Plan receptacle locations around furniture and egress paths, and reserve chases for future low-voltage runs. Coordinate vent grille placement with lighting to prevent glare and drafts.

Upgrade Wiring And Ventilation

Where do you add capacity and airflow without tearing finished surfaces back open? Start by tracing existing circuits, then size a new subpanel or feeder to meet load calculations per NEC Article 220.

Pull new cable through chase walls, soffits, or surface-mounted raceway, and staple or strap within code limits. Add AFCI/GFCI protection where required, bond metal boxes, and label breakers for electrical safety.

Upgrade lighting feeds with 14/2 or 12/2 as amperage dictates, and keep junction boxes accessible.

For ventilation systems, run insulated ducting to a roof or gable cap, slope condensate lines, and seal joints with mastic. Meet ASHRAE 62.2 rates, provide makeup air for fans, and verify clearances at insulation and rafters.

Stairs, Storage, and Layout That Work Daily

You’ll start by specifying stairs that meet local code for rise/run, minimum clear width, headroom, and guard/handrail requirements while staying compact with winders or alternating treads where permitted.

You’ll then lock in built-in storage—knee-wall cabinets, under-stair drawers, and rated access panels—so it preserves egress paths, doesn’t block required clearances, and supports HVAC/electrical serviceability.

Finally, you’ll plan the daily-flow layout by mapping circulation from the stair landing to sleep, work, and bath zones, keeping door swings, clear walking paths, and furniture footprints conflict-free.

Safe, Space-Smart Stairs

Although a loft stair can double as storage and circulation, it still has to meet daily-use safety basics: size the run for code-compliant headroom and landing clearances, keep risers uniform, and provide a continuous handrail with proper graspability and guard protection at open edges.

For stair safety, confirm tread depth and riser height stay within your adopted code, and keep nosings consistent to prevent trips. If you need space-efficient stairs, favor a compact straight run or switchback over alternating treads unless permitted and clearly justified.

Maintain a clear walking width, limit steepness, and avoid encroaching doors at landings. Add slip-resistant nosings, bright step-edge contrast, and lighting controlled from both levels.

Verify guard heights and infill spacing at the loft opening.

Built-In Storage Solutions

Once your stair run and loft opening meet code and feel predictable underfoot, you can make the circulation zone earn its keep with built-in storage that doesn’t steal clearance. Keep required egress width and headroom intact by recessing cabinets between studs or under treads, and stop faces flush to avoid snag points.

Use drawer boxes on full-extension slides rated for the load, and anchor to framing with structural screws, not finish nails. Add Hidden compartments behind removable toe-kicks or false risers, but keep access panels tool-free and labeled for maintenance.

Specify Modular shelving with adjustable standards fastened into blocking so shelves stay plumb and don’t rack. Vent any enclosed volumes near HVAC returns, and maintain fireblocking where cavities connect to concealed spaces.

Daily-Flow Layout Planning

Because lofts compress circulation into a few critical feet, plan the daily-flow path around the stair run, the landing/loft opening, and the doors or drawers you’ll touch most, then lock those clearances in before you place storage or furniture.

Keep egress routes unobstructed: maintain a clear stair width per local code, provide uniform riser/tread geometry, and preserve headroom at the opening and along the run.

Size the landing so you can turn, open a door, or pull drawers without stepping into the stair.

For furniture arrangement, align the bed or desk so you don’t narrow the path; avoid low beams at primary walking lines.

Add guardrails at edges and consider privacy considerations with partial-height screens that don’t block required ventilation or light.

Conclusion

You’ve turned your loft from dead air into working square footage by proving headroom, joist capacity, and safe load paths. You’ve matched the space to its use, then cleared permissions, Building Regs, and inspections so nothing’s left to chance. With continuous insulation, sealed vapor control, and sized HVAC, comfort won’t leak away. You’ve poured in daylight, compliant wiring, and balanced ventilation. Finally, code-safe stairs, smart storage, and a tight layout make it liveable daily.…

Scroll to Top